

Introduction
The delightful combination of chocolate and peanut butter is a timeless classic that never fails to satisfy sweet cravings. These ingredients, when combined, create a truly irresistible treat—one that is simple to make yet luxurious enough for any occasion. In this article, we delve into the method of crafting Decadent Chocolate Peanut Butter Truffles, a rich American dessert that promises to be a hit at gatherings, parties, or simply as a sweet indulgence for yourself.
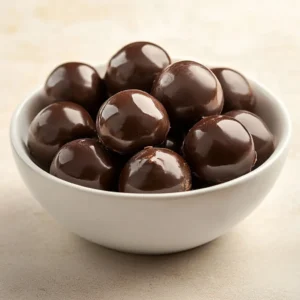
With their creamy filling and rich chocolate coating, these truffles offer a perfect balance of flavors and textures. The smooth peanut butter bliss topped with a glossy chocolate layer creates a visual and taste experience that is hard to resist. Whether you’re looking for a dessert to impress at a family gathering or a special treat for a movie night at home, these truffles are the answer. They are sure to elevate your dessert game.
Ready to learn how to make these heavenly bites? Let’s dive into the details of the recipe!
Recipe Overview
– Prep Time: 15 minutes
– Cook Time: 5 minutes
– Total Time: 50 minutes
– Course: Dessert
– Cuisine: American
– Servings: 12
– Calories: ~150 per serving
Ingredients
– 1 cup creamy peanut butter
– 1 cup powdered sugar
– 1 cup dark chocolate chips
– 1 teaspoon pure vanilla extract
– A pinch of sea salt (optional)
– Chopped nuts or sprinkles for garnish (optional)

Equipment Needed
When preparing Decadent Chocolate Peanut Butter Truffles, certain tools can make the preparation process smoother and more enjoyable. Here’s what you’ll need:
– Mixing bowls: Essential for blending the peanut butter and sugar mixture smoothly.
– Cookie scoop or hands: Necessary for shaping the truffles into perfectly round shapes.
– Parchment paper: Use this to line your baking sheet; it prevents the truffles from sticking and makes cleanup easier.
– Microwave-safe bowl: A must-have for melting the dark chocolate without the risk of burning it.
– Fork: Ideal for dipping the truffles into the chocolate and for allowing excess chocolate to drip off.
Preparation Steps
Creating these truffles is a straightforward process that anyone can master with just a little bit of time and attention to detail.
Mixing the Base
Begin by preparing your truffle mixture. In a large mixing bowl, blend together 1 cup of creamy peanut butter and 1 cup of powdered sugar until the mixture is smooth and fully combined. This step is crucial because achieving a smooth texture will enhance the overall experience of the truffles. If you choose, you can enhance the flavor profile of the truffle filling by adding a pinch of sea salt to the mixture. This optional step brings out the natural flavors of the peanut butter and adds a delightful contrast to the sweetness.
Adding Flavor
Once the peanut butter and sugar are well mixed, it’s time to deepen the flavor. Stir in 1 teaspoon of pure vanilla extract until it is evenly incorporated. This addition will create a rich and creamy base that complements the chocolate perfectly. The vanilla enhances the sweetness and creates a more complex flavor in the truffles, making them all the more enjoyable.
Shaping the Mixture
After your base is ready, it’s time for the fun part—shaping the truffles! Using a small cookie scoop or your hands, take portions of the rich mixture and roll them into balls. Aim for about 1 inch in diameter; this size makes for a perfect bite-sized treat. Once rolled, place the peanut butter balls onto a lined baking sheet, ensuring they are spaced apart evenly. This spacing is essential to prevent the truffles from sticking to one another when they chill in the refrigerator.
Melting the Chocolate
Next, we’ll move on to melting the dark chocolate, an important step that requires some care for best results.
Using a Microwave
To melt the chocolate, place the 1 cup of dark chocolate chips into a microwave-safe bowl. Heat the chocolate in intervals of 30 seconds, stirring after each interval. This technique helps to avoid overheating or burning the chocolate, ensuring it melts smoothly. The goal is to achieve a beautifully glossy and fluid chocolate coating that will envelop your truffles.
Importance of Smoothness
Make sure to stir until the chocolate is completely smooth. The correct consistency is key for dipping, allowing the silky chocolate to coat the truffles evenly. If the chocolate is still too thick after microwaving, you can heat it for a few more seconds until the desired smoothness is achieved. A well-melted chocolate not only looks appealing but contributes to the overall richness of the truffles.
Dipping the Truffles
Now that your chocolate is melted and smooth, it’s time to coat the truffles. Carefully dip each peanut butter ball into the melted chocolate, making sure they are fully coated. Using a fork can help facilitate the dipping process, allowing you to tap gently on the edge of the bowl to let any excess chocolate drip off. This technique ensures that your truffles are not overly coated, leading to a balanced flavor experience.
After dipping, return the chocolate-covered truffles to the parchment-lined baking sheet. This is an excellent opportunity to get creative! Before the chocolate sets, you can sprinkle the tops with chopped nuts or colorful sprinkles to enhance their appearance and taste. This optional step adds a touch of flair and makes the truffles visually stunning—perfect for any occasion.
Once dipped, it’s essential to allow the chocolate to set properly. To do this, place the baking sheet in the refrigerator for at least 30 minutes. This not only hardens the chocolate but also allows the flavors to meld beautifully, creating an incredibly indulgent treat.
By following these steps, you’re well on your way to creating a batch of Decadent Chocolate Peanut Butter Truffles that will impress anyone who tries them! With their creamy, rich filling and the satisfying crunch from the chocolate coating, these truffles are sure to be a delightful addition to your dessert repertoire.
Techniques for coating the peanut butter balls in chocolate
Coating the peanut butter balls in chocolate is essential to creating the luxurious layers that define these truffles. The technique you use for dipping can significantly affect the appearance and taste of the final product.
Using a fork: Technique for dipping and allowing excess chocolate to drip off
A fork is one of the best tools for dipping the peanut butter balls into the melted chocolate. Begin by gently inserting the fork into the truffle, ensuring it is securely underneath. Then, lift it out and dip it into the chocolate, allowing it to become fully submerged. One of the advantages of using a fork is that you can easily lift it out and tap it on the side of the bowl, allowing excess chocolate to drip off. This technique results in a clean and even coating that adds a professional finish to your truffles.
Ensuring even coverage: Tips to make sure the truffles are well-coated
When coating your truffles, it’s crucial to ensure they are evenly covered to avoid any bare spots. After dipping, if you find some areas that seem lacking in chocolate, use a spoon to drizzle a bit of chocolate over those spots. This additional layer will not only beautify the truffles but also add richness. For a more uniform look, consider rotating the truffle gently while it’s submerged, ensuring all surfaces are equally coated.
Adding Finishing Touches
To elevate the visual appeal and flavor of your truffles, consider adding some finishing touches!
Optional garnishing ideas to enhance presentation and flavor
Garnishing isn’t just about looks; it can also heighten the truffle’s taste exposition. A variety of options can enhance both the aesthetic and flavor profiles of your truffles.
Chopped nuts: Types of nuts that pair well with chocolate and peanut butter
Chopped nuts bring additional crunch and flavor. Pecans and walnuts, with their earthy notes, complement the sweetness of the chocolate and peanut butter beautifully. Alternatively, try a sprinkle of crushed hazelnuts or almonds for a different texture and taste combination. Just be sure that any nuts used are finely chopped to provide an elegant touch without overpowering the truffle.
Colorful sprinkles: Fun and festive ways to top off truffles
For a fun and festive twist, colorful sprinkles can be sprinkled on top of the chocolate before it sets. This option is particularly delightful for special occasions or holidays. You can choose themed sprinkles, such as pastel colors for spring festivities or red and green for the winter holidays.
Cooling and Setting
After the indulgence of dipping and adding garnishes, it’s time for one of the most crucial steps in the process—cooling and setting your truffles.
The chilling process necessary for perfect truffles
Once you have dipped and garnished your truffles, the next step is to chill them properly. This allows the chocolate coating to firm up and ensures a satisfying bite. The process of chilling also helps the flavors to meld together, creating a harmonious combination that sings with deliciousness.
Refrigeration time: Importance of allowing chocolate to harden
As mentioned in the instructions, placing the baking sheet in the refrigerator for at least 30 minutes is vital. This chilling time allows the chocolate to set and harden, making your truffles easier to handle and more enjoyable to eat. It prevents the chocolate from smudging when picked up, maintaining a clean, professional appearance.
How it enhances flavor melding: The benefits of proper chilling
Chilling the truffles also enhances the overall flavor experience. During this time, the peanut butter filling and chocolate coating have a chance to meld, creating a well-balanced treat that highlights both flavors. The moments spent in the refrigerator are not just about setting the chocolate but elevating the taste from good to unforgettable.
Serving Suggestions
Now that your truffles are perfectly set, consider how to present them for various occasions.
Ideas on how to serve or present the truffles for various occasions
Depending on the event, the presentation of your truffles can vary dramatically. For casual get-togethers, serving them on a beautiful platter can suffice. For special occasions, consider a tiered cake stand which creates an impressive display.
Decorative plates: Arranging truffles for festive gatherings
Utilizing decorative plates can draw attention to your truffles. Place them on vibrant, colorful plates to match your gathering’s theme or occasion. Arrange them in clusters of three or more for a visual impact that entices guests to dig in.
Gift options: Packaging in decorative boxes
These truffles also make for fantastic gifts. You can package them in decorative boxes lined with colorful tissue paper. Wrapping them in clear plastic wrap or placing each piece in mini cupcake liners can add an elegant touch. Tie it all together with a nice ribbon to create a thoughtful homemade gift.
Storage Tips
To ensure that your truffles maintain their delicious quality, proper storage is essential.
Best practices for storing leftover truffles to maintain their quality
After making the truffles, if you find you have some leftovers (though that might be unlikely!), it’s best to store them appropriately. Place them in an airtight container to keep them fresh and protect them from absorbing any unwanted odors from your refrigerator.
Refrigerating: Keeping them fresh for longer
The truffles should ideally be stored in the refrigerator. This not only helps preserve their quality but also means you can enjoy them chilled, allowing the flavors to shine even more. Make sure to separate layers of truffles with parchment paper to prevent them from sticking together.
Freezing: Information on freezing for extended preservation
For longer-term preservation, truffles can be frozen. Lay them in a single layer on a baking sheet and freeze until solid. Once frozen, transfer them to a freezer-safe container or bag. This method allows the truffles to retain their quality and can keep them enjoyable for several weeks. When you’re ready for a treat, simply take out the desired number and let them sit at room temperature for a few minutes before enjoying.
Nutritional Information
Understanding the nutritional value of your truffles can help you make informed choices.
Insight into the calorie content and key nutritional details
Each serving of these Decadent Chocolate Peanut Butter Truffles contains approximately 150 calories. The combination of peanut butter and dark chocolate not only satisfies a sweet craving but also provides a dose of protein and healthy fats.
Breakdown of calories: Approximate values per serving
While these truffles are indulgent, they can be enjoyed in moderation. With about 150 calories per serving, they can fit into a healthy dessert rotation without excessive guilt.
Considerations for dietary choices
It’s worth noting that these truffles contain common allergens like peanuts and dairy (from the chocolate), which may not align with everyone’s dietary preferences. For those with specific dietary needs, consider exploring nut butters or chocolates that fit within those requirements.
Variations on the Recipe
For those feeling adventurous in the kitchen, customizing the truffles can yield delightful results.
Exploring different flavors and ingredients to customize the truffles
Variations on the basic recipe can be exciting and may appeal to different taste preferences.
Flavor variations: Suggestions for using other nut butters
While peanut butter provides a classic flavor, other nut butters like almond butter or cashew butter can also be used. Each substitution brings a unique taste profile, expanding the range of flavors for your truffles.
Alternative chocolates: White chocolate or milk chocolate options
In terms of chocolate, consider experimenting with white chocolate for a sweeter, creamier result, or opt for milk chocolate for a less intense alternative to dark chocolate. Each variation will change the character of the truffles, catering to different palates.
Conclusion
These Decadent Chocolate Peanut Butter Truffles provide a satisfying blend of creamy peanut butter and rich chocolate for a delightful dessert experience. With their simple preparation process and customizable flavors, they can cater to all kinds of celebrations. Enjoying these treats not only satisfies the sweet tooth but also brings a sense of indulgence to any gathering.
Decadent Chocolate Peanut Butter Truffles Recipe
Ingredients
- 1 cup creamy peanut butter
- 1 cup powdered sugar
- 1 cup dark chocolate chips
- 1 teaspoon pure vanilla extract
- a pinch sea salt optional
- as needed chopped nuts or sprinkles for garnish optional
Instructions
- Blend together the creamy peanut butter and powdered sugar until smooth.
- Add a pinch of sea salt if desired, then stir in the vanilla extract.
- Roll the mixture into 1-inch balls using a cookie scoop or your hands.
- Place the balls on a parchment-lined baking sheet, spaced apart.
- Melt the dark chocolate chips in a microwave-safe bowl in 30-second intervals, stirring until smooth.
- Dip each peanut butter ball into the melted chocolate, ensuring full coverage.
- Return the chocolate-covered truffles to the baking sheet and sprinkle with nuts or sprinkles if desired.
- Refrigerate for at least 30 minutes to allow the chocolate to harden.
- Serve and enjoy your indulgent chocolate peanut butter truffles!