

Introduction
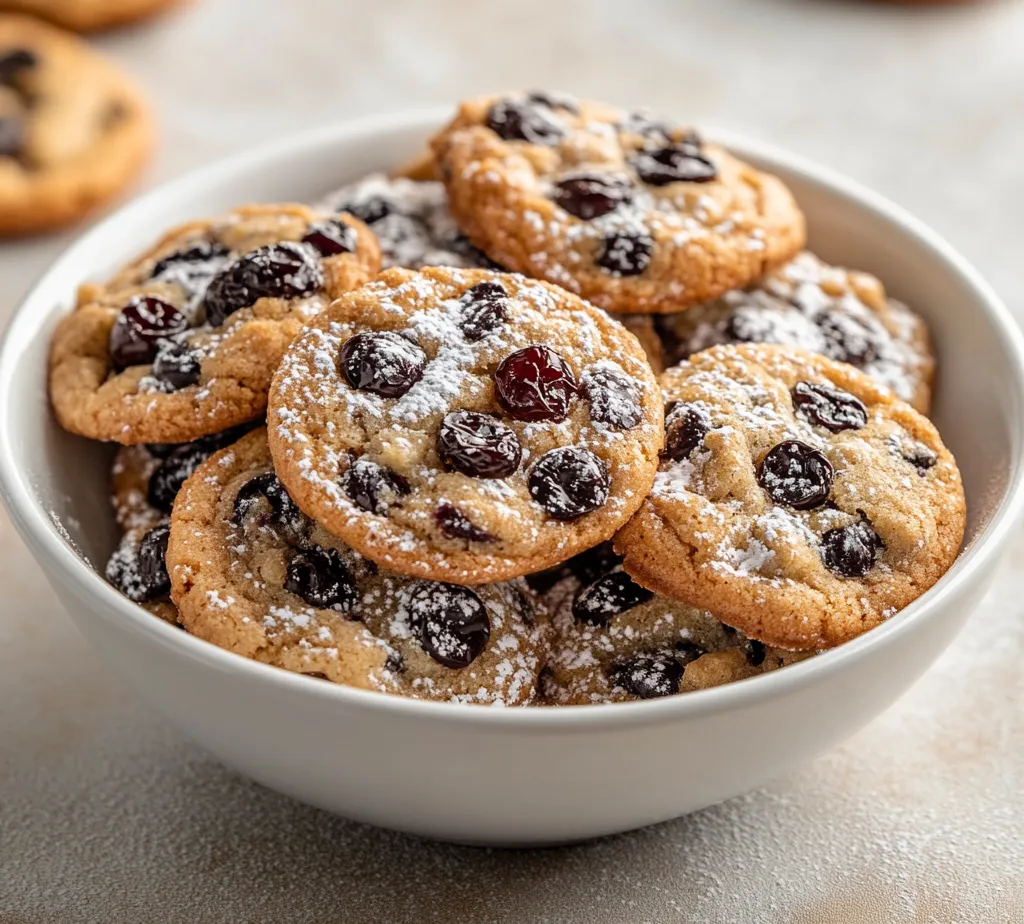
Exploring the rich flavors of the classic Black Forest dessert, these Black Forest Bliss Cookies combine the delightful elements of chocolate, cherries, and the optional crunch of walnuts. The allure of chocolate and cherries has captured hearts for decades, and these cookies encapsulate that essence with an easy-to-bake recipe. The addition of dried cherries introduces a sweet, fruity note, perfectly balancing the rich cocoa flavor, while walnuts can add an enjoyable crunch if you choose to include them.
Perfect for festive occasions, holiday gatherings, or simply as a sweet treat to indulge in anytime, these cookies deliver a chewy texture and a burst of fruity flavor in every bite. Whether serving at a celebration or enjoying them with a warm beverage at home, Black Forest Bliss Cookies are sure to impress family and friends alike.
Recipe Overview
Black Forest Bliss Cookies are a decadent twist on the traditional Black Forest cake, encapsulating its essence in cookie form. With rich chocolate, tart cherries, and optional walnuts, each bite offers a delightful combination of flavors and textures. Not only do these cookies appeal to the taste buds, but they also provide a beautiful presentation that’s sure to impress.
– Total Time: 30 minutes
– Prep Time: 20 minutes
– Baking Time: 10-12 minutes
– Yield/Servings: 24 cookies
– Difficulty: Not specified in the recipe
Ingredients
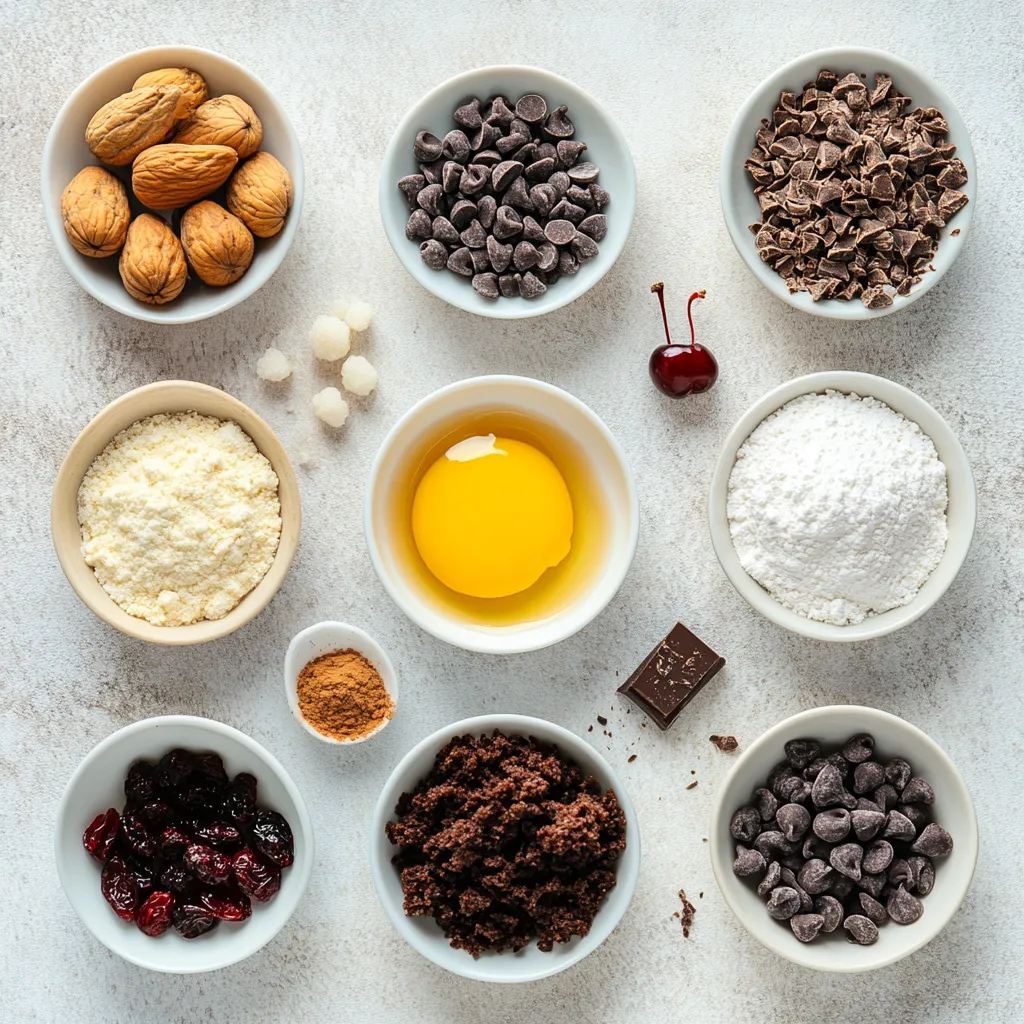
Main Ingredients
– 1 cup unsalted butter, softened to room temperature
– 1 cup granulated sugar
– 1 cup packed light brown sugar
– 2 large eggs
– 1 teaspoon pure vanilla extract
Dry Ingredients
– 2 ½ cups all-purpose flour
– ½ cup unsweetened cocoa powder
– 1 teaspoon baking soda
– ½ teaspoon salt
ins
– 1 cup semi-sweet or dark chocolate chips
– 1 cup dried cherries or sweetened dried tart cherries
– ½ cup chopped walnuts (optional)
Finishing Touches
– Powdered sugar for dusting
Instructions
1. Begin by preheating your oven to 350°F (175°C). Prepare two baking sheets by lining them with parchment paper to prevent sticking.
2. In a large mixing bowl, combine the softened butter, granulated sugar, and brown sugar. Cream them together using an electric mixer or a sturdy spatula until the mixture is light, fluffy, and well-blended.
3. Add the eggs to the butter-sugar mixture one at a time, ensuring each egg is fully incorporated before adding the next. Then, pour in the vanilla extract and mix until everything is smoothly combined.
4. In a separate bowl, whisk together the all-purpose flour, cocoa powder, baking soda, and salt. This will help to evenly distribute the dry ingredients.
5. Gradually add the dry mixture to the wet ingredients, stirring gently until just combined. Be careful not to overmix, as this could affect the texture of your cookies.
6. Gently fold in the chocolate chips, dried cherries, and walnuts (if using), ensuring they are evenly distributed throughout the dough for a delightful burst of flavor in every bite.
7. Using a cookie scoop or a tablespoon, drop rounded balls of dough onto the prepared baking sheets, placing them about 2 inches apart to allow for spreading during baking.
8. Bake in the preheated oven for 10-12 minutes, or until the edges are set and the tops exhibit a slight crackle. The centers may look soft, but they will firm up as they cool.
9. Once baked, remove the cookies from the oven and allow them to cool on the baking sheets for 5 minutes. Then, transfer them to wire racks to cool completely.
10. After the cookies have cooled, finish them off by dusting with powdered sugar for a festive and elegant presentation.
Preparing the Oven and Baking Sheets
Preheating the Oven
Setting the oven to the right temperature is crucial for achieving the perfect cookie texture. Preheating your oven to 350°F (175°C) ensures that the cookies bake evenly, providing that tender, chewy interior with slightly crisp edges. This preparation step is important not only for baking cookies but for all types of baked goods, as it allows for immediate cooking upon placing the dough inside.
Lining the Baking Sheets
Proper preparation of your baking sheets will make the cookie baking process smoother. Using parchment paper to line two baking sheets creates a non-stick surface, allowing the cookies to easily release without the risk of breaking apart. It also aids in achieving a lovely, uniform browning of the cookies. Parchment paper is available in rolls or pre-cut sheets, making it a convenient option for any baking enthusiast.
Creaming the Butter and Sugars
Combining Ingredients
The creaming process is one of the most critical steps in baking cookies, impacting the overall texture and taste. By combining softened unsalted butter with granulated sugar and packed light brown sugar, you establish a base that contributes to a light, airy texture. The sugars help to aerate the butter as you mix, creating tiny air pockets that expand during baking, resulting in a soft and delightful cookie.
Mixing Techniques
To achieve the desired texture, you can use an electric mixer or a sturdy spatula for manual mixing. Regardless of your chosen method, it’s essential to thoroughly cream the ingredients until the mixture is light and fluffy. This step should take a few minutes, during which you’ll notice the color change from a deep yellow to a lighter shade. This well-blended mixture not only foreshadows a delicious cookie but also aids in the distribution of flavors throughout the baked treat.
Incorporating Eggs and Vanilla
Adding Eggs
After creaming the butter and sugars, it’s time to add the eggs, which provide moisture and help bind the ingredients together. Introducing the eggs one at a time is key; make sure each egg is fully incorporated before adding the next. This method promotes an even mixture, helping to create a smoother batter. The eggs also contribute essential richness, complementing the other flavors and ensuring a chewy texture.
Mixing in Vanilla
Vanilla extract serves as an aromatic flavor enhancer in these cookies. Once the eggs are well mixed in, pouring in the vanilla extract and continuing to mix will create a wonderfully fragrant base. The warmth of the vanilla combined with the rich chocolate and tart cherries sets the stage for a cookie that is both comforting and indulgent. The careful incorporation of these ingredients ensures that each bite is infused with that beloved vanilla flavor.
Mixing Dry Ingredients
Whisking Together
Before you combine the wet and dry ingredients, it is crucial to whisk the dry ingredients thoroughly. This step involves combining all-purpose flour, cocoa powder, baking soda, and salt in a separate bowl. Whisking helps to evenly distribute the baking soda and salt, ensuring that each cookie bakes uniformly. Additionally, this practice aids in breaking up any clumps in the flour and cocoa powder, which can lead to an uneven texture in your final dough.
Gradually Combining
When you are ready to integrate the dry ingredients with the wet, do so gradually. This means adding the flour mixture to the creamed butter-sugar-egg mixture a little at a time while stirring gently. It is important not to overmix the dough at this stage, as this could develop the gluten in the flour too much, resulting in tough cookies instead of the desired chewy texture. Stir just until the ingredients are combined, which will create a perfect dough ready for the delightful addition of mix-ins.
Importance of Proper Mixing
Mixing the cookie dough properly is crucial for achieving the ideal texture and consistency. Proper mixing serves to integrate the ingredients fully and helps prevent any lumps from forming, particularly with the dry ingredients like flour and cocoa powder. When the dough mixture appears smooth and uniform, it indicates that the mixing process has been executed correctly, leading to consistent baking results across all cookies.
Combining Wet and Dry Ingredients
Gradual Integration
When it comes to combining the wet and dry ingredients, a gentle and gradual approach is essential. Slowly add the whisked dry ingredients into the creamed butter and sugar mixture. This method allows the flour to absorb moisture slowly, leading to a more effective blend without developing any unwanted clumps. Use a rubber spatula to fold the ingredients together, which promotes a lighter texture within the dough.
Avoiding Overmixing
One of the most common mistakes in cookie baking is overmixing. Once the flour mixture has been added, mix only until the dry ingredients are just incorporated. The goal here is to leave the dough slightly under-mixed, which maintains a tender crumb. Overmixing can lead to the development of gluten, resulting in tough cookies rather than the desired soft and chewy texture that is characteristic of a good cookie.
Adding Chocolate, Cherries, and Walnuts
Folding in the Mix-ins
For the final stage of adding the mix-ins—chocolate chips, dried cherries, and walnuts (if using)—it’s essential to fold them in gently with care. This not only ensures that the chocolate and cherries are evenly distributed throughout the dough but also avoids breaking apart the delicate cookie structure. Use a spatula to lift and turn the dough over, incorporating the mix-ins thoroughly without aggressively stirring.
Flavorful Reach
The combination of semi-sweet or dark chocolate chips, tangy dried cherries, and crunchy walnuts (if included) brings a harmonious balance of textures and flavors. The chocolate adds a rich sweetness, while the cherries introduce a slight tartness that complements the cookies beautifully. The walnuts, when used, add a delightful crunch, broadening the overall taste experience and providing contrast to the chewiness of the cherries and chocolate.
Scooping and Arranging Cookie Dough
Using a Cookie Scoop
To ensure uniformity in size and shape across all cookies, using a cookie scoop is recommended. This handy tool allows you to portion out the dough efficiently, resulting in evenly sized cookies that will bake at the same rate. If a scoop isn’t available, the use of a tablespoon can also suffice, although it’s important to maintain a consistent measurement.
Spacing for Baking
Proper spacing on the baking sheets is critical for allowing the cookies to spread during baking. Each dough ball should be placed approximately 2 inches apart. This spacing prevents the cookies from merging together, ensuring distinct rounds that develop a perfect shape and texture in the oven.
Baking the Cookies
Baking Time
Once your cookies are arranged on the baking sheets, it’s time to bake. The recipes suggest a baking time of 10-12 minutes at 350°F (175°C). Keep a close eye on the cookies as they bake. The edges should appear set while the center may still look slightly soft, a sign that they are nearly ready.
Signs of Doneness
To check for doneness, look for characteristic signs such as a slightly cracked surface and firm edges. The appearance of crackling can indicate that the cookie is baking properly. However, a soft center is expected, which will firm up as the cookies cool down.
Cooling the Cookies
Cooling on Baking Sheets
After baking, allow the cookies to cool on the baking sheets for approximately 5 minutes. This initial cooling period is crucial as it lets them set further, making them easier to transfer without crumbling or breaking.
Transferring to Wire Racks
Following the cooldown on the sheets, carefully transfer the cookies to a wire rack for complete cooling. This step helps air circulate around the cookies, preventing any sogginess and preserving their delightful texture. Allow them to cool entirely before proceeding with the optional powdered sugar dusting.
Dusting with Powdered Sugar
Final Presentation
Once the cookies have completely cooled, the finishing touch involves dusting them with powdered sugar. This not only enhances their visual appeal by adding a festive touch but also provides a touch of sweetness that complements the rich chocolate and tart cherries within.
Serving Suggestions
For an elegant presentation, consider arranging the cookies on a decorative platter, perhaps garnished with extra dried cherries scattered around them. Adding a few fresh mint leaves can contribute a vibrant splash of color, making the dish more inviting and visually pleasing.
Storing the Cookies
Storage Tips
To keep your Black Forest Bliss Cookies fresh, store them in an airtight container at room temperature. This method helps maintain their soft texture and prevents them from drying out. If these cookies are made in larger batches or during the holidays, storage is key for enjoying them later.
Best Practices
For longer-term storage, consider freezing the cookies. Wrap them tightly in plastic wrap or aluminum foil, and then place them in a freezer bag. They can be stored this way for up to three months, allowing for easy access to homemade cookies whenever a craving strikes.
Conclusion
The Black Forest Bliss Cookies showcase a perfect blend of rich chocolate, tangy cherries, and optional crunchy walnuts, yielding a delightful cookie with a soft, chewy center. Prepared in just under 30 minutes, these cookies are both a delicious treat and an eye-catching addition to any dessert table. With proper technique, cooling, and storage, they provide a satisfying sweetness that can be enjoyed fresh or later.

Black Forest Bliss Cookies Recipe for a Festive Treat
Ingredients
- 1 cup unsalted butter softened
- 1 cup granulated sugar
- 1 cup packed light brown sugar
- 2 large eggs
- 1 teaspoon pure vanilla extract
- 2 ½ cups all-purpose flour
- ½ cup unsweetened cocoa powder
- 1 teaspoon baking soda
- ½ teaspoon salt
- 1 cup semi-sweet or dark chocolate chips
- 1 cup dried cherries or sweetened dried tart cherries
- ½ cup chopped walnuts optional
- Powdered sugar for dusting
Instructions
- Preheat your oven to 350°F (175°C) and line two baking sheets with parchment paper.
- In a large bowl, cream together the softened butter, granulated sugar, and brown sugar until light and fluffy.
- Add the eggs one at a time, mixing well after each addition, then stir in the vanilla extract.
- In a separate bowl, whisk together the flour, cocoa powder, baking soda, and salt.
- Gradually mix the dry ingredients into the wet ingredients until just combined.
- Fold in the chocolate chips, dried cherries, and walnuts if using.
- Drop rounded balls of dough onto the prepared baking sheets, spacing them 2 inches apart.
- Bake for 10-12 minutes until the edges are set and the tops are slightly crackled.
- Cool on the baking sheets for 5 minutes before transferring to wire racks to cool completely.
- Dust cooled cookies with powdered sugar before serving.