
Introduction
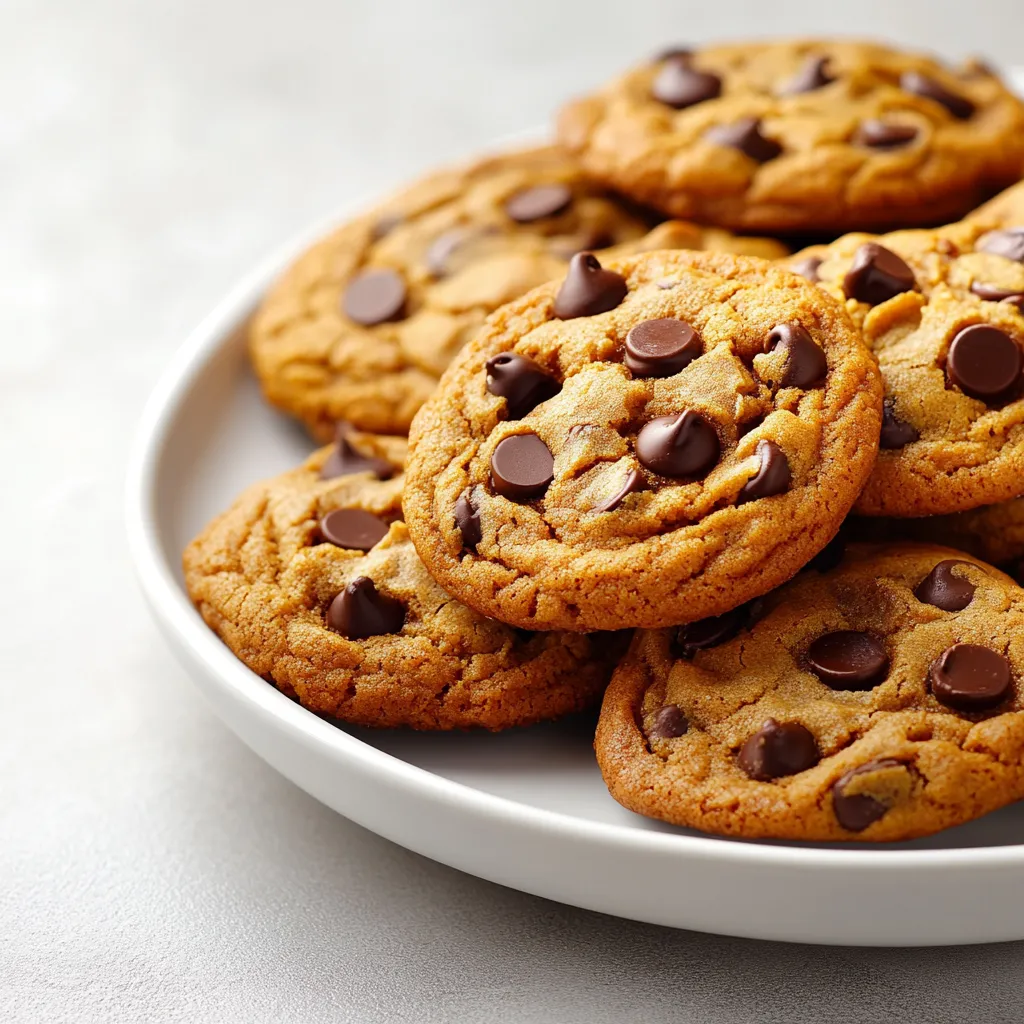
As the leaves turn and a crisp chill permeates the air, there’s nothing quite as comforting as the aroma of freshly baked cookies filling your home. Brown Butter Pumpkin Chocolate Chip Cookies encapsulate the essence of autumn, combining rich, nutty flavors with warm spices and the indulgence of chocolate. These cookies are not only a delightful treat but also a celebration of fall flavors, perfectly suited for gatherings, holiday parties, or cozy nights spent by the fireplace.
Imagine sinking your teeth into a soft, chewy cookie that melds the earthy sweetness of pumpkin with the decadent richness of semi-sweet chocolate chips. The added warmth from spices such as cinnamon, nutmeg, and ginger further elevates these cookies, making them a true seasonal favorite. Whether enjoyed warm from the oven or as a comforting snack throughout the week, these cookies promise a delectable experience every time.
Recipe Overview
This recipe for Brown Butter Pumpkin Chocolate Chip Cookies is a harmonious blend of flavors and textures, making it a perfect addition to your fall baking repertoire. The preparation time is just 15 minutes, and with a total time of one hour, you can have these delicious cookies ready to serve in no time. This yield is approximately 24 cookies, ideal for sharing with family and friends or indulging all on your own.
– Total Time: 1 hour
– Prep Time: 15 minutes
– Servings: About 24 cookies
– Difficulty: Not specified in the recipe
Ingredients
Essential Ingredients
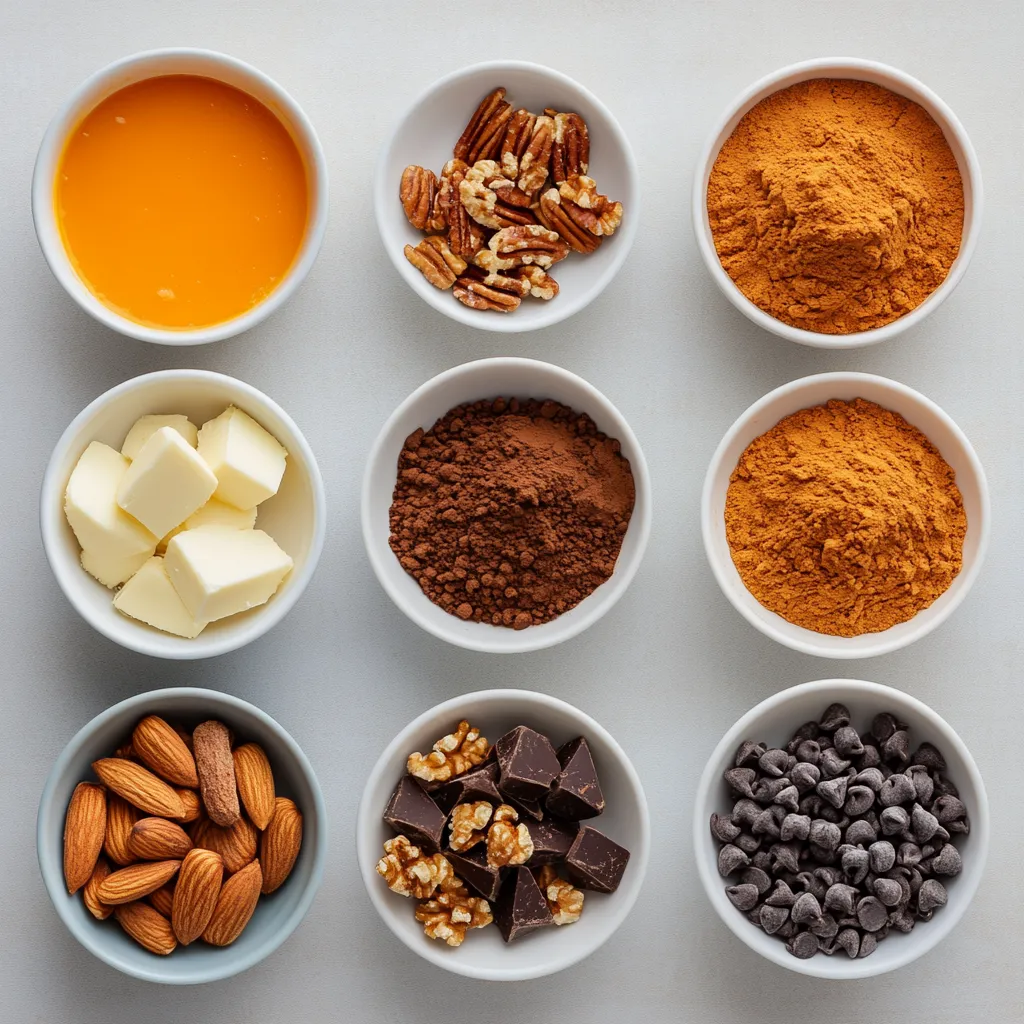
– 1 cup unsalted butter (2 sticks)
– 1 cup pumpkin puree (canned or fresh)
– 1 cup packed brown sugar
– 1/2 cup granulated sugar
Additional Ingredients
– 1 large egg
– 1 teaspoon vanilla extract
– 2 1/4 cups all-purpose flour
Leavening Agents
– 1 teaspoon baking soda
– 1 teaspoon baking powder
Spices
– 1 teaspoon ground cinnamon
– 1/2 teaspoon ground nutmeg
– 1/4 teaspoon ground ginger
– 1/2 teaspoon salt
Flavor Enhancers
– 1 cup semi-sweet chocolate chips
– 1/2 cup chopped nuts (optional)
Instructions
1. Brown the Butter: In a medium saucepan, melt the unsalted butter over medium heat. Keep stirring frequently as it cooks. Watch closely for it to turn a rich golden brown and develop a nutty aroma, which should take about 5-7 minutes. Once browned, remove it from the heat and allow it to cool slightly.
2. Mix Wet Ingredients: In a large mixing bowl, combine the browned butter, pumpkin puree, packed brown sugar, and granulated sugar. Whisk these ingredients together until smooth and creamy. Next, add the egg and vanilla extract, mixing until fully incorporated.
3. Combine Dry Ingredients: In a separate bowl, whisk together the all-purpose flour, baking soda, baking powder, ground cinnamon, ground nutmeg, ground ginger, and salt until evenly mixed.
4. Combine Mixtures: Gradually add the dry ingredient mixture to the wet ingredients, stirring gently until just combined. Be careful not to overmix. Gently fold in the chocolate chips and chopped nuts, if using.
5. Chill the Dough: Cover the dough with plastic wrap and refrigerate it for a minimum of 30 minutes. Chilling the dough helps the cookies hold their shape during baking.
6. Preheat Oven: Preheat your oven to 350°F (175°C) and prepare a baking sheet by lining it with parchment paper.
7. Scoop the Cookies: Using a cookie scoop or a tablespoon, drop rounded balls of dough onto the prepared baking sheet, ensuring there is about 2 inches of space between each cookie to allow for spreading.
8. Bake: Place the baking sheet in the preheated oven and bake for 10-12 minutes, or until the edges of the cookies are lightly golden. The centers may appear slightly underbaked, but they will continue to firm up as they cool.
9. Cool: Once baked, remove the cookies from the oven and let them sit on the baking sheet for about 5 minutes. Then, transfer them to a wire rack to cool completely.
10. Enjoy: Serve the cookies warm, or store them in an airtight container at room temperature for up to a week for a delightful treat anytime.
Browning the Butter
Choosing the Right Butter
Using unsalted butter in this recipe is essential for achieving the best flavor and control over the final saltiness of the cookies. This allows the natural sweetness of the pumpkin and sugars to shine through without being overshadowed by salt. The unsalted butter also gives the baker flexibility to adjust the salt levels in other areas of the recipe.
The Browning Process
To brown butter effectively, start by melting it in a medium saucepan over medium heat. It’s crucial to keep stirring the butter as it melts and heats up. Watching closely is important; you’re looking for a golden-brown color while ensuring that it doesn’t burn. This process generally takes about 5-7 minutes. Once it reaches that coveted golden hue and starts to smell nutty, take it off the heat immediately and let it cool slightly. These visual and aromatic cues help ensure that the butter reaches the desired state for optimal flavor.
Benefits of Browned Butter
Browning butter not only enhances its flavor but also adds a distinct nutty richness to baked goods that can elevate even a simple cookie recipe to something extraordinary. This method introduces complex, deep flavors that are especially fitting for fall-themed treats like pumpkin cookies. The unique taste achieved through browning perfectly complements the spices and sweetness of the pumpkin puree.
Preparing the Wet Mixture
Combining Ingredients
In the large mixing bowl, begin by whisking together the cooled, browned butter, pumpkin puree, packed brown sugar, and granulated sugar until the mixture reaches a smooth, creamy consistency. This is a crucial step, as the blending of these wet ingredients creates a base that ensures moisture and flavor throughout the cookies.
Incorporating the Egg
Adding a large egg into the mix introduces structure to the cookie dough. It helps bind the ingredients together, contributing to a chewy texture while allowing for proper leavening. The egg also aids in moisture retention, making the cookies softer in the center after baking.
Enhancing with Vanilla
Vanilla extract serves as a quintessential flavor enhancer in baking, rounding out the overall taste of the cookies. It not only complements the pumpkin and spices but also elevates the rich flavor of the brown butter. A teaspoon of vanilla adds a fragrant note that enhances the aroma and depth of these fall-inspired treats.
Mixing the Dry Ingredients
Importance of Flour
All-purpose flour is the backbone of this cookie recipe, providing structure and stability. The right amount of flour is essential for the development of gluten, which helps the cookies maintain their shape and offers a soft, chewy texture once baked.
Leavening Agents
The use of both baking soda and baking powder in this cookie recipe ensures a perfectly balanced rise. Baking soda reacts with the acids in brown sugar and pumpkin to create lift, while baking powder provides additional lightness, resulting in cookies that are both chewy and tender. Understanding how these leavening agents work together can lead to the perfect cookie texture.
Spice Blends
The blend of spices in this cookie recipe—cinnamon, nutmeg, and ginger—creates a warm, aromatic flavor profile that is quintessentially autumnal. These spices not only enhance the sweetness of the cookies but also add a comforting warmth that complements the pumpkin beautifully. By incorporating these spices during the mixing of the dry ingredients, they are evenly distributed throughout the cookie dough, ensuring every bite is infused with rich, lively flavor.
Unpacking Flavor Profiles
The addition of cinnamon, nutmeg, and ginger brings a warm, aromatic depth to Brown Butter Pumpkin Chocolate Chip Cookies.
Cinnamon is renowned for its sweet and spicy notes, which create a comforting baseline flavor in baked goods. In this recipe, it enhances the sweetness of the brown sugar while contributing warmth that pairs perfectly with the season’s aromatic spices.
Nutmeg, with its slightly sweet and nutty taste, adds a complexity that elevates the warmth from the cinnamon. Its rich flavor profile complements the pumpkin puree beautifully, embracing the cozy essence of autumn.
Ginger, slightly sharper and more pungent, contrasts the sweetness from the other spices, offering a zesty finish that awakens the palate. The combination of these three spices creates a balance that is both comforting and invigorating, resulting in cookies that are not just sweet treats but also a multi-layered experience for the taste buds.
Combining the Mixtures
Gradual Integration
When you’re ready to combine your mixtures, it is essential to do so gradually. Begin by adding the dry ingredients to the wet mixture in increments. This method allows for a more even distribution of flour and ensures that you’re less likely to overmix. Overmixing can lead to dense, tough cookies instead of the soft, chewy texture desired. Stir with a gentle hand, using a spatula or wooden spoon until the ingredients are just combined. A few streaks of flour are fine; it’s better to err on the side of under-mixing.
Adding Chocolate Chips
When folding in chocolate chips, if you’re opting for nuts as well, sprinkle them evenly over the surface of the dough rather than dumping them all in at once. This method encourages uniform distribution throughout the dough. Use a spatula to gently fold the chocolate chips and nuts, ensuring that they’re blended without additional mixing. A good indication that you have added them successfully is the sight of chocolate chips peeking through the dough, creating a welcoming visual appeal.
Texture of the Dough
The final cookie dough should have a soft, slightly sticky texture. If it feels too wet, it may need a bit more flour, but be cautious not to add too much. The dough should hold together well but not appear dry or crumbly. Properly mixed dough should easily scoop and form a mound when placed on a baking sheet, with visible chocolate chips and nuts shouldering through.
Chilling the Dough
Importance of Chilling
Chilling the dough is a crucial step that not only improves the texture of the cookies but also allows the flavors to meld. When you chill the dough, the fats solidify, which prevents the cookies from spreading too much while baking. This results in cookies that are thick and chewy versus flat and crispy. Additionally, chilling helps to intensify the flavors, creating a richer overall taste.
Recommended Chilling Time
Ideally, aim for at least 30 minutes of chilling. However, if time allows, leaving the dough in the refrigerator for an hour or even overnight will yield even better results. This extended period allows flavors to develop further and enhances the overall structural integrity of the cookie during baking.
Handling Chilled Dough
After chilling, you might find the dough is quite firm. Let it sit at room temperature for about 5-10 minutes before scooping to make it easier to work with. If the dough becomes too soft during this time, return it to the refrigerator briefly to firm up before baking. When scooping, be sure to use a cookie scoop or spoon to form uniform balls, which will help them bake evenly.
Prepping for Baking
Preheating the Oven
Preheating your oven to 350°F (175°C) is essential for achieving the right texture and bake. This ensures that the cookies start cooking immediately when placed in the oven, preventing over-spread and promoting a beautiful golden color.
Preparing the Baking Sheet
Line your baking sheet with parchment paper to prevent sticking and to promote even baking. Ensure the parchment paper is flat against the baking sheet to avoid any creases that could affect how the cookies bake. Space the cookies about 2 inches apart to allow for expansion.
Tools for Scooping
Using a cookie scoop or a tablespoon guarantees uniformity in size, which is key for even baking. A medium cookie scoop, often holding about 2 tablespoons of dough, is ideal for this particular recipe. If using spoons, make sure to level off the dough for consistency.
Baking the Cookies
Timing and Temperature
The baking time of 10-12 minutes is critical for achieving the perfect cookie. Set a timer for 10 minutes, and keep an eye on the cookies. They should be lightly golden at the edges but may still look soft in the center. It’s important not to bake them until they are completely firm, as they will continue to cook slightly once removed from the oven.
What to Expect
During the baking process, you’ll notice a gentle rise and a slight spread. The edges should become a light golden brown while the centers remain slightly puffed and soft. This contrast in texture gives rise to the delightful chewy consistency.
Cooling Method
Once out of the oven, let the cookies rest on the baking sheet for about 5 minutes. This resting time allows them to set without falling apart when moved. After resting, transfer the cookies to a wire rack where they can cool completely and help maintain their chewy texture.
Storing and Serving
Cooling Techniques
To ensure maximum freshness, you must allow cookies to cool completely before storing them. This prevents moisture from building up, which can lead to sogginess. The wire rack is an excellent method, as it promotes airflow around the cookies.
Presentation Ideas
For a festive presentation, dust the cooled cookies lightly with powdered sugar or arrange them on a festive platter. You can also create a warm serving suggestion by pairing them with a side of homemade pumpkin spice dip or a drizzle of melted chocolate.
Storage Tips
Once cooled, store the cookies in an airtight container at room temperature. They may last up to one week, retaining their soft texture and flavor. For longer storage, consider freezing the cookie dough before baking or freezing finished cookies for a quick treat.
Flavor Pairing Suggestions
Seasonal Drinks
These cookies pair beautifully with seasonal beverages such as pumpkin spice lattes, chai tea, or even a simple glass of milk. The warm spices in the cookies complement the flavors in these drinks, creating a cozy afternoon treat.
Savory Accompaniments
For a twist, you could serve the cookies with a sharp cheese or mixed nuts. The savory contrast enhances the sweetness of the cookies, providing a unique snacking experience.
Gifting
During the holiday season, these cookies make excellent gifts. Consider packaging them in decorative boxes or jars with a ribbon for a personal touch. Accompanying a card with the recipe adds a thoughtful gesture for the recipient.
Conclusion
Brown Butter Pumpkin Chocolate Chip Cookies deliver a harmonious blend of rich flavors and inviting textures. With a perfect balance of crispy edges and soft centers, these cookies shine as delightful autumn treats. The preparation and waiting times are well worth the rich, nutty aroma filling your kitchen and the joyful flavors that await in every bite.

Brown Butter Pumpkin Chocolate Chip Cookies
Ingredients
- 1 cup unsalted butter
- 1 cup pumpkin puree
- 1 cup packed brown sugar
- ½ cup granulated sugar
- 1 large egg
- 1 teaspoon vanilla extract
- 2 ¼ cups all-purpose flour
- 1 teaspoon baking soda
- 1 teaspoon baking powder
- 1 teaspoon ground cinnamon
- ½ teaspoon ground nutmeg
- ¼ teaspoon ground ginger
- ½ teaspoon salt
- 1 cup semi-sweet chocolate chips
- ½ cup chopped nuts
Instructions
- Brown the butter in a saucepan over medium heat until golden brown and nutty.
- In a mixing bowl, combine browned butter, pumpkin puree, brown sugar, and granulated sugar until smooth.
- Add the egg and vanilla extract, mixing until fully incorporated.
- In a separate bowl, whisk together flour, baking soda, baking powder, cinnamon, nutmeg, ginger, and salt.
- Gradually add dry ingredients to wet ingredients, stirring gently until just combined.
- Fold in chocolate chips and chopped nuts if using.
- Chill the dough for at least 30 minutes.
- Preheat oven to 350°F (175°C) and line a baking sheet with parchment paper.
- Scoop rounded balls of dough onto the baking sheet, spacing them 2 inches apart.
- Bake for 10-12 minutes until edges are lightly golden, then cool on a wire rack.