

Introduction
Chocolate chip cookies are undeniably one of the most cherished baked goods worldwide. Their invention, credited to Ruth Wakefield in the 1930s, transformed them into the classic treat we savor today. This Chocolate Chip Cookie Extravaganza recipe pays homage to that timeless delight, offering a well-rounded mix of flavors and textures that elevate it above your average cookie. The combination of butter, sugars, and an abundance of rich chocolate chips brings warmth and nostalgia, making these cookies a perfect treat for gatherings, casual snack times, or simply as a sweet indulgence at the end of a long day.
The comfort provided by a homemade cookie cannot be overstated. Whether you are a seasoned baker or a novice, this recipe allows you the joy of creating something with your own hands. The simple act of mixing ingredients fosters a sense of accomplishment, and the aromatic symphony filling your kitchen while they bake only adds to the experience. Picture serving these warm cookies straight from the oven to your loved ones, their eyes glistening with anticipation as they take their first bite—each cookie a delicious expression of love and care.
Baking cookies at home also presents an opportunity to unleash creativity. The Chocolate Chip Cookie Extravaganza invites you to personalize it according to your preferences, including optional nuts that add more texture and flavor. With only a modest list of ingredients and straightforward steps, making these cookies becomes an enjoyable and fulfilling endeavor for anyone who decides to step into the kitchen.
Recipe Overview
– Total Time: 25 minutes
– Prep Time: 15 minutes
– Yield/Servings: 24 cookies
– Difficulty: Not specified in the recipe
This recipe showcases classic flavors with a slight twist, offering an irresistible balance between chewy and crispy textures. You can expect each bite to be bursting with the rich taste of semisweet and/or milk chocolate chips, complemented by the softness of the dough. While the warm edges provide a slight crunch, the centers remain delectably gooey. These cookies are perfect for any occasion, from family gatherings to cozy evenings at home, ensuring satisfaction and smiles.
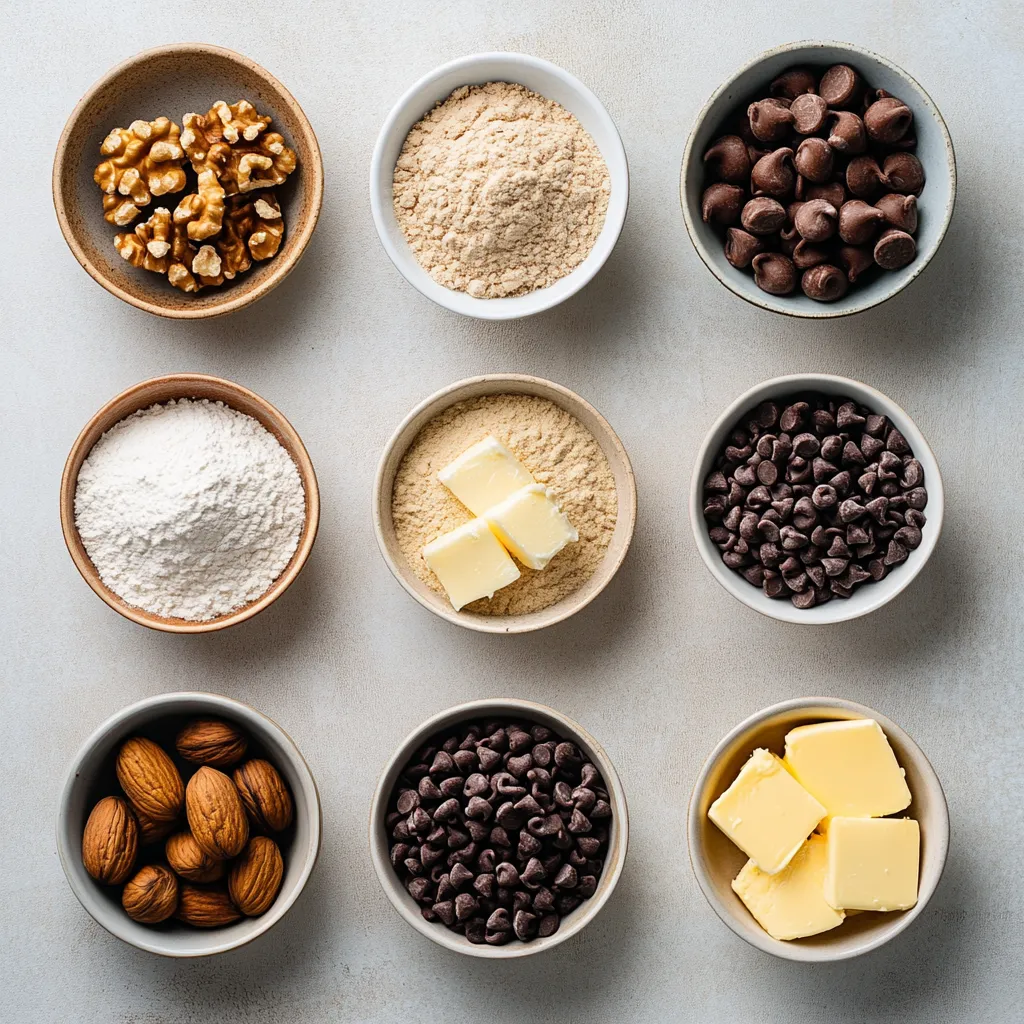
Ingredients
– 2 1/4 cups all-purpose flour
– 1/2 teaspoon baking soda
– 1 cup unsalted butter, softened to room temperature
– 1/2 cup granulated sugar
– 1 cup packed light-brown sugar
– 1 teaspoon kosher salt
– 2 teaspoons pure vanilla extract
– 2 large eggs
– 2 cups semisweet and/or milk chocolate chips
– 1 cup chopped nuts (optional)
Using high-quality ingredients is crucial for achieving the best flavor and texture in your cookies. Unsalted butter is preferred as it allows you to control the saltiness in your cookies, while the choice between semisweet and milk chocolate chips can tailor the sweetness of the final product to your liking. Fresh, high-quality eggs enhance the richness of the dough, while the right balance of sugars contributes to the perfect consistency.
Preparing the Oven and Baking Sheets
To embark on this baking adventure, the very first step is to prepare your oven and baking sheets. Set your oven to preheat at 350°F (175°C). Preheating is vital; it ensures that your cookies start baking immediately upon hitting the oven, resulting in a proper rise and texture.
Next, you’ll want to prepare your baking sheets by lining them with parchment paper. This not only prevents the cookies from sticking but also aids in even baking, allowing for a smooth transition from pan to cooling rack. Choosing the right baking sheet is equally important; opt for one that’s flat with a shiny finish—dull finish sheets can cause cookies to brown unevenly. Ensure your baking sheets are cool before placing the cookie dough on them, as placing warm dough on a hot surface can lead to unwanted spreading.
Mixing the Dry Ingredients
Once the oven is ready and your baking sheets are prepared, it’s time to tackle the dry ingredients. In a small bowl, combine the all-purpose flour and baking soda, whisking them together until they are well blended. This step ensures that the baking soda, which acts as a leavening agent, is evenly distributed throughout the flour. An even mixture of dry ingredients is crucial for maintaining the cookie’s structure, leading to a uniform rise as they bake.
Each component plays an essential role; the flour provides the base and structure of the cookies, while the baking soda reacts with the acidic components in the recipe (such as the brown sugar) to create the CO2 needed for a perfect lift. Setting this mixture aside briefly helps to keep the ingredients adequately separated until you are ready to combine them with the wet ingredients.
Creaming the Butters and Sugars
With your dry ingredients ready, focus on the creaming process, which is critical for achieving the right texture in your cookies. Begin by placing the softened unsalted butter, granulated sugar, and light-brown sugar into a spacious mixing bowl. Use an electric mixer on medium speed to cream the ingredients together, mixing for about 2-3 minutes. The goal here is to achieve a light and fluffy mixture.
This creaming process incorporates air into the sugar and butter, which is vital for the cookies’ rise and texture. The incorporation of air bubbles during this stage ensures that when the cookies bake, they lift beautifully and achieve a desirable chewiness. It’s essential not to rush this step; taking the time to cream the ingredients properly lays the foundation for a delicious cookie you’ll be proud to serve. The outcome should yield a mixture with a pale, whipped appearance—evidence of successful creaming that promotes tender yet robust cookies.
Incorporating Wet Ingredients
After achieving the perfect creamed mixture, it’s time to incorporate the wet ingredients for additional flavor and moisture. Add your kosher salt, pure vanilla extract, and large eggs to the bowl with the butter-sugar mixture. Ensure that you beat everything together until you obtain a smooth and fully combined consistency. This step is vital for flavor distribution throughout the dough; the kosher salt elevates the sweetness of the cookies, while the vanilla extract adds depth.
Using room temperature ingredients is important; it allows for better emulsification, resulting in a smooth batter that bakes evenly. If your eggs are cold from the refrigerator, consider letting them sit at room temperature for about 30 minutes before baking, or run them under warm water for a few minutes. This simple adjustment can contribute significantly to the final texture of your cookies.
Combining Dry and Wet Ingredients
Now that your wet mixture is perfectly blended, it’s time to gradually add the dry ingredients to the bowl. It’s best to do this in batches, mixing on low speed until just combined after each addition. Being careful not to overmix is critical; overworking the dough can lead to tough cookies due to gluten development.
Once the flour and baking soda mixture is incorporated, you should have a soft and slightly sticky cookie dough that’s ready for the next delicious step—adding in the chocolate chips and optional nuts, bringing your Chocolate Chip Cookie Extravaganza to life.

Best practices for mixing to avoid overworking the dough
When mixing your cookie dough, it’s essential to use the right technique to achieve the desired texture. Start by ensuring that your butter is adequately softened but not melted. This will help create air pockets during the creaming process, resulting in a light and airy cookie. When creaming together the butter and sugars, mix just until they are blended and fluffy—aim for about 2-3 minutes on medium speed. Be cautious not to overmix, as this can develop gluten in the flour and result in cookies that are tough instead of tender. Once you add the flour mixture, mix only until you see no dry flour left. The key is to leave some lumps in the dough, as they will help keep the cookies softer.
How proper combining can influence the final texture of the cookies
The way you combine ingredients significantly impacts the final texture of your cookies. Proper creaming of the butter and sugars introduces air and helps the cookies rise while baking. The incorporation of eggs and vanilla extract adds moisture and flavor, while the gradual addition of the flour mixture ensures that the dough retains a tender consistency. If you overmix, the cookies may turn out compact and chewy instead of having the desired soft and chewy bite. Aim for a balance where ingredients are just combined—this will yield cookies that have a delightful texture.
Folding in Chocolate Chips and Nuts
Instructions for gently folding in semisweet and/or milk chocolate chips
Once your cookie dough is mixed, it’s time to incorporate the chocolate chips. Using a spatula or a wooden spoon, gently fold in the chocolate chips into the dough. Take care to not stir vigorously; the goal is to evenly distribute the chocolate without deflating the dough. You’ll want all the chocolate chunks to be visible within the cookie dough, providing pockets of gooey chocolate once baked.
Options for adding chopped nuts and their role in enhancing texture and flavor
Chopped nuts are a popular addition to chocolate chip cookies, adding texture and flavor complexity. Whether you choose walnuts, pecans, or even macadamia nuts, they not only introduce a crunchy element but also pair well with the chocolate. If you include nuts in your dough, ensure that they are roughly chopped so that they mix evenly without overwhelming the cookie’s texture. As with the chocolate chips, gently fold the nuts into the dough to maintain the lightness of the mixture.
Advice on distributing these additions evenly throughout the dough
Ensure that both the chocolate chips and nuts are evenly distributed throughout the dough. This is best accomplished by folding them in gently but thoroughly. Uneven distribution can lead to some cookies being overloaded with toppings while others are under-chocolatey or lacking crunch. Aim for a consistent mixture where each cookie has a balanced ratio of cookie dough to chocolate and nuts.
Forming the Cookie Dough
Techniques for using a cookie scoop or tablespoon to portion the dough
For uniformity in size and baking times, use a cookie scoop, which measures approximately 1.5 tablespoons of dough per cookie. This ensures that your cookies will bake evenly and look professional. If you don’t have a cookie scoop, a standard tablespoon will suffice. Just ensure that each dollop of dough is similar in size for consistent results.
Safety tips for spacing the dough balls on the prepared baking sheets
When placing cookie dough on the baking sheets, maintain a minimum spacing of 2 inches between each ball. This spacing is crucial as it allows the cookies to spread properly during baking. Insufficient spacing can result in the cookies merging into one another, leading to misshapen cookies and uneven baking.
Discussing the importance of spacing for cookie spreading during baking
Proper spacing also impacts the texture of the cookies. Spacing allows heat to circulate around each cookie, enabling them to bake evenly and develop the perfect texture with crisp edges and soft centers. If cookies are too close together, they can steam instead of bake, which affects their taste and chewiness negatively.
Baking the Cookies
Instructions for baking cookies for the perfect time, ensuring optimal texture
Preheated to 350°F (175°C), your oven is ready for baking the cookies. Bake the cookies for 10-12 minutes, ensuring that the edges turn golden brown while the centers remain slightly underbaked. This will yield a cookie that is both chewy and soft, perfect for enjoying warm.
Visual cues to look for when determining if cookies are ready to be taken out of the oven
Keep an eye out for golden-brown edges and a slightly puffy center. The cookies may appear underdone at first; this is expected as they will continue to cook and firm up once removed from the oven. This dance between baking time and cookie texture is crucial for achieving that delectably soft center.
Letting cookies cool on the baking sheets and the benefits of this step
After baking, it’s important to allow the cookies to cool on the baking sheets for about 5 minutes. This allows them to set, making them easier to transfer without breaking. During this cooling period, the cookies will firm up while still retaining their soft, chewy centers.
Cooling and Storing the Cookies
Step-by-step guidance for cooling cookies on wire racks
Once cooled for a few minutes, gently transfer the cookies to a wire rack using a spatula. This allows air to circulate around the cookies, enabling them to cool more thoroughly. Avoid stacking the cookies too soon, as they can stick together while warm.
Tips for storing cookies to maintain freshness, texture, and flavor
To maintain the freshness and texture of your chocolate chip cookies, store them in an airtight container at room temperature for up to one week. To keep them chewy, place a slice of bread in the container; the cookies will absorb moisture from the bread, preventing them from becoming hard.
Suggestions for freezing cookies for longer preservation
For longer storage, cookies can be frozen. Allow them to cool completely, then layer them in an airtight container with parchment paper between each layer to prevent sticking. Frozen cookies can last for up to three months. To enjoy, simply thaw them at room temperature or reheat them in the oven for a few minutes for that just-baked taste.
Serving Suggestions and Presentation Tips
Ideas for presenting chocolate chip cookies beautifully
When it comes to presentation, charm your guests by stacking cookies on decorative plates or in glass jars. A rustic look can be achieved by using rustic earthenware or simple white plates, letting the cookies shine as the centerpiece.
Creative ways to serve cookies, including pairing with beverages
Pair your chocolate chip cookies with a glass of cold milk for the classic combination or serve warm cookies alongside a scoop of ice cream for an indulgent treat. Coffee, tea, or even a warm cup of cocoa also pair beautifully, enhancing the flavor experience.
Tips for garnishing with additional chocolate chips or nuts for visual appeal
For visual appeal, sprinkle a few extra chocolate chips or chopped nuts on top of the warm cookies just after coming out of the oven. This not only makes the presentation enticing but also adds an extra burst of chocolate and nutty flavor, elevating the humble cookie.
Variations and Customizations
Exploring potential variations, such as using different types of chocolate or adding spices
While this recipe primarily utilizes semisweet and/or milk chocolate chips, feel free to experiment with other types of chocolate, such as dark chocolate or white chocolate swirls for an exciting twist. You might also consider incorporating spices like cinnamon or nutmeg for added warmth and depth of flavor.
Suggestions for making allergen-friendly cookies, including nut-free versions
For individuals with nut allergies, simply omit the nuts and ensure you check the labels on the chocolate chips used for any cross-contamination warnings. You can also explore gluten-free flour alternatives if necessary, though keep in mind that texture and spread may vary.
Incorporating seasonal flavors or ingredients for unique twists
Consider adding seasonal ingredients to personalize your cookies. During the fall, try incorporating pumpkin spice or even chopped dried cranberries. In summer, mixing in toasted coconut or incorporating citrus zest can provide a refreshing twist to the classic chocolate chip cookie.
Conclusion
The Chocolate Chip Cookie Extravaganza is a delightful treat that balances the rich flavor of chocolate with a soft, chewy center and crispy edges. This recipe, taking a total of about 25 minutes, yields satisfying cookies that are perfect for any occasion. Each cookie offers a wonderful burst of flavor and texture that will certainly please anyone looking for a classic dessert.

Chocolate Chip Cookie Extravaganza Recipe
Ingredients
- 2 ¼ cups all-purpose flour
- ½ teaspoon baking soda
- 1 cup unsalted butter softened
- ½ cup granulated sugar
- 1 cup packed light-brown sugar
- 1 teaspoon kosher salt
- 2 teaspoons pure vanilla extract
- 2 large eggs
- 2 cups semisweet and/or milk chocolate chips
- 1 cup chopped nuts optional
Instructions
- Preheat your oven to 350°F (175°C) and line two baking sheets with parchment paper.
- In a small bowl, whisk together the flour and baking soda, then set aside.
- In a mixing bowl, cream the softened butter, granulated sugar, and light-brown sugar until light and fluffy.
- Add the kosher salt, vanilla extract, and eggs, mixing until smooth.
- Gradually incorporate the flour mixture into the wet ingredients, mixing on low speed.
- Fold in the chocolate chips and chopped nuts using a spatula.
- Drop rounded balls of dough onto the prepared baking sheets, spacing them 2 inches apart.
- Bake for 10-12 minutes until the edges are golden brown and the centers are soft.
- Let the cookies cool on the baking sheets for 5 minutes before transferring to a wire rack.