Introduction
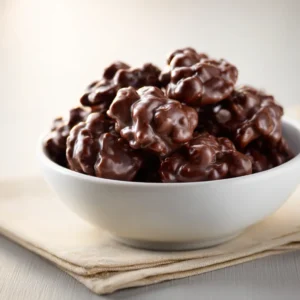
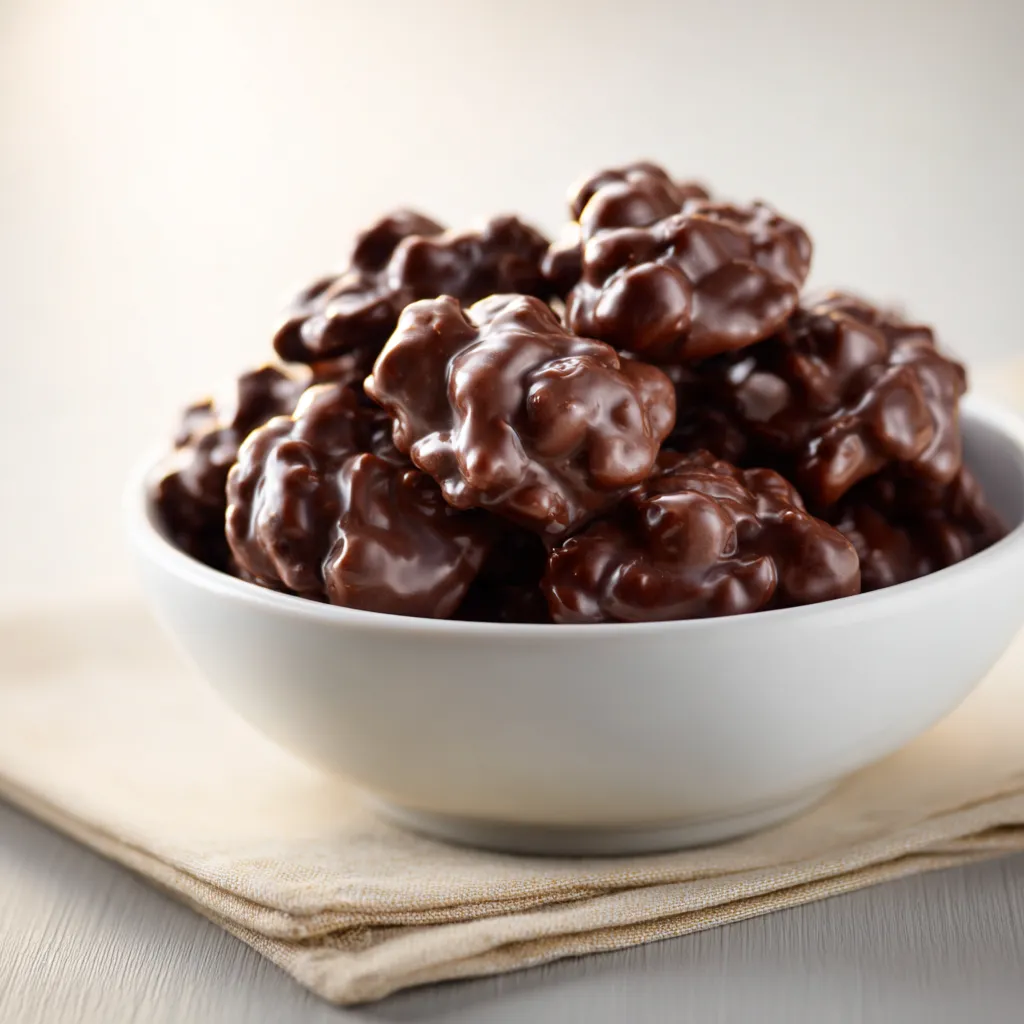
Chocolate and peanut combinations have gained tremendous popularity over the years, captivating taste buds with their delightful balance of rich, creamy chocolate and the nutty crunch of peanuts. These flavors meld together to create tasty snacks that are both satisfying and indulgent. The versatility of chocolate-peanut confections makes them an ideal choice for various gatherings, from casual movie nights to formal celebrations, ensuring that everyone has something to enjoy.
The Crockpot stands out as a powerhouse in the kitchen, especially for those who appreciate the art of slow-cooked treats. It offers an effortless cooking approach that takes the stress out of time management, allowing for seamless integration of ingredients without the constant attention required by traditional methods. For those who love chocolate-peanut treats, the Crockpot Chocolate Peanut Clusters are a fantastic option, delivering a rich and decadent flavor with minimal effort.
You will find that these clusters not only satisfy a sweet tooth but also provide a satisfying crunch that can enhance any occasion, whether it’s a family gathering, a festive celebration, or simply a personal treat at the end of a long day. The beauty of this recipe lies in its simplicity, turning ordinary ingredients into extraordinary snacks through the magic of slow cooking.
Recipe Overview
– Total Time: 2 hours 30 mins
– Prep Time: 15 mins
– Yield/Servings: Approximately 24 clusters
– Difficulty: Not specified in the recipe
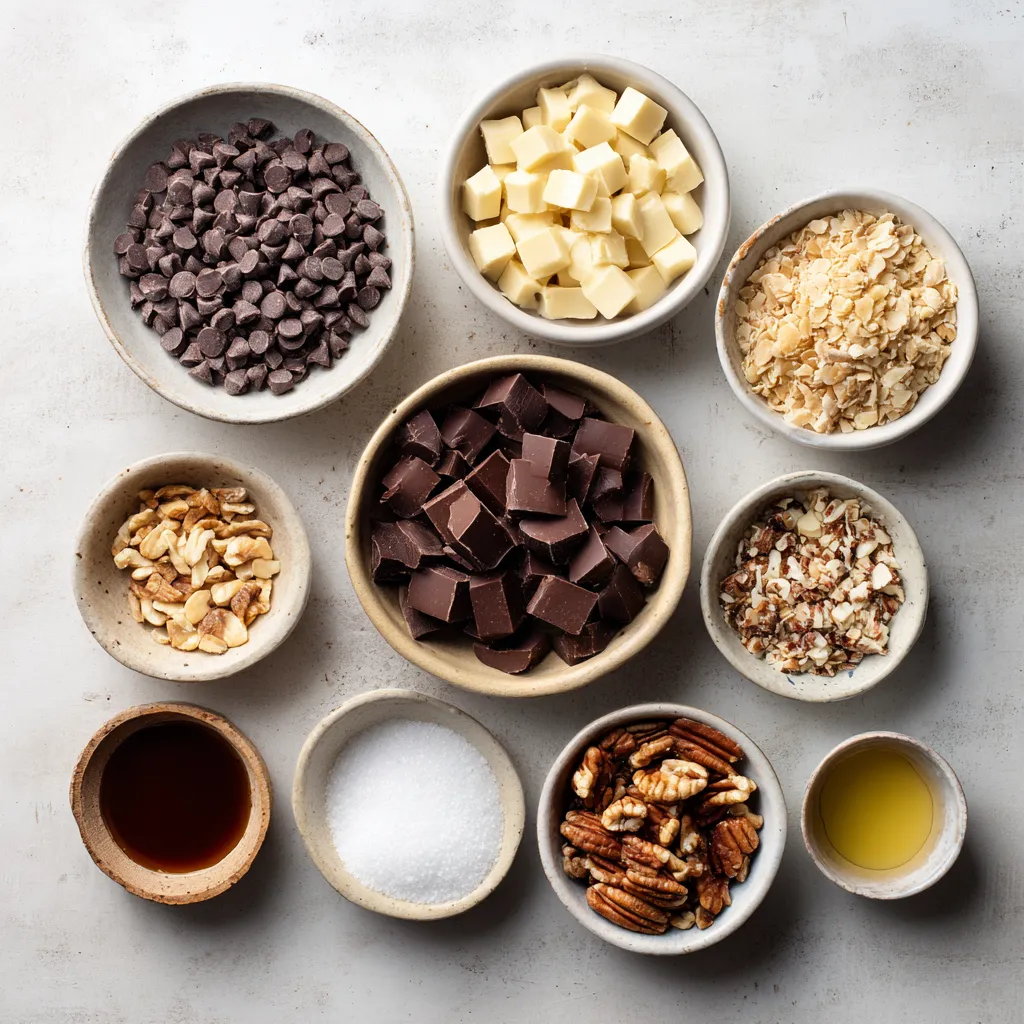
Ingredients
– 2 cups of creamy milk chocolate chips
– 1 cup of rich semi-sweet chocolate chips
– 2 cups of crunchy salted peanuts (or unsalted, if preferred)
– 1 cup of toasted pecans, roughly chopped (optional)
– 1 teaspoon of pure vanilla extract
– A sprinkle of sea salt for garnish (optional)
Instructions
1. Prepare Your Crockpot: Start by lightly spraying the inside of your crockpot with cooking spray to ensure easy release of the clusters after they set.
2. Melt the Chocolates: Add both the milk chocolate chips and semi-sweet chocolate chips into the crockpot. Set the heat on low and allow the chocolates to melt over approximately 30 minutes. Make sure to stir occasionally until the mixture is beautifully smooth and completely combined.
3. Mix in Peanuts & Pecans: Once your chocolates are melted to perfection, incorporate the salted peanuts and the chopped pecans (if using). Stir vigorously to ensure that each peanut is generously coated in the decadent chocolate.
4. Forming Clusters: Utilize a spoon or cookie scoop to dollop generous spoonfuls of the chocolate-peanut mixture onto a baking sheet lined with parchment paper. Aim for bite-sized clusters to create the perfect treat for snacking.
5. Cool & Allow to Set: If desired, enhance flavor by sprinkling a touch of sea salt on top of each cluster. Transfer the baking sheet to the refrigerator to allow the chocolate to set completely, which should take about 1 to 2 hours.
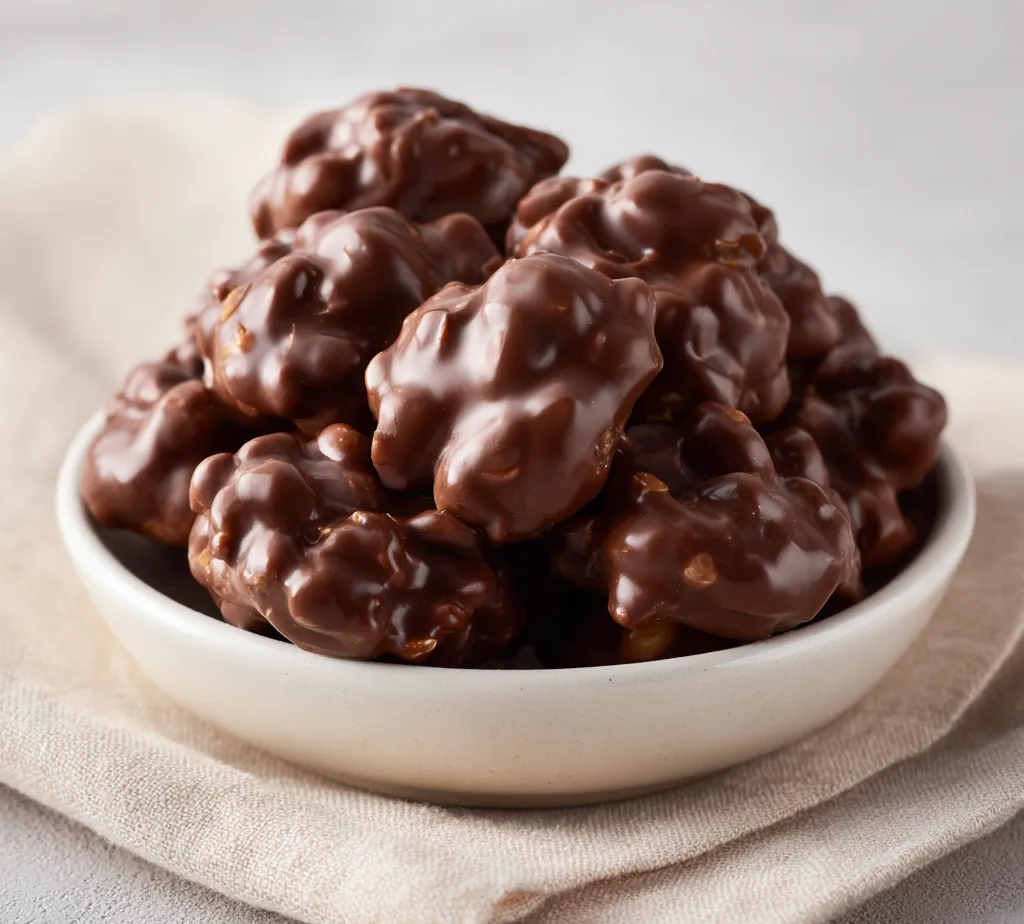
6. Serve or Store: Once fully set, indulge in your delightful chocolate peanut clusters! Any leftovers can be stored in an airtight container at room temperature for up to one week.
Preparing Your Crockpot
Before diving into the delicious process of making Crockpot Chocolate Peanut Clusters, it’s essential to ensure the crockpot is ready to facilitate a non-stick cooking experience. Lightly spraying the interior with cooking spray is an effective method to prevent the chocolate mixture from adhering to the sides. This step ensures your sweet creations will easily lift away from the surface without crumbling or breaking apart, allowing you to retain the delectable shape of your clusters.
While many cooking sprays are available in the market, any standard non-stick spray will work effectively for this purpose. It’s important to cover the entire cooking surface lightly. After spraying, take a moment to check for any areas that might need a bit more attention, as an even coat will yield better results. Proper preparation of your crockpot sets the foundation for smooth melting and easy removal, making the overall cooking process far more enjoyable.
Melting the Chocolates
The melting process of chocolate is crucial for achieving that luscious, smooth consistency that forms the base of the chocolate peanut clusters. Start by placing both the creamy milk chocolate chips and the rich semi-sweet chocolate chips into the crockpot, allowing them to combine their flavors during the melting process. Setting the heat to low is imperative; high temperatures can result in burnt chocolate, ruining the texture and flavor of your finished clusters.
It’s important to be patient during this phase. Allow the chocolate to melt gently over the course of approximately 30 minutes, taking care to stir occasionally. This will help distribute the heat evenly and prevent any parts from getting too hot. The ideal visual cue to indicate the chocolates have melted perfectly is a glossy, even mixture devoid of any lumps. If you can achieve this smooth blend, you’re well on your way to crafting a delightful treat that will impress anyone who takes a bite.
Mixing in Peanuts & Pecans
Timing is key when it comes to adding the peanuts and optional pecans into the melted chocolate. Once you’ve achieved that perfect smooth chocolate mixture, it’s time to incorporate the crunchy salted peanuts. Their addition not only brings texture but also contributes a delightful contrast to the sweetness of the chocolate.
For optimal coating, it’s advisable to stir vigorously, ensuring that each peanut is enveloped in the chocolate. This not only elevates the flavor but ensures that every bite of the finished cluster will have that satisfying chocolatey goodness. Consider your nut options carefully; the recipe allows for either salted or unsalted peanuts, so think about the flavor profile you wish to achieve. Salted peanuts will lend an added savory element, while unsalted ones provide a more straightforward sweet and nutty flavor.
If you decide to add pecans, which are optional in this recipe, their rough chop creates an extra layer of texture and richness. These nuts pair beautifully with the chocolate and can elevate the clusters further, adding depth to the overall taste experience. Make sure to mix well so that the pecans and peanuts are evenly distributed throughout the chocolate, creating uniform clusters that are both visually and tastefully appealing.
Forming Clusters
The fun part of this whole process comes when it’s time to form the clusters. Using a spoon or cookie scoop, dollop generous spoonfuls of the chocolate-peanut mixture onto a baking sheet lined with parchment paper. This step is crucial for shaping your clusters into bite-sized pieces that are perfect for snacking.
Aim for a size that is manageable for a single bite, which not only makes them easy to enjoy but also ensures that they set evenly. The parchment paper not only assists with the non-stick element but also makes cleanup significantly easier when the clusters have set. As you place the dollops onto the baking sheet, you can begin to visualize the delicious final product — a medley of chocolate and peanuts waiting to be enjoyed.
If you’re feeling creative with presentation, consider spacing the clusters according to your aesthetic preferences. You can even make larger clusters if you wish; just remember that they may require a bit longer to set in the refrigerator. Once formed, you can indulge in your creations or store them for later enjoyment.
Best Tools for Shaping the Chocolate-Peanut Mixture
To achieve perfectly shaped clusters, certain tools can enhance your experience. A standard cookie scoop proves to be one of the best choices for portioning the chocolate-peanut mixture. This tool allows for uniform product size, ensuring even cooking and visual appeal. Alternatively, a large spoon can be used for a more rustic look, allowing you to create varying sizes for more unique clusters. Whichever tool you choose, ensure it is easy to handle and allows for quick and efficient scooping.
Guidelines on Portion Sizes for Clusters
When determining portion sizes for your clusters, consider bite-sized pieces that encourage sharing. Each scoop should be roughly 2 tablespoons in volume, which usually results in clusters weighing around 1 ounce each. This size is ideal for a snack that is not too overwhelming but still satisfying. For larger gatherings, feel free to create smaller or larger clusters to cater to different preferences.
Importance of Using Parchment Paper for Easy Removal
Using parchment paper is crucial when forming your clusters. Its non-stick surface prevents the chocolate from adhering to the baking sheet, allowing for smooth and easy removal once your clusters have set. This saves time in clean-up and ensures that your clusters maintain their shape without breaking apart during extraction.
Creative Tips for Cluster Shapes and Sizes
While traditional clusters consist of rounded scoops, don’t hesitate to experiment with shapes and sizes. Consider forming larger, flat discs for an elegant cookie-like presentation or use mini scoops to create bite-sized morsels ideal for gatherings. To infuse your clusters with a bit of creativity, try pressing them into silicone molds for fun shapes like hearts or stars. These variations not only add visual interest but can also attract different age groups or preferences during your serving occasions.
Cooling & Allowing to Set
Optimal Cooling Time and Temperature Considerations
Once you have placed your clusters on the parchment-lined baking sheet, allow them to cool at room temperature for about 10-15 minutes before transferring them to the refrigerator. The combination of room temperature cooling initially followed by chilling helps the chocolate set evenly without developing a grainy texture.
The Role of Refrigeration in Setting the Chocolate
Refrigeration is vital for ensuring that the chocolate fully sets and firms up. During refrigeration, the clusters solidify into their final form, which usually takes about 1 to 2 hours. Keeping them in the refrigerator assists not only in setting speed but also helps preserve their texture, maintaining that satisfying crunch of the peanuts.
Optional Sprinkling of Sea Salt: Flavor Enhancement and Presentation
Sprinkling sea salt on top of your clusters serves both aesthetic and gustatory purposes. The tiny grains of salt contrast beautifully with the sweet chocolate, enhancing its flavor profile. For a more polished look, consider a light dusting just before the clusters fully set, ensuring the salt adheres beautifully without causing it to slide off.
Signs that Indicate the Clusters Are Ready to Serve
Your clusters are ready to be served when the chocolate has hardened to a firm texture without any tackiness. A light tap on the surface should yield a clean sound, indicating they are set. Visually, they should appear glossy yet firm, and should maintain their shape without sagging.
Serving Suggestions
Ideas for Presentation: Platters and Garnishes
When presenting your chocolate peanut clusters, opt for a decorative platter that compliments the treat’s richness. A white or colored ceramic plate can enhance the visual appeal. Consider surrounding the clusters with fresh fruit, like strawberries or slices of orange, for a striking contrast. Edible flowers or sprigs of mint can also add a touch of elegance, particularly for special occasions.
Pairing Suggestions: Fruits, Nuts, or Dessert Sauces to Complement
Pair your clusters with items that balance their richness. Slices of crisp apple or pear provide a refreshing palate cleanser, while whipped cream or a drizzle of caramel adds further decadence. For those who enjoy enriched flavors, serve these clusters with a side of chocolate or butterscotch sauce for dipping.
Ideal Serving Temperatures and Settings
Chocolate peanut clusters can be enjoyed chilled or at room temperature. Consider serving them at room temperature for gatherings, allowing them to soften slightly, which enhances their melt-in-your-mouth experience. They work wonderfully as a dessert table centerpiece or snack at casual gatherings like movie nights or birthday parties.
Best Occasions for Serving: Gatherings, Holidays, or Casual Snacks
These clusters are fit for various occasions—from holiday parties to birthday celebrations, or simply as a delightful treat during game night with friends. Their versatility makes them suitable for both formal and informal settings, catering to all age groups and preferences.
Storing Leftovers
Guidelines for Storing Chocolate Peanut Clusters
To maintain freshness, store your chocolate peanut clusters in an airtight container. This prevents exposure to air, which can cause the chocolate to bloom or lose texture. Layer parchment paper between the clusters, if necessary, to avoid them sticking together.
Airtight Container Recommendations and Shelf Life
For optimal preservation, use glass containers or high-quality plastic containers that seal tightly. Properly stored clusters can last up to a week at room temperature, but refrigeration can extend their shelf life a bit longer, up to two weeks. Always ensure that conditions remain dry, as humidity can adversely affect chocolate.
Discussion on Re-purposing Clusters in Other Desserts or Snacks
If you find yourself with leftover clusters—or want to get creative—consider repurposing them. Chop them up and mix them into homemade trail mix for an additional treat. Alternatively, use them as a topping for ice cream sundaes or in baked goods such as brownies for an exciting twist.
Nutritional Information
Overview of the Nutritional Benefits of Peanuts and Chocolate
Chocolate peanut clusters not only satisfy a sweet tooth but also offer nutritional benefits. Peanuts are rich in protein, healthy fats, and essential vitamins and minerals. They provide satiety and energy, making them a valuable addition to snacks.
Caloric Breakdown per Serving
Each cluster typically contains around 100-120 calories, contingent on the specific proportions and ingredients used. This can vary based on the type of chocolate and nuts you opt for, as well as any additional ingredients added.
Optional Alternatives for Dietary Preferences
For those with dietary restrictions, various options can be explored without introducing new ingredients. Consider using dairy-free chocolate chips to accommodate vegan diets. Additionally, swapping out peanuts for alternatives like almonds or sunflower seeds can cater to nut allergies while still providing texture and crunch.
Tips for Customization
Suggestions for Adding Different Nuts or Candies
In the spirit of creativity, feel free to substitute or add nuts into your clusters. Chopped walnuts or crisped rice can provide a different texture. Including candy pieces, such as crushed pretzels or toffee bits, can also create a unique flavor profile.
Ideas for Flavor Enhancements: Spices or Extracts
Introduce additional flavors by infusing your chocolate mixture with spices like cinnamon or espresso powder, enhancing the overall taste. A hint of almond extract, alongside the vanilla, can provide a delightful depth of flavor.
Adapting the Recipe for Various Diets (e.g., Vegan Chocolate Options)
Accommodate various dietary needs by sourcing vegan chocolate chips and ensuring all other ingredients are free from animal products. Remember to verify the source of your nuts as some manufacturers may process them in facilities where cross-contamination occurs.
Troubleshooting Common Issues
Solutions to Common Melting Problems
If you find your chocolate chips are not melting smoothly, it could be due to over heating. Always ensure the crockpot temperature is set low. If needed, add a tablespoon of coconut oil to assist in achieving a smoother consistency.
Tips for Avoiding Clusters Falling Apart
To help your clusters maintain their shape, ensure a proper coating of chocolate on all peanuts. If the mixture seems too dry, drizzle a little melted chocolate over the top before they cool to bind them together better.
Reasons Chocolate May Not Set Properly and Solutions
If clusters aren’t setting well, it could be attributed to excess moisture. Make sure that any other ingredients added (like nuts) are fully dry. If the clusters are soft due to environmental humidity, consider longer refrigeration times and storing them in a cooler, dry place until fully set.
Conclusion
Crockpot Chocolate Peanut Clusters deliver a perfect balance of creamy chocolate and crunchy peanuts, creating a delightful treat. With a total preparation time of about 2 hours and 30 minutes, these clusters are both engaging to make and enjoyable to eat. Each bite offers a satisfying mix of textures and flavors, making them a great option for snacking or sharing at gatherings.