
Introduction
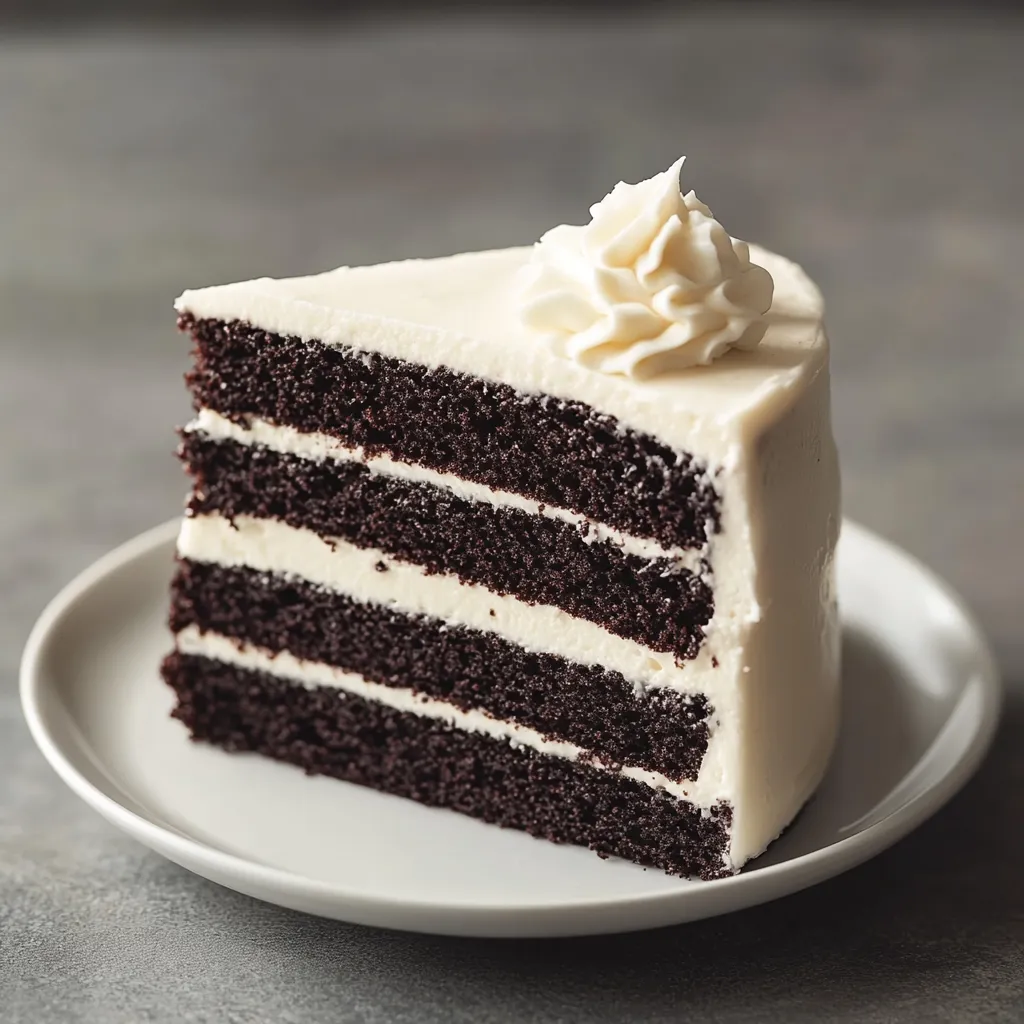
Black velvet cake is a luxurious dessert that captivates both the eye and the palate. Known for its striking dark color and rich chocolate flavor, this cake carries a legacy that dates back to the early 20th century, often associated with special occasions and celebrations. Its distinctive appearance and velvety texture evoke a sense of sophistication, making it a sought-after choice for everything from birthday parties to weddings.
The allure of black velvet cake lies not only in its stunning visual appeal but also in its delightful taste. The combination of cocoa powder and the subtle hint of black food coloring creates a cake that is as decadent as it is beautiful. Each bite reveals a moist crumb infused with rich chocolate flavor, which is beautifully balanced by a smooth and creamy frosting. To elevate this dessert further, the use of quality ingredients plays a critical role in achieving the desired depth of flavor and texture.
Whether it’s a special celebration or a simple indulgence at home, black velvet cake promises to impress. The cake’s versatility makes it an excellent choice for various occasions, ensuring that it can bring a touch of elegance to any table.
Recipe Overview
– Total Time: 1 hour 15 minutes
– Prep Time: 20 minutes
– Bake Time: 30-35 minutes
– Yield/Servings: 12 servings
– Difficulty: Not specified in the recipe
This black velvet cake is characterized by its moist, rich texture and deep chocolate flavor, making it a true delight for chocolate lovers. The buttermilk and vegetable oil contribute to its luscious consistency, while the cream cheese frosting enhances the overall indulgence with its tangy richness. Additionally, the optional black food coloring adds a dramatic finish that enhances the cake’s opulent appearance, making it suitable for upscale events.
With its stunning look and divine taste, black velvet cake is an ideal centerpiece for any gathering, whether it be a formal celebration or a casual get-together with friends. You can serve it as a remarkable dessert after dinner or offer slices to guests throughout the day as a delightful treat.
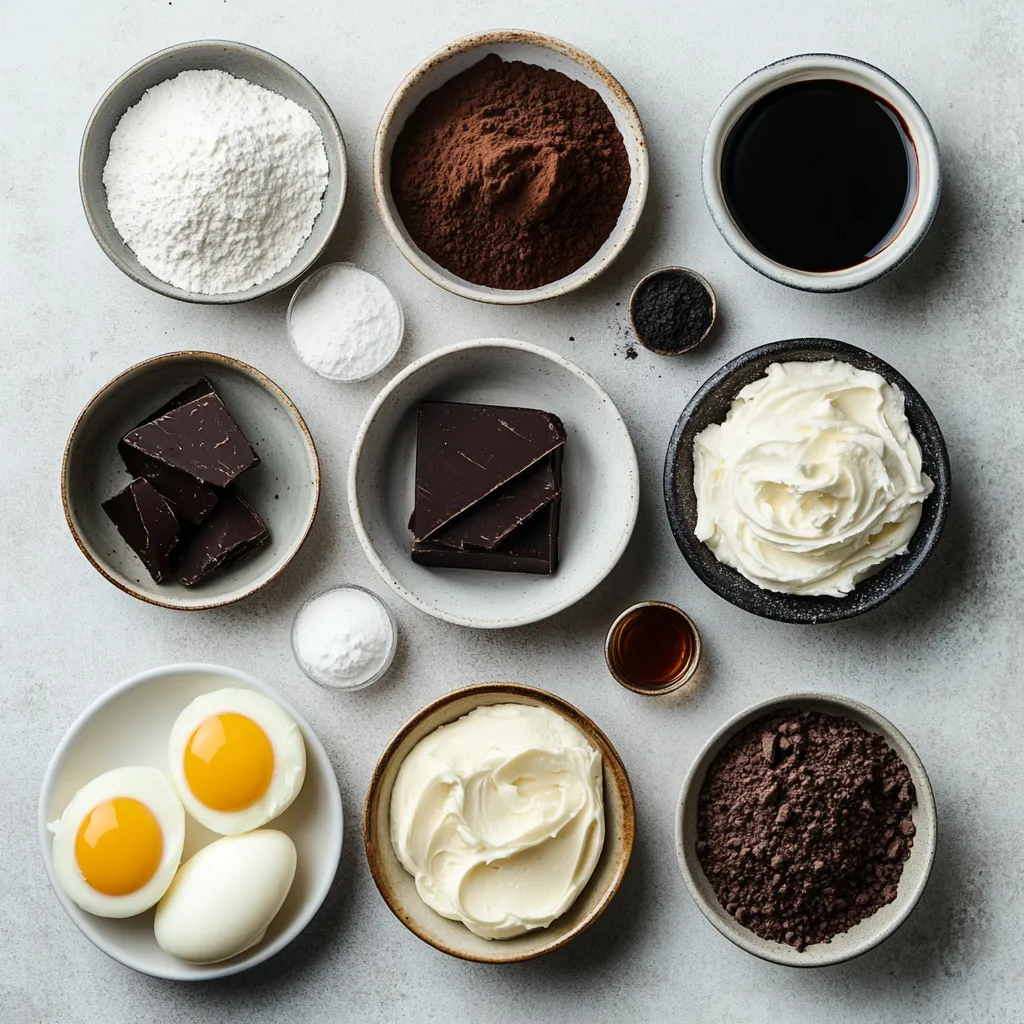
Ingredients
– 2 ½ cups all-purpose flour
– 1 ½ cups granulated sugar
– 1 cup unsweetened cocoa powder
– 1 ½ teaspoons baking powder
– 1 ½ teaspoons baking soda
– 1 teaspoon fine sea salt
– 1 ½ cups buttermilk, at room temperature
– 1 cup vegetable oil
– 2 large eggs, at room temperature
– 2 teaspoons pure vanilla extract
– 1 cup boiling water
– 1 tablespoon black food coloring (optional)
– Cream cheese frosting (for layering and topping)
Each ingredient in this black velvet cake serves a specific role that contributes to the cake’s overall flavor, texture, and appearance. All-purpose flour provides the necessary structure and stability, ensuring that the cake holds its shape when baked. Meanwhile, granulated sugar not only adds sweetness but also helps retain moisture, resulting in a tender crumb. Unsweetened cocoa powder infuses the cake with a rich chocolate flavor that is essential to the black velvet profile.
The baking powder and baking soda serve as leavening agents, ensuring that the cake rises beautifully in the oven. The fine sea salt is crucial for balancing the sweetness and enhancing the flavor of the other ingredients. Buttermilk is a cornerstone of this recipe, providing moisture along with a hint of tanginess that elevates the overall taste of the cake.
Vegetable oil contributes richness and ensures that the cake remains moist, while the eggs play a vital role in binding the ingredients together and providing additional structure. Pure vanilla extract enriches the overall flavor profile, making each bite more delicious. The addition of boiling water helps to activate and harmonize the dry ingredients, creating a smooth batter. The optional black food coloring adds an elegant touch, enhancing the visual allure without dramatically altering the flavor. Lastly, the cream cheese frosting serves as a delightful topping and filling, bringing together the elements of the cake in a harmonious union.
Instructions
1. Preheat the Oven: Begin by preheating your oven to 350°F (175°C). Prepare two 9-inch round cake pans by greasing them thoroughly and dusting with flour to prevent sticking.
2. Mix Dry Ingredients: In a large mixing bowl, sift together the all-purpose flour, granulated sugar, unsweetened cocoa powder, baking powder, baking soda, and fine sea salt. Use a whisk to combine the ingredients evenly, ensuring there are no lumps.
3. Combine Wet Ingredients: In a separate bowl, whisk together the buttermilk, vegetable oil, eggs, and pure vanilla extract until the mixture is smooth and well blended.
4. Combine Mixtures: Gradually pour the wet ingredients into the bowl of dry ingredients. Mix on medium speed with an electric mixer until just combined, being careful not to overmix. Scrape down the sides of the bowl as needed to ensure everything is well incorporated.
5. Add Boiling Water: Slowly stir in the boiling water to the batter (note that the batter will be quite thin). If desired, add the black food coloring and mix until it is fully incorporated for an extra touch of elegance.
6. Pour and Bake: Evenly distribute the batter between the two prepared cake pans. Place them in the preheated oven and bake for 30-35 minutes, or until a toothpick inserted into the center of the cakes comes out clean.
7. Cool the Cakes: Once baked, remove the cakes from the oven and let them cool in the pans for about 10 minutes. Then, carefully transfer them to a wire rack to cool completely.
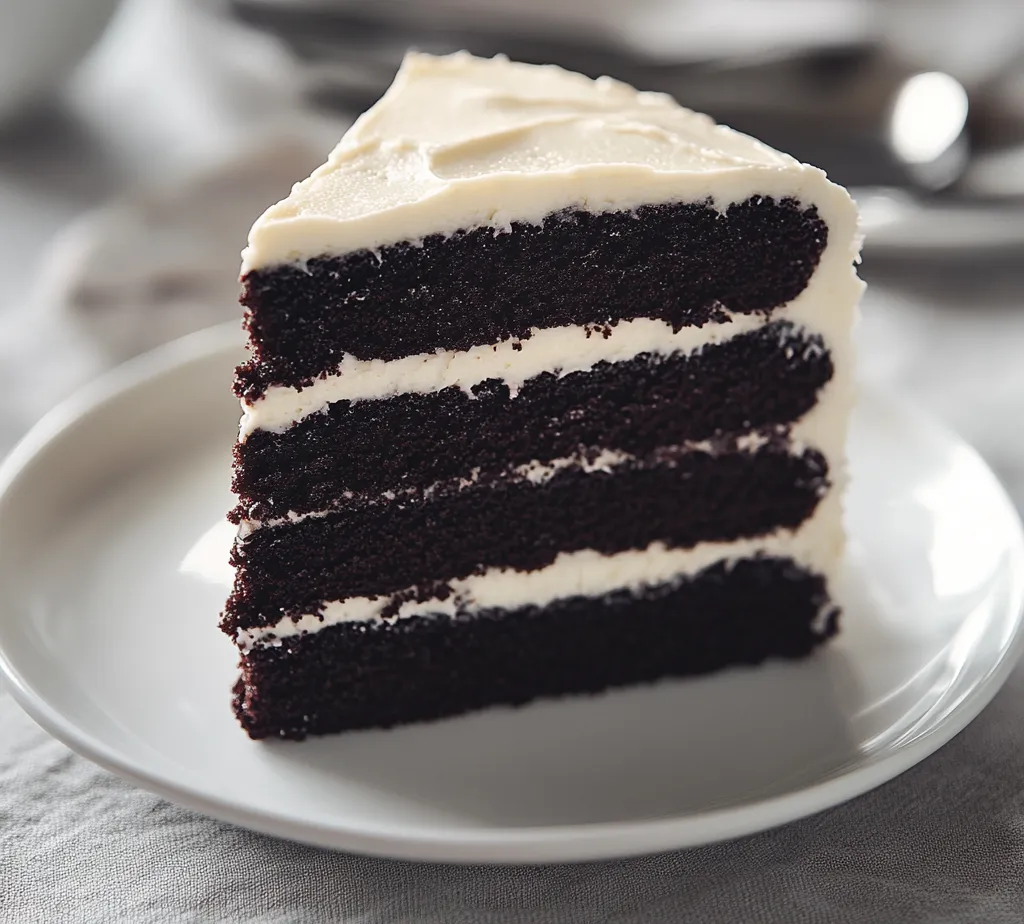
8. Frost the Cake: When the cakes are completely cool, place one layer on a serving plate. Generously spread a layer of cream cheese frosting on top. Carefully place the second layer on top and frost the top and sides of the cake with the remaining cream cheese frosting as desired.
9. Serve and Enjoy: Slice the cake into generous portions and serve to your guests. Delight in the rich, moist flavors of this luxurious black velvet cake!
In the next section, we will discuss how to prepare the ingredients for optimal results, ensuring your black velvet cake turns out perfectly every time.
Tips for Scraping the Bowl Efficiently
When mixing batters, especially those like the decadent black velvet cake, a thorough combination of ingredients is crucial. To scrape the bowl efficiently, use a flexible rubber spatula to reach the corners and edges of the mixing bowl. Gently swipe from the bottom, lifting any batter that has settled, and fold it back into the mixture. This technique ensures that no lumps remain and that every ingredient is well integrated without overmixing, preserving the light texture.
Incorporating Boiling Water
The addition of boiling water is a unique step in this recipe that enhances the cake’s moisture and richness. When incorporating boiling water, pour it slowly into the batter while stirring continuously. This method helps to temper the batter without cooking the eggs or altering the texture too drastically. The hot water activates the cocoa powder, contributing to the cake’s deep flavor profile and ensuring a moist crumb.
Effects of Temperature on the Batter
Room temperature ingredients are essential for achieving the best results with this black velvet cake. When all the wet ingredients—like eggs, buttermilk, and even the mixing bowl—are at room temperature, they blend more effectively, resulting in a smoother batter. The temperature also helps the flour absorb moisture better, which can lead to a fluffier texture. Using cold ingredients can result in a more dense and less aerated cake.
Discussions on the Consistency of the Batter Post-Addition
After adding the boiling water, the consistency will be notably thinner than most typical cake batters. This is expected and crucial for achieving a moist cake. The thin batter means that it will spread easily in the cake pans and cook evenly. Do not be alarmed by the liquidity; a well-mixed thin batter leads to a beautifully tender cake once baked.
Baking the Cake
Oven Preparation: Preheating and Placement Tips
Preheating your oven to 350°F (175°C) is the first step to successfully baking your cake. Ensuring the oven reaches the correct temperature before placing the cake inside is crucial for achieving an even rise. When placing the cake pans in the oven, position them in the center of the oven to ensure that they receive consistent heat from all sides. Avoid placing them too close to the oven walls, which can cause uneven baking.
Importance of Oven Temperature Accuracy
Using an oven thermometer to check your oven’s actual temperature can prevent baking disasters. An oven that is too hot can cause the outside of the cake to set before the inside has fully cooked, while a cooler oven results in a flat or undercooked cake. Maintaining an accurate temperature is vital for baking success.
Best Practices for Baking Multiple Layers
If you’re baking additional layers or cakes, ensure each pan has enough space around it for heat circulation. This will help all layers bake evenly. If baking more than two layers, rotate the pans halfway through the baking process to ensure even cooking.
Baking Time and Testing for Doneness
The baking time for this cake is approximately 30-35 minutes. Begin checking for doneness at around 30 minutes. Insert a toothpick into the center of the cake; if it comes out clean or with a few moist crumbs, the cake is done.
Using Toothpicks Effectively
Toothpicks are a handy tool for testing baked goods, but be mindful of how you use them. Insert them gently to avoid disturbing the cake. Test multiple areas of the cake, particularly the center, for a thorough evaluation of doneness.
Recognizing Visual Cues for Properly Baked Cakes
Visual cues include a slight pull away from the sides of the pan and a rounded top that springs back when lightly pressed. The cake should not wobble excessively, indicating it may not be fully baked.
Cooling the Cakes
Cooling Process and Timing
Allow the cakes to cool in the pans for about 10 minutes before transferring them to a wire rack. This resting time helps the cake stabilize and makes it easier to remove from the pans without breaking.
Importance of Cooling in Pans
Cooling the cakes in their pans allows them to set a bit, firming up the structure and reducing the chances of crumbling during transfer.
How to Transfer Cakes to Wire Racks Without Damage
When transferring, run a thin knife around the edges of the cake. Carefully invert the pan onto the wire rack, gently tapping to release the cake. Allow the cake to cool completely on the rack to ensure the frosting will adhere well without melting.
Tips for Ensuring Complete Cooling Before Frosting
Ensure that the cakes cool completely—this can take up to an hour. Frosting a warm cake can cause the frosting to melt and slide off, ruining your presentation.
Frosting the Cake
Preparing Cream Cheese Frosting: Basic Recipe Outline
The cream cheese frosting typically involves cream cheese, butter, powdered sugar, and vanilla extract. Beat the cream cheese and butter until smooth, gradually adding the powdered sugar until you achieve the desired sweetness and texture.
Tips for Achieving the Right Consistency
For ideal spreading consistency, the frosting should be creamy but thick enough to stay on the cake without dribbling. If the frosting is too thin, add more powdered sugar until you achieve the desired thickness.
Flavor Enhancements: Vanilla vs. Additional Flavors
While vanilla extract is a classic addition to cream cheese frosting, feel free to experiment with flavored extracts (like almond or lemon) for a unique twist.
Constructing the Cake: Layering and Frosting Techniques
When stacking the layers, ensure that the bottom layer is level. Use a serrated knife to trim the tops if necessary. Apply a generous layer of frosting between the layers to enhance flavor and moisture.
Best Practices for Even Layering
Ensure chocolate cake layers are evenly sized and level to create a symmetrical cake. This may include using a cake leveler for precision.
Techniques for Frosting the Sides and Top Neatly
Use an offset spatula or a bench scraper to smooth the frosting on the sides and top of the cake. Applying a thin layer first, known as a crumb coat, helps trap any loose crumbs before the final thicker layer of frosting is added.
Presentation Ideas
Garnishing Tips for an Elegant Finish
For a sophisticated touch, finish the cake with chocolate shavings or fresh berries. These not only enhance the visual appeal but also add a delightful contrast in flavor.
Suggestions for Chocolate Shavings or Fresh Berries
Shave dark chocolate with a vegetable peeler or use a grater to create elegant curls. For berries, a combination of strawberries, raspberries, or blackberries can add a vibrant color contrast against the black cake.
Alternatives for Seasonal Garnishes
Consider using edible flowers or citrus zest for a seasonal touch, adjusting presentation according to holiday themes.
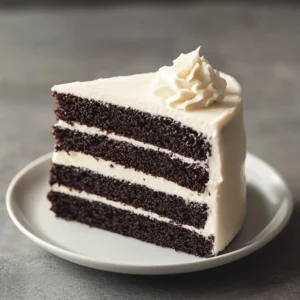
Serving Suggestions: Pairing with Whipped Cream
A dollop of whipped cream beside each slice increases the dessert’s indulgence. You might also consider serving it with a side of fruit compote to provide a refreshing contrast.
Adding Complementary Flavors for a Gourmet Touch
Flavors like espresso or orange zest can add a new dimension to the dessert. Offering a small scoop of vanilla ice cream can also elevate the dessert experience.
Storing Leftovers
Best Practices for Storing the Black Velvet Cake
Store leftover cake in an airtight container to maintain moisture. For longer-term storage, wrap individual slices in plastic wrap before placing them in the container.
Tips for Keeping the Cake Moist
To keep the cake moist, avoid exposing it to air. If refrigerating, place a piece of wax paper between the cake and the lid of the container to create a barrier.
Discussion on Refrigeration vs. Room Temperature
Store the cake in the refrigerator if it’s topped with cream cheese frosting for more than two days. However, it can be kept at room temperature for a day if consumed quickly, ensuring the frosting retains its texture.
Recommended Pairings
Beverage Pairings for the Black Velvet Cake
The richness of the black velvet cake pairs beautifully with coffee or espresso, enhancing its chocolate flavor. Flavored teas, particularly chai or Earl Grey, also complement the cake well.
Options Including Coffee, Tea, and Dessert Wines
Consider dessert wines like port or sweet red wines for an adult indulgence.
Food Pairings for a Dessert Table
This cake can be a centerpiece on a dessert table, complemented with lighter desserts, such as fruit tarts or a selection of cookies.
Ideas for Complementary Flavors
Caramel sauce drizzled over a slice can enhance the cake’s richness. Pairing it with a spiced apple compote could also round out the dish.
Conclusion
The Decadent Black Velvet Cake is a rich and moist dessert that delights with its luxurious flavors and inviting chocolate hue. With a preparation time of just 20 minutes and a total cooking time of approximately 1 hour and 15 minutes, this cake promises to impress both visually and taste-wise, making it a perfect choice for any occasion. Its creamy frosting and optional elegant garnishes add to its appeal, ensuring that every slice is a delightful experience.
Decadent Black Velvet Cake
Ingredients
- 2 ½ cups all-purpose flour
- 1 ½ cups granulated sugar
- 1 cup unsweetened cocoa powder
- 1 ½ teaspoons baking powder
- 1 ½ teaspoons baking soda
- 1 teaspoon fine sea salt
- 1 ½ cups buttermilk
- 1 cup vegetable oil
- 2 large eggs
- 2 teaspoons pure vanilla extract
- 1 cup boiling water
- 1 tablespoon black food coloring
- cream cheese frosting
Instructions
- Preheat the oven to 350°F (175°C) and prepare two 9-inch round cake pans.
- Sift together flour, sugar, cocoa powder, baking powder, baking soda, and salt in a large bowl.
- In a separate bowl, whisk buttermilk, oil, eggs, and vanilla until smooth.
- Gradually combine wet and dry ingredients, mixing on medium speed until just combined.
- Slowly stir in boiling water and optional black food coloring until incorporated.
- Distribute batter evenly between prepared pans and bake for 30-35 minutes.
- Cool cakes in pans for 10 minutes, then transfer to a wire rack to cool completely.
- Layer one cake with cream cheese frosting, place the second layer on top, and frost the entire cake.
- Slice and serve to enjoy the rich flavors of this black velvet cake.