

Introduction
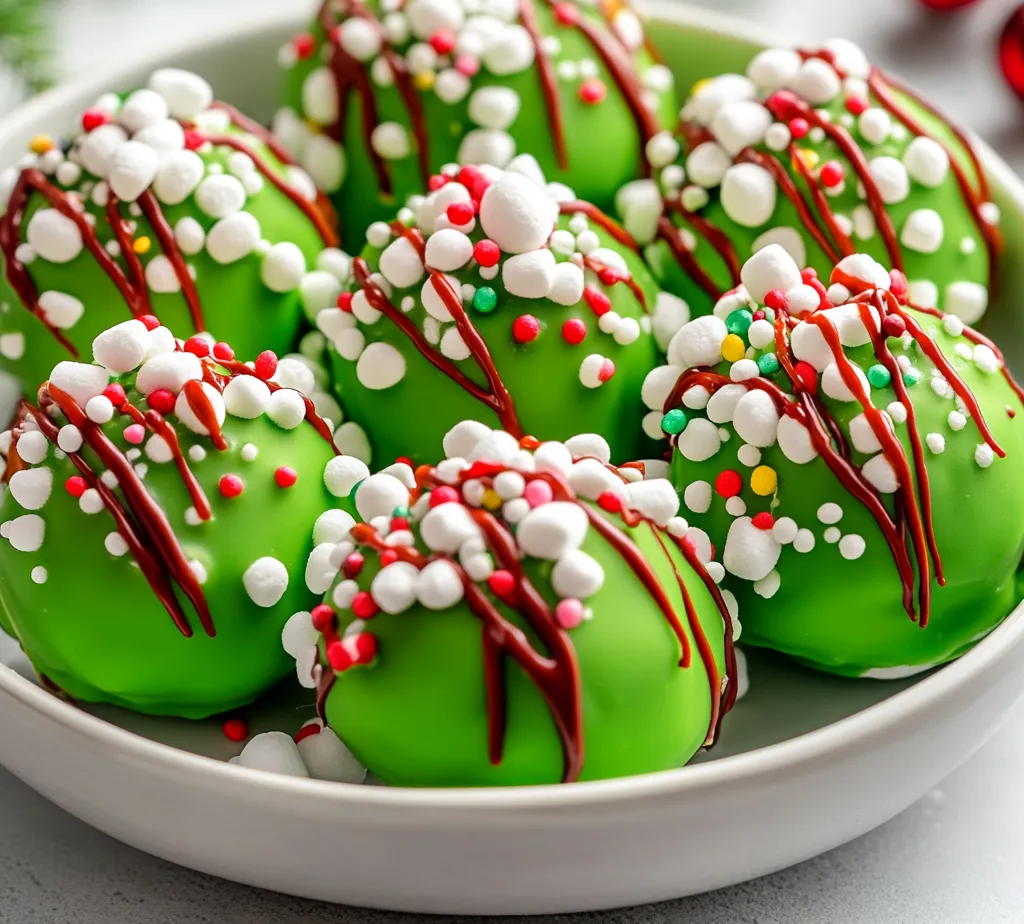
Festive treats have a magical way of bringing joy to holiday gatherings, and the No-Bake Grinch Oreo Balls are a perfect example. These delightful bites not only celebrate the whimsy of the holiday season but are also incredibly easy to make. The rich flavors of chocolate and cream cheese, combined with the vibrant green and red colors, make for a visually stunning and delicious addition to any festive table.
These treats do more than just appeal to the eye; they are a harmonious blend of flavors. The crunchiness of Oreo cookies pairs perfectly with the creaminess of softened cream cheese, resulting in a mix that holds together beautifully. The optional peppermint extract adds an invigorating twist to each bite, evoking classic holiday tastes that everyone knows and loves. Whether you’re hosting a holiday party, planning a gift for a friend, or simply indulging your sweet tooth, these Grinch Oreo Balls will certainly add an extra touch of joy.
Moreover, the simplicity of the no-bake method allows you to make these fun balls without the hassle of preheating your oven. In a short amount of time, you can whip up a batch of these treats that everyone will rave about. Whether you serve them as a festive dessert or a party snack, they are sure to become a seasonal favorite.
Recipe Overview
– Prep Time: 20 minutes
– Total Time: 1 hour
– Servings: 20-25 balls
– Difficulty: Not specified in the recipe
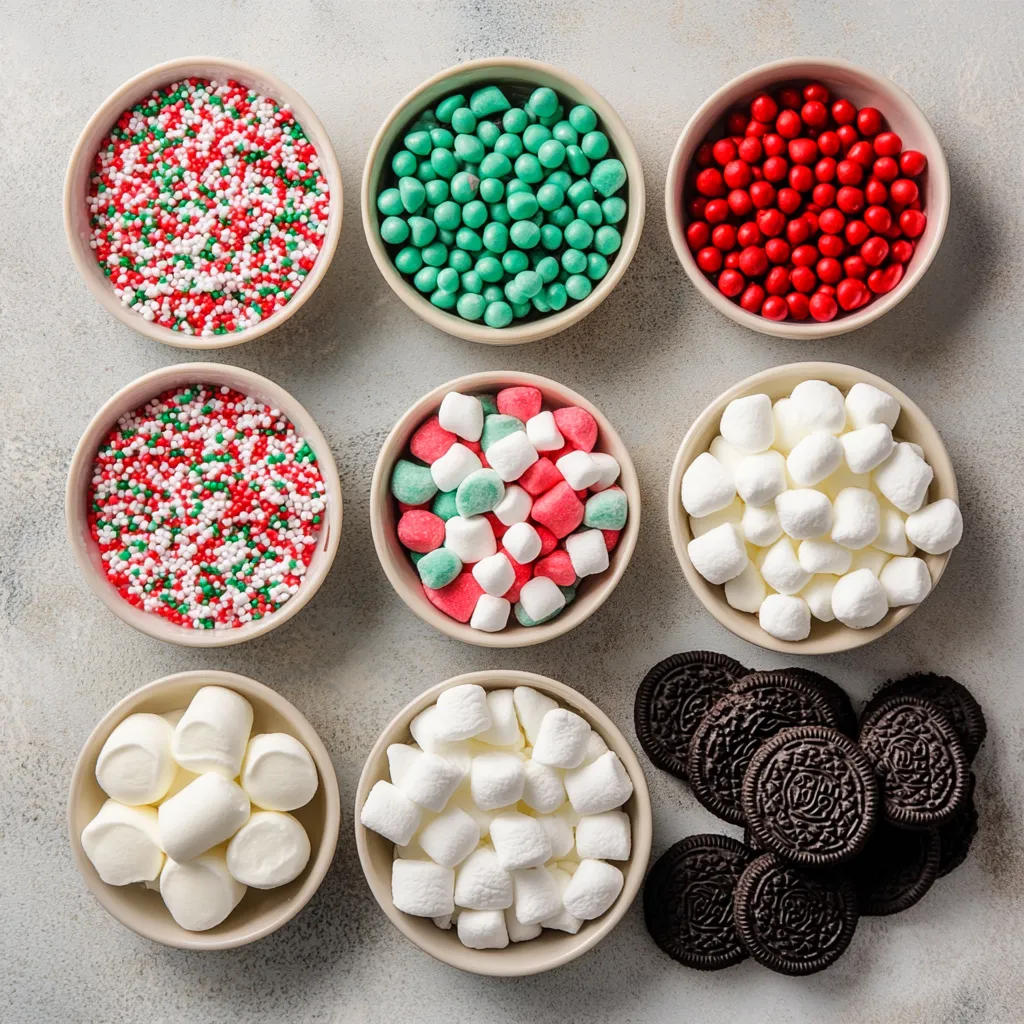
Ingredients
– 1 package (15.5 oz) Oreo cookies, finely crushed
– 8 oz cream cheese, softened to room temperature
– 1 cup green candy melts or white chocolate chips tinted with green food coloring
– 1/2 cup red candy melts or chocolate chips, melted (for decorative drizzling)
– 1/4 cup mini marshmallows (for decoration)
– 1/4 teaspoon peppermint extract (optional for a minty twist)
– Holiday sprinkles (optional, for an extra festive touch)
Instructions
1. In a large mixing bowl, combine the finely crushed Oreo cookies with the softened cream cheese. If you wish to add a touch of holiday cheer, include the peppermint extract. Mix the ingredients together until they are thoroughly blended and the mixture is smooth and creamy.
2. Using your hands, scoop out portions of the mixture and roll them into small balls, approximately 1 inch in diameter. Place these balls onto a baking sheet lined with parchment paper. You should yield around 20-25 balls.
3. Once all the balls are formed, transfer the baking sheet to the freezer and allow them to chill for about 15-20 minutes, or until they are firm to the touch.
4. Meanwhile, prepare the green candy coating by melting the green candy melts in a microwave-safe bowl. Heat them in 30-second intervals, stirring in between each interval until the mixture is completely smooth.
5. After the Oreo balls have chilled, remove them from the freezer. Dip each ball into the melted green candy coating, ensuring they are completely enveloped. Use a fork to lift them out, allowing any excess coating to drip off before placing them back onto the parchment-lined baking sheet.
6. While the green coating remains wet, create a festive drizzle by gently drizzling the melted red candy melts over the tops of the coated Oreo balls. For an added touch, place mini marshmallows on top to resemble the Grinch’s heart!
7. If you desire, sprinkle some colorful holiday sprinkles over the top for an extra burst of festive cheer.
8. Let the Oreo balls set completely at room temperature or place them in the refrigerator for about 30 minutes before serving.
The Foundation: Oreo Cookies
At the very heart of this recipe is the iconic Oreo cookie. The use of finely crushed Oreos not only imparts a delightful flavor but also provides a perfect texture that binds beautifully with the cream cheese. To achieve the finest crumble for your Oreo base, it is essential to crush them thoroughly without leaving any large chunks. The finest result will come from using either a food processor or a rolling pin; both methods can be effective. A food processor allows for consistent crumbles, while a rolling pin necessitates a little more physical effort but can be equally rewarding.
When crushing your Oreos, aim for a fine consistency resembling sand. This will ensure the cookies integrate seamlessly with the cream cheese, leading to a more uniform mixture. If there are any larger pieces left, they could disrupt the smoothness that makes these treats so appealing. Crushing the Oreos well will result in a more cohesive mixture, helping your Oreo balls to hold their shape perfectly.
Creaming Together: The Role of Cream Cheese
Cream cheese plays a pivotal role in this recipe. This rich and creamy cheese not only binds the cookie mixture together but adds an element of richness that counterbalances the sweetness of the Oreos. When selecting cream cheese, always opt for a standard cream cheese block, as spreads or whipped varieties may include added ingredients that could alter the texture and taste of your Oreo balls.
Before starting, it is crucial to soften the cream cheese to room temperature, which allows for easier mixing and ensures a smoother texture. Cold cream cheese is tough to blend and can lead to a lumpy mixture. To soften, simply remove the cream cheese from the refrigerator and let it sit for about 30 minutes prior to mixing.
Once softened, the cream cheese should be mixed until smooth, combining seamlessly with the crushed Oreos. This step is vital in achieving the creamy, cohesive texture that characterizes the perfect no-bake treat. It is during this mixing stage that you can incorporate any additional flavors, such as the optional peppermint extract.
Adding a Festive Twist: Optional Peppermint Extract
One of the most appealing aspects of the No-Bake Grinch Oreo Balls is the versatility offered through optional ingredients. While the plain Oreo and cream cheese mixture is delicious on its own, incorporating peppermint extract lends a delightful minty freshness that many associate with holiday desserts. The optional 1/4 teaspoon of peppermint extract enhances the overall flavor experience, making each bite reminiscent of classic holiday treats.
If you decide to add peppermint extract, it’s essential to gauge your personal taste; balance is key. Start with a small amount and mix it in completely before tasting the mixture. If you desire a stronger peppermint flavor, feel free to add a little more, keeping in mind that the extract is quite potent.
In addition to peppermint, consider other flavoring alternatives, such as vanilla or almond extract, if peppermint isn’t your preference. Each of these will offer a unique taste profile, allowing you to customize your festive balls while still maintaining the essence of the original recipe.
How Chilling Prepares the Treats for the Candy Coating Step
Chilling the Oreo balls is a critical step that prepares them for the candy coating process. The time spent in the freezer allows the mixture to firm up, making it easier to dip the balls into the melted candy without them losing their shape. When the mixture is properly chilled, each ball remains intact during the coating process, ensuring a neat and tidy finish.
The recommended chilling time of 15-20 minutes is optimal, as it strikes a balance between firming the balls and not allowing them to freeze solid. This temperature allows the balls to hold together well while providing a pleasant contrast between the creamy filling and the crunchy candy coating.
The Green Coat: Melting Candy Melts
Step-by-Step Instructions on Melting Candy Melts Correctly
To melt the green candy melts properly, begin by placing the candy melts in a microwave-safe bowl. It’s essential to use the microwave in intervals to avoid scorching the candy.
1. Heat the candy melts in 30-second increments, stopping to stir after each interval. This stirring ensures that the heat is evenly distributed throughout the melts, allowing them to become fully liquefied without burning.
2. Continue this process until the candy melts are smooth and completely emulsified, resembling a flowing consistency. If you find the melted candy is too thick, you can add a small drop of vegetable oil or shortening to help achieve a thinner texture, making dipping easier.
Importance of Microwave Intervals and Stirring for an Even Melt
Using short intervals in the microwave mitigates the risk of overheating, which can allow the candy to clump rather than melt smoothly. Stirring between intervals not only distributes the heat but also checks for any unmelted pieces. This technique ensures that your coating will be glossy and appealing when it sets.
Alternative Options for Those Who May Prefer White Chocolate Chips
For those who wish to use white chocolate chips instead of candy melts, it’s possible to achieve a similar green hue by adding green food coloring after melting. Here, the same melting technique should be employed, which involves melting the chips gradually and stirring continuously for an even consistency. Be cautious; white chocolate can seize easily if overheated.
Dipping Techniques for the Perfect Coat
How to Properly Dip Each Oreo Ball in the Melted Candy
Dipping the Oreo balls is a satisfying step that creates the final coated treat. To begin, take your chilled Oreo balls and use a fork or a dipping tool to cover each ball completely in the melted green candy.
1. Submerge the ball fully in the melted candy, allowing it to coat the surface entirely.
2. Use the fork to lift the ball out of the coating and gently tap it on the side of the bowl to let excess coating drip back into the bowl.
Using a Fork for Optimal Draining of Excess Coating
Using a fork is crucial for optimal drainage. The fork allows any excess coating to return to the bowl rather than pooling on the parchment paper where your balls will rest. This technique helps avoid a thick coating that may not set evenly.
Presentation Tips for Achieving a Smooth and Even Coating
To ensure a smooth and even coating, minimize the amount of time the candy coating is in contact with the heat. If you find the coating is beginning to harden and coat unevenly during the dipping process, return the bowl to the microwave for a few seconds to melt it again, stirring thoroughly afterwards.
Decorating with Drizzle: Creating Festive Accents
Techniques for Drizzling Melted Red Candy Over the Coated Oreo Balls
Creating a striking drizzle of red candy across your coated Oreo balls adds personality and a festive touch. To do this, melt the red candy melts using the same microwave method.
1. Transfer the melted red candy to a piping bag with a very small hole cut at the end or use a spoon to drizzle over the completed green-coated balls.
2. Gently move your hand back and forth to create a decorative zigzag pattern.
Ideas for Creative Drizzle Patterns That Enhance Aesthetics
Experiment with different drizzle patterns for added flair, such as spiral or cross-hatch designs. These designs enhance the visual appeal and contribute to a fun, playful presentation.
Utilizing Mini Marshmallows for Decoration to Mimic the Grinch’s Heart
After drizzling, place a mini marshmallow on each ball while the coating is still wet. This will keep the marshmallow secured and visually represent the Grinch’s small but growing heart.
Adding the Finishing Touch: Holiday Sprinkles
Benefits of Using Sprinkles for Visual Appeal
Sprinkles add an element of festivity and allure, making your Oreo balls even more visually inviting. They can catch the light, bringing a sparkle to each treat that is sure to catch the eye.
Various Sprinkle Options for Different Holiday Themes
You can select various types of sprinkles that align with your theme. Consider using red, green, and white sprinkles for a Christmas-specific look or opt for gold and silver for a more elegant celebration.
Timing for Adding Sprinkles to Ensure They Adhere Properly
Adding sprinkles should take place immediately after drizzling the red candy before it sets, as this ensures proper adhesion. If allowed to dry without sprinkles, it becomes much more challenging to achieve a decorative finish afterward.
Setting Time: How to Achieve the Best Texture
Options for Letting the Balls Set at Room Temperature vs. Refrigeration
You may choose to let your treats set at room temperature or place them in the refrigerator. While room temperature allows for a softer texture, refrigerating the balls will yield a firmer finish, which some may prefer.
The Role of Chilling in Stabilizing the Coating
Chilling reinforces the coating, preventing it from becoming overly soft or losing its shape. Ideally, the balls should be left to set for about 30 minutes in the refrigerator after decorating.
Signs That the Oreo Balls Are Ready to Enjoy
The finished Oreo balls are ready when the coating feels firm and no longer sticky to the touch. When they maintain their shape and the coating looks glossy, it indicates they are perfect for serving.
Optional Presentation Tips for Festive Displays
Ideas for Platter Arrangements to Elevate the Presentation
For an eye-catching display, arrange the completed Oreo balls in a circular pattern on a festive platter. Layer them with a cloth or paper garnished with holiday-themed items like artificial holly or ornaments to elevate the overall presentation.
Suggestions for Using Cupcake Liners for Individual Servings
Using festive cupcake liners not only enhances the visual appeal but also makes for easy serving. Select liners that match your color scheme for added harmony on the table.
Choosing a Festive Backdrop That Enhances the Theme of the Treat
Consider placing your treats on a holiday-themed tablecloth or background to enhance their presentation. This thoughtful detail can round off the festive atmosphere at seasonal gatherings.
Conclusion
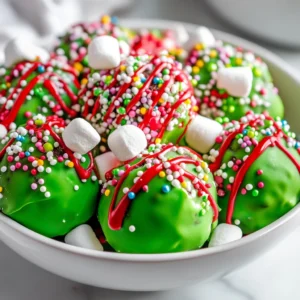
The Festive No-Bake Grinch Oreo Balls expertly blend rich chocolate flavor with a smooth, creamy texture, all while showcasing vibrant festive colors that delight the eye. With just an hour dedicated to their preparation, these treats become a charming centerpiece for any celebration, offering a familiar taste that is both comforting and joyful.
Festive No-Bake Grinch Oreo Balls Recipe
Ingredients
- 1 package Oreo cookies finely crushed
- 8 oz cream cheese softened
- 1 cup green candy melts or white chocolate chips tinted with green food coloring
- ½ cup red candy melts or chocolate chips melted
- ¼ cup mini marshmallows
- ¼ teaspoon peppermint extract
- holiday sprinkles
Instructions
- Combine crushed Oreo cookies and softened cream cheese in a bowl, mixing until smooth.
- Roll the mixture into 1-inch balls and place on a parchment-lined baking sheet.
- Freeze the balls for 15-20 minutes until firm.
- Melt green candy melts in a microwave-safe bowl, stirring until smooth.
- Dip each ball into the melted green coating and let excess drip off.
- Drizzle melted red candy over the coated balls and add mini marshmallows on top.
- Sprinkle with holiday sprinkles if desired.
- Let the balls set at room temperature or refrigerate for 30 minutes before serving.