
Introduction
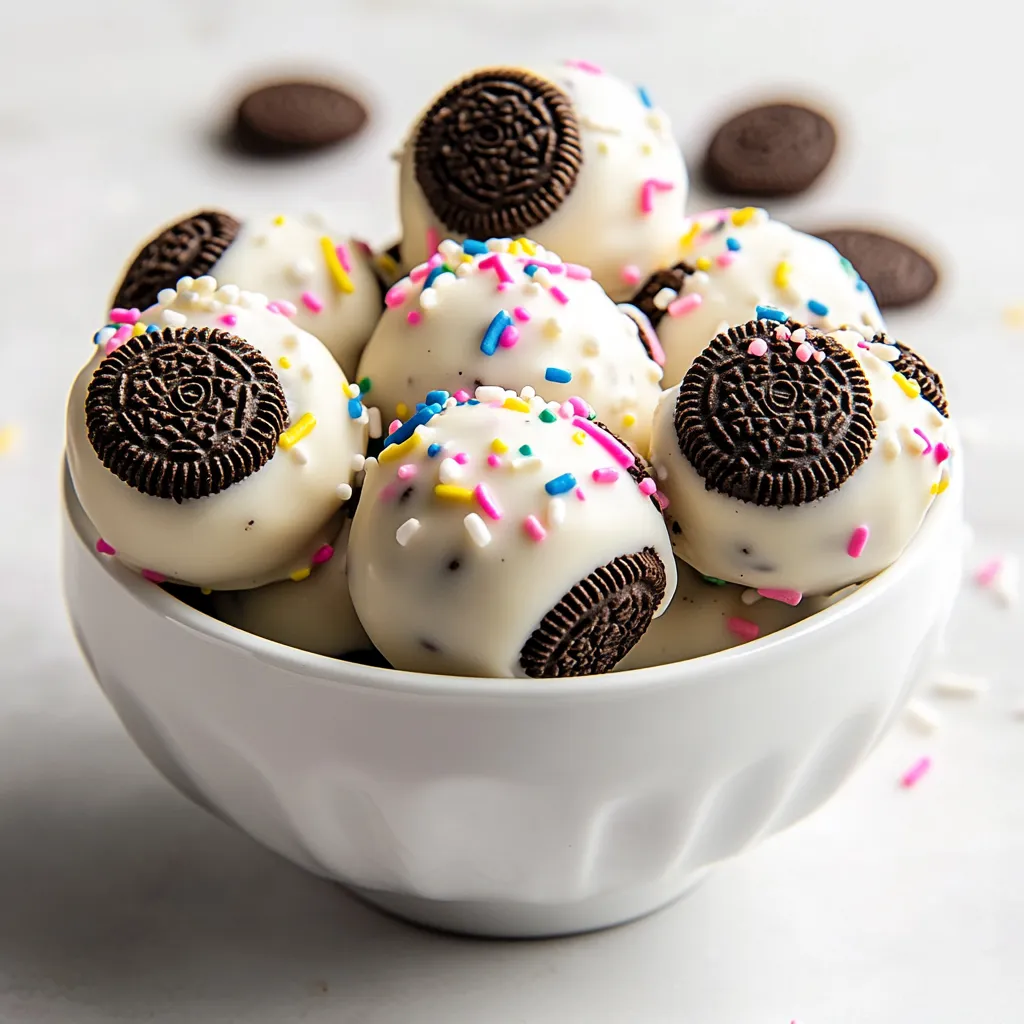
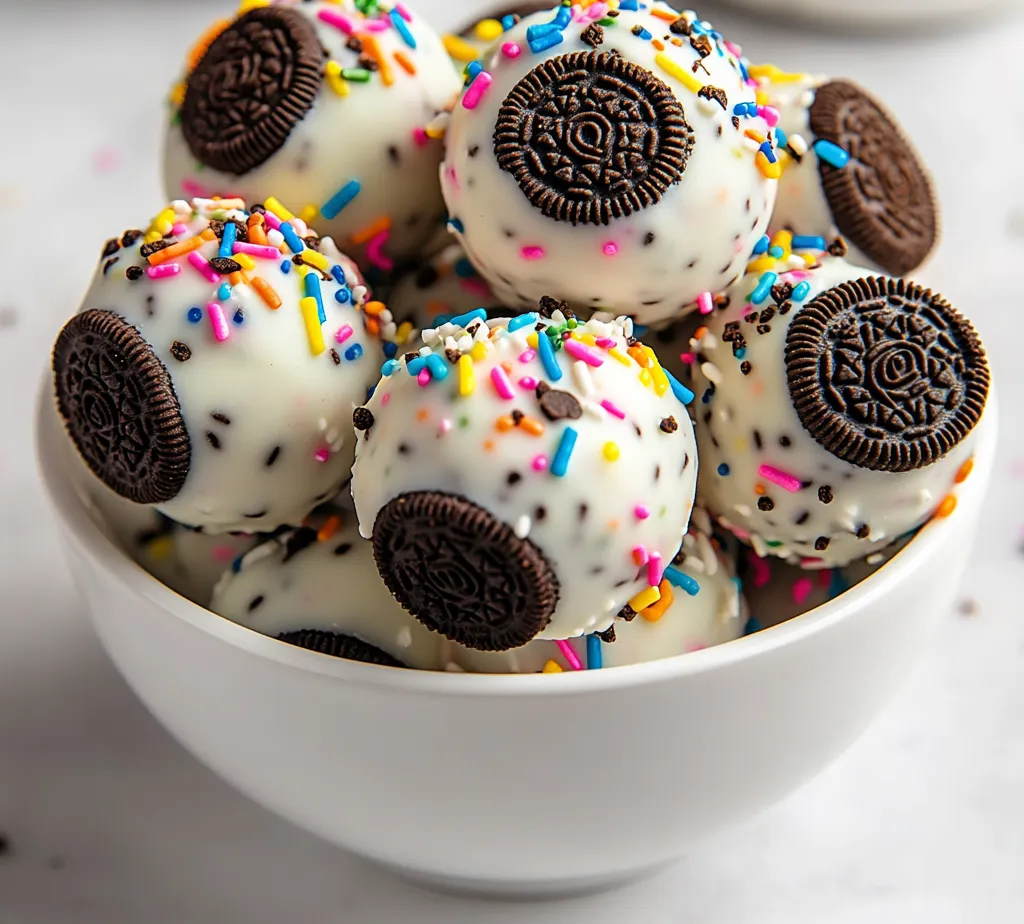
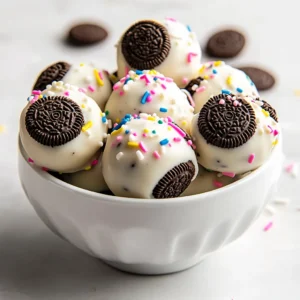
The allure of Oreo Bliss Balls lies in their delightful combination of rich flavors and their irresistibly creamy texture. These no-bake treats are perfect for satisfying any sweet tooth, making them a popular choice for gatherings, parties, or a special family dessert. With the simplicity of just a few ingredients, including your favorite Oreo cookies and cream cheese, they can be prepared in no time. These bliss balls present a delectable treat ideal for those who appreciate the harmonious blend of chocolate and creaminess.
Making Oreo Bliss Balls is a straightforward process that delivers impressive results, whether you’re preparing for a birthday celebration, holiday feast, or just an indulgent snack at home. The beautifully coated, chocolate-covered spheres are not just delicious; they also add a fun twist to conventional dessert presentations. Dive into this guide to learn how to make these heavenly treats step-by-step.
Recipe Overview
Oreo Bliss Balls are a fun and easy dessert that requires minimal preparation yet delivers maximum flavor. Each ball boasts a rich Oreo filling coated in a smooth layer of melted white chocolate, making them a visually appealing addition to any dessert table.
– Total Time: 1 hour
– Prep Time: 15 minutes
– Chilling Time: 30 minutes + 15-20 minutes
– Yield/Servings: 24 blissful balls
– Difficulty: Not specified in the recipe
Ingredients
A detailed look at the ingredients necessary to create delicious Oreo Bliss Balls includes:
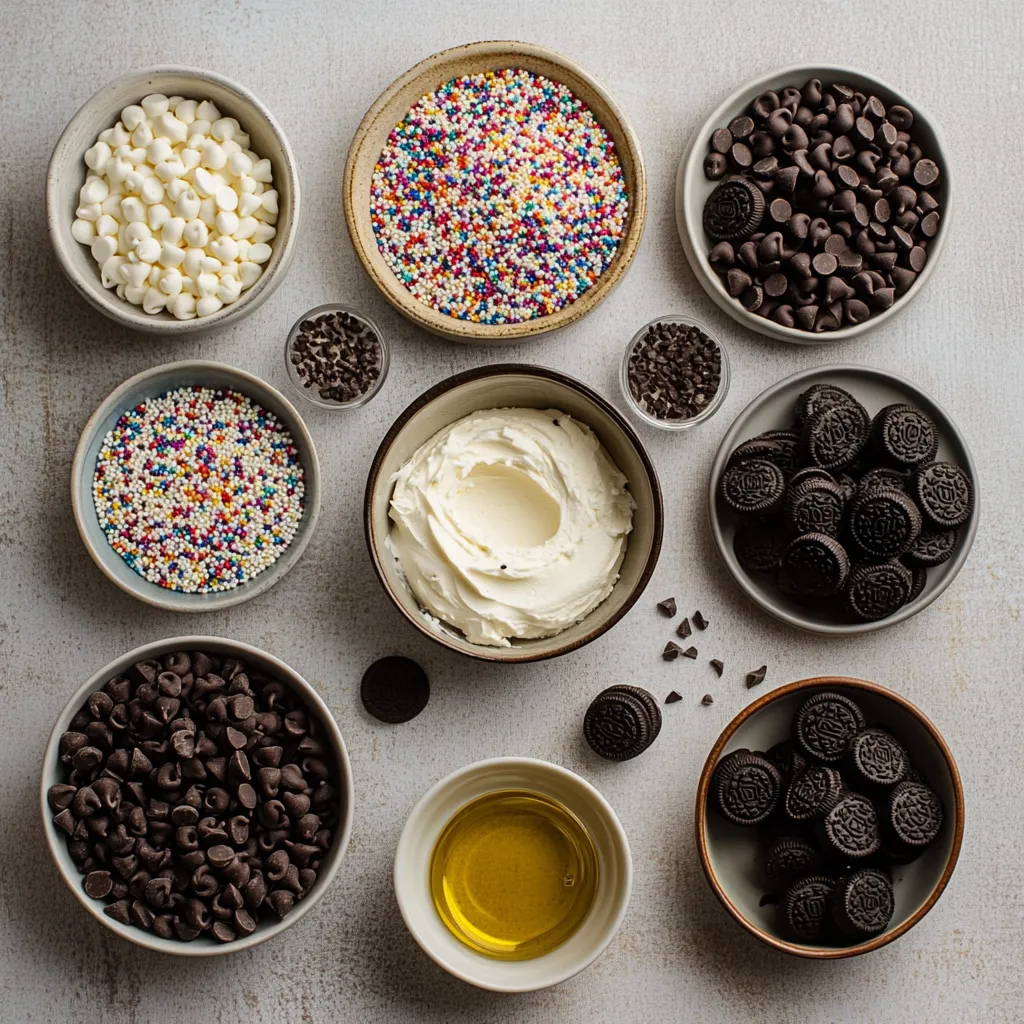
– 1 package (15.25 oz) Oreo cookies
– 8 oz cream cheese, softened to room temperature
– 1 cup white chocolate chips
– 1 tablespoon coconut oil (optional, for a smoother chocolate coating)
– Optional toppings: crushed Oreos, colorful sprinkles, or melted chocolate for drizzling
Instructions
1. Crush the Oreos: Begin by placing the Oreo cookies in a food processor. Pulse them until they are finely crushed and resemble a crumb-like texture. If you don’t have a food processor, you can put the cookies in a zip-top bag and crush them with a rolling pin until finely ground.
2. Combine with Cream Cheese: In a large mixing bowl, add the crushed Oreos to the softened cream cheese. Using your hands, mix the ingredients together thoroughly until you achieve a smooth and homogeneous mixture. This step may take a few minutes, but it ensures the flavors meld beautifully.
3. Shape the Balls: Take tablespoon-sized portions of the Oreo mixture and roll them into smooth balls using your palms. Arrange the formed balls on a baking sheet lined with parchment paper to prevent sticking.
4. Chill the Balls: Place the baking sheet with the Oreo balls in the refrigerator for about 30 minutes. This chilling period helps them firm up, making them easier to coat later.
5. Melt the Chocolate: In a microwave-safe bowl, combine the white chocolate chips and coconut oil (if using). Heat in the microwave in 30-second intervals, stirring in between, until the mixture is completely melted and smooth.
6. Coat the Oreo Balls: Once the Oreo balls are chilled, dip each one into the melted white chocolate, ensuring they are fully coated. Use a fork to lift the balls out, allowing any excess chocolate to drip back into the bowl before placing them on the parchment-lined baking sheet.
7. Add Toppings: While the chocolate is still wet, feel free to sprinkle crushed Oreos or your choice of toppings on top of each chocolate-covered ball. For an artistic flair, you can drizzle additional melted chocolate over the tops.
8. Chill Again: Return the coated Oreo balls to the refrigerator for another 15-20 minutes to allow the chocolate coating to set properly.
9. Serve and Enjoy: Once the chocolate has hardened, your delightful Oreo Bliss Balls are ready to be served! For any leftovers, store them in an airtight container in the refrigerator to maintain their freshness.
Ideal Oreo Variety
While classic Oreo cookies are the backbone of this recipe, there is room for creativity. Different Oreo flavors can be used to add distinct tastes to your bliss balls. Consider experimenting with double-stuffed Oreos for more creamy filling or seasonal flavors, such as pumpkin spice or holiday mint, to elevate them for festive occasions. Using different variations can also challenge your palate and may surprise your family or guests with new flavors blended seamlessly into the classic treat.
Creamy Base
The cream cheese is the secret ingredient that creates a luscious blend with the crushed Oreos, transforming the mixture into a melt-in-your-mouth filling. To achieve the right texture, make sure the cream cheese is softened to room temperature. This step is crucial as it allows for better incorporation with the Oreo crumbs, ensuring a smooth and creamy consistency. For best results, consider using an electric mixer or your hands to thoroughly combine the cream cheese with the crushed Oreos until the mixture exhibits a homogeneous appearance.
Chocolate Coating
The chocolate coating is what truly elevates these bliss balls from mere grub to gourmet. White chocolate chips provide a sweet and creamy wrap that complements the Oreo filling perfectly. If you opt to use coconut oil, it ensures a smoother and shinier chocolate coating. When melting chocolate, do so gently and in short bursts in the microwave to prevent scorching. Stir between intervals to achieve a perfectly melted consistency that will effortlessly coat your Oreo bliss balls.
Topping Options
The final aesthetic touch for your Oreo Bliss Balls can be achieved with a variety of optional toppings. Crushed Oreos can enhance the theme and add texture, while colorful sprinkles can infuse a sense of joy and festivity. For a refined presentation, consider drizzling with additional melted chocolate or using a contrasting chocolate for an appealing look. Toppings can be tailored to suit different occasions—think vibrant sprinkles for children’s parties and a more subdued chocolate drizzle for elegant gatherings. Each choice adds an extra layer of personality to the treats.
Tools Required
Creating the perfect Oreo Bliss Balls doesn’t require an extensive collection of kitchen gadgets. However, having a set of essential tools can streamline the process and maximize your enjoyment.
Food Processor
Using a food processor for crushing Oreos significantly reduces the elbow grease required in this step. It produces a fine, uniform crumb that mixes well with the cream cheese, enabling a smooth texture.
Mixing Bowls
Choose a large mixing bowl for combining the Oreo crumbs and cream cheese. Ensure it is deep enough to avoid spillage during mixing.
Baking Sheet
Selecting the right baking sheet is also key—opt for a sturdy one that can hold the weight of the Oreo balls without bending. Line it with parchment paper to prevent sticking.
Microwave-Safe Bowl
A microwave-safe bowl is essential for safely melting the chocolate. Ensure it is large enough to accommodate both the chocolate chips and the optional coconut oil without risk of overflowing.
Step-by-Step Instructions
The process of creating your Oreo Bliss Balls is as straightforward as it is rewarding. Each step contributes to building the texture and flavors that make these treats irresistible.
Crushing the Oreos
Crushing the Oreos is your first task; achieving the proper consistency is vital. You want finely ground crumbs that will hold together when mixed with the cream cheese. Pulsing them in a food processor yields quick and effective results, but if you opt for the manual method, ensure your rolling pin pressure is consistent for even-sized crumbs.
Mixing with Cream Cheese
When it comes to merging the Oreo crumbs with the cream cheese, patience is key. Spend a few minutes thoroughly mixing by hand until you have a homogenous mixture that feels smooth to the touch. A well-blended mixture enhances the flavor profile and ultimately elevates the final product.
Shaping the Balls
For uniformity in presentation and eating, shape the Oreo mixture into equal-sized balls. Aim for a tablespoon-sized portion; this ensures each bite is delightful without being overwhelming. The rolling technique should involve gentle pressure—too much can lead to the balls losing their smooth surface.
Chilling Process
Chilling the Oreo Bliss Balls plays a pivotal role in the setup of your delightful treats.
Why Chilling is Essential
Chilling the balls after shaping and beforehand helps firm them up, which makes them easier to handle when coating in chocolate. Proper chilling allows the butterfat from the cream cheese to stabilize, creating a firm structure.
Chilling Timeframes
A minimum chilling time of 30 minutes is recommended after shaping; however, you may opt for a longer chill for added firmness. After coating in the melted chocolate, give them an additional 15-20 minutes in the fridge to set, ensuring that the chocolate coating achieves that shiny finish that enhances the overall appeal of the Oreo Bliss Balls.
Melting the Chocolate
The process of melting chocolate is crucial for achieving a smooth and glossy coating for your Oreo Bliss Balls.
Using a Microwave
When using a microwave to melt chocolate, precautions are essential to avoid seizing or burning the chocolate. Start with a microwave-safe bowl to prevent any chemical reactions with the chocolate. Heat the chocolate chips along with coconut oil in 30-second intervals to maintain control over the melting process. After each interval, stir the mixture to distribute the heat evenly. Not only does stirring help the chocolate melt uniformly, but it also allows you to monitor its texture closely. Avoid overheating; the ideal melted chocolate should be smooth, shiny, and free from lumps.
Alternative Melting Methods
For those who prefer a more traditional method, the double boiler technique is an excellent alternative. To do this, fill a saucepan with a couple of inches of water and bring it to a gentle simmer. Place a heatproof bowl on top, ensuring it doesn’t touch the water. The steam will gently melt the chocolate, making it less likely to scorch. This method provides more control over your chocolate’s temperature and can yield a beautifully melted coating.
Coating the Oreo Balls
Once the chocolate is melted, it’s time to coat the cooled Oreo balls.
Dipping Techniques
To ensure an even coating on the Oreo balls, use a fork or a small dipping tool to submerge each ball in the melted chocolate. Roll the ball gently to ensure it is fully coated, then lift it out with the fork, allowing excess chocolate to drip back into the bowl. To achieve even coverage, you can use the back of the fork to help smooth the chocolate over the ball before placing it on the parchment-lined baking sheet.
Managing Excess Chocolate
To minimize dark chocolate drips and achieve a clean finish, tap the fork gently against the bowl’s edge after lifting the balls out. This helps shake off the excess chocolate without compromising the smooth coat. Alternatively, you can also use a toothpick to poke the ball after dipping but before placing it down; this can offer more control while coating.
Adding Toppings
Enhancing the chocolate-coated Oreo balls with toppings can add both visual appeal and extra flavor dimensions.
Timing for Adding Toppings
It’s crucial to apply the toppings while the chocolate is still wet; this is when the toppings will adhere best. For instance, a sprinkle of crushed Oreos on top evokes the classic cookie flavor, while rainbow sprinkles can add a festive touch. Don’t be shy to experiment with various toppings, as they can elevate the treat’s overall aesthetic and taste profile.
Presentation Suggestions
When it comes to presenting the finished Oreo Bliss Balls, consider placing them on a decorative platter. Layer them in different patterns or create a colorful design with the toppings. You can also consider serving them alongside complementary desserts; for instance, a scoop of vanilla ice cream can be a delightful pairing, as the creaminess harmonizes well with the crunchy candies.
Final Chill for Setting
After coating your Oreo balls, the final chilling stage is vital for achieving the perfect texture.
Recommended Chilling Duration
For optimal chocolate setting, return the decorated balls to the refrigerator for an additional 15 to 20 minutes. This time allows the chocolate coating to firm up, enabling them to maintain their shape during serving. Not chilling long enough may result in a gooey texture, making the balls difficult to handle and diminishing their appeal.
Serving Suggestions
Oreo Bliss Balls are versatile in how they can be enjoyed.
Ideal Occasions for Serving
These delights are perfect for a variety of occasions. Whether it’s a birthday party, holiday gathering, or cozy movie night, Oreo Bliss Balls are sure to impress. Their bite-sized nature makes them easy to serve and share among guests.
Pairing Suggestions
When it comes to beverages, a coffee or milkshake can beautifully complement the sweetness of the Oreo Bliss Balls. For a festive touch, serve them with a dessert wine or a sparkling beverage, which can elevate the treat to a more formal dessert option.
Storage Tips
Maintaining the freshness of your Oreo Bliss Balls is essential for prolonged enjoyment.
Airtight Containers
Store the Oreo Bliss Balls in an airtight container to keep them fresh. Proper sealing prevents the balls from drying out or absorbing other odors in the refrigerator. You can keep them in the fridge for about a week, although they are often devoured much quicker!
Freezing for Future Enjoyment
For longer-term storage, Oreo Bliss Balls can be frozen. After the final chilling, place them in a single layer on a parchment-lined baking sheet and freeze until solid. Once frozen, transfer them to an airtight container or a resealable freezer bag. When stored properly, they can remain good for up to three months in the freezer. To enjoy, simply let them thaw in the refrigerator for a couple of hours before serving.
Conclusion
Oreo Bliss Balls present a delightful mix of creamy and crunchy textures, all wrapped in a smooth chocolate coating. Their simple yet indulgent flavor profile makes them an ideal treat for various occasions. With careful attention to melting, coating, and storing, these balls can be prepared ahead of time for a quick and satisfying dessert.
Oreo Bliss Balls Recipe: Creamy No-Bake Treats
Ingredients
- 1 package Oreo cookies
- 8 oz cream cheese softened
- 1 cup white chocolate chips
- 1 tablespoon coconut oil
- optional toppings: crushed Oreos colorful sprinkles, or melted chocolate
Instructions
- Crush the Oreo cookies in a food processor until finely ground.
- Mix the crushed Oreos with softened cream cheese until smooth.
- Roll tablespoon-sized portions into balls and place on a baking sheet.
- Chill the balls in the refrigerator for about 30 minutes.
- Melt white chocolate chips and coconut oil in the microwave until smooth.
- Dip each chilled ball into the melted chocolate and place back on the baking sheet.
- Sprinkle toppings on the chocolate while it's still wet.
- Chill again for 15-20 minutes to set the chocolate.
- Serve and enjoy your Oreo Balls!