

Introduction
Homemade bread has long held a cherished place in culinary traditions around the world. The simple act of combining flour, water, and a few other ingredients can transform into a warm, fragrant loaf that fills the home with an inviting aroma. Bread-making is not just about sustenance; it’s a sensory experience that brings people together, evoking memories of family gatherings and shared meals. Among the myriad of bread recipes, rosemary dinner rolls stand out as a delightful and aromatic addition that elevates any meal.
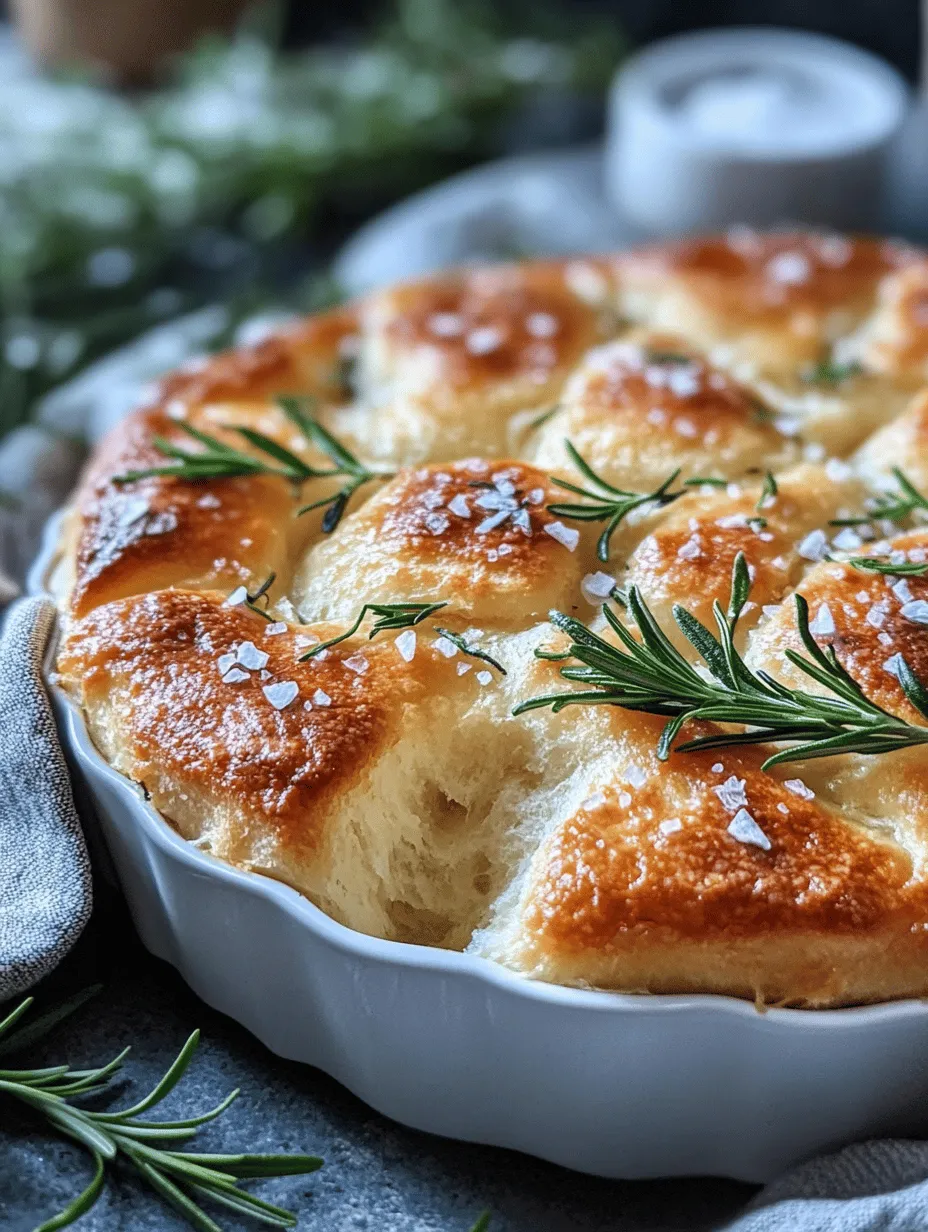
What sets these dinner rolls apart is their captivating combination of fresh rosemary and garlic butter. Rosemary, with its earthy and pine-like aroma, infuses the rolls with a unique flavor that perfectly complements the rich, savory notes of garlic butter. This pairing creates a sensory experience that tantalizes the taste buds and enhances the dining experience. Whether served alongside a hearty stew, a gourmet salad, or as part of a festive holiday feast, these rolls are sure to impress guests and family alike.
The appeal of rosemary dinner rolls extends beyond their flavor. They are versatile enough for casual family dinners, yet elegant enough for special occasions. Imagine serving a basket of these warm, golden rolls at your next gathering, inviting your guests to tear into the soft, fluffy bread, all while being enveloped by the aromatic scent of rosemary and garlic. In this article, we will guide you through the process of making these irresistible rolls, from selecting the right ingredients to the final delicious product.
Understanding the Ingredients
To create the perfect rosemary dinner rolls, it’s essential to understand the role each ingredient plays in the recipe. Here’s a closer look at the key components that contribute to the flavor and texture of these delightful rolls:
All-Purpose Flour
All-purpose flour is a staple in baking and provides the necessary structure for the rolls. It contains a moderate amount of protein, which develops gluten when mixed and kneaded. Gluten is crucial for giving the bread its chewiness and ability to rise. For the best results, choose a high-quality all-purpose flour that will help create a light and fluffy texture in your dinner rolls.
Instant Yeast
Instant yeast is the powerhouse behind the leavening of the dough. Unlike active dry yeast, instant yeast does not require proofing in water before use, making it a convenient option for home bakers. It works quickly to ferment the dough, producing carbon dioxide that causes the rolls to rise. This ingredient is vital for achieving the light and airy texture that defines a perfect dinner roll.
Salt
Salt is often overlooked in baking, but it plays a crucial role beyond just enhancing flavor. It strengthens the dough by tightening the gluten structure, which helps the rolls maintain their shape during baking. Additionally, salt regulates yeast activity, preventing it from rising too quickly and ensuring a balanced fermentation process.
Sugar
Sugar is not only a sweetener but also an essential player in the yeast activation process. It provides food for the yeast, promoting fermentation and enhancing the flavor of the rolls. The sugar in the dough caramelizes during baking, contributing to the rolls’ golden-brown crust.
Warm Milk
Warm milk serves two purposes in this recipe: it hydrates the dough and creates an ideal environment for yeast activation. The warmth helps the yeast to work effectively, which is crucial for achieving a good rise. Using whole milk adds richness and flavor to the rolls, making them even more delicious.
Unsalted Butter
Unsalted butter adds richness and flavor to the dough, contributing to a tender texture in the finished rolls. The fat in butter coats the flour particles, inhibiting gluten formation slightly, which results in a softer crumb. Using unsalted butter allows for better control over the overall salt content in the recipe.
Fresh Rosemary
Fresh rosemary is the star of this recipe, adding a unique aroma and taste that transforms ordinary dinner rolls into something extraordinary. The fragrant herb pairs beautifully with garlic butter, creating a savory complement that enhances the overall flavor profile. When incorporating rosemary, it’s important to chop it finely to ensure even distribution throughout the dough.
Egg Wash
An egg wash is a mixture of beaten egg and water brushed onto the surface of the rolls before baking. This simple step provides a beautiful, golden crust while adding a slight sheen to the finished product. The egg wash also helps to adhere any toppings, such as flaky sea salt, that you may want to sprinkle on top before baking.
Garlic Butter
Garlic butter is the finishing touch that elevates these dinner rolls to gourmet status. Made by melting butter and infusing it with minced garlic, this flavorful mixture is brushed over the warm rolls just before serving. The result is a burst of savory flavor that complements the rosemary and adds richness to every bite.
Step-by-Step Guide to Making Rosemary Dinner Rolls
Now that we’ve covered the essential ingredients, let’s dive into the step-by-step process of making these delectable rosemary dinner rolls. Follow these instructions carefully to ensure your rolls come out perfectly every time.
Preparing the Dough
The first step in making rosemary dinner rolls is preparing the dough. Begin by gathering your dry ingredients: all-purpose flour, instant yeast, sugar, and salt. In a large mixing bowl, combine the flour, yeast, sugar, and salt, ensuring that the yeast and salt are kept separate initially. Mixing them together directly can inhibit yeast activity, so it’s best to create a well in the center of the dry ingredients.
Next, in a separate bowl, combine the warm milk and melted unsalted butter. The warmth of the milk will activate the yeast, so ensure it’s not too hot to avoid killing the yeast. Once the milk and butter are combined, pour this mixture into the well of the dry ingredients. Using a wooden spoon or spatula, gently mix the ingredients until a shaggy dough forms. The goal at this stage is to incorporate the dry and wet ingredients without overworking the dough.
Hydrating the Dough
Once you have mixed the dough into a shaggy mass, it’s time to hydrate it further. This is where the warm milk and melted butter really come into play. Kneading the dough helps to develop gluten, which is essential for the structure of the rolls. To achieve the right dough consistency, you want it to be slightly tacky but not overly wet. If the dough feels too sticky, you can add a little more flour, a tablespoon at a time, until you reach the desired texture.
Incorporating Fresh Rosemary
After hydrating the dough, it’s time to add the fresh rosemary. Make sure to finely chop the rosemary leaves before incorporating them into the dough. Sprinkling the chopped rosemary over the dough and folding it in helps to evenly distribute the herb throughout. This ensures that each roll will have a burst of rosemary flavor in every bite. Be careful not to over-knead the dough at this stage; you want to incorporate the rosemary without breaking down the gluten structure you’ve developed.
Kneading the Dough
Kneading is a crucial step for developing gluten in the dough, which gives your rolls their structure and chewiness. Transfer the dough onto a lightly floured surface and begin kneading. Push the dough away from you with the heel of your hand, fold it over, and repeat the process. Knead for about 8-10 minutes until the dough is smooth, elastic, and slightly tacky to the touch. You’ll know it’s well-kneaded when it bounces back slightly when pressed with your finger and has a silky texture.
First Rise
After kneading, place the dough in a greased bowl and cover it with a clean kitchen towel or plastic wrap. Let it rise in a warm, draft-free area until it doubles in size, about 1 to 1.5 hours. This fermentation stage is essential as it develops the flavor of the rolls. As the yeast ferments, it produces carbon dioxide, causing the dough to rise and become airy. During this time, the wonderful aroma of rosemary will begin to fill your kitchen, setting the stage for the delicious rolls to come.
Throughout this process, keep an eye on your dough. If your kitchen is particularly cool, it may take a little longer for the dough to rise. Conversely, if it’s warm, the dough may rise more quickly. You can test if the dough has risen enough by gently pressing a finger into it. If the indentation remains, it’s ready for the next stage.
Stay tuned for the next part of this article, where we will continue with the shaping, second rise, and baking of your rosemary dinner rolls with garlic butter, ensuring that you achieve the perfect golden rolls every time.
 WANT TO SAVE THIS RECIPE?