

Introduction
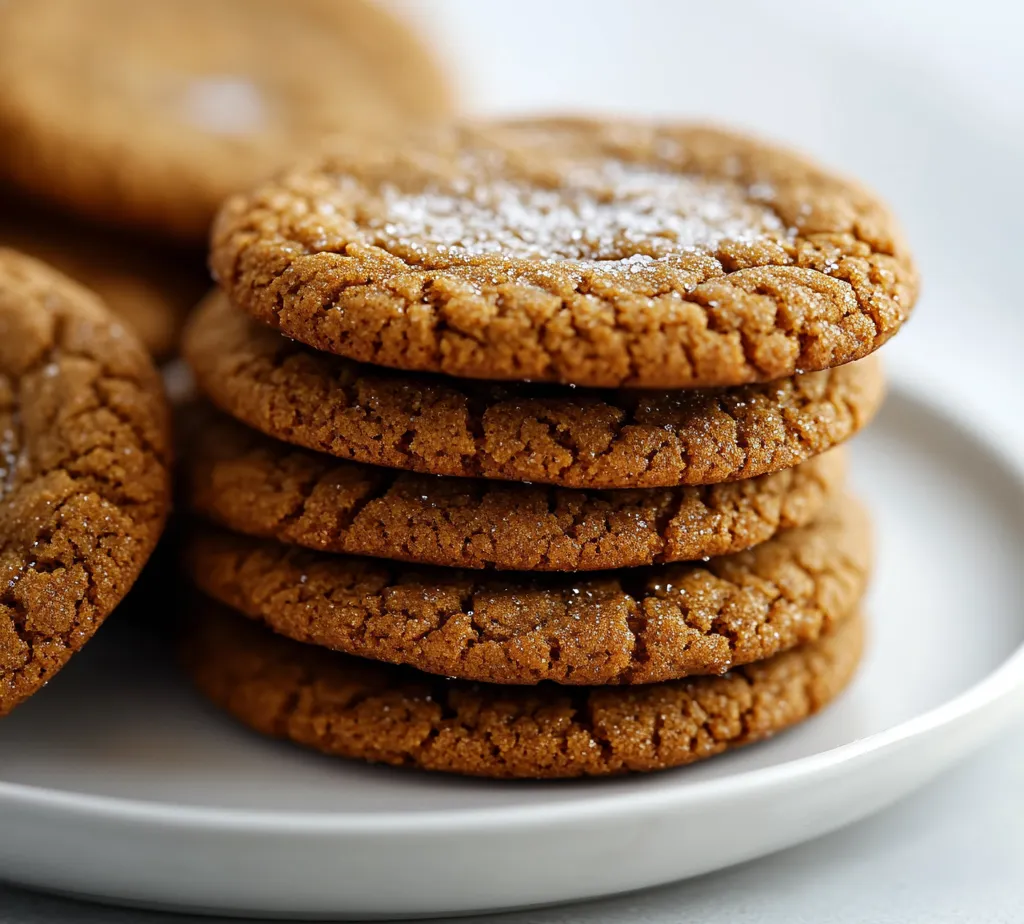
There’s something uniquely comforting about soft and chewy molasses cookies that makes them utterly irresistible. The combination of rich molasses and warm spices creates an aromatic experience that fills your kitchen with a sense of nostalgia. These cookies offer a tender bite, bringing sweetness and a gentle spiciness that lingers long after the last crumb has vanished. Perfect for winter gatherings or as a cozy treat to enjoy with your favorite cup of tea, these cookies are sure to become a favorite in your household.
The history of molasses cookies dates back to colonial America, where the syrup derived from sugarcane became a staple in many kitchens. Originally known as “gingerbread,” these cookies were often made with treacle and flavored with a variety of spices. Over the years, molasses cookies have evolved, but they retain their classic qualities: soft interiors, crisp edges, and mouthwatering flavors. As you explore this recipe, you’ll see just how easy it is to bake up a batch that honors the tradition of this beloved cookie.
Texture and flavor play crucial roles in cookie baking, especially for recipes that promise softness and chewiness. This particular recipe highlights the importance of proper ingredient proportions and technique to ensure that every bite is just right—a harmonious blend of sweet and spice, firm enough to hold its shape while still yielding a tender chew.
Recipe Overview
– Total Time: 1 hour 15 minutes
– Prep Time: 15 minutes
– Yield/Servings: 24 cookies
– Difficulty: Not specified in the recipe
These molasses cookies present a rich, spiced, and sweet flavor profile, making them suitable for various occasions. They are perfect for holiday celebrations, cozy gatherings, or simply as an everyday snack. With an anticipated yield of approximately 24 cookies, you can easily share them with friends and family or enjoy them throughout the week.
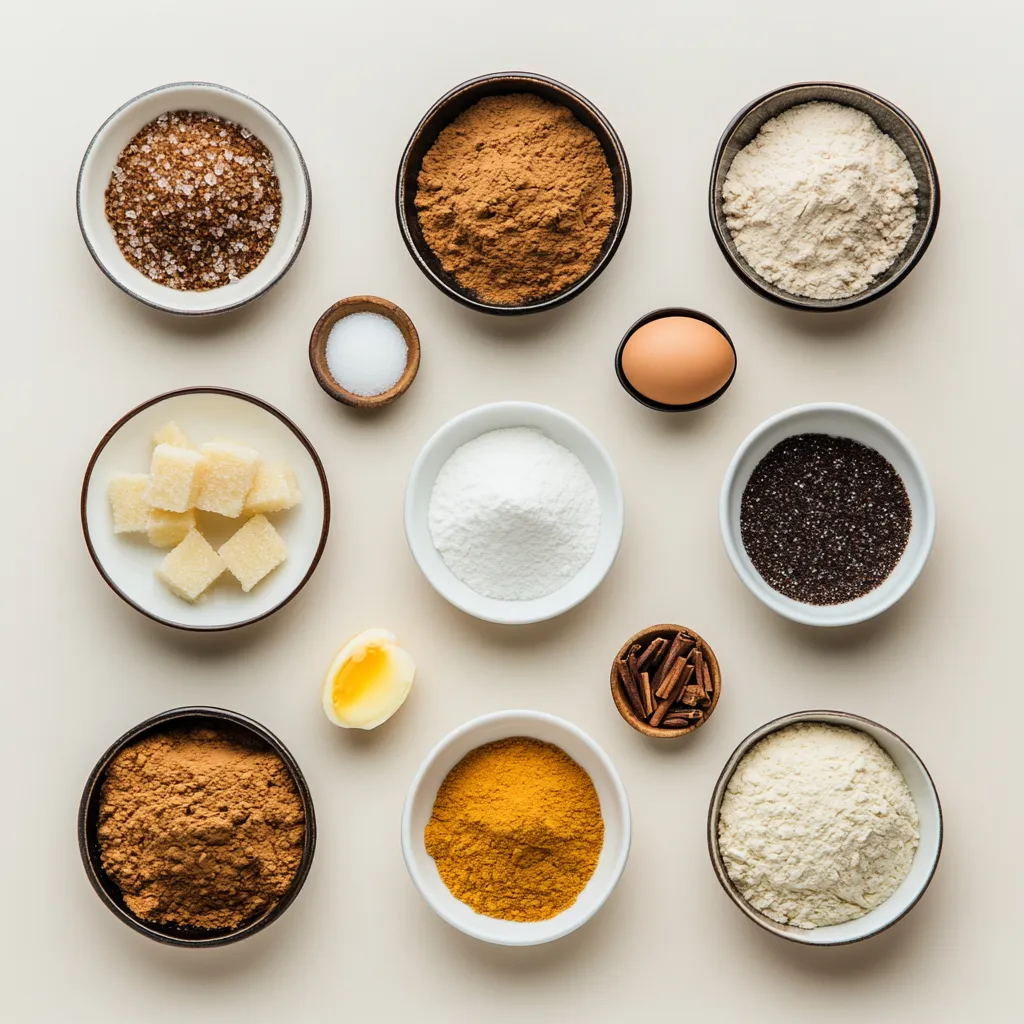
Ingredients
– 3/4 cup unsalted butter, softened to room temperature
– 1 cup packed brown sugar
– 1/4 cup granulated sugar
– 1/2 cup unsulfured molasses
– 1 large egg
– 2 1/4 cups all-purpose flour
– 2 teaspoons baking soda
– 1 teaspoon ground cinnamon
– 1 teaspoon ground ginger
– 1/2 teaspoon ground cloves
– 1/2 teaspoon salt
– 1/2 cup granulated sugar (for rolling)
Breakdown of Primary Ingredients
– Unsalted Butter: Essential for achieving the soft texture of the cookies, while also allowing for better control of the overall flavor.
– Brown Sugar and Granulated Sugar: A combination of sugars that enrich the cookies with sweetness and moisture. Brown sugar adds depth and a slight chewiness, while granulated sugar contributes to the crispiness of the edges.
– Unsulfured Molasses: The star ingredient in this recipe, providing distinct flavor and moisture that makes these cookies flavorful and soft.
– Large Egg: Acts as a binding agent to hold the dough together while adding richness.
– All-Purpose Flour: Serves as the backbone, giving the cookies structure without being overly dense.
– Ground Cinnamon: Adds warmth and depth to the cookie’s flavor profile.
– Ground Ginger: Imparts a zesty kick that elevates the cookies with its bold flavor.
– Ground Cloves: Offers an aromatic touch that complements the other spices beautifully.
– Baking Soda: Functions as a leavening agent, making sure the cookies rise slightly and have a good texture.
– Salt: Enhances the overall flavor, balancing the sweetness.
– Granulated Sugar for Rolling: Provides a sugary coating that adds an appealing texture and sweetness to the outside.
Instructions
1. Preheat your oven to 350°F (175°C). Line two baking sheets with parchment paper to prevent sticking.
2. In a large mixing bowl, combine the softened butter, packed brown sugar, and granulated sugar. Beat together with an electric mixer on medium speed until the mixture is light and fluffy, approximately 2-3 minutes.
3. Incorporate the molasses and the egg into the butter-sugar mixture, mixing until everything is well blended and smooth.
4. In a separate bowl, whisk together the all-purpose flour, baking soda, ground cinnamon, ground ginger, ground cloves, and salt to ensure even distribution of the dry ingredients.
5. Gradually add the dry mixture to the wet ingredients, stirring gently until just combined. Be careful not to overmix; the dough should be soft and slightly sticky.
6. Cover the bowl with plastic wrap and chill the dough in the refrigerator for about 30 minutes. This will make it easier to handle.
7. After chilling, use a tablespoon to scoop portions of the dough and roll each portion into a ball. Roll each ball in the granulated sugar until fully coated.
8. Arrange the sugar-coated dough balls on the prepared baking sheets, spacing them about 2 inches apart to allow for spreading during baking.
9. Bake in the preheated oven for 8-10 minutes, or until the edges are set and the centers remain soft. The cookies will firm up as they cool.
10. Allow the cookies to cool on the baking sheets for 5 minutes, then transfer them to wire racks to cool completely.
Pre-Baking Preparations
Softening the butter properly is pivotal for achieving the desired texture in these molasses cookies. If you’re pressed for time, a quick method to soften butter is to cut it into small cubes and let it sit at room temperature for about 10-15 minutes. You could also microwave it for a few seconds, being cautious not to melt it. Room temperature ingredients mix better, resulting in a uniform dough that bakes evenly.
Chilling the dough is another essential step not to overlook. Refrigerating the dough prevents the cookies from spreading too much during baking. Additionally, it allows the flavors to meld beautifully, which contributes to the depth of flavor in your cookies. A thorough chill for about 30 minutes makes handling the dough easier and results in a better cookie texture.
Mixing the Dough
Mixing the wet ingredients correctly is crucial for a well-balanced dough. You’ll want to combine the softened butter, sugars, molasses, and egg until you achieve a smooth, creamy texture. Using an electric mixer can help you achieve that light and fluffy consistency, essential for the right cookie. Once your wet ingredients are prepared, blending in the dry ingredients is the next key step.
Ensure you whisk together the dry ingredients thoroughly; this helps distribute the baking soda and spices uniformly throughout the dough. It’s important to incorporate the dry mixture gradually into the wet ingredients. This gentle mixing will prevent the dough from being overworked, which can lead to tough cookies. Aim for a soft, slightly sticky dough that retains a lightness, ensuring a delightful chew in every bite.
Recognizing the Signs of Correctly Mixed Dough
When preparing your dough for soft and chewy molasses cookies, it’s crucial to understand the signs of appropriately mixed ingredients. The final mixture should be soft and slightly sticky but not overly wet. A well-mixed dough will have a cohesive texture, where all ingredients are combined thoroughly without any dry patches or lumps. This consistency is essential for achieving the desired chewy texture post-baking.
Chilling the Dough
Benefits of Chilling Cookie Dough
Chilling the dough is a critical step that shouldn’t be overlooked. This process not only makes the dough easier to handle, but also enhances the overall flavor of the cookies. As the dough chills, the flavors meld together, resulting in a richer taste profile once baked. Additionally, chilling solidifies the fats in the butter, helping to prevent excessive spreading during baking.
How It Affects Flavor Concentration and Manageability
When you refrigerate the dough for about 30 minutes, the flour fully hydrates, allowing for proper gluten development while maintaining the chewy texture once baked. This resting period leads to a more concentrated flavor, as the sugars and spices have time to infuse throughout the dough.
Recommended Chilling Time for Best Results
For optimal results, chilling the dough for at least 30 minutes is recommended. While this recipe specifies a chilling duration of 30 minutes, you may find that chilling for up to an hour can deepen the flavor even further without compromising texture.
Shaping the Cookies
Techniques for Scooping and Rolling Dough Balls
When it comes to forming your cookies, using a tablespoon or a cookie scoop can ensure consistency in size. This not only results in evenly baked cookies but also aids in portion control, allowing each cookie to have the same texture and flavor.
Tools and Tips for Consistent Sizing
Utilizing a cookie scoop can simplify the process of measuring out your dough. This tool is helpful for achieving the same-sized dough balls, which promotes even baking. If you are rolling by hand, wetting your hands slightly can prevent sticking, making the process easier and cleaner.
Importance of Sugar Coating
The sugar coating plays a dual role; it enhances the taste, creating a sweet and slightly crunchy exterior, while also providing a beautiful sparkle that makes the cookies visually appealing. The sugar will caramelize slightly during baking, forming a delightful crust that contrasts beautifully with the soft interior.
Effects on Taste and Appearance After Baking
Once baked, the sugar coating will contribute a delightful sweetness, while the chewy texture of the cookies enhances the overall eating experience. The visual appeal of sugar-dusted cookies can make them a standout treat, aesthetically pleasing for any gathering.
Arranging for Baking
Best Practices for Placing Cookies on Baking Sheets
Proper arrangement of cookies on the baking sheet is essential to ensuring even baking and preventing cookies from merging during the baking process. Using parchment paper will help with easy release post-baking and minimize sticking.
Spacing Guidelines to Ensure Proper Spreading
For best results, space each cookie dough ball approximately 2 inches apart. This spacing is crucial as it allows the cookies room to spread while baking. With the right spacing, you can achieve beautifully formed cookies without overflow.
Tips for Preventing Sticking Without Additional Grease
Using parchment paper negates the need for greasing the baking sheets, which is ideal since added grease can alter the texture of the cookies during baking. The parchment paper provides a non-stick surface while promoting even browning.
Baking Process
Optimal Oven Temperature and Baking Time for Perfect Cookies
Baking soft and chewy molasses cookies requires an oven temperature of 350°F (175°C). This temperature provides a perfect balance for the inside to remain soft while the edges set.
Understanding When Cookies Are Done: Visual Cues to Observe
Watch for key visual cues: the edges should appear set while the center remains a bit soft and puffed. The cookies will continue to firm up as they cool, so be careful not to overbake, as this may lead to a drier texture.
The Science Behind Cookie Spreading and Setting During Baking
The cookies spread when the fats begin to melt in the oven, allowing the dough to expand. Once the outer edges of the cookies begin to set, the residual heat cooks the interior, creating that chewy texture you desire. Pay attention to the time; even an extra minute can impact the final outcome.
Tips for Achieving a Consistent Bake Across All Cookies
To ensure even baking, rotate the baking sheets halfway through the baking time if your oven tends to have hot spots. Additionally, consider baking only one sheet at a time when possible, to avoid uneven heat distribution.
Cooling the Cookies
Importance of Cooling on Baking Sheets Before Transferring
Letting the cookies cool on the baking sheets for about 5 minutes after baking allows them to set properly. This is a crucial step; moving them too soon may result in broken cookies, especially with the soft centers characteristic of molasses cookies.
Why Cookies Need Time to Firm Up
As the cookies cool, they will continue to firm up. This cooling period helps solidify the structure without compromising the chewy texture. Skipping this step may yield cookies that are too soft and difficult to handle.
Best Practices for Transferring Cookies to Wire Racks
To transfer cookies from baking sheets to wire racks, gently lift each cookie with a spatula, being cautious not to break them. Allowing them to cool completely on a wire rack prevents any steaming and ensures that the bottoms retain their lovely texture.
How Cooling Racks Aid in Maintaining Texture
Cooling racks provide airflow around the cookies, preventing condensation and allowing them to maintain their chewy, soft texture, rather than becoming soggy. This method is essential for preserving the integrity of the cookie.
Serving Suggestions
Thoughtful Presentation Ideas to Enhance Serving
For an inviting display, arrange the cookies on a festive plate, considering seasonal themes if serving during holidays. Simple touches like garnishing with a light dusting of powdered sugar can add an elegant touch.
Suggestions for Festive Plating and Garnishing
Utilizing different colored plates or wrapping the cookies in cellophane can elevate your presentation. Include additional sweets or festive decorations surrounding the cookies to create a delightful tableau.
Pairing Suggestions for Maximal Enjoyment
Molasses cookies pair wonderfully with beverages like cold milk, herbal teas, or spiced cider, enhancing the warm flavors of the cookies. For adult gatherings, consider serving alongside coffee or dark hot chocolate for an indulgent experience.
Ideal Beverages to Serve Alongside, Such as Milk or Tea
Milk, both regular and plant-based options, complements the sweetness of the cookies beautifully. Warm drinks like chai or peppermint tea also provide a cozy counterpart to the flavors of the cookies.
Storage Tips
Best Methods for Storing Molasses Cookies for Freshness
To keep your molasses cookies fresh, store them in an airtight container at room temperature. Layering parchment paper can help maintain their texture and prevent sticking.
How Long Cookies Can Be Kept and Freezing Techniques
Freshly baked cookies can last up to a week when stored properly. For longer storage, consider freezing the cookies. Place the cooled cookies in a single layer on a baking sheet to freeze immediately, then transfer them to an airtight container or freezer bag.
Tips for Reviving Cookies If They Become Too Hard
If cookies have become hard, reviving them is straightforward. Place a slice of bread in the container with the cookies, sealing it tightly overnight. The moisture from the bread will help soften the cookies, restoring some of their original texture.
Conclusion
Soft and chewy molasses cookies provide a delightful combination of spices and sweetness, offering a warm treat that is perfect for any gathering. The textures are tender yet pleasantly chewy, inviting one more bite. With a relatively brief preparation and baking time of around an hour and fifteen minutes, these cookies are sure to bring joy with their rich, comforting flavor.

Soft and Chewy Molasses Cookies Delight Recipe
Ingredients
- ¾ cup unsalted butter softened
- 1 cup packed brown sugar
- ¼ cup granulated sugar
- ½ cup unsulfured molasses
- 1 large egg
- 2 ¼ cups all-purpose flour
- 2 teaspoons baking soda
- 1 teaspoon ground cinnamon
- 1 teaspoon ground ginger
- ½ teaspoon ground cloves
- ½ teaspoon salt
- ½ cup granulated sugar for rolling
Instructions
- Preheat your oven to 350°F (175°C) and line baking sheets with parchment paper.
- In a mixing bowl, beat the softened butter, brown sugar, and granulated sugar until light and fluffy.
- Mix in the molasses and egg until well blended.
- In a separate bowl, whisk together flour, baking soda, cinnamon, ginger, cloves, and salt.
- Gradually add the dry ingredients to the wet mixture, stirring until just combined.
- Cover the dough with plastic wrap and chill in the refrigerator for 30 minutes.
- Scoop portions of dough and roll into balls, then coat in granulated sugar.
- Place the dough balls on baking sheets, spacing them 2 inches apart.
- Bake for 8-10 minutes until edges are set and centers are soft.
- Cool on baking sheets for 5 minutes before transferring to wire racks.