Introduction
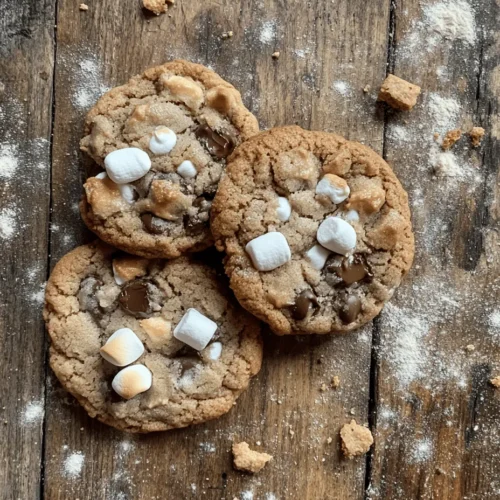
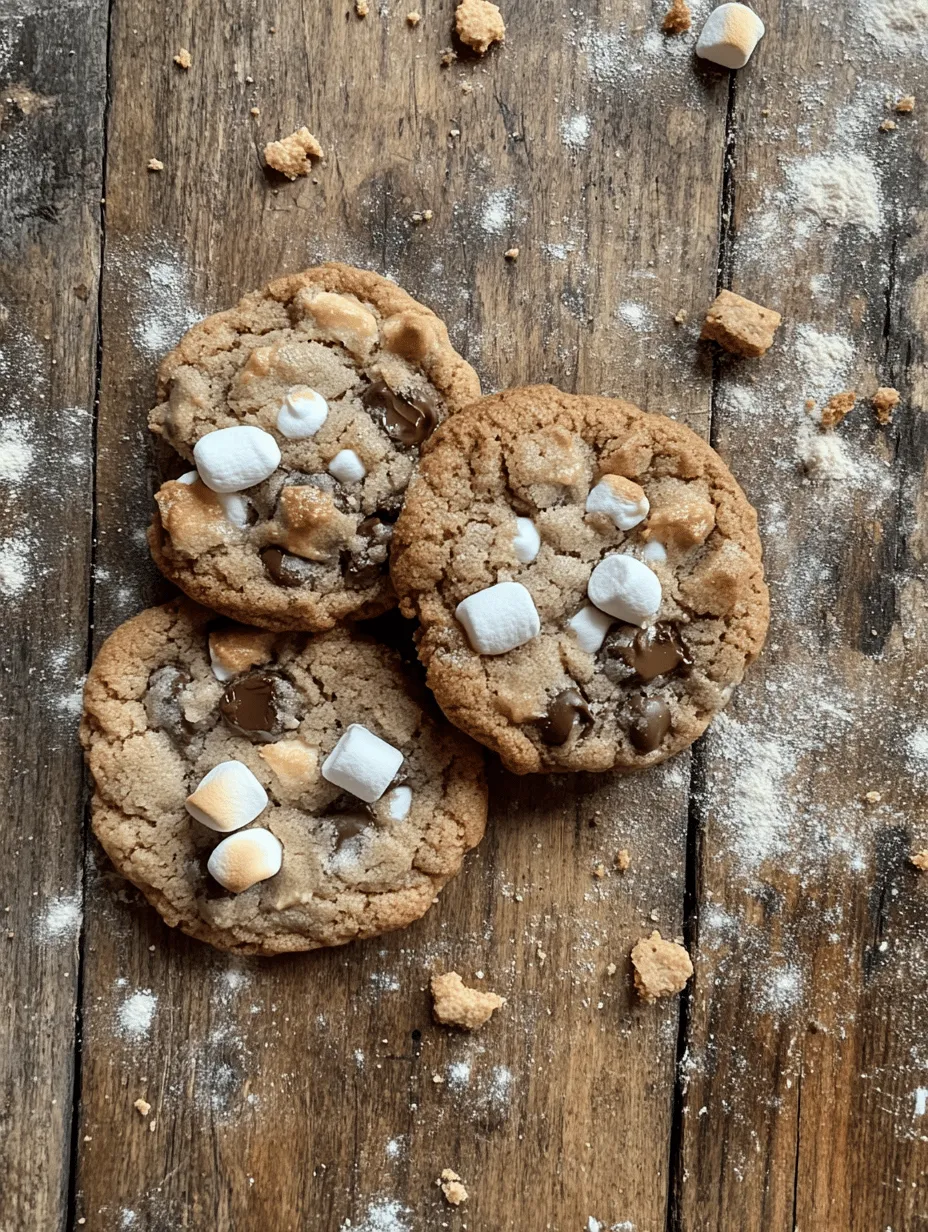
Campfire cookies have an undeniable charm that evokes memories of summer nights spent outdoors, surrounded by friends and family. The warmth of the fire, the sound of laughter, and the delightful scent of baked treats wafting through the air create a nostalgic experience that many of us treasure. These Toasty Campfire Cookies encapsulate that joy, offering a delicious blend of textures and flavors that remind us of classic camping treats like s’mores.
What makes these cookies unique is their thoughtfully chosen ingredients that mirror the quintessential campfire experience. Imagine biting into a soft, chewy cookie filled with rich chocolate chips, gooey mini marshmallows, and crunchy graham cracker crumbs—each element working together to transport you back to your favorite outdoor adventures. Not only do these cookies evoke delightful memories, but they are also incredibly easy to prepare, whether you’re in a cozy kitchen or gathered around a campfire.
In this article, we will explore the essential ingredients that bring these cookies to life, along with a detailed step-by-step guide on how to make them perfectly, ensuring they are a hit at your next gathering or camping trip.
Understanding the Ingredients
To create the perfect Toasty Campfire Cookies, it’s important to understand the role each ingredient plays in the recipe. Each one contributes to the overall flavor, texture, and appearance of the cookies, making them irresistibly delicious. Let’s break down the essential ingredients:
All-Purpose Flour
All-purpose flour serves as the foundation of the cookies, providing structure and stability. It helps bind the ingredients together while allowing for that perfect chewy texture. The right amount of flour is key; too little can lead to flat cookies, while too much can make them dense.
Baking Soda
Baking soda is a crucial leavening agent in this recipe. It reacts with the acidity of the brown sugar and helps the cookies rise, creating a light and airy texture. Ensuring you use the correct amount is essential, as too much can lead to a soapy taste, while too little may result in dense cookies.
Salt
A pinch of salt may seem simple, but it plays a vital role in enhancing the overall flavor of the cookies. It balances the sweetness of the sugars and elevates the taste of the other ingredients, ensuring a well-rounded flavor profile.
Unsalted Butter
The choice of unsalted butter is intentional, as it contributes richness and flavor without adding any extra saltiness. Butter also aids in creating a tender, melt-in-your-mouth texture, which is essential for a great cookie. Make sure your butter is softened to room temperature for the best results during the creaming process.
Brown Sugar vs. Granulated Sugar
In this recipe, both brown sugar and granulated sugar are used, and each brings something unique to the table. Brown sugar, with its higher moisture content, adds a deep, caramel-like flavor and keeps the cookies moist. In contrast, granulated sugar helps the cookies spread and adds a slight crispiness to the edges. The combination of these sugars creates a delightful balance between chewy and crispy textures.
Egg
The egg in this recipe serves as a binding agent, holding all the ingredients together while adding moisture. It also contributes to the cookie’s richness and helps achieve the desired texture. For the best results, use a large egg at room temperature.
Vanilla Extract
Vanilla extract is a flavor enhancer that adds depth and warmth to the cookies. Its sweet, aromatic profile complements the chocolate and marshmallows beautifully, making each bite even more enjoyable.
Rolled Oats
Incorporating rolled oats into the cookie dough introduces a delightful chewiness and a hearty texture. Oats not only provide additional fiber but also help absorb some moisture in the dough, ensuring the cookies don’t become overly soft or goopy during baking.
Chocolate Chips
No cookie recipe is complete without chocolate chips. Their rich sweetness and melty texture add a comforting and indulgent element to the cookies. Feel free to mix and match varieties, such as semi-sweet, milk chocolate, or dark chocolate, to suit your taste preferences.
Mini Marshmallows
The mini marshmallows are what truly bring the campfire experience to these cookies. As they bake, they become gooey and soft, mimicking the marshmallows toasted over an open flame. Their sweetness and texture enhance the overall cookie and evoke the s’mores flavor we all love.
Graham Cracker Crumbs
Finally, the graham cracker crumbs provide a crunchy texture and a touch of nostalgia, reminiscent of classic s’mores. They add a subtle sweetness and a hint of cinnamon, elevating the flavor profile of the cookies and tying all the elements together.
Step-by-Step Guide to Making Toasty Campfire Cookies
Now that we’ve explored the key ingredients, it’s time to dive into the process of making these delightful Toasty Campfire Cookies. Follow this step-by-step guide to ensure your cookies turn out perfectly every time.
Preheating the Oven and Preparing Baking Sheet
Start by preheating your oven to 350°F (175°C). This temperature is ideal for baking cookies, allowing them to spread and rise properly without becoming overly dry.
While the oven is heating, prepare your baking sheet. Line it with parchment paper to prevent the cookies from sticking and to make cleanup a breeze. This step is crucial for achieving perfectly baked cookies, as it allows for easy removal once they’re done.
Mixing the Dry Ingredients
In a medium bowl, whisk together the all-purpose flour, baking soda, and salt. Whisking these dry ingredients helps to evenly distribute the baking soda and salt throughout the flour, ensuring a consistent texture and flavor in the cookies. Set this mixture aside while you work on the wet ingredients.
Creaming Butter and Sugars
In a large mixing bowl, use an electric mixer or a wooden spoon to cream together the softened unsalted butter, brown sugar, and granulated sugar until the mixture is light and fluffy. This process typically takes about 2-3 minutes with an electric mixer.
The creaming method is essential for incorporating air into the dough, which helps create a light texture in your cookies. The color should lighten, and you should notice a change in consistency.
For optimal results, ensure that your butter is at room temperature, as this will allow it to mix more easily and incorporate air effectively. If your butter is too cold, it won’t cream well, leading to denser cookies.
Incorporating the Egg and Vanilla
Once the butter and sugars are creamed together, it’s time to add in the egg and vanilla extract. Mix until fully combined, scraping down the sides of the bowl to ensure all ingredients are incorporated. The egg will help bind everything together, while the vanilla will enhance the overall flavor of the dough.
At this stage, the mixture should be smooth and slightly fluffy, indicating that you have successfully combined the wet ingredients.
As you progress through these steps, you’ll be well on your way to creating a batch of Toasty Campfire Cookies that are perfect for any occasion. In the next section, we will continue with the remaining steps of preparing the dough and baking these delightful treats. Stay tuned for more delicious details!

Combining Wet and Dry Mixtures
When it comes to baking, the order in which you combine your ingredients can significantly impact the final product. For Toasty Campfire Cookies, it’s essential to add your wet ingredients gradually to ensure they blend smoothly into the dry mixture. This step helps achieve a well-integrated dough, allowing the flavors to meld beautifully. Begin by mixing your softened butter and sugar until light and fluffy, which creates air pockets that contribute to a tender texture. Then, slowly add in your eggs and vanilla extract, one at a time. This gradual incorporation prevents the mixture from becoming too dense or overly sticky, promoting an even consistency that is key to cookie perfection.
Best Practices for Mixing Without Overworking the Dough
As you combine the wet and dry mixtures, be mindful of your mixing technique. Overworking the dough can lead to tough cookies due to the development of gluten, which is not desirable for our delicate campfire treats. Instead, use a spatula or wooden spoon to gently fold the dry ingredients into the wet mixture. Stop mixing as soon as you no longer see dry flour or dry spots. A few lumps are perfectly fine! This method ensures your cookies remain soft and chewy, with a delightful texture that will have everyone reaching for seconds.
Stirring in Mix-Ins
The magic of Toasty Campfire Cookies lies in the delightful mix-ins that capture the essence of a classic campfire experience. To achieve an even distribution of oats, chocolate chips, marshmallows, and graham cracker crumbs throughout the dough, it’s best to stir them in gently after you’ve combined the wet and dry ingredients. Use a spatula to fold in the mix-ins, ensuring that each cookie gets a generous helping of each element. This not only enhances flavor but also creates a beautiful texture contrast with each bite. Aim for a balanced mix, ensuring that no cookie is left without a gooey chocolate chip or a piece of toasted marshmallow.
Portioning the Cookies
To achieve uniform cookies that bake evenly, portioning is key. Using a cookie scoop or a tablespoon can help you create consistent sizes. If you prefer larger cookies, opt for a generous scoop, keeping in mind that larger cookies may require additional baking time. For smaller bites, use a tablespoon. Place each portion of dough onto your prepared baking sheet, leaving enough space between them for spreading. This step is crucial, as cookies tend to expand and spread during baking, creating that perfectly chewy texture we all crave.
Baking the Cookies
When it comes time to bake, preheat your oven to 350°F (175°C) and ensure your baking sheets are lined with parchment paper. This simple step prevents sticking and promotes even cooking. As you slide your baking sheet into the oven, keep an eye out for visual cues that indicate doneness. The cookies should be golden brown around the edges while remaining slightly soft in the center. They will continue to cook on the baking sheet after being removed from the oven due to residual heat, so it’s crucial to avoid overbaking. Aim for a soft, chewy center that will firm up as they cool.
Cooling Process
Once your cookies are out of the oven, transfer them to a wire rack to cool. This step is vital for achieving the ideal texture. Cooling cookies on a rack allows air to circulate around them, preventing sogginess and ensuring they retain their delightful chewiness. If you leave them on the baking sheet too long, you risk a dense, moist cookie that doesn’t offer the pleasant bite you desire. After about 10 minutes on the baking sheet, gently transfer your cookies to the wire rack and allow them to cool completely. This process not only enhances texture but also intensifies the flavors as they settle.
Variations and Customization Ideas
One of the best features of Toasty Campfire Cookies is their versatility. Feel free to get creative with ingredient substitutions or additions to cater to different tastes and dietary preferences. If you want to switch up the chocolate, consider using white chocolate chips, dark chocolate chunks, or even peanut butter chips for a unique twist. Nuts can also add a delightful crunch; try walnuts, pecans, or even macadamia nuts for an unexpected flavor profile.
For those following a vegan or gluten-free diet, there are plenty of alternatives. Substitute regular butter with coconut oil or a plant-based butter spread, and use flaxseed meal mixed with water as a binder in place of eggs. For gluten-free options, be sure to use a gluten-free flour blend that mimics all-purpose flour’s texture and properties.
Moreover, seasonal variations can add a festive touch to your cookies. In the fall, consider adding a pinch of cinnamon or nutmeg for a warm, spiced flavor. During the summer, you might want to incorporate fresh berries or even lemon zest for a refreshing twist that captures the essence of the season.
Serving Suggestions
Toasty Campfire Cookies are not only perfect for savoring on their own but also lend themselves to creative serving ideas. Pair them with a scoop of vanilla ice cream for a delicious sundae, or present them alongside a warm cup of hot chocolate for a cozy treat on chilly evenings. For gatherings or camping trips, these cookies can be a crowd-pleaser. Consider packaging them in rustic boxes or tying them with twine for a charming presentation that adds a touch of whimsy.
Storing and Freezing Cookies
To maintain the freshness of your Toasty Campfire Cookies, store them in an airtight container at room temperature. This simple step will keep them soft and chewy for up to a week. If you want to enjoy your cookies for an extended period, consider freezing them. To do this, ensure your cookies are completely cooled before placing them in a freezer-safe container or freezer bag. Layer parchment paper between cookies to prevent them from sticking together. They can be frozen for up to three months.
Additionally, you can freeze the cookie dough itself. Scoop portions of the dough onto a baking sheet and freeze until solid. Once frozen, transfer the dough balls to a freezer bag. When you’re ready to bake, simply place the frozen dough on a baking sheet and add an extra couple of minutes to the baking time. This way, you can have freshly baked Toasty Campfire Cookies on demand!
Conclusion
Making and sharing Toasty Campfire Cookies is not just about enjoying a delicious treat; it’s about creating memories and embracing the joy of baking. The comforting aroma of cookies baking in the oven evokes nostalgia, reminding us of evenings spent around campfires, sharing stories, and indulging in sweet delights. Whether you’re preparing them for a cozy night in or taking them along on an outdoor adventure, these cookies are sure to bring a smile to anyone’s face.
So, gather your ingredients, invite some friends or family, and enjoy the process of baking. The end result is not just a batch of cookies, but a delightful experience that brings people together. Let the warmth of your kitchen and the joy of baking fill your home as you create these delectable Toasty Campfire Cookies.