

Introduction
Soft chocolate chip cookies are a classic treat loved by many. Their chewy texture combined with the sweet richness of chocolate creates an irresistible dessert that is perfect for any occasion. Whether you’re baking for a family gathering, a cookie swap, or simply indulging your sweet tooth at home, these cookies are sure to impress. In this recipe for Award-Winning Soft Chocolate Chip Cookies, the inclusion of smoked sea salt elevates the traditional flavor profile, bringing a unique twist that sets them apart from other recipes.
The combination of semi-sweet chocolate chips and the option to add walnuts offers a delightful burst of flavor in every bite. With a perfect balance between sweetness and a hint of smokiness, these cookies are best enjoyed warm, straight from the oven, or at room temperature with a glass of milk. Whichever way you choose to savor them, these delightful cookies promise to leave a lasting impression.
Recipe Overview
– Total time: 30 minutes
– Prep time: 15 minutes
– Yield/Servings: 24 cookies
– Difficulty: Not specified in the recipe
Description of the Cookies
These Award-Winning Soft Chocolate Chip Cookies are characterized by their soft and chewy texture, complemented by the rich flavor of semi-sweet chocolate chips. The addition of walnuts provides a satisfying crunch, while a sprinkle of smoked sea salt on top delivers an unexpected yet delightful contrast to the sweetness, making each bite a delightful experience.
Origin and Inspiration
Inspired by classic cookie recipes that have been enjoyed for generations, this recipe updates the traditional version with a contemporary twist—smoked sea salt. This innovative touch not only enhances the flavor but also adds a layer of complexity that makes these cookies stand out. The incorporation of both brown and granulated sugars contributes to the rich flavor and delightful texture, ensuring that every batch is simply the best.
Perfect for Any Occasion
Soft chocolate chip cookies are versatile and suitable for numerous occasions. Whether it’s a casual weekend treat, a birthday party, or a holiday gift, they fit seamlessly into any setting. Their timeless appeal makes them a go-to option for bake sales, picnics, and cozy evenings at home. The ease of preparation also makes it feasible for bakers of all skill levels, allowing everyone to enjoy a batch of warm, soft cookies with minimal effort.
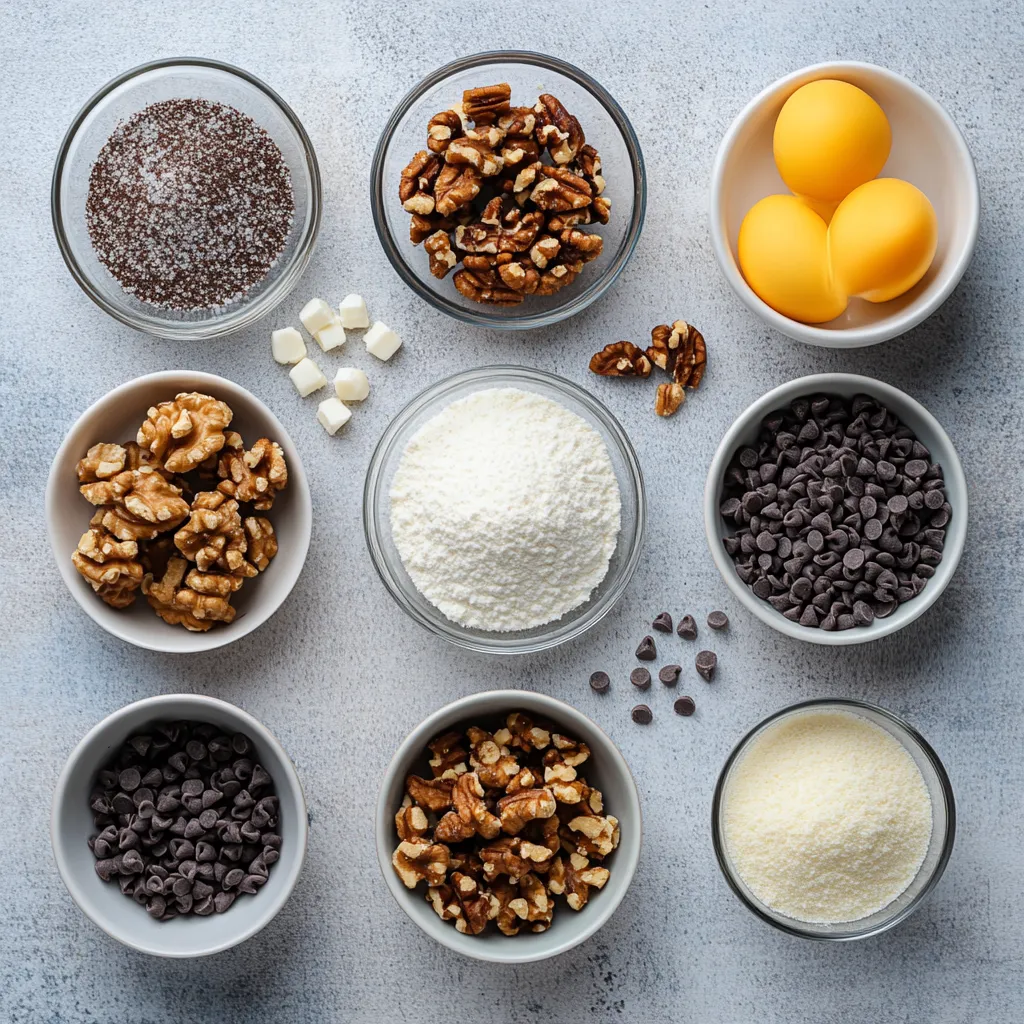
Ingredients
– 2 1/4 cups all-purpose flour
– 1 teaspoon baking soda
– 1/2 teaspoon salt
– 1 cup unsalted butter, softened to room temperature
– 3/4 cup granulated sugar
– 3/4 cup packed brown sugar
– 1 tablespoon pure vanilla extract
– 2 large eggs
– 2 cups semi-sweet chocolate chips
– 1/2 cup chopped walnuts (optional)
– 1 teaspoon smoked sea salt (for topping)
Essential Baking Ingredients
The core of any great cookie recipe lies in the choice of ingredients. For these cookies, all-purpose flour provides the structure necessary for a chewy texture. Baking soda acts as a leavening agent, helping the cookies rise and develop a soft texture. Salt is essential for enhancing the flavors of the other ingredients, ensuring a balanced sweetness.
Optional Add-Ins
Though the recipe calls for semi-sweet chocolate chips, the option to include chopped walnuts gives additional texture and flavor. If you’re a fan of nuts or simply looking to add an extra crunch, including walnuts can transform these cookies into a delightful treat that’s both soft and crunchy.
Special Garnishes
The use of smoked sea salt as a garnish is what truly sets these cookies apart. It’s not just for decoration; it adds a sophisticated flavor contrast that beautifully complements the sweetness of the chocolate and the richness of the butter. This extra touch turns an ordinary cookie into something extraordinary.
Prepping the Baking Environment
Importance of Oven Temperature
Before beginning the mixing process, preheating the oven to 350°F (175°C) is crucial. An adequately heated oven establishes the right environment for the cookies to bake evenly and develop that perfect golden-brown crust. Baking at the correct temperature ensures that the cookies rise appropriately, leading to a delightful soft and chewy texture rather than a hard or dense cookie.
Preparing Baking Sheets
Lining the baking sheets with parchment paper or silicone baking mats is an important step to prevent the cookies from sticking. This not only aids in easy removal once the cookies are baked but also helps ensure even baking. Properly prepared baking sheets contribute to the overall texture and appearance of the finished cookies, giving them a beautiful shape and preventing any burnt edges.
Tools and Equipment Needed
For this cookie recipe, the essential tools include mixing bowls, an electric mixer for creaming the butter and sugars, and a cookie scoop or tablespoon for portioning the dough onto the baking sheets. Having these tools handy streamlines the baking process and helps achieve the desired result without any hassle.
Mixing the Dry Ingredients
Choosing the Right Flour
All-purpose flour is the backbone of this cookie recipe, providing a balanced amount of protein that supports the cookie’s structure. This type of flour creates a tender yet sturdy cookie that holds up well during baking, contributing to both the softness and chewiness that everyone loves in homemade cookies.
Role of Baking Soda and Salt
Baking soda is essential for providing leavening in the cookies. As it reacts with the acidic components in the dough, it creates carbon dioxide bubbles, allowing the cookies to rise as they bake. The addition of salt not only helps to enhance the sweetness but also brings out the flavors of the chocolate and butter, making every bite more satisfying.
Whisking Techniques for Even Distribution
Incorporating the baking soda and salt evenly into the flour is achieved through whisking. This technique ensures that these key ingredients are distributed uniformly throughout the flour, preventing clumps and leading to consistent cookie results. A well-mixed dry ingredient blend is fundamental for achieving well-textured cookies.
Creaming the Butter and Sugars
Importance of Room Temperature Butter
Using softened, room-temperature butter is vital in this step. It allows for better incorporation with the sugars, creating an airy and fluffy texture that contributes to the cookies’ overall tenderness. Cold butter does not cream well, which can lead to denser cookies.
Techniques for Creaming
To cream the butter and sugars, an electric mixer is used to beat the softened butter with both granulated and brown sugars until the mixture becomes light and fluffy. This process typically takes about 2-3 minutes and is crucial for incorporating air, leading to soft cookies with the ideal texture.
Understanding the Light and Fluffy Texture
A well-creamed mixture should showcase a pale color and a texture that appears almost whipped. This indicates that sufficient air has been incorporated, which will help the cookies rise during baking. Achieving this perfect light and fluffy consistency is essential for the delightful mouthfeel and texture that defines these chocolate chip cookies.
Incorporating Eggs and Vanilla
Best Practices for Adding Eggs
When incorporating eggs into the creamed mixture, it is best to add them one at a time. This allows for thorough mixing and ensures even distribution throughout the dough. Mixing well after each addition guarantees a unified mixture, preventing any pockets of unmixed egg in the final cookie dough.
The Role of Vanilla Extract in Flavor
Vanilla extract plays a significant role in enhancing the flavor profile of these cookies. It adds depth and richness that complements the chocolate well. The use of pure vanilla extract, rather than imitation, is recommended for the best flavor outcome.
Ensuring Uniform Mixing
After adding the eggs and vanilla, mixing until fully combined is important. This ensures that every part of the dough contains the flavors and ingredients necessary for perfect chocolate chip cookies. Achieving uniformity here contributes to consistent flavor and texture in the final bake.
Combining Ingredients
Gradual Addition of Dry Ingredients
When combining the dry and wet ingredients, the process should be gradual. Adding the dry mixture to the wet mixture bit by bit allows for easier incorporation without overmixing. This careful approach helps maintain the light, airy structure that results in soft, chewy cookies rather than flat and dense ones. Each addition should be mixed just until the dry ingredients are incorporated, optimizing the final texture and assuring that all ingredients blend seamlessly.

Tips to Avoid Overmixing
Overmixing can lead to cookies that are tougher than desired. One key to achieving a soft texture is to mix the dough just until the ingredients are combined. Here are some practical tips:
– Use a Mixing Bowl with a Wide Opening: This allows for easier access and better visibility to monitor consistency.
– Incorporate Ingredients Gradually: When adding flour to the creamed mixture, do it slowly, about a half cup at a time. This will help you gauge when the dough is just mixed.
– Utilize a Rubber Spatula: When folding in the dry ingredients or chocolate chips, use a spatula instead of a mixer. This allows for gentle mixing without overworking the dough.
Achieving the Right Dough Consistency
The dough should have a thick and slightly sticky texture. Here’s how you can assess and adjust it:
– Visual Inspection: The dough should hold its shape when scooped but not be dry or crumbly.
– Temperature Matters: If your dough feels too soft due to warm conditions, refrigerate it for 15-30 minutes to help it firm up before baking.
– Humidity Check: In humid environments, you might need to add a couple of extra tablespoons of flour; too much humidity can cause the dough to be overly sticky.
Adding Chocolate Chips and Nuts
Choosing the Right Chocolate Chips
The choice of chocolate chips can significantly impact the overall flavor profile:
– Semi-sweet vs. Dark Chocolate: Semi-sweet chocolate chips maintain a balance of sweetness that pairs beautifully with the dough, while dark chocolate chips will provide a deeper cocoa flavor.
– Quality Counts: Opt for high-quality brands of chocolate chips for the best melting and flavor outcome. Consider using chocolate chunks for a more substantial chocolate experience.
Benefits of Adding Walnuts
Incorporating walnuts not only adds a pleasant crunch but also enhances the cookie’s flavor:
– Flavor Contrast: The slightly bitter, earthy flavor of walnuts complements the sweetness of the chocolate and the smoothness of the cookie dough.
– Nutritional Boost: Walnuts introduce healthy fats and omega-3 fatty acids, making your treat a bit more wholesome.
– Allergy Considerations: If baking for a crowd, consider labeling your cookies clearly if they contain nuts, as allergens can be a concern.
Methods for Even Distribution in Dough
It’s important to ensure your chocolate chips and nuts are evenly dispersed for consistent flavor in every bite:
– Folding Technique: Use a gentle folding action. Start from the bottom of the bowl and lift the dough over the chips and walnuts to avoid breaking them.
– Pre-chill the Chips: If your chocolate chips are chilled, they are less likely to sink during baking.
– Toss in Flour: Lightly coating the chocolate chips and walnuts with flour before adding them to the dough can help them stay suspended during baking.
Scooping the Dough
Tools for Portioning the Dough
Efficiently scooping your dough will ensure uniform cookies:
– Cookie Scoops or Disher: A cookie scoop not only makes portioning easy but also yields uniform shapes, resulting in evenly baked cookies.
– Two Spoons Technique: If you don’t have a scoop, you can use two spoons to form equally sized mounds.
Spacing Cookies on Baking Sheets
Proper spacing is crucial for the cookies to spread evenly:
– Leave Room to Spread: There should be about 2 inches of space between each cookie. This prevents the cookies from merging during baking.
– Use Multiple Baking Sheets: If your oven can accommodate them, use multiple sheets to prevent overcrowding.
Tips for Even Cookie Sizes
Consistency in size helps ensure even baking:
– Weigh Your Dough: Using a kitchen scale to measure each scoop of dough can help keep sizes uniform.
– Practice Visual Estimation: With experience, you can learn to eye the portion sizes after weighing a few batches.
Adding the Smoked Sea Salt
Importance of Salting the Topping
Salt plays a critical role in enhancing flavor in baked goods:
– Balancing Sweetness: A sprinkle of salt against the sweetness of chocolate adds depth to the cookie and balances the flavors.
– Umami Notes: Smoked salt adds a hint of savory complexity that contrasts beautifully with the chocolate.
Flavor Impact of Smoked Sea Salt
The choice of smoked sea salt is particularly intriguing and should be used thoughtfully:
– Types of Smoked Salts: Different types of smoked salt impart varying levels of smokiness. Choose one that best complements the dessert without overpowering the chocolate.
– Optimal Quantity: A small pinch per cookie is typically sufficient. Too much could overshadow the subtle flavors of the chocolate.
Best Practices for Sprinkling
The way you apply the salt can affect the end result:
– Even Application: Hold the salt at a height to ensure a light and even distribution across all cookies.
– Do it Right Before Baking: Sprinkling the salt just before the cookies go into the oven ensures that it sticks well, enhancing the overall texture and taste.
Baking the Cookies
Ideal Baking Time and Temperature
Baking at the right temperature ensures cookies are perfectly baked:
– Temperature: 350°F (175°C) creates a golden brown exterior while resulting in a soft interior.
– Baking Time: Generally, 10-12 minutes is adequate, but ovens can vary, so monitoring closely during the last few minutes is crucial.
What to Look for When They’re Done
Identifying the perfect bake is key to achieving that soft texture:
– Visual Cues: Look for golden edges while the centers appear slightly underbaked. They will continue cooking from residual heat after removal from the oven.
– Surface Appearance: The surface may have a shiny appearance due to the melted chocolate—this is a good indicator of a freshly baked cookie.
Tips for Monitoring
For consistent results, consider:
– Rotate Baking Sheets: If your oven has hot spots, rotate the sheets halfway through baking for even cooking.
– Timer vs. Visual Cues: While adhering to timers, it’s essential to also trust your judgment based on the cookie appearance to avoid overbaking.
Cooling the Cookies
Recommended Cooling Time on Baking Sheets
Cooling is crucial to the final texture:
– 5-Minute Wait: Allowing cookies to cool on the baking sheets helps them set, making them easier to transfer without breaking.
– Don’t Rush: If you attempt to move the cookies too early, they may crumble.
Transferring to Wire Racks
Moving cookies properly is essential for cooling them evenly:
– Use a Spatula: A flat spatula can help lift the cookies off the sheet without damage.
– Arrange in a Single Layer: Space them out on the wire rack to ensure proper airflow around the cookies for even cooling.
Factors Affecting Texture During Cooling
Several elements can influence the final mouthfeel:
– Humidity Levels: In high humidity, cookies may absorb moisture from the air, resulting in a softer texture. Conversely, dry conditions can make cookies crisper.
– Thickness of Cookies: Thicker cookies may hold more heat and take longer to cool, affecting the final texture.
Serving Suggestions and Pairings
Best Ways to Enjoy the Cookies
These cookies shine in various settings:
– Warm with a Glass of Milk: Enjoy them fresh from the oven or warmed slightly before serving.
– Ice Cream Sandwiches: Consider making ice cream sandwiches with your favorite flavors for a delightful treat.
Pairing with Beverages
Complementing flavors can enhance your experience:
– Coffee or Espresso: The rich flavors of coffee pair wonderfully with the chocolate.
– Tea Options: A warm cup of chai or hibiscus tea can balance the richness, making for a delightful afternoon snack.
Presentation Ideas for Special Occasions
A little extra detail can enhance visual appeal:
– Decorative Plates: Stack the cookies on a beautiful platter, possibly dusted with powdered sugar.
– Individual Wrapping: For gifts, wrapping cookies in cellophane tied with a ribbon adds a personal touch.
Conclusion
These award-winning soft chocolate chip cookies offer a delightful balance of textures, featuring a soft and chewy interior enhanced with rich chocolate and a unique smoky undertone from the sea salt. With a relatively quick preparation and baking time, they make an excellent choice for any occasion, whether enjoyed warm right out of the oven or at room temperature.

Award-Winning Soft Chocolate Chip Cookies Recipe
Ingredients
- 2 ¼ cups all-purpose flour
- 1 teaspoon baking soda
- ½ teaspoon salt
- 1 cup unsalted butter softened
- ¾ cup granulated sugar
- ¾ cup packed brown sugar
- 1 tablespoon pure vanilla extract
- 2 large eggs
- 2 cups semi-sweet chocolate chips
- ½ cup chopped walnuts
- 1 teaspoon smoked sea salt
Instructions
- Preheat your oven to 350°F (175°C) and prepare baking sheets.
- In a bowl, combine flour, baking soda, and salt; whisk and set aside.
- Cream butter, granulated sugar, and brown sugar until light and fluffy.
- Add eggs one at a time, mixing thoroughly, then stir in vanilla extract.
- Gradually mix dry ingredients into wet ingredients until just combined.
- Fold in chocolate chips and walnuts until evenly distributed.
- Scoop rounded balls of dough onto baking sheets, leaving space between them.
- Sprinkle tops with smoked sea salt before baking.
- Bake for 10-12 minutes until edges are golden and centers are soft.
- Cool on baking sheets for 5 minutes, then transfer to a wire rack.