

Introduction
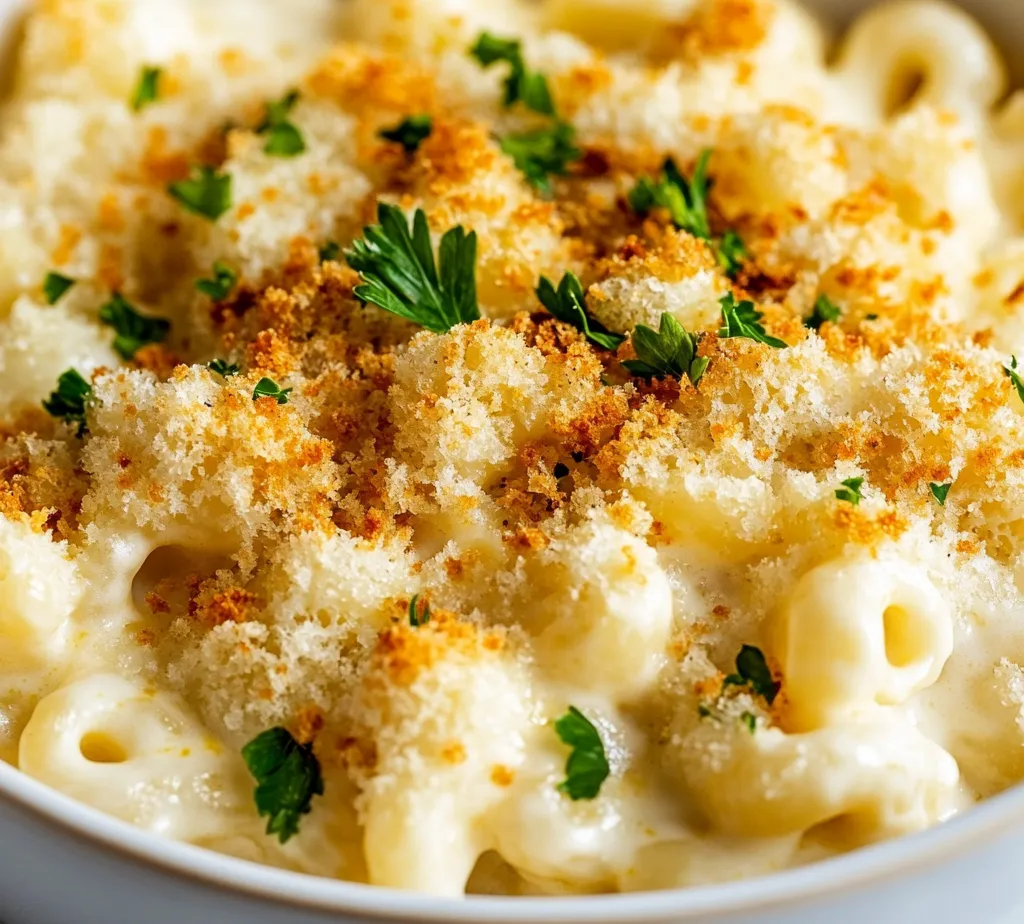
The allure of mac and cheese is universal, transcending age and culinary expertise. This Ultimate Creamy Mac and Cheese Delight takes the classic comfort food to an extraordinary level with a luscious blend of cheeses and a crunchy topping that promises to satisfy the deepest of cravings. The rich creaminess of the dish, combined with the delightful crispiness of the panko topping, creates a perfect balance that will please any palate. Whether served for a family meal, a potluck gathering, or a cozy night in, this dish never fails to impress.
The history of mac and cheese can be traced back centuries, with variations found in many cultures worldwide. The fundamental combination of pasta and cheese has resonated with home cooks and chefs alike. This recipe not only continues that tradition but elevates it with carefully selected cheeses and seasonings to transform a simple dish into an ultimate delight. In this article, we will explore everything you need to know to create this extraordinary mac and cheese experience.
Recipe Overview
– Total Time: 1 hour
– Yield/Servings: 6 servings
– Difficulty: Not specified in the recipe
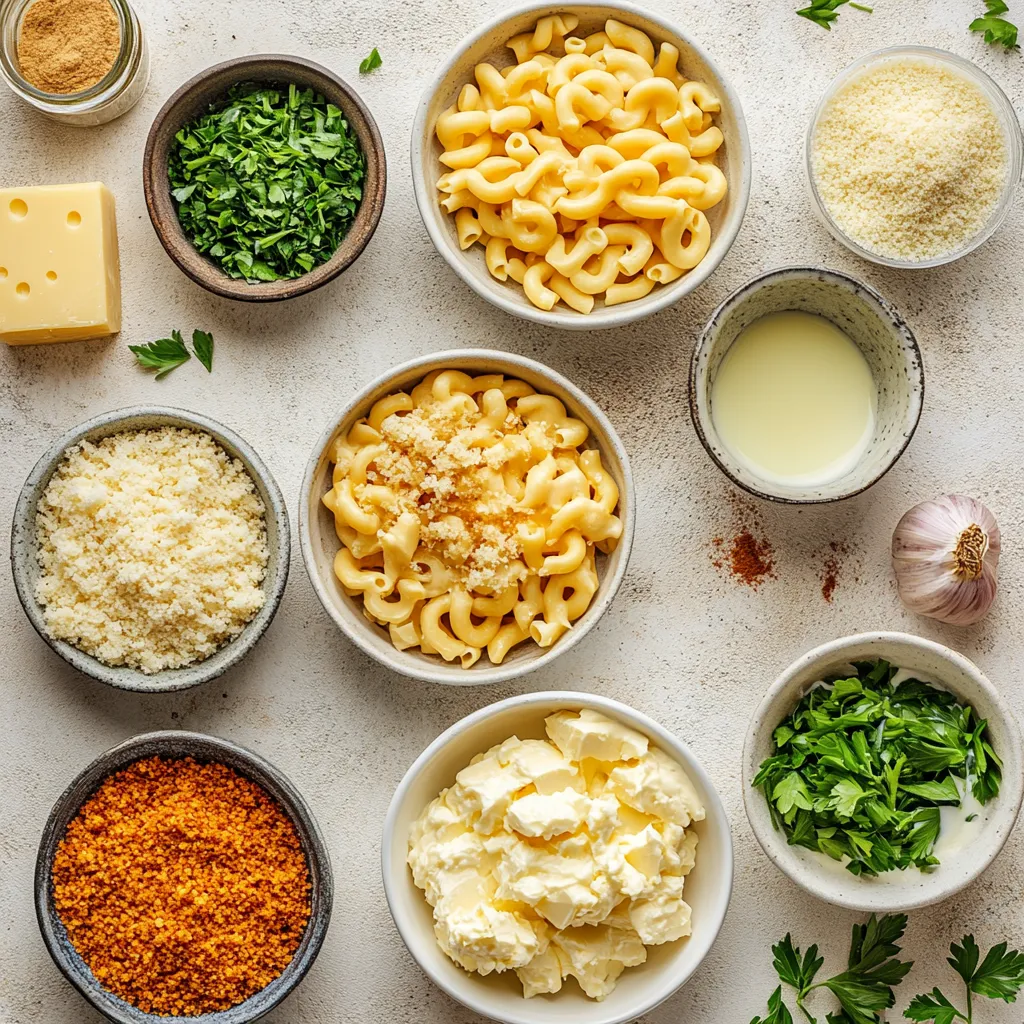
Ingredients
– 8 oz elbow macaroni
– 2 cups sharp cheddar cheese, shredded
– 1 cup Gruyère cheese, shredded
– 1 cup cream cheese, softened
– 3 cups whole milk
– 1/2 cup unsalted butter
– 1/4 cup all-purpose flour
– 1/2 tsp garlic powder
– 1/2 tsp onion powder
– 1/2 tsp smoked paprika
– Salt and pepper, to taste
– 1 cup panko breadcrumbs
– 1/4 cup grated Parmesan cheese
– Fresh parsley, chopped (for garnish)
Instructions
1. Cook the Pasta: Begin by bringing a large pot of salted water to a rolling boil. Add the elbow macaroni and cook according to the package instructions until al dente. Once cooked, drain the pasta and set aside to cool slightly.
2. Make the Cheese Sauce: In a large saucepan set over medium heat, melt the unsalted butter. Once the butter is fully melted, add the all-purpose flour and whisk continuously for about 1-2 minutes. This process will create a roux, which should turn a light golden color.
3. Incorporate Milk: Gradually pour the whole milk into the roux while whisking vigorously to prevent lumps. Continue cooking for about 5-7 minutes, stirring frequently, until the mixture thickens and begins to bubble gently.
4. Add Cream Cheese: Lower the heat and introduce the softened cream cheese into the saucepan. Stir until the cream cheese is completely melted and the sauce is smooth and creamy.
5. Add Cheeses and Seasonings: Keep the heat on low and mix in the shredded sharp cheddar and Gruyère cheeses. Stir until all the cheese has melted into the sauce. Season the cheese mixture with garlic powder, onion powder, smoked paprika, salt, and pepper, mixing thoroughly to ensure even flavor distribution.
6. Combine Pasta and Sauce: Gently fold the cooked elbow macaroni into the rich cheese sauce, ensuring that every piece of pasta is well-coated with the creamy goodness.
7. Prepare for Baking: Preheat your oven to 350°F (175°C). Pour the mac and cheese mixture into a greased 9×13 inch baking dish, spreading it out evenly.
8. Prepare the Topping: In a small bowl, mix together the panko breadcrumbs and grated Parmesan cheese. Evenly sprinkle this crunchy topping over the mac and cheese for an added layer of texture.
9. Bake: Place the baking dish in the preheated oven and bake for 25-30 minutes, or until the top is beautifully golden brown and crispy.
10. Serve and Garnish: Once baked, remove the dish from the oven and allow it to cool for a few minutes. Before serving, garnish with freshly chopped parsley for a pop of color and freshness.
Cooking Equipment Needed
Preparing the Ultimate Creamy Mac and Cheese Delight involves several essential kitchen tools that will streamline your cooking process and enhance your culinary experience. Ensuring that you have the right equipment will facilitate each step, from boiling the pasta to baking the dish to crispy perfection.
Cooking Pots
A large pot is necessary for boiling the elbow macaroni. This pot must be spacious enough to allow the pasta to cook evenly without sticking. Ensure you have a lid on hand to bring the water to a boil quickly, which can save time.
Saucepan
The cheese sauce demands a large saucepan, preferably one with a heavy bottom to help distribute heat evenly. This is crucial when making the roux and ensuring that the milk does not scorch while thickening.
Baking Dish
A 9×13 inch baking dish is required for the final step of this recipe. This size allows for even baking and provides ample room for the mac and cheese to bubble and brown without overflowing.
Mixing Bowls
You will need small mixing bowls, particularly for combining the panko breadcrumbs and grated Parmesan cheese. Having separate bowls for mixing toppings keeps your workspace organized and efficient.
Whisk and Spatula
A whisk is imperative for mixing the roux and ensuring that the flour is well incorporated into the melted butter, preventing lumps in the cheese sauce. Additionally, a spatula is essential for folding the cooked macaroni into the cheese sauce, ensuring each piece is well-coated.
Referencing these kitchen tools may seem simple, but utilizing the right equipment will not only make your cooking process smoother but also enhance the quality of your Ultimate Creamy Mac and Cheese Delight.
Step-by-Step Cooking Instructions
To create the Ultimate Creamy Mac and Cheese Delight, follow these detailed cooking instructions carefully. Each step is crafted to ensure that you achieve the desired rich and creamy texture, along with the crispy topping that everyone loves.
Cooking the Pasta
Begin by boiling a large pot of salted water. The salt is crucial for flavoring the pasta as it cooks. Once the water is at a rolling boil, add the elbow macaroni, stirring it occasionally to prevent sticking. It’s important to follow the package instructions for the cooking time; this usually results in the pasta being cooked to al dente, allowing for the perfect bite that will hold up well in the final dish. After the cooking time, promptly drain the pasta in a colander, allowing it to cool slightly and prevent overcooking while you prepare the cheese sauce.
This meticulous approach to cooking the pasta will lay the foundation for a truly delightful mac and cheese experience, setting you on the right path for the steps to come.
Draining and cooling
Once your elbow macaroni is cooked to al dente perfection, it’s essential to drain it properly to avoid sogginess. Use a colander to let the pasta lose its cooking water completely. Set the colander aside for a few minutes to allow any residual steam to escape, which will prevent the pasta from continuing to cook. Cooling the pasta slightly is beneficial, as it helps maintain its structure when combined with the hot cheese sauce, ensuring every bite remains delightfully chewy.
Making the Cheese Sauce
Melting butter
The process of melting butter in a saucepan is the foundational step in creating a smooth, creamy cheese sauce. Begin with medium heat to gently melt the butter. It’s important not to rush this step; allowing the butter to melt completely will create a perfect base for your roux. The slower melting helps to coax out the rich flavors of the butter, adding depth to your final dish.
Forming the roux
Creating the roux is a crucial step for achieving the creamy consistency of your cheese sauce. Once the butter is fully melted, add the all-purpose flour and whisk continuously for about 1-2 minutes. This cooking time allows the flour to combine with the fat from the butter, forming a paste that provides the thickening power for your sauce. Aim for a light golden color, which indicates that the flour is cooked and ready to absorb the milk you’ll be adding next.
Incorporating Milk
Gradual addition
To achieve a silky smooth cheese sauce, it’s essential to add the whole milk gradually. Pouring in the milk too quickly can lead to lumps, which you definitely want to avoid. Use a whisk to continuously stir as you add the milk, ensuring that each portion is incorporated before adding more. This method allows for even distribution of the flour mixture and prevents clumping.
Thickening process
As the sauce heats, it will gradually thicken, reaching a bubbly state. It’s during this bubbling that the starches from the flour activate and begin to thicken the milk, solidifying the base for your creamy delight. Keep the heat on medium and stir frequently to prevent the mixture from scorching on the bottom, watching for a texture that coats the back of a spoon. This is the ideal consistency before you introduce the cream cheese.
Adding Cream Cheese
Lowering the heat
Once you have your thick, bubbly base, it is crucial to lower the heat before adding the softened cream cheese. This step prevents the cream cheese from seizing or curdling, which can happen if introduced to too high a temperature. Incorporate the cream cheese and stir gently until it melts completely into the sauce, enhancing its creaminess and richness.
Combining thoroughly
Ensure that the cream cheese is fully integrated, with no lumps remaining. This might take a minute or two of gentle stirring but is crucial for achieving a fully cohesive sauce. The final product should be glossy and velvety, ready to embrace the delicious cheeses you’ll be adding next.
Mixing in Cheeses and Seasonings
Adding cheddar and Gruyère
With your creamy base established, it’s time to introduce the star players: sharp cheddar and Gruyère cheese. Keeping the heat low during this step is pivotal, as it allows the cheeses to melt evenly without separating. Stir the cheeses gently into the sauce until they are completely melted and impart their flavor, creating a luscious blend that envelops the pasta.
Seasoning the sauce
After the cheese has melted, don’t forget to season the mixture. Add garlic powder, onion powder, smoked paprika, salt, and pepper, tasting as you go to ensure the flavors meld harmoniously. The seasonings provide an extra layer of complexity to the dish; balance here is key for a well-rounded cheese sauce.
Combining Pasta and Cheese Sauce
Folding technique
When it comes to combining the cooked elbow macaroni with the cheese sauce, a gentle folding technique is recommended. This method minimizes the risk of breaking the pasta while ensuring every piece is thoroughly coated in that decadent sauce. Take care to scrape the sides and bottom of the pan to incorporate all the cheesy goodness.
Baking the Mac and Cheese
Preparing the Oven
Before transferring your mac and cheese to the oven, preheating to 350°F (175°C) ensures that the dish bakes evenly from the moment it enters. This step is essential for achieving that wonderful golden-brown crust we all crave on top of our baked dishes.
Pouring into Baking Dish
Ensure your 9×13 inch baking dish is greased well to prevent sticking and make serving much easier. Pour in your creamy macaroni and cheese mixture, spreading it out evenly with a spatula to encourage uniform cooking.
Preparing the Topping
Combining panko and Parmesan
For a delightful crunchy topping, mix panko breadcrumbs with grated Parmesan cheese in a small bowl. The panko adds texture, while the Parmesan enhances flavor, creating a tantalizing contrast to the creaminess beneath. Evenly spread this mixture over the top of the mac and cheese before baking, ensuring every bite holds a satisfying crunch.
Achieving the Perfect Bake
Baking Time
Timing is key in baking the mac and cheese to perfection. Bake for 25-30 minutes, keeping an eye on the dish. The edges should start bubbling, and the top should develop a beautiful golden brown crust. If browning is slow, consider increasing the oven’s temperature slightly in the last few minutes.
Observing the Crispiness
As your mac and cheese nears the end of baking, observe the visual and textural cues that indicate doneness. A golden top with a crispiness suggests that the panko is nicely toasted, and the bubbling edges indicate that everything beneath is heated through.
Serving Suggestions
Plating Techniques
For an impressive presentation, consider serving the mac and cheese in individual ramekins. This creates a charming look and makes it easy for guests to help themselves. Alternatively, serving family-style directly from the baking dish fosters a communal atmosphere, perfect for gatherings.
Garnishing Options
Enhance the visual appeal of your dish by garnishing it with freshly chopped parsley. This not only adds a pop of color but also provides a fresh flavor contrast to the rich cheese. A light sprinkle of additional smoked paprika can also provide a touch of spice and color on the surface, making for an inviting plate.
Storage and Reheating
Refrigeration Tips
To store leftovers of your mac and cheese, allow it to cool to room temperature. Cover the baking dish with plastic wrap or transfer portions into airtight containers. Stored properly, your mac and cheese will remain fresh for up to three days in the refrigerator. Ensuring it’s well-covered will help prevent it from drying out or absorbing any fridge odors.
Reheating
To reheat, preheat your oven to 350°F (175°C) and place the mac and cheese in an oven-safe dish. To maintain moisture, consider adding a splash of milk to the dish before covering it with foil. This will help revive the creaminess of the sauce during reheating. Bake for about 20-25 minutes or until heated through, removing the foil for the last 5 minutes to crisp up the topping again.
In conclusion, this Ultimate Creamy Mac and Cheese Delight boasts a rich, velvety texture with a satisfying crunchy topping. The perfect balance of creamy and cheesy flavors unfolds with each bite, making it a comforting dish. With a total prep and bake time of about one hour, it’s a great choice for both casual evenings and special gatherings.

Ultimate Creamy Mac and Cheese Delight Recipe
Ingredients
- 8 oz elbow macaroni
- 2 cups sharp cheddar cheese shredded
- 1 cup Gruyère cheese shredded
- 1 cup cream cheese softened
- 3 cups whole milk
- ½ cup unsalted butter
- ¼ cup all-purpose flour
- ½ tsp garlic powder
- ½ tsp onion powder
- ½ tsp smoked paprika
- Salt and pepper to taste
- 1 cup panko breadcrumbs
- ¼ cup grated Parmesan cheese
- Fresh parsley chopped (for garnish)
Instructions
- Cook the elbow macaroni in salted boiling water until al dente, then drain and set aside.
- Melt the unsalted butter in a large saucepan over medium heat, then whisk in the all-purpose flour to create a roux.
- Gradually add the whole milk to the roux while whisking to prevent lumps, cooking until thickened.
- Lower the heat and stir in the softened cream cheese until melted and smooth.
- Mix in the shredded sharp cheddar and Gruyère cheeses until fully melted, then season with garlic powder, onion powder, smoked paprika, salt, and pepper.
- Fold the cooked macaroni into the cheese sauce until well-coated.
- Preheat the oven to 350°F (175°C) and pour the mixture into a greased baking dish.
- Combine panko breadcrumbs and grated Parmesan, then sprinkle over the mac and cheese.
- Bake for 25-30 minutes until the top is golden brown and crispy.
- Garnish with chopped parsley before serving.