
Introduction
Peanut butter cookies hold a special place in the hearts of many, often evoking memories of childhood treats enjoyed on warm afternoons or after school. Their sweetness, combined with that iconic nutty flavor, creates a delightful experience with every bite. The beauty of these Melt-in-Your-Mouth Chewy Peanut Butter Cookies lies not only in their rich taste but also in their signature texture, which offers that perfect balance of chewy and tender. While there are many variations of peanut butter cookies, this recipe stands out for its simplicity and the use of creamy peanut butter to achieve that melt-in-your-mouth quality.
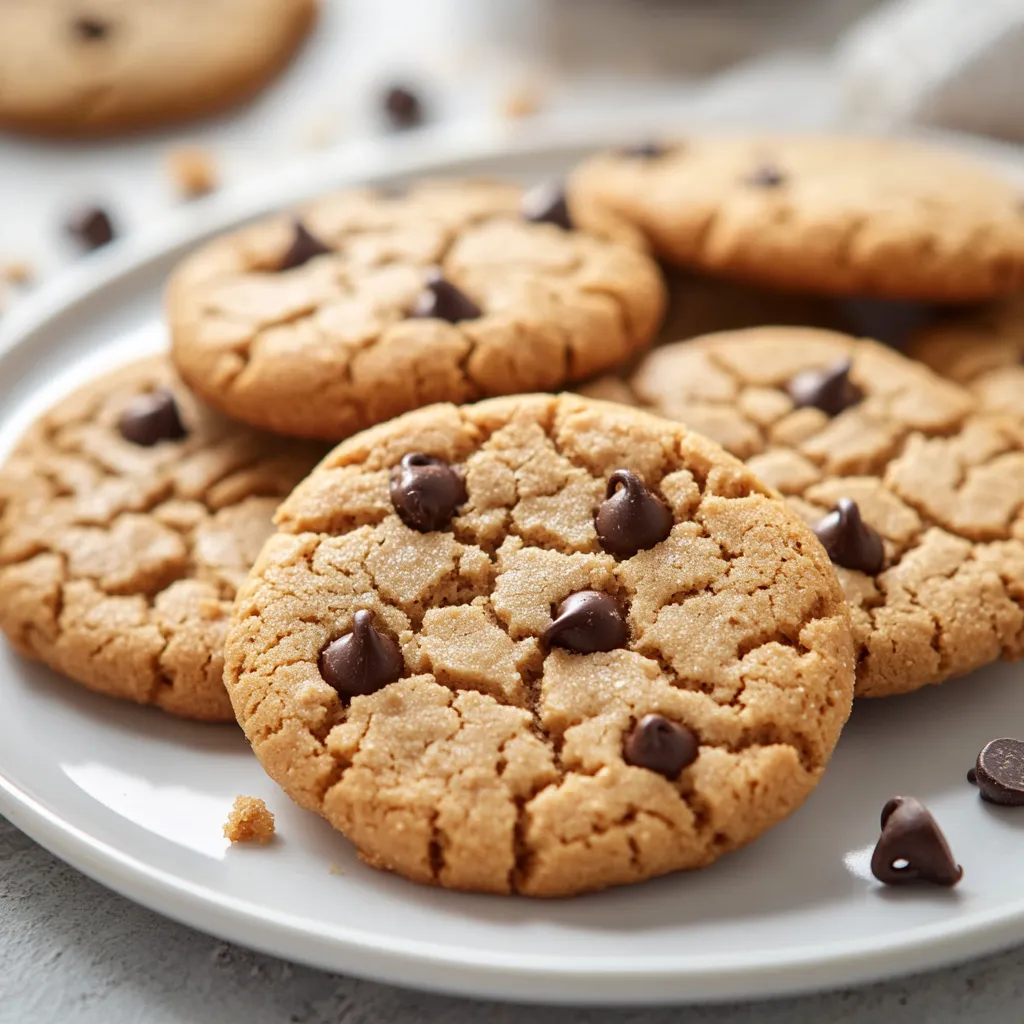
Creamy peanut butter plays a pivotal role in the texture and flavor of these cookies. Creamy peanut butter, as opposed to crunchy, provides a smooth and rich base that blends seamlessly with sugars, ensuring each cookie turns out perfectly chewy. This texture, complemented by the sweetness of brown and granulated sugars, makes each bite irresistible. Moreover, this recipe allows for the option to include semi-sweet chocolate chips, which adds a delightful contrast to the overall flavor profile — satisfying both peanut butter fans and chocolate lovers alike.
Recipe Overview
– Total Time: 25 minutes
– Prep Time: 15 minutes
– Servings: Approximately 24 cookies
– Difficulty: Not specified in the recipe
The flavors of the cookies combine the earthiness of peanut butter with the rich sweetness of sugars, enhanced by the aroma of vanilla extract. The preparation method is straightforward, requiring little more than mixing, portioning, and baking. The result? A batch of soft, slightly crispy-edge cookies that offer a delightful textural experience and a comforting taste.
Ingredients
– 1 cup creamy peanut butter
– 1 cup packed brown sugar
– 1/2 cup granulated sugar
– 1 large egg
– 1 teaspoon pure vanilla extract
– 1 teaspoon baking soda
– 1/4 teaspoon fine sea salt
– 1/2 cup all-purpose flour
– 1/2 cup semi-sweet chocolate chips (optional)
– Coarse sea salt for finishing (optional)
To craft these chewy peanut butter cookies, each ingredient plays a crucial role. The rich and smooth creamy peanut butter not only gives the cookies their distinct flavor but also ensures a chewy texture that melts in your mouth. The blend of brown and granulated sugars enhances the sweetness while providing a slight depth of flavor; brown sugar adds moisture and a hint of caramel notes, while granulated sugar offers straightforward sweetness.
Incorporating a large egg is vital as it binds the mixture and contributes additional moisture, leading to that coveted chewiness. A splash of vanilla extract elevates the overall flavor profile, providing a warm and inviting aroma. The baking soda is essential for leavening, creating a slight rise during baking, while the fine sea salt balances the sweetness, enhancing overall flavors.
The inclusion of all-purpose flour contributes to the structural integrity of the cookies, helping them hold their shape while maintaining a light crumb. Optional chocolate chips can be added for those who crave a chocolate-infused experience, and a sprinkle of coarse sea salt on top before baking adds a gourmet touch.

Instructions
1. Begin by preheating your oven to 350°F (175°C). Prepare a baking sheet by lining it with parchment paper to prevent sticking.
2. In a large mixing bowl, combine the creamy peanut butter, packed brown sugar, and granulated sugar. Mix these ingredients together until you achieve a smooth, well-blended consistency.
3. Next, crack the large egg into the mixture, followed by the pure vanilla extract. Stir thoroughly until the egg is fully incorporated into the peanut butter mixture.
4. In another bowl, whisk together the baking soda, fine sea salt, and all-purpose flour. Gradually add this dry mixture to the wet ingredients, stirring gently until just combined. Take care not to overmix, as this can affect the texture of your cookies.
5. If you choose to include chocolate chips, fold them into the dough now, ensuring they are evenly distributed.
6. Using a tablespoon or a cookie scoop, portion out the dough onto the prepared baking sheet, making sure to leave about 2 inches of space between each cookie. Lightly flatten each mound of dough with the back of a fork, creating a charming crisscross pattern on top.
7. For an added burst of flavor, sprinkle a small pinch of coarse sea salt atop each cookie before baking, if desired.
8. Place the baking sheet in the preheated oven and bake for 10-12 minutes. The edges should be lightly golden while the centers remain soft; remember, the cookies will continue to firm up as they cool.
9. Once baked, remove the cookies from the oven and allow them to cool on the baking sheet for about 5 minutes. After that, transfer them to a wire rack to cool completely.
The preparation for these cookies is simple yet crucial for achieving that perfect texture. Since the cookie dough comes together quickly, it allows for a fun and rewarding baking experience. Keeping the baking process organized and following the steps carefully will ensure your cookies come out just right, with a delightful chew and melt-in-your-mouth quality that everyone will love.
Preparation Time
The total preparation time for these cookies is a quick 15 minutes, making them a perfect option for those who crave homemade treats without dedicating an entire afternoon. This swift prep time allows you to impress family and friends with freshly baked cookies in less than half an hour. It’s crucial to gather and measure out all your ingredients before you begin mixing; this ensures a smooth flow and prevents any last-minute scrambling.
Being organized not only increases your efficiency but also allows you to focus on the art of baking. Set out your mixing bowls, measuring cups, and utensils ahead of time. Preparing the baking sheet with parchment paper ensures you’re ready to place your cookies in the oven as soon as they’re mixed, minimizing downtime and making the baking process seamless.
Mixing the Dough
Mixing the dough is the heart of the cookie-making process and sets the foundation for the cookie texture. Begin by combining the creamy peanut butter, brown sugar, and granulated sugar in a large mixing bowl. Using a mixer or a sturdy spatula, incorporate these ingredients until you achieve a smooth and creamy mixture. This initial step is critical, as thoroughly blending these ingredients ensures an even distribution of flavors throughout the dough.
Once the peanut butter and sugars are combined, crack a large egg into the bowl and drizzle in pure vanilla extract. Stir vigorously until the egg is fully integrated. This step is important as it adds moisture and helps bind the cookie dough together.
Next, transition to mixing the dry ingredients. In a separate bowl, whisk together the baking soda, salt, and flour. This not only combines the ingredients but also aerates the flour, which is essential for achieving a light texture in the final cookies. When you add the dry mixture to the wet ingredients, do so gradually. Gently stirring the dry and wet components together until just combined is essential to avoid overmixing, which could lead to tougher cookies.
Incorporating the Dry Ingredients
When it comes time to incorporate the dry ingredients into the wet mixture, precision is key. Start by adding a small portion of the flour mixture to the peanut butter blend, stirring gently. The goal here is to combine without significantly overworking the dough. A light hand is critical; overmixing develops gluten in the flour, which results in cookies that can be overly tough rather than delightfully chewy.
Once the flour mixture is in, if you opt to include chocolate chips, it’s best to fold them in during this step. Gently turn the dough with a spatula or wooden spoon, allowing for even distribution while ensuring the dough remains tender. This method guarantees that each cookie will be a delicious blend of peanut-buttery goodness with pockets of chocolate (if chosen).
After this step, you will have a luscious, rich dough that is ready for shaping. The anticipation of transforming this wonderful mixture into cookies is part of the joy of baking, and with careful attention to detail, you’re set for cookie perfection.

Techniques for Portioning the Cookie Dough
When it comes to creating uniform cookies, consistency is key. Using a tablespoon or a cookie scoop can help in achieving evenly sized dough balls. A standard cookie scoop typically holds about 1.5 tablespoons of dough, making it an efficient tool for this purpose. For a more decorative and rustic look, you can opt for releasing the dough from your hands, rolling them into small balls before placing them on the baking sheet. This traditional technique gives your cookies a homemade touch, adding to their charm.
Importance of Spacing on the Baking Sheet
Proper spacing on the baking sheet is crucial to the success of your cookies. Leaving approximately 2 inches of space between each cookie allows for even baking and prevents them from merging into one another. As the cookies bake, the dough spreads, and without adequate room, you could end up with one giant cookie rather than distinct ones. The optimum distance assists in achieving that ideal baked texture and shape, ensuring each cookie has a nice, round form.
Creating the Crisscross Pattern with a Fork
The iconic crisscross pattern on top of peanut butter cookies is both decorative and functional. Not only does it create a visually appealing design, but it also helps the cookies to bake evenly. When you lightly flatten each mound of dough with the back of a fork, you increase the surface area, allowing the cookie to expand and cook through more uniformly. This old-fashioned technique connects back to the tradition of peanut butter cookie-making, allowing a long-standing charm to shine through in your baking.
Baking the Cookies
Prepping the Oven: Why Preheating is Crucial
Preheating your oven to 350°F (175°C) is a critical step in ensuring that your cookies bake properly. When you place dough into a non-preheated oven, it affects the initial rise and ultimately the texture of the cookie. A preheated oven allows the fats in the cookie dough to melt and disperse throughout the dough evenly, creating that delightful chewiness. Additionally, it helps to set the edges of the cookie, creating a perfect contrast between the outside and the inside.
Detailed Baking Instructions
Once you place your cookie sheet in the preheated oven, the baking time ranges between 10 to 12 minutes. As you approach the 10-minute mark, take the opportunity to observe them closely. After about 8 minutes, the cookies will begin to puff up slightly. This is the perfect moment to check for even browning on the edges, which indicates doneness. As discussed earlier, be mindful that the centers will appear softer; this is intentional as they will continue to firm up while cooling.
Time and Visual Cues for Doneness
Visual cues are essential when determining if your cookies are done. Look for lightly golden edges and slightly undercooked centers, which signifies that the cookies have retained that desired chewy texture. If you notice that the edges are darker than a golden color or the tops are too firm, it may indicate overbaking. The perfect doneness results in a cookie that is initially soft but achieves a lovely firmness as it cools.
Understanding Cookie Texture Changes While Cooling
The cooling process is vital to achieving the perfect texture. As cookies sit on the baking sheet, steam builds up, allowing them to set. This is why it’s essential to let them cool on the baking sheet for about 5 minutes before transferring them to a wire rack. During this time, the cookies remain soft and chewy in the center, while the outer edges gain a slight crispness, resulting in the melt-in-your-mouth experience that makes them delightful.
Cooling Process
Importance of Allowing Cookies to Cool on the Baking Sheet
Letting your cookies cool on the baking sheet creates the necessary environment for them to set properly. This brief resting period allows the cookies to finish baking in the residual heat of the pan, maintaining their softness and preventing them from breaking apart during the transfer. Cooling them on the baking sheet for 5 minutes helps retain moisture, which prevents them from becoming too dry.
Transferring to Wire Racks: Benefits for Texture and Taste
After the initial cooling on the baking sheet, transferring the cookies to a wire rack is essential for optimal texture. This method permits air circulation around the cookies, allowing them to cool evenly. It helps maintain the chewy center while preventing any sogginess from forming at the bottom. This step is particularly crucial when baking in batches, as it ensures that all cookies achieve the desired texture before serving.
Duration for Cooling and the Science Behind It
Cookies should ideally cool on the wire rack for about 20 to 30 minutes to achieve the best texture. During this time, the cookies continue to stabilize, solidifying their shapes and allowing the flavors to settle. While it may be tempting to dive right into the warm batch, patience pays off in the form of a superior cookie experience.
Presentation Tips
Creative Ideas for Serving the Cookies
Presentation can elevate your baking endeavors from average to exceptional. When arranging your cookies, consider using tiered platters or decorative trays, which add visual height and dimension. Surround your cookies with complimentary items like fresh fruit or dessert sauces to entice the palate visually.
Arranging on Plates
A simple yet effective way to present your cookies is to group them in odd numbers (e.g., 3 or 5 cookies) for a more appealing aesthetic. You can also alternate between cookies and a variety of treats, such as fudge brownies or mini cupcakes, to showcase an inviting dessert spread.
Using Powdered Sugar or Chocolate Drizzle for Decoration
Adding a dusting of powdered sugar can lend a rustic touch, providing a visual contrast against the golden-brown cookies. Drizzling melted chocolate, whether dark, milk, or white, can enhance both flavor and design, creating an eye-catching appeal. This dessert drama invites your guests to savor the experience before they even take a bite.
How Presentation Can Enhance the Eating Experience
The appearance of your cookies can significantly affect the overall eating experience. A well-presented plate invites curiosity and interest, enhancing the communal aspect of sharing cookies. Whether at gatherings, parties, or family meals, the visual allure can create excitement around your cookies before they are even tasted.
Flavor Profile
In-Depth Exploration of the Cookie’s Flavor
The flavor profile of melt-in-your-mouth chewy peanut butter cookies is a complex balance of ingredients that work harmoniously. The creamy peanut butter delivers a rich, nutty taste, while the brown and granulated sugars provide a sweet contrast that complements the natural saltiness of the peanut butter.
Balancing Sweetness from Sugars
The use of both brown and granulated sugars creates a depth of flavor. Brown sugar brings moisture and richness due to its molasses content, while granulated sugar contributes to the desired crispness at the edges. Together, this dynamic interplay ensures that the cookies are not overwhelmingly sweet but instead, celebrate the peanut butter flavor.
How Peanut Butter Lends Its Unique Taste
Peanut butter is the star ingredient, imparting a creamy texture and a characteristic flavor that is unmistakably comforting. The nutty notes work well with the sweetness of the sugars, creating an indulgent treat without any overwhelming flavors. The presence of optional chocolate chips can enhance the overall experience, introducing a contrast that rounds out the taste beautifully.
The Optional Addition of Chocolate Chips and Its Impact
While chocolate chips are optional, they add an extra layer of flavor that can elevate these cookies to another level. The semi-sweet chocolate offers a pleasant contrast to the nutty, sugary cookie base. The melty texture of the chocolate enhances the overall mouthfeel, ensuring a decadent bite.
Texture Analysis
Describing the Melt-in-Your-Mouth Quality
The melt-in-your-mouth quality of these cookies is a result of carefully balanced ingredients and precise baking techniques. The creamy peanut butter, along with the sugars, creates a tender structure that dissolves on the tongue. This unique texture makes them irresistible, as each bite offers both chew and yield.
Comparison to Other Cookie Textures
Unlike crunchy cookies which have a firmer bite, the chewy texture of these peanut butter cookies creates a more comforting experience. While some cookies are cake-like and airy, these maintain a dense structure that makes them hearty. The contrast between the soft centers and the slightly crisp edges is a defining characteristic of their delightful texture.
Factors Contributing to the Soft Center and Crispy Edges
The moisture from peanut butter, coupled with the presence of brown sugar, results in a soft cookie center. The baking time and temperature play crucial roles; underbaking slightly keeps the interiors chewy, while the surrounding heat creates the golden edges. Achieving this perfect balance is vital for replicating the melt-in-your-mouth feel.
Serving Suggestions
Pairing Ideas with Beverages
These cookies are versatile and can pair beautifully with a variety of beverages. A classic glass of cold milk complements the peanut butter flavor, while a steaming cup of coffee balances the sweetness. For a different experience, pair with herbal teas, which can provide a refreshing contrast.
Best Storage Methods for Keeping Cookies Fresh
To maintain the freshness of your cookies, store them in an airtight container at room temperature. This will protect them from exposure to air, which can cause them to dry out.
Short-Term vs. Long-Term Storage
For short-term storage, the cookies can last up to a week, staying soft and delicious. If you desire to extend their shelf life, consider freezing them. Place completely cooled cookies in a resealable plastic bag, removing as much air as possible before sealing. Properly frozen, they can last for up to three months while preserving their texture and taste.
Conclusion
The melt-in-your-mouth chewy peanut butter cookies offer a delightful blend of soft interiors and slightly crisp edges, making them a perfect treat for any occasion. The combination of creamy peanut butter and sugars creates a rich flavor, while the optional chocolate chips can enhance the overall experience. With a total prep and bake time of just 25 minutes, they are as quick to make as they are delicious.

Melt-in-Your-Mouth Chewy Peanut Butter Cookies
Ingredients
- 1 cup creamy peanut butter
- 1 cup packed brown sugar
- ½ cup granulated sugar
- 1 large egg
- 1 teaspoon pure vanilla extract
- 1 teaspoon baking soda
- ¼ teaspoon fine sea salt
- ½ cup all-purpose flour
- ½ cup semi-sweet chocolate chips
- coarse sea salt for finishing
Instructions
- Preheat your oven to 350°F (175°C) and line a baking sheet with parchment paper.
- In a large bowl, mix together peanut butter, brown sugar, and granulated sugar until smooth.
- Add the egg and vanilla extract, stirring until fully incorporated.
- In another bowl, whisk together baking soda, sea salt, and flour, then gradually add to the wet mixture.
- Fold in chocolate chips if using, ensuring even distribution.
- Scoop dough onto the baking sheet, leaving 2 inches between each cookie, and flatten slightly with a fork.
- Sprinkle coarse sea salt on top of each cookie if desired.
- Bake for 10-12 minutes until edges are golden and centers are soft.
- Let cool on the baking sheet for 5 minutes before transferring to a wire rack.