
Introduction
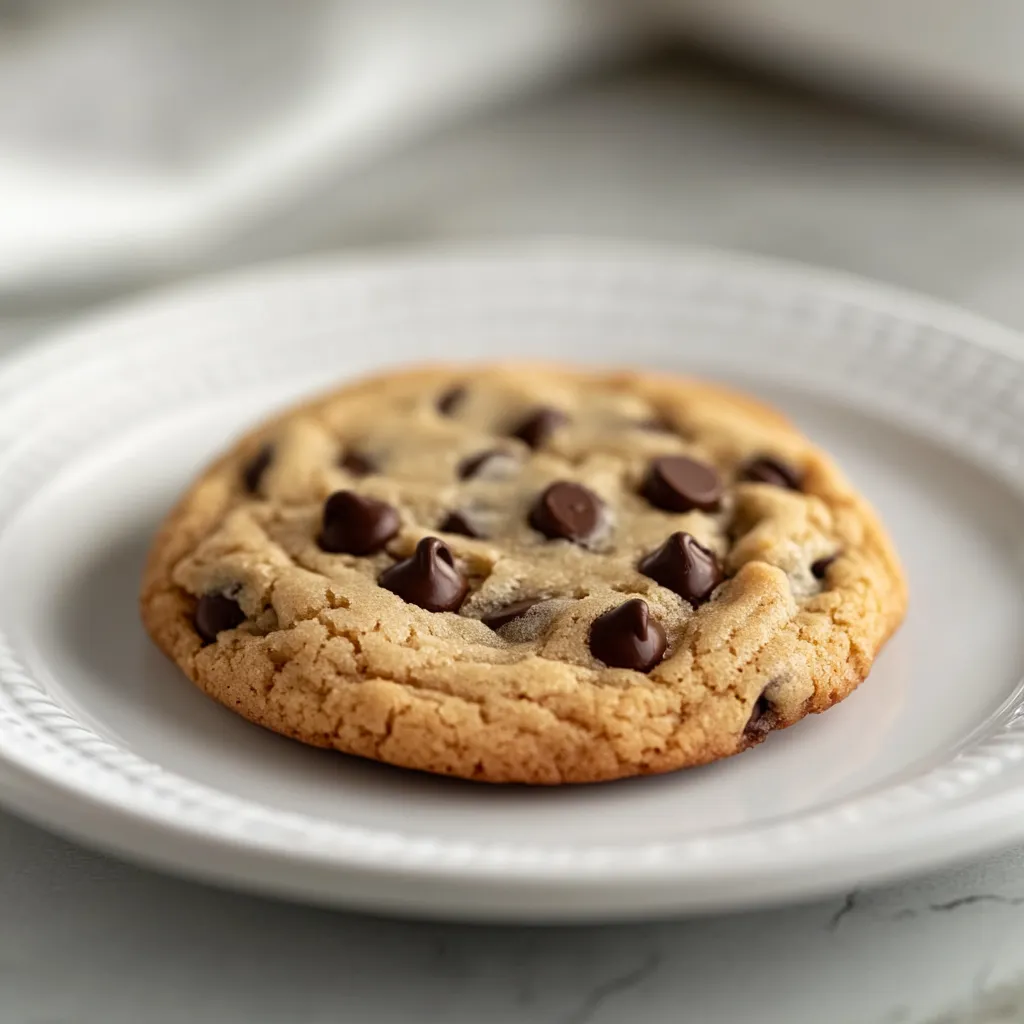
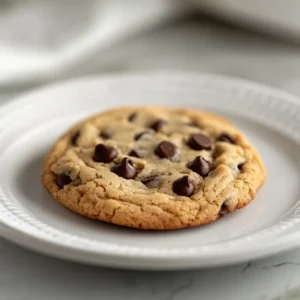
The classic chocolate chip cookie is an all-time favorite for cookie lovers, bringing warmth and nostalgia with each bite. Its roots date back to the 1930s, and since then, it has become a beloved treat enjoyed by people of all ages. This recipe will guide you through crafting the ultimate chocolate chip cookies that are soft, chewy, and bursting with chocolatey goodness. The perfect combination of flavor, texture, and aroma makes these cookies an ideal option whether you’re baking for a special occasion, a gathering with friends, or simply indulging yourself.
As the cookies bake, they fill your kitchen with a delightful aroma, creating a comforting atmosphere that draws everyone in. When they come out of the oven, their golden-brown edges and soft, chewy centers are a sight to behold, encouraging you to dig in while the cookies are still warm. The best part? These cookies are incredibly versatile—you can enjoy them as a sweet snack during the day, dessert after dinner, or even paired with a cold glass of milk to satisfy a late-night craving.
Recipe Overview
– Total Time: 25 minutes
– Prep Time: 15 minutes
– Baking Time: 9-11 minutes
– Yield/Servings: 24 cookies
– Difficulty: Not specified in the recipe
Ingredients
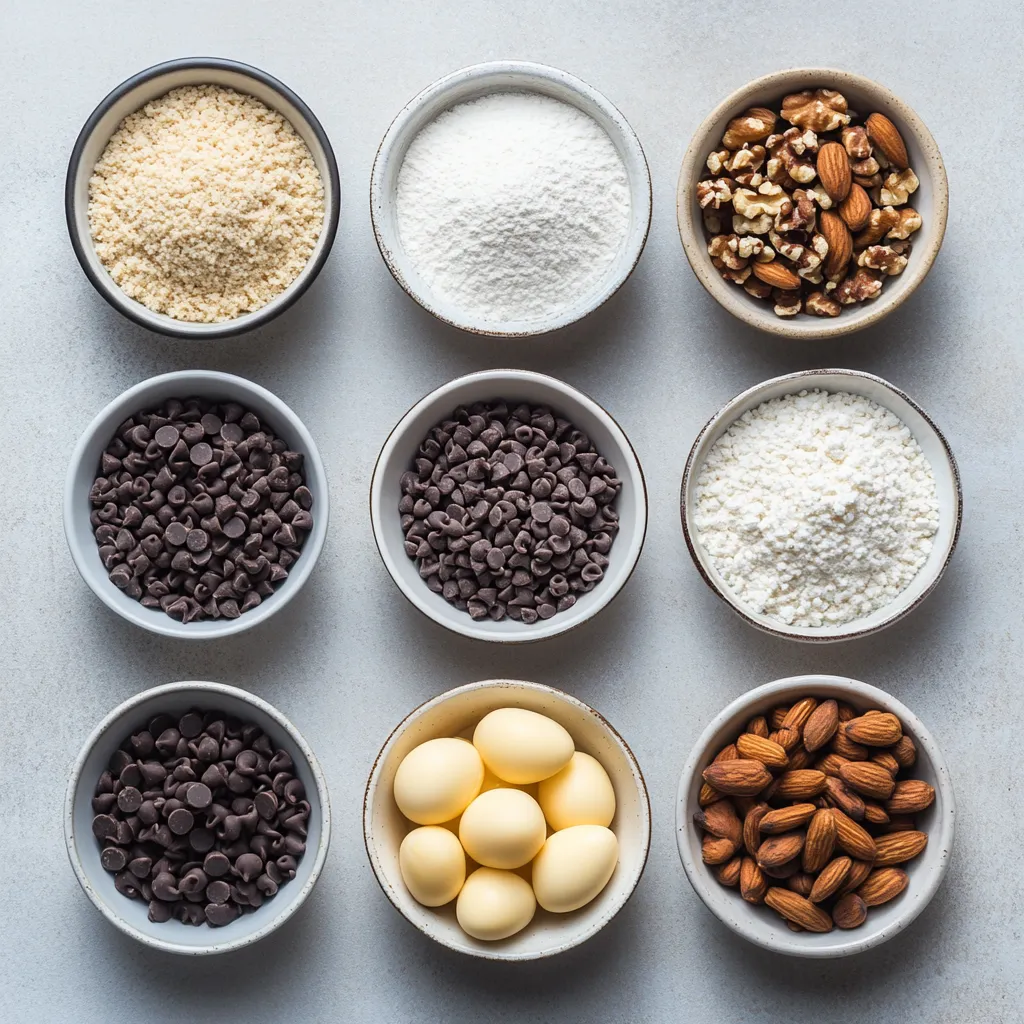
– 2 1/4 cups all-purpose flour
– 1/2 teaspoon baking soda
– 1 cup (2 sticks) unsalted butter, softened to room temperature
– 3/4 cup granulated sugar
– 3/4 cup packed brown sugar (light or dark, based on preference)
– 1 teaspoon salt
– 2 teaspoons pure vanilla extract
– 2 large eggs
– 2 cups semi-sweet chocolate chips
– 1 cup chopped nuts (optional; walnuts or pecans work well)
The recipe calls for basic yet essential components like all-purpose flour, baking soda, and both granulated and brown sugars, which work together to create the cookie’s structure and sweetness. It also includes unsalted butter for that rich and creamy texture the cookies are known for, alongside eggs which help bind the ingredients.
In terms of optional ingredients, the addition of chopped nuts can enhance texture and flavor but is entirely a personal choice. Walnuts or pecans are recommended, adding a satisfying crunch balancing out the softness of the cookie. Semi-sweet chocolate chips are the star of the show, melting into every bite and delivering a delightful burst of chocolate.
Baking Essentials
The quality of your ingredients is paramount when creating the ultimate classic chocolate chip cookies. Freshness counts; outdated flour or stale baking soda can affect the rise and texture of your cookies. Always choose high-quality chocolate chips because they significantly influence the overall flavor. The balance of buttery richness, sweet sugars, and the bittersweet notes of chocolate is what makes each bite of your cookies incredible.
For tools, a reliable electric mixer is essential for creaming butter and sugars together, creating the fluffy mixture that acts as a base for your cookie dough. You’ll also need a mixing bowl, a measuring cup, and spoons for measuring out your ingredients accurately. A whisk is recommended for combining the dry ingredients and a spatula for folding in chocolate chips and nuts gently.
When it comes to measuring, ensure you spoon flour into your measuring cup and level it off with a knife; this technique helps avoid packing the flour, which can lead to overly dry cookies.
Preparing Your Baking Environment
Setting the correct oven temperature is critical for baking cookies that are perfectly cooked. Preheating your oven to 375°F (190°C) allows for even baking, ensuring your cookie edges become golden and crisp while keeping the center soft and chewy.
Choosing the right baking tray can also make a notable difference. A standard flat baking sheet or a heavy-duty cookie sheet is ideal to facilitate even heat distribution. Avoid using dark-coated pans, as they can cause the cookies to brown too quickly.
For easy cleanup and to prevent sticking, lining your baking sheet with parchment paper or a silicone mat is highly recommended. These materials help in releasing the cookies effortlessly after baking, and they also contribute to even cooking by providing a non-stick surface.
Mixing the Dough
The method of mixing the dough is crucial to achieving the desired texture in your cookies. The creaming method is particularly effective because it incorporates air into the butter and sugars, creating a light and fluffy base. To start, ensure your butter is at room temperature; this will allow it to cream more effectively with the sugars. If you forget to take the butter out ahead of time, you can cut it into smaller cubes and microwave it for a few seconds until softened but not melted.
Incorporating the eggs and vanilla extract into the creamed butter mixture after it has reached the light, fluffy stage is essential for achieving a rich flavor. Mix each egg in thoroughly before adding the next to ensure a uniform mixture.
Once the wet ingredients are well blended, gradually mix in the dry component—your flour and baking soda mixture. Remember to mix gently until just combined; overmixing can lead to tough cookies. The pieces of flour should be just incorporated into the dough with no dry patches remaining.
Incorporating Chocolate and Nuts
Upon reaching the dough stage, it’s time to incorporate the star ingredients: semi-sweet chocolate chips and, if desired, chopped nuts. Adding semi-sweet chocolate chips brings a complimentary sweetness that balances the slightly salty flavor of the butter. These chips melt perfectly in the oven, creating gooey pockets throughout the cookie.
If you’re including nuts, be mindful about choosing the right type. Walnuts offer a soft crunch that pairs beautifully with chocolate, while pecans give a more buttery flavor. Whichever you choose, fold them gently into the dough using a spatula, ensuring that they are evenly distributed without overmixing. This step allows each cookie to have a balanced flavor profile, ensuring bites are consistently delicious.
Techniques for Portioning Cookie Dough
When it comes to portioning cookie dough, consistency is key. Using a cookie scoop can help achieve uniform sizes, ensuring that all cookies bake evenly. For this recipe, a tablespoon-sized scoop works well to create cookie portions that are manageable in size while allowing for an ideal spread. If you do not have a cookie scoop, a standard tablespoon can also suffice — just be sure to level it off for even portions.
After scooping, using your hands can give additional shape to the dough balls, ensuring that there are no cracks, which could affect the appearance and texture during baking. Lightly rolling the portions between your palms will create smooth, rounded balls that promote even baking. It’s also important to remember to reserve a small amount of dough for any taste-testing!
Importance of Spacing on the Baking Sheet for Even Baking
Spacing cookies properly on the baking sheet is crucial to ensure they bake evenly. Cookies will spread as they bake; therefore, leaving about 2 inches between each dough ball allows for adequate room to expand without merging into one another. This spacing helps to prevent uneven cooking, which can lead to some cookies being underbaked in the centers while others are overcooked at the edges. If baking multiple trays at once, it’s advisable to rotate them midway during baking for uniform heat distribution that results in evenly baked cookies.
Understanding Cookie Spread During Baking
The amount a cookie spreads during baking can be influenced by several factors, including the butter temperature, flour measurement, and even the type of baking sheet used. Using room temperature butter — as indicated in the recipe — enables the cookie to spread more evenly. If your cookies are spreading too much, it may indicate that the dough was overmixed or that it needs to chill before baking. Conversely, if your cookies don’t spread enough, it might be necessary to ensure the butter wasn’t too cold or that correct measurements were used.
Baking the Cookies
Optimal Baking Times and Indicators for Doneness
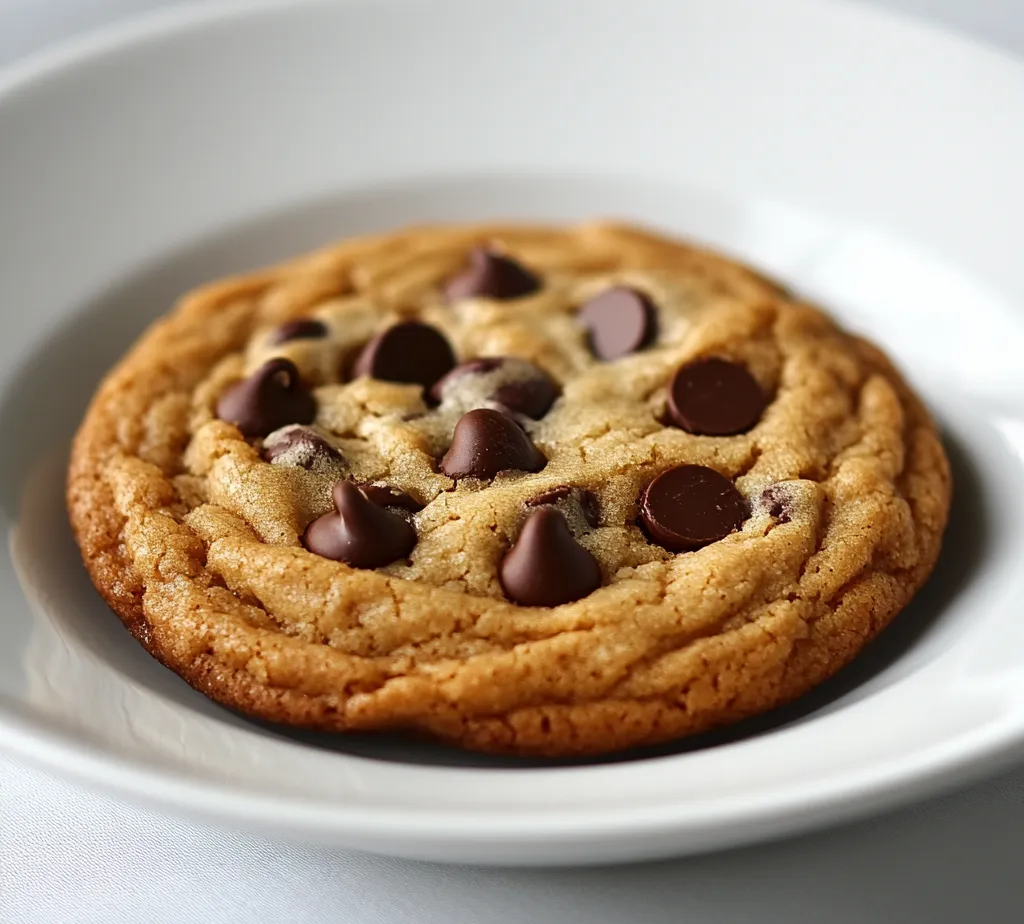
Baking times can vary from oven to oven; however, the general range for this recipe is between 9 to 11 minutes. During this time, visually inspect the cookies several minutes before the lower end of the recommended baking time. Look for golden brown edges with a slightly puffy center. The cookies will continue to cook after being removed from the oven due to residual heat, so they may look slightly underbaked in the centers — this is normal and desired for a chewy texture.
How to Achieve Golden Brown Edges and Soft Centers
Achieving the perfect balance of golden brown edges and soft centers requires careful attention to both the baking time and the oven temperature. If your cookies consistently come out too dark on the edges or too gooey in the center, consider lowering the oven temperature by 10-15 degrees Fahrenheit and extending the baking time slightly. This will help evenly distribute heat, promoting thorough baking without over-browning.
Tips for Managing Varying Oven Temperatures
Oven temperatures may differ from the dial setting, leading to inconsistent baking results. An oven thermometer can be a wise investment, providing accurate readings of the internal temperature. For those encountering issues with their oven’s performance, know that baking should be done in the center rack for even heat distribution. If you’re working with an older oven, it can be helpful to rotate the baking sheet halfway through the baking time for uniform results.
Cooling and Storing Cookies
Best Practices for Cooling Cookies on a Rack
After baking, allow the cookies to cool on the sheet for 2 minutes before transferring them to a wire rack. This initial cooling helps the cookies firm up slightly, making them less likely to break apart. Transferring them to a cooling rack allows for airflow underneath, preventing a soggy bottom and helping to retain their chewy texture.
Discussion on Texture Changes After Cooling
Cookies will undergo changes in texture as they cool. Initially soft and warm, they will firm up to provide a slightly chewy consistency. The outer edges may become crisply defined while retaining a deliciously soft center. Allowing the cookies to cool completely before storing is essential for maintaining their desired texture.
How to Store Cookies for Freshness
To store cookies and maintain their freshness for the longest possible period, place them in an airtight container at room temperature. When stacking, consider placing parchment paper between layers to prevent sticking and preserve textures. If you wish to store them for longer periods, consider freezing them. Arrange the cookies in a single layer on a baking sheet to freeze them individually before transferring them to a freezer-safe bag. Properly stored, cookies can maintain their quality for up to three months in the freezer.
Presentation Ideas
Creative Ways to Serve Chocolate Chip Cookies
Presentation elevates the enjoyment of these classic treats. Consider serving your cookies warm on a decorative platter alongside small bowls of toppings, such as sprinkles, chocolate sauce, or even whipped cream. For added sophistication, a light dusting of powdered sugar on top before serving can enhance their visual appeal.
Using Decorative Platters for a Festive Touch
Choose platters that complement the occasion. For a casual gathering, a rustic wooden board can accentuate the homemade quality of the cookies. For more formal events, elegant china or a shiny metal tray can create a refined atmosphere. The goal is to present the cookies in a manner befitting the gathering while being enticing to guests.
Pairing Cookies with Beverages or Sauces for Enhanced Enjoyment
Apart from the classic pairing with a glass of cold milk, consider serving chocolate chip cookies with coffee or hot cocoa for a rich flavor combination. An added twist would be to drizzle cookies with warm chocolate sauce for dipping. Alternatively, pairing them with fresh fruit, like strawberries or raspberries, can bring a refreshing contrast to the rich cookie flavor.
Variations on the Classic Recipe
Suggestions for Flavor Variations
Experimenting with chocolate chip selections can add new layers to the flavor profile. Consider using milk chocolate or dark chocolate chips, or even a combination for a unique taste. Additionally, trying flavored extracts such as almond or hazelnut can introduce subtle notes that perfectly complement the chocolate.
Exploring Alternative Nut Options
While walnuts and pecans are popular choices, consider substituting with slivered almonds or macadamia nuts for a different texture and flavor. Almonds provide a delicate crunch, while macadamias bring a rich creaminess that pairs harmoniously with chocolate.
How to Modify the Recipe for Dietary Preferences
This recipe does not currently account for gluten-free options; however, using a gluten-free all-purpose flour blend can yield satisfying outcomes. Ensure the blend includes binding agents typically absent in gluten-free flours, such as xanthan gum. For those looking to reduce sugar intake, consider substituting some of the granulated sugar for a natural sweetener, keeping in mind that such modifications may alter texture and taste.
Ideal Pairings
Best Beverages to Accompany Chocolate Chip Cookies
Classic choices for beverages include cold milk and coffee, both of which beautifully complement the rich chocolate flavors of the cookies. Herbal teas or chai can provide a lovely contrast with their aromatic spice notes.
Unique Serving Suggestions That Elevate the Cookie Experience
Beyond traditional servings, consider crafting cookie ice cream sandwiches by layering a scoop of your favorite ice cream between two cookies. This transformation not only enhances the indulgence but also offers a fun twist that appeals to all ages.
Complementary Desserts That Work Well Alongside Chocolate Chip Cookies
When hosting a dessert spread, chocolate chip cookies can easily be paired with lighter treats such as fruit tarts or cheesecakes. The contrasting flavors and textures create a well-rounded dessert experience sure to please a variety of palates.
Conclusion
These ultimate classic chocolate chip cookies embody a perfect balance of flavor and texture, offering a delightful treat that everyone will enjoy. With a quick preparation time of just 15 minutes and a total of 25 minutes to completion, you’ll find these cookies are not only delicious but also easy to make. Enjoy the soft, chewy centers and the delightful crunch of chocolate and nuts throughout these timeless favorites.
Ultimate Classic Chocolate Chip Cookies
Ingredients
- 2 ¼ cups all-purpose flour
- ½ teaspoon baking soda
- 1 cup unsalted butter softened
- ¾ cup granulated sugar
- ¾ cup packed brown sugar
- 1 teaspoon salt
- 2 teaspoons pure vanilla extract
- 2 large eggs
- 2 cups semi-sweet chocolate chips
- 1 cup chopped nuts optional
Instructions
- Preheat your oven to 375°F (190°C) and prepare a baking sheet.
- In a medium bowl, whisk together the flour and baking soda.
- In a large bowl, cream the softened butter with granulated and brown sugars until light and fluffy.
- Add the vanilla extract and eggs one at a time, mixing well after each addition.
- Gradually mix in the dry flour mixture until just combined.
- Fold in the chocolate chips and nuts, if using.
- Drop rounded portions of dough onto the baking sheet, spacing them 2 inches apart.
- Bake for 9-11 minutes until golden brown around the edges.
- Let the cookies cool on the baking sheet for 2 minutes before transferring to a wire rack.
- Enjoy your cookies with a glass of cold milk.