

Introduction
Delve into the world of delectable desserts with the delightfully sweet Hershey Kiss Delight Cookies. These cookies are not just a treat for the taste buds but also an eye-catching addition to any dessert table. Combining rich flavors of chocolate and a buttery cookie base, they’re bound to become a favorite. Each bite offers a perfect balance of sweetness, creating a delightful experience that appeals to children and adults alike. The charming presentation with a melting Hershey’s Kiss on top makes these cookies perfect for parties, family gatherings, or just a cozy night in when you need a little something sweet.
Baking is often seen as a therapeutic activity, and making Hershey Kiss Delight Cookies can be a heartwarming way to spend time in the kitchen. Not only is the process straightforward, but the results are also consistently rewarding. The delightful combination of cookie dough and chocolate brings warmth and happiness to any occasion, and sharing these cookies will surely elicit smiles all around. Whether you are planning a holiday celebration, a potluck, or simply indulging yourself, these cookies are sure to impress.
Recipe Overview
– Prep Time: 15 minutes
– Cook Time: 12 minutes
– Total Time: 27 minutes
– Course: Dessert
– Cuisine: American
– Servings: 24 cookies
– Calories: ~150 per cookie
Hershey Kiss Delight Cookies are an American dessert that charm with their melt-in-your-mouth texture and irresistible chocolate surprise. This recipe yields 24 cookies, perfect for gatherings or as a sweet snack at home. With a simple ingredient list and straightforward steps, they can be whipped up in just 27 minutes from start to finish.
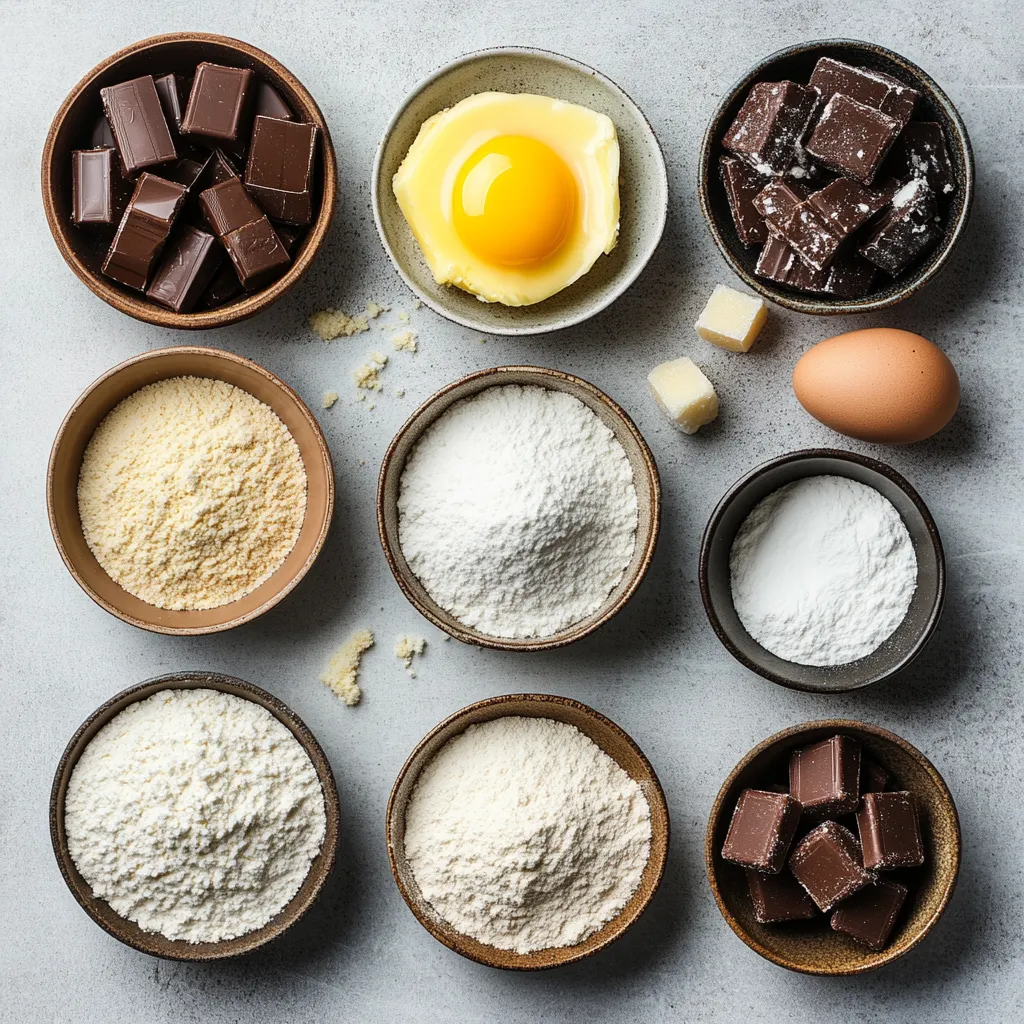
Ingredients
– Unsalted butter, softened to room temperature
– Granulated sugar
– Packed brown sugar
– Large eggs
– Pure vanilla extract
– All-purpose flour
– Baking soda
– Salt
– Unwrapped Hershey’s Kisses
Instructions
1. Begin by preheating your oven to 350°F (175°C) to ensure it’s hot and ready for baking.
2. In a large mixing bowl, combine the softened butter, granulated sugar, and brown sugar. Using a hand mixer or a stand mixer, beat the mixture on medium speed until it becomes light and fluffy, which should take about 3-4 minutes.
3. Add the eggs one at a time, mixing well after each addition. Follow by incorporating the vanilla extract, ensuring a smooth batter.
4. In a separate bowl, whisk together the all-purpose flour, baking soda, and salt until evenly combined.
5. Gradually add the dry ingredients to the wet mixture, stirring gently until just combined. Be careful not to overmix to keep the cookies tender.
6. Using your hands, roll the dough into 1-inch balls. Place the cookie dough balls on a baking sheet lined with parchment paper, spacing them about 2 inches apart to allow for spreading.
7. Bake in the preheated oven for 10-12 minutes, or until the edges of the cookies are lightly golden brown. Keep an eye on them to avoid overbaking.
8. As soon as the cookies are out of the oven, press a Hershey’s Kiss firmly into the center of each cookie while they are still warm, allowing it to melt slightly into the cookie.
9. Let the cookies cool on the baking sheet for about 5 minutes before transferring them to a wire rack to cool completely. This will help them set without breaking.
10. Serve your delightful Hershey Kiss Cookies fresh with a cold glass of milk or your favorite beverage for the perfect treat!
Baking Preparation
Preheating the Oven
Preheating the oven is a crucial first step in baking. It ensures that your cookies bake evenly and helps achieve that desirable texture—crunchy on the outside and soft on the inside. The optimal baking temperature for these Hershey Kiss Delight Cookies is 350°F (175°C). This temperature allows the cookies to rise properly and develop a beautiful golden brown color on the edges without becoming overly crispy.
Gathering Ingredients
Before you dive into mixing and baking, it’s smart to gather all your ingredients. Each component plays a role in the final taste and structure of your cookies. For instance, using unsalted butter allows you better control over the saltiness of the cookies. Granulated sugar and brown sugar together create a perfect balance of sweetness, while eggs provide moisture and bind everything together. A checklist can help streamline this process—simply mark off each item to ensure you won’t forget a crucial ingredient.
Mixing the Batter
Creaming Butter and Sugars
The first significant step in creating a cookie dough that’s light and fluffy is creaming the butter with both types of sugar. Start with softened unsalted butter; it should be at room temperature for easier mixing. When you combine the butter with granulated sugar and brown sugar, use a hand mixer or stand mixer to beat the mixture on medium speed. This technique incorporates air into the batter, creating a fluffy texture that’s essential for delicious cookies. Aim for a mixing time of about 3-4 minutes, watching as your mixture becomes light and pale.
Adding Eggs and Vanilla
Once you achieve the fluffy consistency, it’s time to add the eggs and vanilla extract. Incorporate the eggs one at a time, mixing well after each addition. This method helps ensure that the eggs are fully integrated for a smoother batter. Vanilla extract plays an essential role in flavor enhancement, contributing a rich, warm note to the cookies. Without this critical ingredient, the sweetness of the sugars can overpower the overall flavor, so give it the respect it deserves by ensuring it’s evenly mixed into the batter.
Combining Dry Ingredients
Whisking Techniques
The dry ingredients—flour, baking soda, and salt—are just as important to the final product as the wet ingredients. Whisking these together helps to evenly distribute the leavening agent and salt, preventing any one cookie from being overly salty or not rising properly. Proper incorporation is key to achieving that ideal cookie texture. When preparing to add these dry elements to your wet mix, it’s best to do a thorough job — this won’t only ensure uniform distribution but will also contribute to the overall structural integrity of your cookies.
Preparing for Wet and Dry Mixtures
As you prepare to mix the dry and wet mixtures together, a few tips can help ensure the best outcome. Gradually add the dry ingredients to the wet mixture to avoid clumping, and gently fold the two together. Be mindful not to overmix the dough. Overmixing can lead to tough cookies rather than tender ones; the delicate balance of combining these mixtures is crucial for producing a soft and chewy cookie, which is what everyone loves about Hershey Kiss Delight Cookies.
Forming the Cookies
Rolling the Dough
Once your cookie dough is ready, it’s time to shape it into cookies. Using your hands, roll the dough into 1-inch balls. Uniformity in size is important; the ideal size ensures even baking and a consistent look. Arrange the cookie dough balls on a baking sheet lined with parchment paper, ensuring there is about 2 inches of space between each ball. This distance is necessary as the cookies will spread during baking, ensuring that they don’t merge into one another but retain their distinct shapes.
Arranging on Baking Sheet
When preparing to bake your Hershey Kiss Delight Cookies, the arrangement of the dough balls on your baking sheet is crucial to achieving the right texture and appearance. The cookies will spread as they bake, so it’s important to space them correctly. When placing the cookie dough balls, ensure they are about 2 inches apart. This spacing allows for enough room for the cookies to expand without merging together.
Using parchment paper is recommended for baking these cookies. It not only prevents sticking but also facilitates even cooking and easy clean-up. The paper acts as a barrier between the hot baking sheet and your cookie dough, resulting in evenly baked goodies with a beautifully soft bottom. This step is essential for ensuring that your cookies retain their shape and texture while baking.
Baking the Cookies
The actual baking of the cookies is where the magic happens, and monitoring the baking time is vital. Begin checking your cookies at around 10 minutes. The ideal cookies will have edges that turn lightly golden brown while remaining soft and slightly underbaked in the center. This contributes to that delicious gooey texture everyone loves in a cookie.
To avoid overbaking, consider rotating your baking sheet halfway through the baking time. Ovens may have hot spots, and this rotation helps achieve an even bake across your cookies. You might also want to keep an eye on the color change, as relying solely on time can sometimes lead to unexpected results.
Cooling Techniques
After you’ve taken the cookies out of the oven, the cooling process plays a significant role in the final product. Allow the cookies to cool on the baking sheet for about 5 minutes. This resting time helps the cookies set without breaking apart. The residual heat from the baking sheet continues to cook the bottom of the cookies slightly, ensuring they are perfectly chewy.
Once the cookies have cooled sufficiently, it’s crucial to transfer them to a wire rack. This step allows air to circulate around the cookies, preventing them from becoming soggy on the underside. Cooling completely on the rack will help maintain that delightful texture you’ve worked so hard to achieve.
Kissing the Cookies
The most delightful part of making Hershey Kiss Delight Cookies is the addition of the Hershey’s Kisses. It’s essential to press the chocolate into the cookie right after they come out of the oven. The warmth of the cookie will slightly melt the chocolate, creating that irresistible combination of cookie and chocolate.
Pressing the Hershey’s Kisses
Timing is key when adding the Hershey’s Kisses. As soon as your cookies are out of the oven, firmly press one unwrapped Hershey’s Kiss into the center of each warm cookie. The gentle warmth will cause the underside of the chocolate to melt just enough to adhere to the cookie. Be careful not to apply too much pressure; you want the chocolate to sink in without breaking through the bottom.
The Melting Effect
The interaction between the warm cookies and the Hershey’s Kisses not only enhances the flavor but also adds a visually appealing factor to your treat. The melted chocolate creates a smooth surface that looks luscious and inviting, making these cookies even more tantalizing. This effect symbolizes indulgence and helps them stand out, whether you’re serving them at a gathering or enjoying them as a delightful snack at home.
Serving Suggestions
Once your cookies are baked and cooled, it’s time to think about serving them. Presentation plays a significant role in adding to the enjoyment of your dessert.
Presentation Ideas
To create an attractive display of your Hershey Kiss Delight Cookies, consider arranging them on a decorative plate. You can sprinkle colorful sprinkles or chocolate shavings around the cookies to provide contrast and add a touch of elegance. Additionally, serving them with a small glass of milk beside the cookies can create a charming and inviting presentation that guests will love.
Perfect Pairings
These delectable cookies pair wonderfully with a variety of beverages. A cold glass of milk is a classic choice, but you might also consider serving them alongside coffee or hot chocolate for a more decadent treat. Ideal occasions for serving these cookies include parties, holiday gatherings, or simply as a delightful after-school snack.
Tips for Success
Baking can sometimes be tricky, and a few tips can go a long way in ensuring your cookies turn out perfectly every time.
Baking Tips
Common mistakes include overmixing the dough, which can lead to dense cookies. Remember to mix until just combined to maintain softness. Additionally, if you bake at a high altitude or in humid climates, adjustments to the flour and sugar proportions may be necessary. You might need to experiment to find the right balance for the perfect cookie texture.
Storing Cookies
Proper storage is crucial for maintaining the freshness of your Hershey Kiss Delight Cookies. To keep them soft and delicious, store them in an airtight container. You can also layer them with parchment paper to prevent sticking. For long-term storage, consider freezing them. Place the cooled cookies in a resealable plastic bag, and they can be stored in the freezer for several weeks.
Variations and Customizations
If you want to mix things up a bit, there are plenty of ways to customize your cookies.
Flavor Enhancements
Consider adding a touch of nutmeg or cinnamon to your dough for a subtle flavor twist. These spices can elevate your cookies’ taste profile, giving them a warm and inviting flavor. You can also explore using alternate chocolate options, such as caramel-filled Kisses or dark chocolate varieties for a different experience.
Dietary Adjustments
For those with dietary restrictions, gluten-free alternatives can be used to create a suitable cookie choice. Gluten-free flour blends work well as a substitute in this recipe. If you’re looking to make them dairy-free, coconut oil can replace the butter, bearing in mind that it may alter the final texture slightly. You can also adjust sugar levels to create a lower-sugar version without compromising flavor too much.
Conclusion
Hershey Kiss Delight Cookies provide a delightful taste experience with a soft, buttery texture melted by delicious chocolate. With a prep time of just 15 minutes and a cook time of 12 minutes, they are a quick and rewarding dessert option that everyone will enjoy. Their versatility allows for numerous variations, ensuring that they can suit many occasions and preferences.

Hershey Kiss Delight Cookies: A Homemade Sweet Treat
Ingredients
- 1 cup unsalted butter softened
- 1 cup granulated sugar
- 1 cup packed brown sugar
- 2 large eggs
- 2 teaspoons pure vanilla extract
- 3 cups all-purpose flour
- 1 teaspoon baking soda
- ½ teaspoon salt
- 1 cup unwrapped Hershey's Kisses
Instructions
- Preheat your oven to 350°F (175°C).
- In a large bowl, combine softened butter, granulated sugar, and brown sugar. Beat until light and fluffy.
- Add eggs one at a time, mixing well after each addition. Incorporate vanilla extract.
- In a separate bowl, whisk together flour, baking soda, and salt.
- Gradually add dry ingredients to the wet mixture, stirring gently until just combined.
- Roll the dough into 1-inch balls and place on a lined baking sheet, spacing 2 inches apart.
- Bake for 10-12 minutes until edges are lightly golden brown.
- Press a Hershey's Kiss into the center of each cookie while warm.
- Cool on the baking sheet for 5 minutes before transferring to a wire rack.
- Serve fresh with a cold glass of milk.