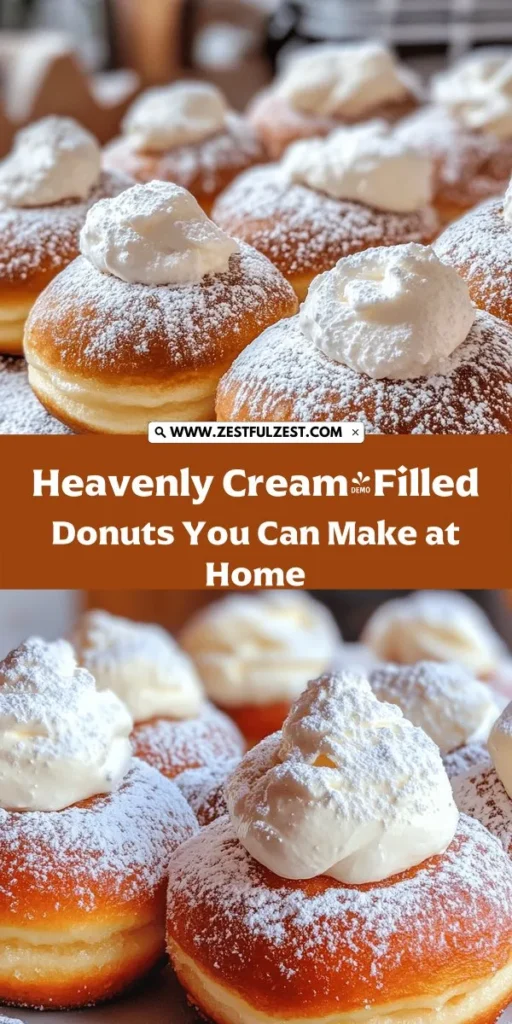
Indulging in a freshly made donut is one of life’s simple pleasures. When that donut is cream-filled, it elevates the experience to heavenly heights. The combination of a crispy exterior and a luscious cream filling creates a treat that is perfect for breakfast, dessert, or any time you crave a sweet moment. In this article, we will provide a detailed step-by-step guide to crafting these delightful treats from scratch, ensuring they are sure to impress your family and friends.
Understanding the Ingredients
Before diving into the donut-making process, it’s essential to familiarize yourself with the key ingredients that contribute to the irresistible nature of these heavenly cream-filled donuts. Each component plays a specific role in achieving the perfect texture and flavor, making them a culinary delight.
All-Purpose Flour
All-purpose flour is the building block of our donuts. Its moderate protein content provides the right balance between tenderness and structure, resulting in a soft and fluffy texture. For the best results, ensure you measure your flour accurately; spooning it into the measuring cup and leveling it off is the recommended technique to avoid dense donuts.
Granulated Sugar
Granulated sugar is crucial for sweetness and contributes to the browning of the donuts during frying. The sugar not only enhances the flavor but also plays a role in the texture, helping to create that nice, crispy exterior that we all love.
Active Dry Yeast
Active dry yeast is the leavening agent responsible for giving our donuts their airy quality. This ingredient ferments and produces carbon dioxide, which causes the dough to rise. To activate the yeast properly, it’s important to use warm milk—not hot, as excessive heat can kill the yeast.
Whole Milk
Whole milk adds moisture and richness to the dough, making the donuts tender and flavorful. The fat content in whole milk also contributes to the overall richness, which is essential for a satisfying donut experience.
Unsalted Butter
Unsalted butter enhances the flavor and tenderness of the donuts. Using unsalted butter allows you to control the salt content in your recipe, ensuring that your donuts are perfectly seasoned.
Eggs
Eggs provide structure and richness to the donuts. They help bind the ingredients together and contribute to the overall flavor and texture. For the best results, use room temperature eggs, as they incorporate more easily into the dough.
Salt
Salt may seem like a small ingredient, but it plays a significant role in balancing sweetness and enhancing overall flavor. A pinch of salt in the dough can elevate the taste of your donuts, ensuring they are well-rounded and delicious.
Heavy Cream
Heavy cream is the star ingredient for the filling, offering a rich and creamy texture that takes these donuts to another level. When whipped, heavy cream transforms into a light, airy filling that complements the donut perfectly.
Powdered Sugar
Powdered sugar is used for sweetening the whipped cream and for dusting the finished donuts. Its fine texture allows it to dissolve easily, creating a smooth and sweet filling.
Vanilla Extract
Vanilla extract adds aromatic flavor to the cream filling, elevating its deliciousness. Using pure vanilla extract rather than imitation enhances the overall flavor profile of the donuts.
Vegetable Oil
Vegetable oil is ideal for frying donuts, as it has a high smoke point that allows for even cooking and a perfect golden-brown crust. Using a neutral oil ensures that the flavor of the donuts remains front and center.
Preparation Steps for Heavenly Cream-Filled Donuts
Now that we know our ingredients, it’s time to delve into the preparation steps for making heavenly cream-filled donuts. Each step is crucial to achieving the perfect donut, and following them carefully will yield delicious results.
Activating the Yeast
The first step in making donuts is activating the yeast. Begin by gently warming the whole milk to about 110°F (43°C). This temperature is warm enough to activate the yeast without killing it. In a small bowl, combine the warm milk with the active dry yeast and a teaspoon of granulated sugar. Allow this mixture to sit for about 5-10 minutes until it becomes frothy. This foaming action indicates that the yeast is active and ready to work its magic in your dough.
Mixing the Dough
Once the yeast is activated, it’s time to mix the dough. In a large mixing bowl, combine the all-purpose flour, remaining granulated sugar, and salt. Make a well in the center and add the yeast mixture, room temperature eggs, and melted unsalted butter. Using a wooden spoon or a dough hook attachment on a stand mixer, mix the ingredients until they come together and form a shaggy dough.
Kneading
Kneading is a vital step in developing gluten, which gives the donuts their structure. If you’re using a stand mixer, knead the dough on medium speed for about 5-7 minutes until it’s smooth and elastic. If you prefer kneading by hand, transfer the dough to a lightly floured surface and knead it for about 8-10 minutes. The dough should be soft and slightly tacky, but not overly sticky. If it’s too sticky, gradually add a little more flour until you reach the desired consistency.
First Rise
After kneading, place the dough in a lightly greased bowl, cover it with plastic wrap or a clean kitchen towel, and let it rise in a warm, draft-free area. This first rise is crucial, as it allows the dough to double in size, typically taking about 1 to 1.5 hours. You’ll know it’s ready when you can press a finger into the dough, and it springs back slowly.
Shaping the Donuts
Once the dough has risen, it’s time to shape the donuts. Turn the dough out onto a lightly floured surface and gently punch it down to release any air bubbles. Roll the dough out to about 1/2 inch thick. Using a donut cutter or two round cookie cutters (one larger and one smaller), cut out donut shapes. Make sure to cut a hole in the center of each donut to allow even frying. Place the shaped donuts on a parchment-lined baking sheet, leaving enough space between each one for rising.
Second Rise
Cover the shaped donuts with a clean kitchen towel and allow them to rise for an additional 30-45 minutes. During this time, they will puff up and become airy, which is essential for achieving that light and fluffy texture.
Frying
Prepare to fry your donuts by heating vegetable oil in a deep pot or fryer to 375°F (190°C). Carefully lower the donuts into the hot oil, a few at a time, being cautious not to overcrowd the pot. Fry each donut for about 1-2 minutes on each side, or until they achieve a beautiful golden-brown color. Use a slotted spoon to remove the fried donuts and transfer them to a paper towel-lined plate to drain excess oil.
Whipping the Cream
While the donuts are cooling, it’s time to prepare the cream filling. In a mixing bowl, combine heavy cream, powdered sugar, and vanilla extract. Using a hand mixer or stand mixer, whip the cream on medium-high speed until stiff peaks form. This whipped cream should be light and airy, perfect for filling your donuts.
With the donuts fried and the cream whipped, you’re now ready to assemble your heavenly cream-filled donuts. Stay tuned for the next part of this article, where we will guide you through the final steps of filling and finishing your donuts, ensuring they are as delectable as they are beautiful!

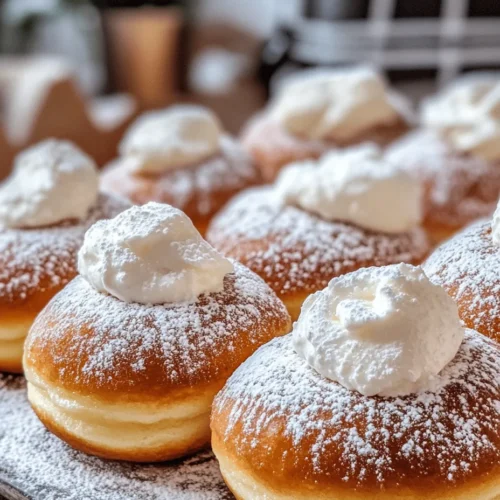
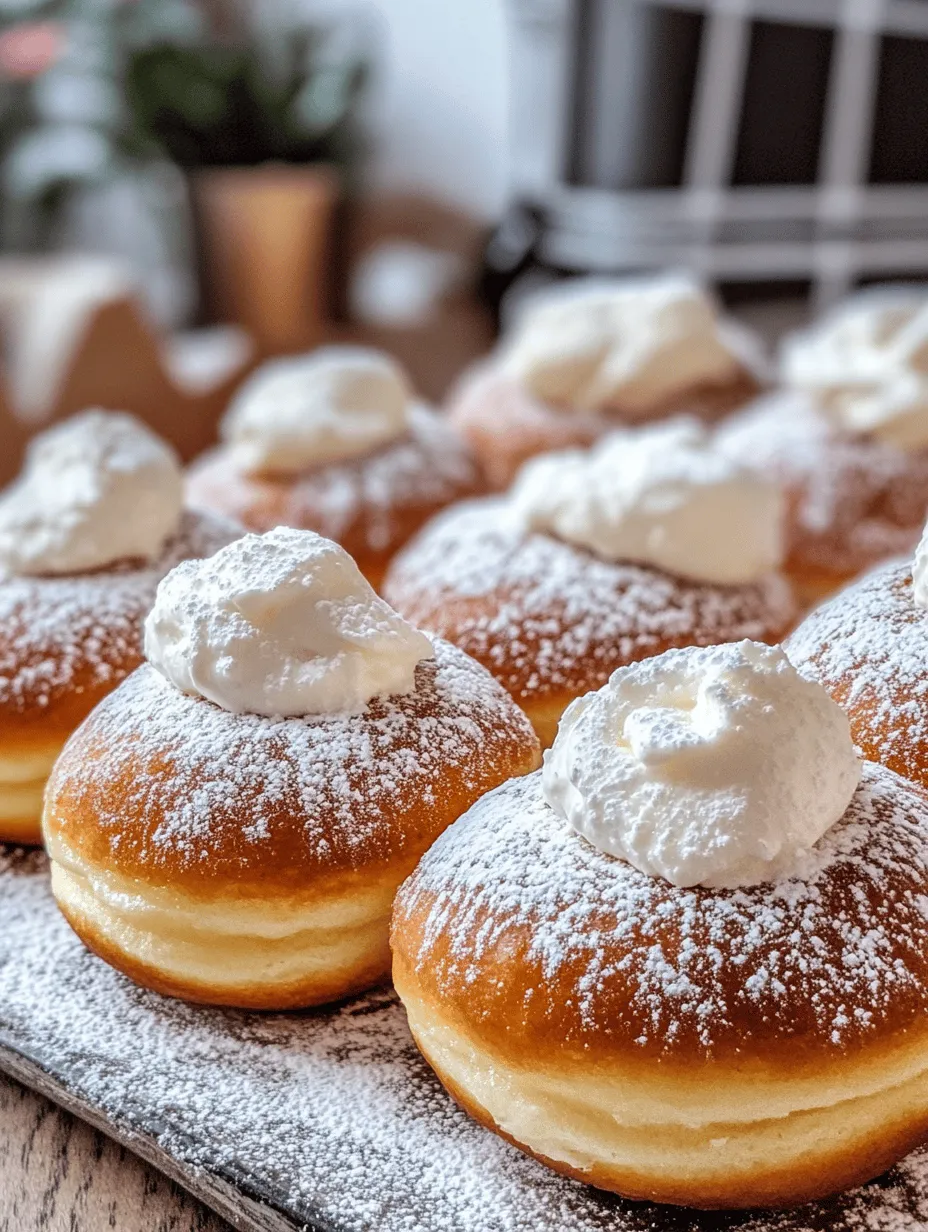
Filling the Donuts: Ensuring Each Donut is Generously Filled
Once your donuts are perfectly fried and cooled, it’s time for the most exciting part — filling them with cream! The filling process can be done using several methods, each ensuring that your donuts are generously filled without making a mess.
1. Piping Method: The most popular method involves using a piping bag fitted with a long, thin nozzle. Simply insert the nozzle into the side of the cooled donut and squeeze gently, allowing the cream to fill the donut until you feel it give way slightly. Take care not to overfill, as this can lead to leaks.
2. Basting Method: For a more rustic approach, you can use a squeeze bottle filled with cream. Puncture a small hole in the side of the donut, insert the nozzle, and squeeze to fill. This method is less precise but can be easier if you don’t have a piping bag.
3. Cutting Method: If you prefer a more visual presentation, consider slicing the donuts in half and spreading a generous layer of cream on the bottom half, then placing the top back on. This method allows for a beautiful display of the creamy interior.
Dusting: The Finishing Touch
The dusting of powdered sugar or cocoa powder is not only a classic finishing touch but also adds a beautiful presentation to your heavenly cream-filled donuts. Here are some techniques to achieve an even dusting:
1. Use a Sifter: Place your powdered sugar in a fine-mesh sieve or sifter. Hold it above the donuts and gently tap the side to create a light, even dusting across the surface.
2. Shake Method: If you don’t have a sifter, you can place powdered sugar in a small jar with holes in the lid and shake it gently over the donuts for an even coating.
3. Flavor Variations: Consider mixing cocoa powder with powdered sugar for a chocolatey twist, or experiment with cinnamon sugar for a warm, spiced flavor.
Frying Techniques for Perfect Donuts
The frying process is critical to achieving the perfect texture and flavor in your donuts. Here’s an in-depth look at the essential frying techniques:
Choosing the Right Oil
When it comes to frying donuts, selecting the right oil is crucial. Vegetable oil is commonly preferred due to its high smoke point and neutral flavor, making it ideal for frying. Alternatives like canola oil or peanut oil can also work well, but be mindful of any allergies. Avoid oils with low smoke points, such as olive oil, as they can impart unwanted flavors and may not withstand high frying temperatures.
Temperature Control
Maintaining the correct frying temperature is vital for achieving golden-brown, fluffy donuts. The ideal frying temperature is between 350°F to 375°F (175°C to 190°C). Use a deep-fry thermometer to monitor the oil temperature closely. If the oil is too cool, the donuts will absorb excess oil, becoming greasy; if it’s too hot, they may brown too quickly without cooking through.
Batch Frying
Frying donuts in batches allows for better control over temperature and ensures each donut is cooked evenly. Avoid overcrowding the fryer, as this can reduce the oil temperature significantly. Fry in small batches, allowing enough space for the donuts to float freely and cook evenly. Aim for about 3-4 donuts per batch, depending on the size of your fryer.
Whipping the Cream: Achieving the Perfect Consistency
The filling of your heavenly donuts is only as good as the whipped cream you create. Here’s how to whip cream to perfection:
Importance of Cold Ingredients
Start with cold heavy cream for the best results. Chilling the bowl and beaters in the refrigerator for about 15 minutes before whipping can help achieve a better volume and stability in your whipped cream. The cold temperature prevents the fat in the cream from melting during whipping, enabling it to hold air better.
Gradual Sugar Addition
When adding powdered sugar to your cream, do so gradually. Start by whipping the cream on medium speed until soft peaks begin to form, then slowly sift in the powdered sugar while continuing to whip. This technique helps to incorporate the sugar evenly without deflating the cream, resulting in a smooth, sweet filling.
Flavoring the Cream
To enhance the flavor of your whipped cream, consider adding a splash of vanilla extract. A teaspoon or two of pure vanilla extract will elevate the taste and provide a lovely aroma. You can also experiment with other flavorings, such as almond extract or citrus zest, to customize the filling to your preference.
Presentation and Serving Suggestions
Once your donuts are filled and dusted, it’s time to think about how to present them. Here are some ideas to make your heavenly cream-filled donuts a showstopper:
Dusting with Powdered Sugar
For an elegant touch, dust your filled donuts with powdered sugar just before serving. This not only adds a beautiful finish but also makes the donuts look inviting. To avoid excess sugar, dust them in batches and serve immediately.
Plating Ideas
Consider creative plating options when serving your donuts. Arrange them on a large platter, stacking some for height, or display them in a tiered stand for a stunning visual effect. You can also serve them alongside fresh berries or drizzles of chocolate sauce for added flair.
Pairing Suggestions
Pair your heavenly cream-filled donuts with a variety of beverages for a delightful experience. Coffee or espresso complements the sweet flavors beautifully, while a glass of cold milk is a classic choice. For a refreshing twist, consider serving them with herbal tea or a fruit-infused iced tea.
Common Mistakes to Avoid
When making heavenly cream-filled donuts, there are a few common pitfalls to be aware of:
Over or Under Kneading
Properly kneading the dough is crucial for developing gluten, which gives donuts their fluffy texture. Signs of over-kneading include a tough texture, while under-kneaded dough may result in dense donuts. Aim for a soft, elastic dough that springs back when gently pressed.
Incorrect Oil Temperature
As mentioned, the oil temperature is critical for frying. To gauge if the oil is hot enough, drop a small piece of dough into the oil; it should sizzle and float to the surface quickly. If the dough sinks or doesn’t bubble, the oil is too cool.
Overfilling the Donuts
While it’s tempting to add a generous amount of cream, overfilling can lead to messy leaks. Aim for a moderate amount of filling — enough to satisfy but not so much that it spills out when you take a bite. A good rule of thumb is to fill until you feel slight resistance.
Conclusion: The Joy of Homemade Heavenly Cream-Filled Donuts
Making heavenly cream-filled donuts at home can be a rewarding and enjoyable experience. By following the detailed steps and understanding the ingredients, anyone can recreate this delightful treat. The combination of warm, fluffy donuts filled with rich whipped cream is not only a feast for the taste buds but also a source of joy and satisfaction. Whether you’re making them for a special occasion or just to enjoy on a cozy afternoon, these donuts are sure to bring a touch of happiness to your day. So gather your ingredients, don your apron, and indulge in the bliss of creating these heavenly delights from scratch. Your taste buds will thank you!