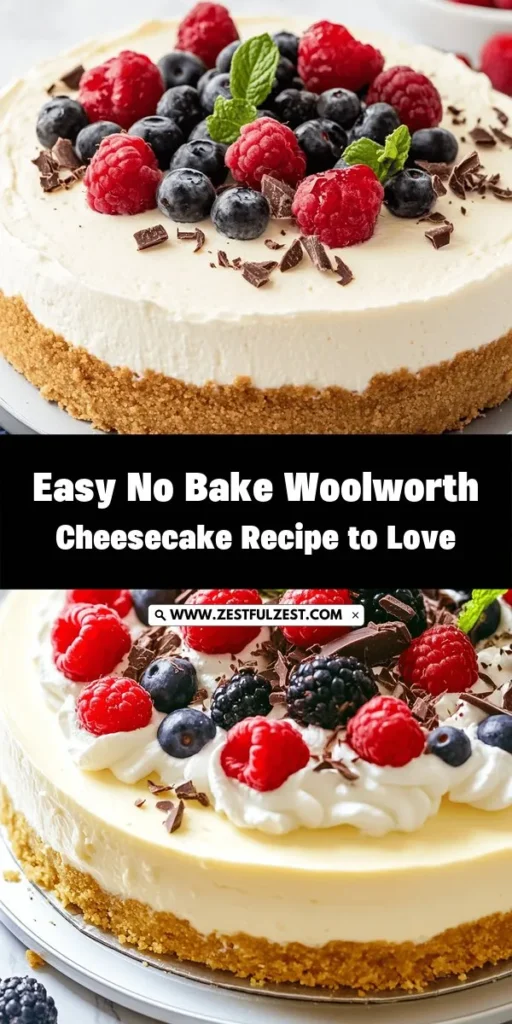
Introduction
Delve into the world of desserts with the classic No Bake Woolworth Cheesecake, a timeless recipe that has captured hearts for generations. This delightful cheesecake combines a buttery graham cracker crust with a smooth and creamy filling, creating a perfect balance of flavors and textures. The absence of baking makes it an accessible option for both novice and experienced bakers alike. In this article, we will explore the history of the Woolworth Cheesecake, its ingredients, step-by-step preparation, and tips for serving, ensuring you create a delicious dessert that everyone will enjoy.
The History of Woolworth Cheesecake
Understanding the origins of this beloved dessert adds depth to your baking experience. The Woolworth Cheesecake traces back to the 1920s and was famously served in the lunch counters of the Woolworth department store. This iconic retail chain, known for its five-and-dime stores, became a staple in American culture, offering a variety of affordable goods and delicious meals. Among these, the cheesecake stood out, becoming a popular choice for shoppers looking for a sweet treat during their errands.
The no-bake version gained traction due to its simplicity and the ease with which it could be prepared, making it a household favorite. Many people have fond memories of enjoying this cheesecake, often associated with family gatherings, celebrations, and special occasions. The nostalgia surrounding the Woolworth Cheesecake continues to evoke feelings of warmth and comfort, as it represents not just a dessert but a connection to the past. Its creamy texture and rich flavor have made it a classic that transcends generations, reminding us that some recipes never go out of style.
Ingredients Breakdown
To recreate this delightful dessert, understanding the key components is essential. Each ingredient plays a significant role in achieving the perfect no-bake Woolworth Cheesecake.
Graham Cracker Crust
The foundation of any great cheesecake is its crust, and the graham cracker crust is the preferred choice for this recipe. Graham cracker crumbs provide a sweet and slightly nutty flavor that complements the creamy filling beautifully. The texture is also crucial; the crumbs need to be finely ground to ensure a smooth and cohesive base. The mixture of graham cracker crumbs with melted butter creates a cohesive crust that holds its shape while delivering a satisfying crunch. This crust not only serves as a base for the cheesecake but also adds a delightful contrast to the creamy filling.
Cream Cheese
Cream cheese is the star ingredient in any cheesecake, and for a no-bake version, using softened cream cheese is crucial. It lends a rich, creamy texture that forms the basis of the filling. Softening the cream cheese allows it to blend smoothly with the other ingredients, preventing any lumps and ensuring a silky finish. The richness of cream cheese is what gives this dessert its indulgent quality, making it a favorite among cheesecake enthusiasts.
Powdered Sugar vs. Granulated Sugar
When it comes to sweetening the cheesecake, the choice of sugar matters. Powdered sugar, also known as confectioners’ sugar, is typically used for the filling due to its fine texture, which dissolves easily and creates a smooth consistency. In contrast, granulated sugar is reserved for whipping the cream, as it helps to stabilize the whipped texture. This distinction ensures that the cheesecake has the perfect level of sweetness without compromising the creamy texture.
Lemon Juice
Fresh lemon juice is a vital ingredient that brightens the flavors of the cheesecake. It adds a delightful tang that balances the richness of the cream cheese, enhancing the overall flavor profile of the dessert. The acidity from the lemon juice also helps to cut through the sweetness, making each bite refreshing and light. Using fresh lemon juice rather than bottled juice ensures the best flavor, contributing to a more vibrant cheesecake.
Whipping Cream
Heavy whipping cream is essential for achieving the light and airy texture characteristic of a no-bake cheesecake. When whipped, it incorporates air into the mixture, creating a fluffy consistency that elevates the cheesecake’s overall feel. The richness of the cream also adds to the indulgence of the dessert, making each slice a decadent treat. It’s important to whip the cream to soft peaks, as this allows it to fold easily into the cream cheese mixture without deflating.
Optional Garnishes
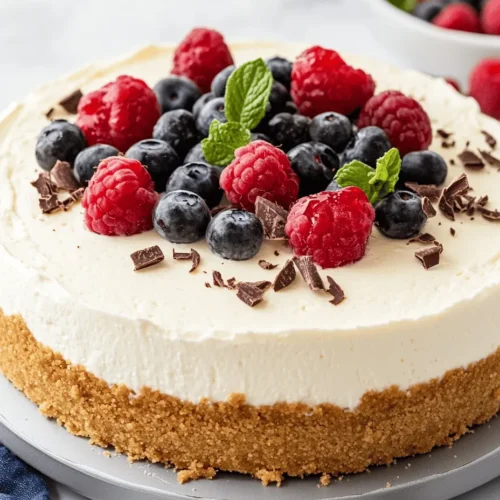
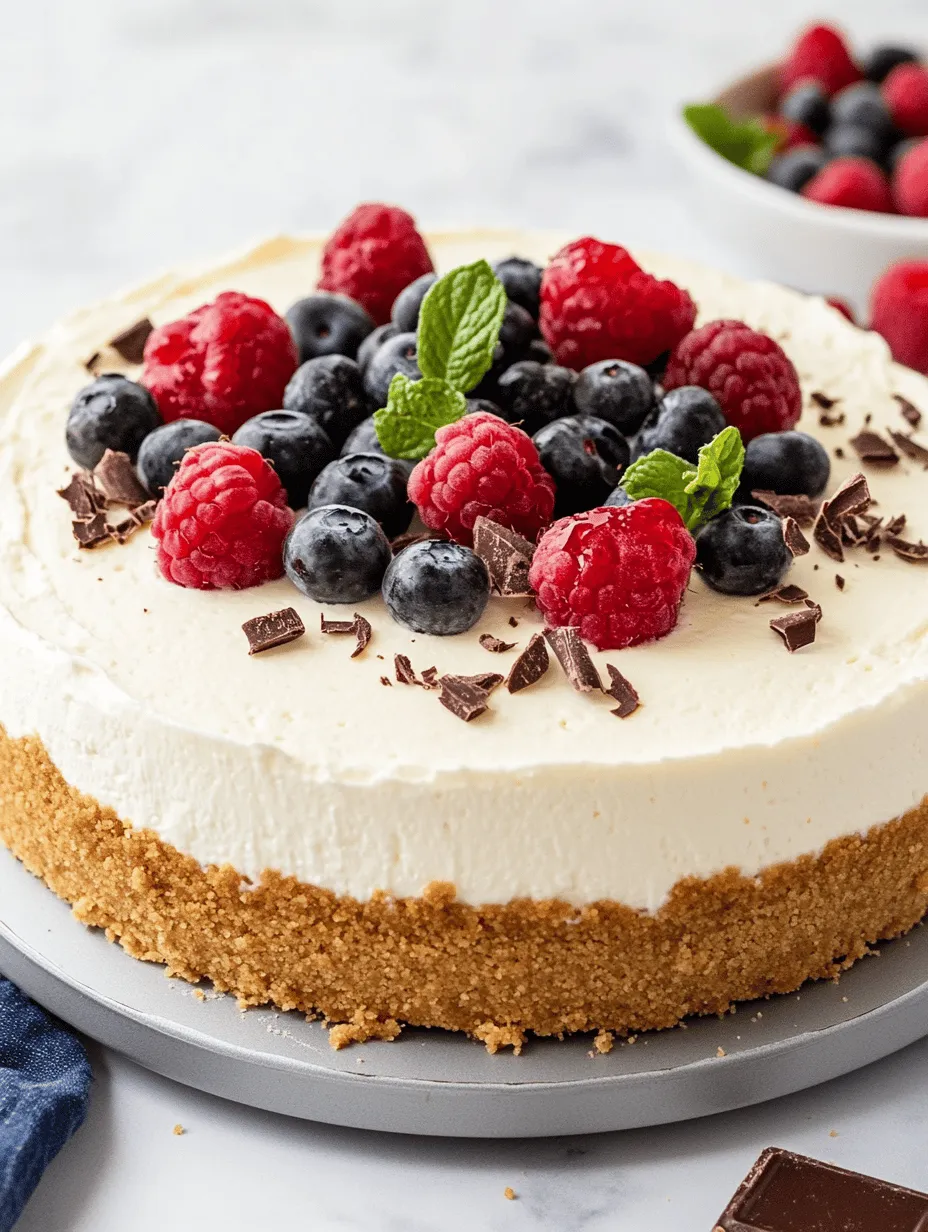
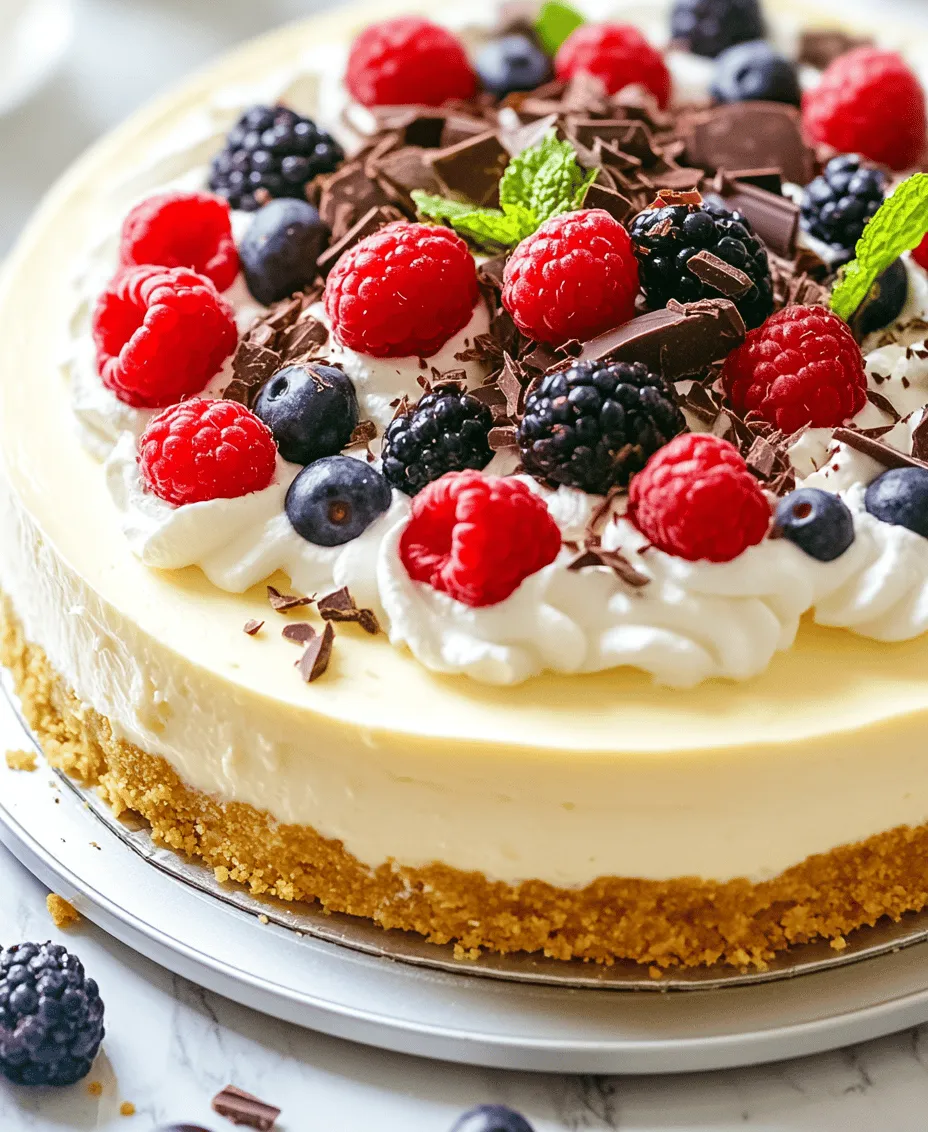
While the cheesecake is delicious on its own, adding garnishes can enhance its presentation and flavor. Popular toppings include fresh berries, such as strawberries or blueberries, which add a burst of color and freshness. Chocolate shavings or drizzles can also elevate the dessert, providing a contrasting richness. Whipped cream can be added for an extra touch of elegance, making the cheesecake even more inviting. These garnishes not only enhance the visual appeal but also allow for personalization, letting you tailor the dessert to your taste preferences.
Step-by-Step Preparation Guide
Now that we’ve explored the ingredients, let’s dive into the step-by-step preparation of the No Bake Woolworth Cheesecake. This guide will provide clear instructions to ensure your cheesecake turns out perfectly.
Preparing the Crust
1. Gather Your Ingredients: Start by gathering the necessary ingredients for the graham cracker crust. You will need graham cracker crumbs, melted butter, and a pinch of sugar to enhance the flavor.
2. Crush the Graham Crackers: If you’re using whole graham crackers, crush them into fine crumbs. You can do this by placing the crackers in a zip-top bag and using a rolling pin to crush them or by pulsing them in a food processor until finely ground.
3. Combine Ingredients: In a mixing bowl, combine the graham cracker crumbs with the melted butter and a tablespoon of sugar. Mix well until all the crumbs are evenly coated with butter. The mixture should resemble wet sand and hold together when pressed.
4. Press into the Pan: Choose a 9-inch springform pan for a smooth release. Pour the graham cracker mixture into the pan and use the back of a measuring cup or your fingers to press it firmly into the bottom and slightly up the sides of the pan. Ensure the crust is even and compact for the best texture.
5. Chill the Crust: Once the crust is pressed firmly, place the pan in the refrigerator for about 10-15 minutes to set. This step helps the crust firm up, making it easier to fill with the cheesecake mixture.
As you prepare the crust, take a moment to appreciate the simplicity and nostalgia of this process. The graham cracker crust is not only a delicious base for your cheesecake but also a reminder of the many joyful moments spent baking in the kitchen. With the crust ready, you’ll be well on your way to creating a classic dessert that is both easy to make and utterly satisfying.
Stay tuned for the continuation of this recipe, where we will dive into the preparation of the creamy filling and additional tips for serving the No Bake Woolworth Cheesecake!
Forming the Crust
To begin crafting the perfect No Bake Classic Woolworth Cheesecake, it’s essential to focus on the crust, which serves as the foundation for the entire dessert. Start by taking your prepared graham cracker crumbs and transferring them to a mixing bowl. Add the melted butter and a pinch of sugar, if desired, to enhance the sweetness. The mixture should resemble wet sand; if it feels too dry, add a little more melted butter until you achieve the right consistency.
Next, you’ll need a 9-inch springform pan to hold your cheesecake. To form the crust, pour the crumb mixture into the pan and use the back of a measuring cup or your fingers to press the crumbs firmly into the bottom. Ensure that the crust is even and compact, covering the entire base with a slight upward edge along the sides. This step is pivotal because a well-formed crust will help keep the filling intact and provide a delicious contrast to the creamy cheesecake.
After pressing the crust into place, it’s crucial to chill it in the refrigerator for at least 30 minutes. This step allows the butter to solidify, firming up the crust and preventing it from crumbling when you slice into the cheesecake. Chilling also helps the flavors meld together, creating a more cohesive base for your filling.
Making the Cheesecake Filling
While the crust is chilling, it’s time to prepare the creamy filling that defines this No Bake Classic Woolworth Cheesecake. Start by taking your room-temperature cream cheese and placing it in a large mixing bowl. Using an electric mixer on medium speed, beat the cream cheese until it becomes smooth and free of lumps. This step is essential; a well-beaten cream cheese ensures a velvety texture that will elevate your cheesecake.
Once the cream cheese is smooth, gradually add in the powdered sugar. Continue to beat the mixture until fully incorporated, which will take about 1-2 minutes. The powdered sugar not only sweetens the filling but also contributes to a silky texture. Next, add the vanilla extract and fresh lemon juice, mixing until just combined. The lemon juice adds a subtle tanginess that balances the sweetness and enhances the overall flavor profile.
Whipping Cream to Stiff Peaks
Achieving the perfect whipped cream is a critical step in creating the light and airy texture of your cheesecake filling. In a separate bowl, pour in the heavy cream and begin to whip it with a hand or stand mixer on medium-high speed. Be vigilant as you whip the cream; it should take about 3-5 minutes to reach stiff peaks. Stiff peaks mean that the cream holds its shape and doesn’t collapse when you lift the whisk out.
Once the cream reaches the desired consistency, it’s time to incorporate it into the cream cheese mixture. This is a delicate process, so use a spatula to fold the whipped cream into the cream cheese mixture gently. Start by adding a small portion of whipped cream to lighten the cream cheese, then gradually fold in the rest. Be careful not to overmix, as this can deflate the whipped cream and lead to a denser filling.
Combining Mixtures
With both components ready, it’s time to combine the cream cheese and whipped cream mixtures. Using a folding technique is crucial here; this involves gently lifting the mixture from the bottom of the bowl and turning it over onto itself, rather than stirring vigorously. Continue this process until the two mixtures are just combined. The goal is to maintain the airiness of the whipped cream while achieving a uniform filling.
Once fully combined, the filling should be light and fluffy with a beautiful creamy consistency. Carefully pour the filling into the chilled crust, spreading it into an even layer with a spatula. Tap the pan gently on the counter to remove any air bubbles, which can create an uneven texture in the finished cheesecake.
Chilling the Cheesecake
After spreading the filling into the crust, it’s time to let your cheesecake set. Cover the springform pan with plastic wrap or aluminum foil, and place it in the refrigerator. For the best results, chill the cheesecake for at least 4 hours, although overnight is preferable. This extended chilling time allows the filling to firm up, making it easier to slice and serve.
The cheesecake is ready when it has a slight jiggle in the center but is mostly set. Avoid the temptation to rush this step; patience is key to achieving a luscious consistency that will impress your guests.
Serving the Cheesecake
When it’s time to serve your No Bake Classic Woolworth Cheesecake, start by carefully removing it from the springform pan. Run a knife around the edge of the cheesecake to loosen it, and then gently release the sides of the springform pan. Place the cheesecake on a serving platter for an elegant presentation.
To slice the cheesecake, use a sharp knife dipped in hot water, allowing for clean cuts. Wipe the knife clean between slices to maintain a neat appearance. Each slice should reveal the creamy filling set atop the crumbly crust, showcasing the delightful texture and layers.
Presentation Ideas for the No Bake Cheesecake
Enhancing the visual appeal of your No Bake Classic Woolworth Cheesecake can elevate it from a simple dessert to a stunning centerpiece. Here are some creative presentation ideas:
Garnishing Options
Garnishing your cheesecake is an excellent way to add color and flavor. Fresh seasonal fruits such as strawberries, blueberries, or raspberries can be arranged beautifully on top. Drizzling chocolate or caramel sauce over the cheesecake not only enhances its aesthetic but also adds an extra layer of sweetness. For a touch of elegance, consider adding whipped cream dollops around the edges or sprinkle with finely grated chocolate or crushed nuts.
Serving Suggestions
While the cheesecake stands beautifully on its own, pairing it with complementary sides can enhance the dining experience. Fresh fruit, such as a fruit salad or a simple berry compote, adds a refreshing contrast to the creamy cheesecake. A scoop of vanilla or berry ice cream can also provide a delightful cold treat alongside each slice, creating a wonderful mix of textures and flavors.
Nutritional Information
For those mindful of their dietary intake, it’s essential to provide an overview of the cheesecake’s nutritional content. A typical slice of No Bake Classic Woolworth Cheesecake (approximately 1/12 of the recipe) contains roughly:
– Calories: 300-350
– Fat: 20g
– Carbohydrates: 30g
– Sugar: 20g
– Protein: 4g
While this cheesecake is a treat and should be enjoyed in moderation, the use of cream cheese and whipped cream provides some calcium and protein benefits. For a lighter version, consider using low-fat cream cheese and sugar substitutes when preparing the filling.
Conclusion
The No Bake Classic Woolworth Cheesecake is an easy yet impressive dessert that brings joy to any occasion. Its rich, creamy filling and simple preparation make it a favorite for gatherings, celebrations, or a comforting treat at home. By following this comprehensive guide, you can create a delightful cheesecake that pays homage to its storied history while delighting your friends and family with every slice. Whether enjoyed plain or dressed up with garnishes, this cheesecake is sure to become a cherished recipe in your collection. Its effortless elegance and delicious flavor will leave everyone asking for seconds, making it a staple in your dessert repertoire.