
Introduction
Lemon curd is a delightful and tangy spread that has gained immense popularity in the culinary world. Its luscious texture and vibrant flavor make it a favorite for a wide range of desserts and breakfast items. Whether slathered on toast, dolloped atop scones, or used as a filling for tarts and cakes, lemon curd brings a refreshing brightness that can elevate any dish. The traditional method of making lemon curd can be time-consuming, requiring constant stirring over a double boiler, but fear not! This zesty microwave lemon curd recipe offers a quick and convenient alternative without sacrificing flavor or texture.
What makes this microwave lemon curd so special is not just its speed but also its versatility. It can be used in countless recipes, from filling for pastries to a topping for ice cream. Additionally, the bright, citrusy notes can bring life to breakfast items such as pancakes or yogurt bowls. With just a few simple ingredients, you can create a homemade lemon curd that rivals store-bought versions, all in a fraction of the time.
Understanding Lemon Curd
Lemon curd is a creamy mixture made from lemon juice, sugar, eggs, and butter. It originated in England in the 19th century as a spread for bread and was often served with tea. Over time, its uses expanded, and it became a popular filling for desserts, pastries, and as a topping for various dishes. The silky texture and bold tartness have made lemon curd a beloved staple in many households.
Traditionally, lemon curd is used in a variety of culinary applications. It serves as a delicious filling for tart shells, layered cakes, or even as a component in trifles. Its versatility extends to breakfast, where it can enhance the flavor of pancakes, waffles, or yogurt. Additionally, lemon curd can be enjoyed simply spread on toast or used as a dip for fresh fruit, making it a delightful addition to any meal.
Nutritionally, lemon curd provides several benefits. It is rich in vitamin C, which is essential for immune function and skin health. The presence of eggs provides proteins and healthy fats, contributing to a balanced diet when consumed in moderation. Moreover, the natural acidity from the lemons can aid in digestion, making lemon curd not only a tasty treat but also a beneficial one.
Ingredients Breakdown
To make this zesty microwave lemon curd, you’ll need a handful of simple ingredients, each playing a crucial role in creating the perfect balance of flavors and textures.
Granulated Sugar
Granulated sugar is the sweet backbone of lemon curd. It not only adds sweetness to counteract the tartness of the lemons but also contributes to the smooth texture of the curd. The sugar helps to dissolve and blend the other ingredients seamlessly, ensuring a silky finish.
Eggs
Eggs are a vital component in lemon curd, serving as a binding agent and providing the necessary thickening properties. When heated, the proteins in the eggs coagulate, which thickens the mixture and gives lemon curd its luscious consistency. For the best results, use fresh eggs, as they provide a richer flavor and better texture.
Freshly Squeezed Lemon Juice
The star of the show in this recipe is the freshly squeezed lemon juice. It provides the essential tartness and vibrant flavor that defines lemon curd. Fresh juice is crucial, as it offers a bright and zesty taste that bottled lemon juice simply cannot replicate. When selecting lemons, look for ones that are firm and heavy, as these tend to yield more juice.
Lemon Zest
Lemon zest enhances the aroma and flavor profile of the curd. The zest contains essential oils that carry the lemon’s fragrant notes, adding depth and brightness to the mixture. Use a microplane or zester to finely grate the outer layer of the lemon peel, ensuring that no bitter pith is included.
Unsalted Butter
Unsalted butter adds creaminess and richness to the curd, creating a velvety mouthfeel. It helps to mellow the acidity of the lemon juice while contributing to the overall flavor and texture. Using unsalted butter allows you to control the salt content in the recipe, ensuring a well-balanced curd.
Salt
While it may seem counterintuitive to add salt to a sweet spread, a pinch of salt is essential for balancing flavors. Salt enhances sweetness and helps to round out the tartness of the lemon juice, creating a harmonious blend of flavors in the curd.
Step-by-Step Guide to Making Zesty Microwave Lemon Curd
Preparation Steps Before Cooking
Before you start making your zesty microwave lemon curd, it’s essential to prepare your ingredients and tools. The key to a successful lemon curd is using fresh lemons for both the juice and zest. This ensures that you achieve the best flavor possible.
Tools and Equipment Needed
– Microwave-safe bowl: Choose a bowl that is large enough to accommodate the mixture without overflowing during cooking.
– Whisk: A whisk is essential for thoroughly combining the ingredients and ensuring a smooth texture.
– Microplane or zester: This tool will help you easily obtain the lemon zest without including any bitter pith.
– Measuring cups and spoons: Accurate measurements are crucial for achieving the perfect balance of flavors.
– Fine-mesh strainer (optional): If you prefer a super smooth curd, you can strain the mixture to remove any bits of zest or coagulated egg.
Detailed, Clear Instructions for Cooking
1. Whisking the Sugar and Eggs:
Begin by adding the granulated sugar and eggs to your microwave-safe bowl. Using a whisk, beat the sugar and eggs together until well combined. This step is crucial for proper incorporation, as it ensures that the sugar dissolves fully and the eggs are evenly distributed throughout the mixture. You want to achieve a smooth and homogenous base before adding the other ingredients.
2. Incorporating the Lemon Juice and Zest:
Once the sugar and eggs are well mixed, it’s time to add the freshly squeezed lemon juice and lemon zest. Whisk these ingredients into the egg mixture until they are fully incorporated. The zesty aroma will fill the air, signaling that you’re on your way to creating a delicious lemon curd.
3. Adding Butter and Salt:
Next, cut the unsalted butter into small cubes and add it to the mixture along with a pinch of salt. The butter should be at room temperature for easier incorporation. Stir the mixture gently until the butter is well blended in. This will help to create a rich and creamy texture once the curd is cooked.
4. Microwaving the Mixture:
Cover the bowl loosely with a microwave-safe lid or microwave-safe plastic wrap. This helps to trap steam while allowing some air to escape. Microwave the mixture on high for 30 seconds, then give it a good stir to ensure even cooking. Return it to the microwave for an additional 30 seconds. Repeat this process, stirring every 30 seconds, until the mixture has thickened. This typically takes about 2 to 4 minutes, depending on your microwave’s wattage.
5. Checking for Doneness:
The curd is done when it coats the back of a spoon and holds a line when you run your finger through it. If it’s still too runny, continue microwaving in 10-second intervals until the desired thickness is achieved. Be careful not to overcook it, as the eggs can scramble if exposed to too much heat.
By following these steps, you’re well on your way to creating a delicious batch of zesty microwave lemon curd. The next steps will include cooling and storing your curd, ensuring that every last drop is as fresh and flavorful as possible. Stay tuned for the continuation where we will explore these final steps and share extra tips for achieving the best results!

Adding Lemon Juice and Zest: Tips for Achieving the Best Flavor
When it comes to making zesty lemon curd, the quality and freshness of your ingredients can make or break the final product. Start by selecting vibrant lemons that feel heavy for their size, indicating juiciness. For the best flavor, use both fresh lemon juice and freshly grated lemon zest. The zest contains essential oils that provide a robust lemon flavor, enhancing the overall taste of your curd.
To extract the maximum flavor, roll the lemons on the countertop with your palm before cutting. This technique helps to release more juice. When zesting, be careful to only remove the bright yellow outer layer of the rind; avoid the bitter white pith underneath. Combining the tartness of the juice with the aromatic zest will yield a lemon curd that is both bright and flavorful.
Melting the Butter: Importance of Stirring and Preventing Boiling
The next step in your microwave lemon curd recipe is melting the butter. Use unsalted butter for a more controlled flavor profile. Place the butter in a microwave-safe bowl and melt it in short increments, stirring frequently. This not only ensures even melting but also prevents the butter from boiling over, which can lead to a greasy texture in the curd.
Microwaving butter too quickly can result in separation, which will affect the final consistency of your lemon curd. Aim for a smooth, liquid state, and once melted, immediately add your lemon juice and zest. This combination will blend beautifully, creating a rich base for your curd.
Monitoring Consistency: Signs That the Curd is Ready
One of the key indicators that your lemon curd is ready is its consistency. As you microwave the mixture, stir every 30 seconds to ensure even cooking. The curd will begin to thicken as it cooks, transitioning from a liquid to a custard-like texture.
You’ll know the curd is done when it coats the back of a spoon and leaves a clean line when you run your finger through it. If you have a kitchen thermometer, the curd should reach a temperature of around 170°F (77°C). Be cautious not to overcook, as this can lead to curdled eggs, resulting in an undesirable texture.
Straining the Curd: Importance of This Step for Texture
After achieving the right consistency, it’s crucial to strain the lemon curd. This step may seem optional, but it is essential for achieving a smooth, velvety texture free from any cooked egg bits or lumps. Place a fine-mesh strainer over a clean bowl and pour the curd through it. Use a spatula to press the mixture gently, helping it pass through while leaving any unwanted solids behind.
Straining not only enhances the texture but also ensures that your lemon curd is silky and enjoyable. Allow the curd to cool slightly before transferring it to storage containers.
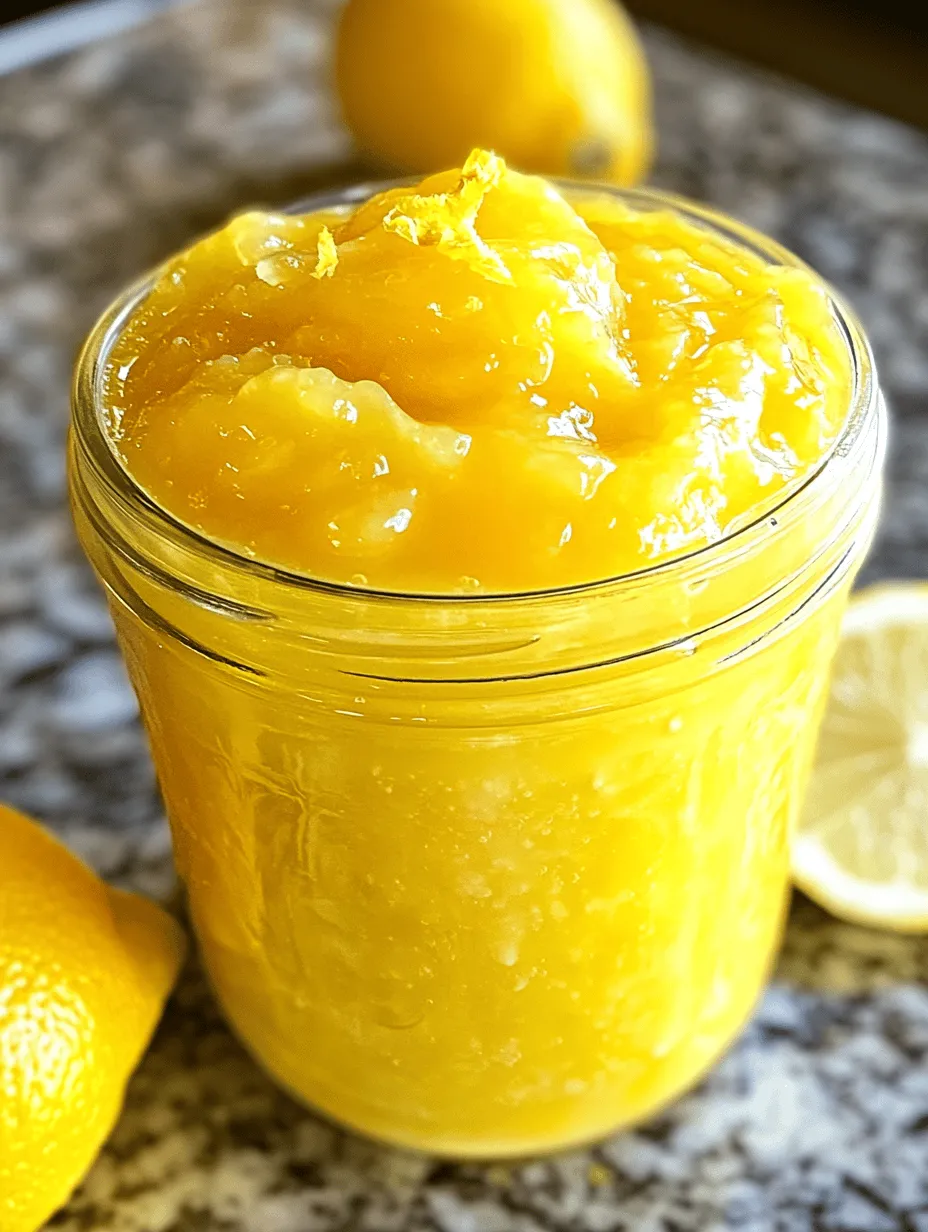
Cooling and Storing Lemon Curd
Once your lemon curd has been strained, it’s time to cool it properly. Allow the curd to come to room temperature before sealing it in containers. This cooling process helps to further thicken the curd as it sets, creating an optimal consistency for spreading or using in recipes.
Best Practices for Storage
– Containers: Opt for airtight glass jars or plastic containers for storing lemon curd. Glass jars are preferable as they do not retain odors and allow you to see the beautiful color of the curd. Ensure that the containers are clean and dry before pouring in the curd to prevent contamination.
– Shelf Life: When stored in the refrigerator, lemon curd can last for up to two weeks. For longer storage, consider freezing it. Lemon curd freezes well and can be stored in airtight containers or freezer-safe bags. Be sure to leave some space in the container for expansion as it freezes. When you’re ready to use it, thaw it in the refrigerator overnight for the best results.
Serving Suggestions
Lemon curd is incredibly versatile, making it a delightful addition to many dishes. Here are some creative ways to enjoy your homemade lemon curd:
– As a Filling for Pastries and Cakes: Use lemon curd as a filling for tarts, cakes, or pastries. It pairs beautifully with buttery crusts and can elevate simple desserts into gourmet treats. Consider filling a sponge cake with lemon curd and whipped cream for a light and refreshing dessert.
– A Topping for Yogurt or Ice Cream: Drizzle lemon curd over your favorite yogurt or ice cream for a zesty twist. The tartness of the curd complements the creaminess of the yogurt or ice cream, creating a delightful balance of flavors.
– Incorporating into Salad Dressings or Marinades: Lemon curd can also be used to brighten up salad dressings or marinades. Mix it with olive oil, vinegar, and herbs for a refreshing vinaigrette or use it to marinate chicken or fish for a burst of citrus flavor.
Variations of Lemon Curd
While classic lemon curd is delicious, don’t hesitate to experiment with flavors. Here are a few variations to consider:
– Adding Other Citrus Fruits: For a refreshing twist, try incorporating other citrus fruits such as limes or oranges. A lime curd offers a tangy kick, while orange curd brings a sweeter flavor profile. Simply substitute part of the lemon juice with the juice of your chosen citrus.
– Infusing with Herbs: For a unique flavor experience, consider infusing your lemon curd with herbs like basil or mint. Add finely chopped herbs to the butter as it melts, allowing the flavors to meld before combining with the lemon juice and zest.
Culinary Tips for Perfect Lemon Curd
To ensure that your lemon curd turns out perfectly every time, keep these culinary tips in mind:
– Common Pitfalls to Avoid: Overheating is a common mistake when making lemon curd in the microwave. Always stir regularly and monitor the cooking time to achieve the perfect consistency without curdling the eggs.
– Enhancing Flavor and Texture: For an even more vibrant flavor, consider using organic lemons, which often have more intense essential oils in their peels. Additionally, using fresh lemon juice instead of bottled juice can significantly enhance the taste of your curd.
Conclusion
Making lemon curd in the microwave is not only easy but also incredibly rewarding. With just a few ingredients and a simple process, you can create a delicious, zesty treat that elevates any dish. Whether you use it as a filling, topping, or ingredient in dressings, the versatility of lemon curd makes it a must-have in any kitchen.
Don’t be afraid to experiment with flavors and applications; the joy of cooking comes from creativity. So grab your lemons, follow these steps, and enjoy the delightful taste of homemade lemon curd in your everyday cooking and baking endeavors.