
Introduction
Crispy chicken strips are a classic comfort food that transcends generations, making them a beloved choice for both children and adults alike. These tender, flavorful strips of chicken are not only a staple at family dinners but also shine during game days and festive gatherings. The crunchy exterior combined with juicy meat creates an irresistible dish that can please even the pickiest of eaters.
One of the best parts about making chicken strips at home is the versatility they offer. You can customize the spices to match your family’s tastes, experiment with various coatings, and choose from an array of dipping sauces. Whether you prefer a spicy kick or a classic honey mustard, the options are endless. In this article, we will explore the appeal of homemade crispy chicken strips, break down the essential ingredients, and provide detailed steps to prepare this delightful dish.
The Appeal of Homemade Chicken Strips
Homemade crispy chicken strips are a favorite choice for many food enthusiasts, and for good reason. Making chicken strips from scratch gives you complete control over the ingredients, ensuring that you can select high-quality chicken and avoid preservatives and additives often found in store-bought options.
Freshness is another key advantage. When you prepare chicken strips at home, you can guarantee that they are cooked to perfection and served hot right off the stove. The satisfaction of biting into a freshly made chicken strip is unparalleled, as the crispiness contrasts beautifully with the tender meat inside.
Additionally, the ability to adjust flavors to your personal preferences makes homemade chicken strips a winning option. From experimenting with different spices and herbs to creating unique dipping sauces, the possibilities are as vast as your culinary creativity allows. You can make them as mild or as spicy as you like, catering to the taste buds of everyone at the table.
Ingredient Breakdown
To create the perfect crispy chicken strips, you need to focus on a few key ingredients that work together to deliver flavor and texture. Here is a breakdown of these essential components:
Chicken Breast
The foundation of any great chicken strip recipe is, of course, the chicken itself. Chicken breast is the ideal choice for this dish due to its lean quality and mild flavor. When cut into strips, chicken breast cooks quickly and evenly, providing a tender bite that pairs perfectly with a crunchy exterior.
For optimal results, look for fresh, high-quality chicken breasts. If you prefer a bit more flavor, consider using chicken thighs; they tend to be juicier and can add a different dimension to your chicken strips.
Buttermilk
One of the secrets to achieving perfectly tender and flavorful chicken strips is marinating the chicken in buttermilk. This process not only adds richness and depth of flavor but also helps to tenderize the chicken. The acidity in buttermilk breaks down protein structures, resulting in a succulent texture that melts in your mouth.
To marinate, simply soak the chicken strips in buttermilk for at least 30 minutes, or up to several hours for a more robust flavor infusion. This step is crucial for a dish that aims to be both crispy and juicy.
Flour and Breadcrumbs
For the coating, a combination of all-purpose flour and Panko breadcrumbs is essential. The flour creates a base for the coating, helping it adhere to the chicken, while Panko breadcrumbs provide that desired crispy exterior. Panko, a Japanese-style breadcrumb, is coarser than regular breadcrumbs, resulting in a crunchier texture that elevates the overall eating experience.
When preparing your coating, consider seasoning both the flour and Panko breadcrumbs with spices to enhance the flavor profile. This ensures that every bite is packed with a delightful taste.
Seasonings
The right blend of seasonings can take your crispy chicken strips from good to great. Common spices used in this recipe include garlic powder, onion powder, paprika, cayenne pepper, salt, and black pepper.
– Garlic Powder: Adds a savory depth that complements the chicken beautifully.
– Onion Powder: Offers a mild sweetness and enhances the overall flavor.
– Paprika: Provides a subtle smokiness and vibrant color to the coating.
– Cayenne Pepper: Introduces a spicy kick; adjust the amount based on your heat preference.
– Salt: Essential for enhancing all the flavors and bringing out the natural taste of the chicken.
– Black Pepper: Adds a touch of warmth and complexity to the seasoning blend.
Preparing the Chicken Strips
Now that we’ve discussed the key ingredients, let’s dive into the preparation process for these crispy chicken strips.
Marinating in Buttermilk
To start, you’ll want to prepare the chicken for marinating. Begin by cutting your chicken breasts into strips, making sure they are roughly uniform in size for even cooking. Place the strips in a bowl or a resealable plastic bag and pour in the buttermilk, ensuring that all pieces are well-coated.
Cover the bowl or seal the bag and place it in the refrigerator. Ideally, the chicken should marinate for at least 30 minutes, but for best results, let it sit for a few hours or even overnight. This step is crucial as it allows the flavors to infuse deeply into the chicken while also tenderizing the meat.
Creating the Coating Mixture
While your chicken marinates, it’s time to prepare the coating mixture. In a shallow dish, combine all-purpose flour with your selected seasonings. This is where you can get creative—feel free to adjust the spice levels according to your preference. Mix the dry ingredients well so that the seasonings are evenly distributed.
Next, in a separate bowl, place the Panko breadcrumbs. If you want to add an extra layer of flavor to your coating, consider mixing in some additional spices or even grated Parmesan cheese for a cheesy twist.
To ensure an even coating, you’ll want to set up a dredging station. This typically involves three shallow dishes: one with the buttermilk-marinated chicken, one with the seasoned flour, and one with the Panko breadcrumbs.
Dredging the Chicken Strips
Once the chicken has finished marinating, remove it from the refrigerator. Working with one strip at a time, let any excess buttermilk drip off before dredging it first in the flour mixture. Press the chicken firmly into the flour to ensure it adheres well.
Next, transfer the coated strip to the bowl with the Panko breadcrumbs. Again, press down gently to ensure the breadcrumbs stick. Repeat this process until all the chicken strips are coated.
Having a well-coated chicken strip will ensure that you achieve that satisfying crunch when frying, so take your time with this step.
The Frying Process
With your chicken strips prepared and coated, the next step is frying. The frying technique is pivotal in achieving that crispy texture everyone loves.
Start by heating a generous amount of oil in a large skillet or deep frying pan over medium-high heat. It’s important to choose an oil with a high smoke point, such as vegetable oil, canola oil, or peanut oil, as these will yield the best results.
To determine if the oil is hot enough, you can drop a small piece of breadcrumb into the oil. If it sizzles and bubbles, you’re ready to start frying. Carefully place the coated chicken strips into the hot oil, making sure not to overcrowd the pan. Fry in batches if necessary to maintain the temperature of the oil.
Fry the chicken strips for about 3-4 minutes on each side or until they are golden brown and cooked through. Using a slotted spoon, transfer the cooked strips to a plate lined with paper towels to absorb any excess oil.
The frying process is where your crispy chicken strips truly come to life. The combination of the hot oil and the coating creates a delightful crunch that is simply irresistible.
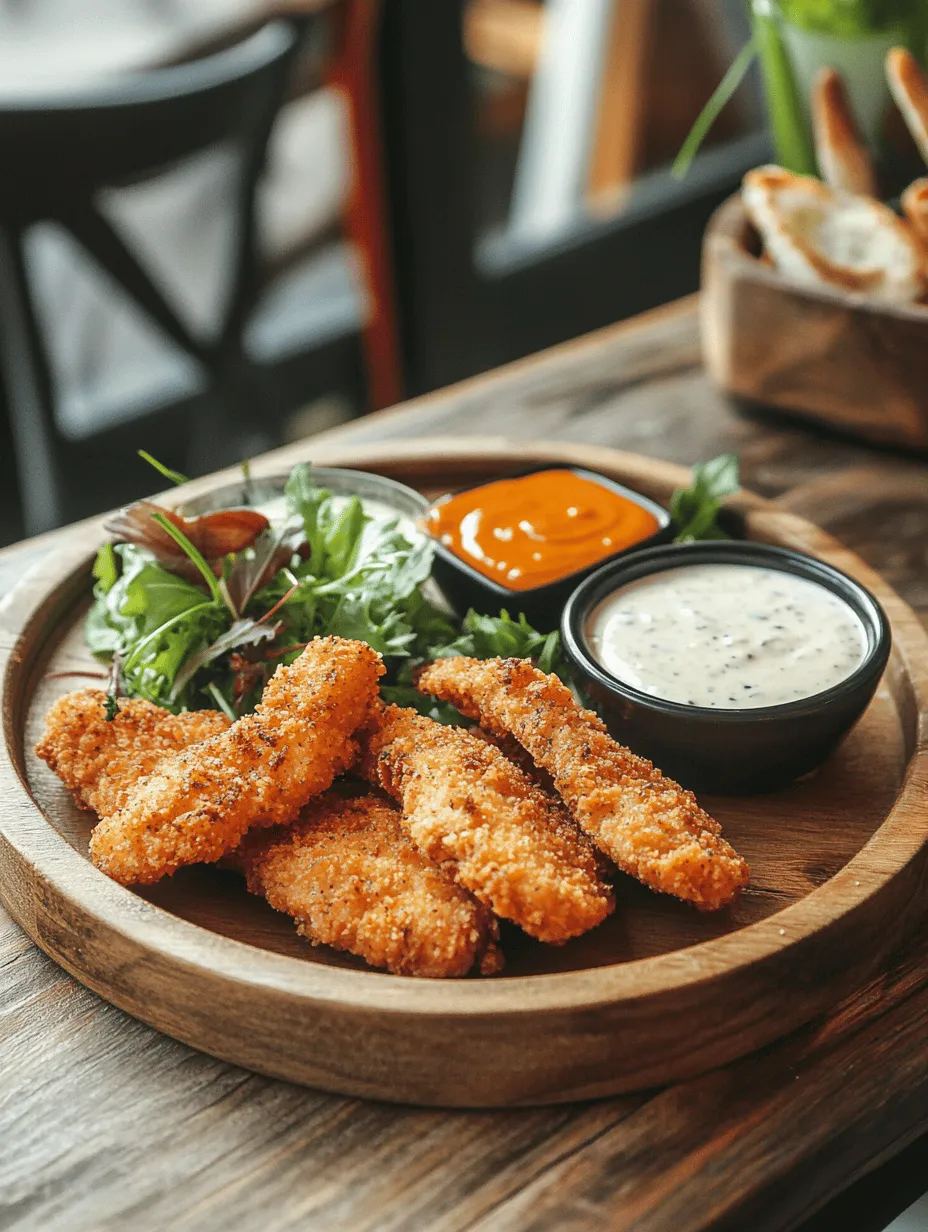
As you prepare to enjoy your homemade crispy chicken strips, remember that they can be served with a variety of dipping sauces—ranch, barbecue, honey mustard, or even a spicy sriracha mayo. Each dip enhances the flavor and adds a new dimension to this already delicious dish.
Stay tuned for the next part of the article, where we will explore additional cooking techniques, serving suggestions, and tips for the best chicken strips you’ve ever made!

Choosing the Right Oil
When it comes to frying chicken strips, selecting the right oil is crucial for both flavor and cooking performance. The best oils for frying are those with high smoke points, which means they can withstand high temperatures without breaking down and producing off-flavors.
Ideal Oils for Frying Chicken Strips:
– Canola Oil: With a smoke point of around 400°F, canola oil is a popular choice due to its neutral flavor and high heat tolerance.
– Peanut Oil: Known for its slightly nutty taste, peanut oil has a smoke point of about 450°F, making it perfect for deep frying.
– Sunflower Oil: With a smoke point of 440°F, sunflower oil is another excellent option that is light in flavor and allows the chicken’s seasoning to shine.
– Vegetable Oil: Typically a blend of various oils, vegetable oil has a smoke point similar to canola oil and works well for frying.
When choosing an oil, consider whether you want subtle flavor or something that enhances the dish. For example, peanut oil will impart a hint of nuttiness, while canola oil will keep the focus on the chicken and its seasoning.
Heating the Oil
Properly heating the oil is essential to achieving those perfectly crispy chicken strips you desire. Start by pouring the oil into a deep skillet or a frying pan, making sure to use enough to fully submerge the chicken strips. A depth of about 1 to 2 inches is usually sufficient.
How to Heat the Oil:
1. Use a Thermometer: For best results, invest in a cooking thermometer. You want the oil to reach about 350°F to 375°F. If the oil is too hot, the outside will burn before the inside is cooked; if it’s too cool, the chicken will absorb excess oil and become greasy.
2. Perform the Water Test: If you don’t have a thermometer, drop a small piece of bread into the oil. If it bubbles vigorously and turns golden brown in about 60 seconds, your oil is ready for frying.
Maintaining the right temperature is crucial. Too low, and the chicken strips will soak up oil; too high, and they will burn. Adjust the heat as needed throughout the frying process, ensuring a consistent temperature.
Frying Technique
Frying chicken strips in batches is key to achieving that golden, crispy exterior. Overcrowding the pan can lower the oil temperature drastically, leading to soggy, unevenly cooked strips.
Frying in Batches:
1. Prepare the Chicken Strips: After coating your chicken strips, gently place them in the hot oil, ensuring they have enough space between them. This will help them crisp up nicely.
2. Monitor Cooking Time: Fry for about 3-5 minutes on each side, depending on the thickness of your strips. They should reach an internal temperature of 165°F to be safe for consumption.
3. Avoid Overcrowding: If you have a large batch, fry in smaller groups. You can keep cooked strips warm in a low oven (about 200°F) while you finish frying the rest.
Achieving the Perfect Crispy Texture
To ensure your chicken strips are not just crispy but perfectly crunchy, consider employing a double dipping method. This technique not only enhances the texture but also adds an extra layer of flavor.
Double Dipping Method:
1. First Dip: Coat the chicken strips in the seasoned flour mixture, ensuring they are fully covered.
2. Wet Dip: Next, dip the floured chicken into a mixture of beaten eggs and a splash of milk or buttermilk. This adds moisture and helps the second layer stick.
3. Second Dip: Finally, return the chicken to the flour mixture for a second coating. This double layer will create a thicker crust that fries up beautifully crispy.
Draining and Serving:
Once your chicken strips are golden brown, remove them from the oil and place them on a wire rack or paper towels. Draining excess oil is essential to maintaining their crispiness.
For serving, consider keeping the chicken strips on a wire rack to allow air to circulate around them, preventing steam from making them soggy.
Serving Suggestions
Crispy chicken strips are versatile and can be enjoyed in various ways. Here are some serving suggestions that will elevate your dish:
Dipping Sauces:
– Honey Mustard: A classic combination, mixing equal parts honey and Dijon mustard creates a tangy and sweet dip.
– Ranch Dressing: Creamy ranch is a favorite; consider making your own with buttermilk, mayo, garlic powder, and herbs.
– Barbecue Sauce: A smoky barbecue sauce adds a rich flavor; try a homemade version with ketchup, brown sugar, vinegar, and spices for extra depth.
– Buffalo Sauce: For a spicy kick, toss your chicken strips in buffalo sauce after frying.
Side Dishes:
– French Fries: Crispy fries are a natural pairing for chicken strips. Consider seasoning them with garlic powder or herbs for an extra flavor boost.
– Coleslaw: A refreshing coleslaw provides a nice crunch and balances the richness of the fried chicken.
– Fresh Salad: A light green salad with a citrus vinaigrette complements the meal and adds a touch of freshness.
Storing and Reheating Leftovers
If you find yourself with leftover chicken strips, proper storage and reheating can help maintain their delightful crunch.
Refrigeration Tips:
– Allow the chicken strips to cool completely before storing.
– Place them in an airtight container lined with paper towels to absorb moisture and prevent sogginess. This will help keep them crispier for longer.
Reheating Methods:
– Oven: Preheat your oven to 375°F. Place the chicken strips on a baking sheet and heat for about 10-15 minutes, flipping halfway through. This method preserves the crispy texture.
– Air Fryer: For an even quicker option, the air fryer is perfect for reheating. Preheat the air fryer to 375°F and cook for about 5-7 minutes, checking to ensure they are heated through and crispy.
Conclusion
Making homemade crispy chicken strips is not only rewarding, but it also brings joy to the dinner table. The satisfaction of biting into a perfectly crispy, flavorful strip is unmatched. As you experiment with different spices and dipping sauces, you can truly make this dish your own.
Whether you’re preparing them for a casual family dinner, a game day snack, or a fun gathering with friends, crispy chicken strips are sure to please everyone. Embrace the process, enjoy the delightful crunch, and relish the comfort that comes with serving a meal that embodies happiness and satisfaction.