Introduction
Imagine the aroma of a perfectly roasted chicken filling your kitchen, the skin crackling to perfection, and the tender meat bursting with flavor. The oven-roasted chicken on a can recipe is a culinary delight that not only elevates your cooking game but also brings a fun twist to the traditional roasting method. This unique technique, often referred to as “beer can chicken,” has gained popularity due to its ability to create moist, flavorful meat that is sure to impress at any gathering, family dinner, or casual weeknight meal.
The appeal of this dish lies not only in its delicious results but also in its simplicity. With just a few basic ingredients and straightforward steps, you can achieve a restaurant-quality meal right in your own kitchen. Whether you’re a novice cook or an experienced home chef, this method is accessible and rewarding. As we delve into the details of this delightful recipe, you’ll discover how easy it is to master the art of oven-roasted chicken on a can, unlocking the secrets to juicy, flavorful poultry that will have your friends and family asking for seconds.
Understanding the Basics of Oven-Roasted Chicken on a Can
At the heart of the oven-roasted chicken on a can technique is the concept of using a can or bottle to support the chicken while it cooks. This method not only holds the chicken upright, allowing for even cooking but also infuses the meat with moisture and flavor from the beverage inside the can. The science behind this technique is fascinating: as the chicken roasts, the heat from the oven causes the liquid inside the can to steam, which in turn keeps the meat moist throughout the cooking process. This results in a tender, juicy chicken with a delectable crispy skin.
When it comes to choosing the right beverage for this method, both beer and soda have proven to be popular choices. Beer, particularly lagers or ales, adds a rich depth of flavor to the chicken, while the carbonation in soda can help tenderize the meat and create a wonderful crust. The use of these liquids enhances not only the moisture content of the chicken but also contributes to the overall flavor profile, making each bite a delightful experience.
Selecting the Right Ingredients for Your Roasted Chicken
To ensure that your oven-roasted chicken on a can turns out perfectly, it’s essential to select high-quality ingredients. Here’s a detailed look at the key components of this recipe and their individual roles:
– Whole Chicken: The cornerstone of this dish, the whole chicken, should ideally weigh between 3 to 5 pounds for optimal cooking. Choosing a fresh, organic chicken can greatly enhance the flavor and texture of the final dish. Pay attention to the quality of the meat, as a higher quality chicken will yield better results.
– Beer or Soda: The choice of beverage is crucial. A lighter beer, such as a lager or pilsner, will impart a subtle flavor without overwhelming the dish, while a darker beer like stout can provide a richer taste. Alternatively, a flavored soda like ginger ale or cola can add a unique sweetness that complements the savory spices. Experimenting with different flavors can lead to delightful discoveries.
– Olive Oil and Dijon Mustard: These ingredients serve as the base for your marinade. Olive oil helps to achieve a golden, crispy skin while also keeping the meat moist. Dijon mustard not only adds flavor but also acts as an adhesive for the spices, ensuring they stick to the chicken.
– Spices and Seasonings: The right blend of spices can make or break your roasted chicken. A combination of garlic powder, onion powder, smoked paprika, thyme, salt, and pepper creates a flavorful crust that enhances the taste of the meat. Each spice contributes its unique essence, resulting in a complex and delicious flavor profile.
– Fresh Lemon and Rosemary: Incorporating fresh herbs and citrus can elevate your dish significantly. The zesty notes of lemon add brightness, while rosemary lends an aromatic quality that pairs beautifully with poultry. Using fresh ingredients not only enhances the flavor but also adds a vibrant touch to your presentation.
Step-by-Step Guide to Preparing Oven-Roasted Chicken on a Can
Now that you have a clear understanding of the ingredients, it’s time to dive into the preparation process. Follow this comprehensive walkthrough to ensure your oven-roasted chicken on a can is a resounding success:
Prepping the Oven
The first step to achieving perfectly roasted chicken is preheating your oven. Set it to 375°F (190°C). Preheating the oven is essential for even cooking, as it ensures that the chicken begins cooking at the right temperature, resulting in a crispy skin and juicy interior.
Cleaning and Drying the Chicken
Before you begin seasoning, it’s crucial to clean and dry the chicken thoroughly. Rinse the chicken under cold water, removing any giblets or excess fat from the cavity. Pat the chicken dry with paper towels, as this step is vital for achieving that coveted crispy skin. Moisture on the surface of the chicken can lead to steaming rather than roasting, so ensure it is as dry as possible before moving on.
Making the Marinade
To create a flavorful marinade that will coat your chicken, combine olive oil, Dijon mustard, and your chosen spices in a mixing bowl. Whisk the ingredients together until they form a smooth paste. This marinade is the secret to a flavorful crust that will develop as the chicken roasts.
Seasoning Techniques
When it comes to seasoning your chicken, thoroughness is key. Generously apply the marinade all over the chicken, ensuring you cover every surface area. To maximize flavor, gently lift the skin of the chicken and apply some marinade directly onto the meat. This technique allows the spices to penetrate deeper, resulting in a more flavorful dish. Don’t be shy; use your hands to massage the marinade into the chicken for even distribution.
Setting Up for Roasting: The Can Technique
Once your chicken is marinated, it’s time to prepare for roasting. Open your chosen beverage and pour out (or drink) about a quarter of it to create space for the chicken. This step is crucial, as it ensures that the can can be securely placed inside the chicken cavity. Carefully insert the can into the cavity of the chicken, ensuring it stands upright. The chicken should now be stable on its own, allowing for even roasting and flavor infusion.
For optimal results, consider placing the chicken on a roasting pan or a baking sheet lined with aluminum foil. This setup will catch any drippings from the chicken, making cleanup easier while also providing a surface for the chicken to roast uniformly.
Now that you’ve successfully prepared your oven-roasted chicken on a can, you’re ready to take the next step in the cooking process, which will yield a deliciously crisp and juicy main dish. Stay tuned for the final steps in achieving perfection with your oven-roasted chicken!
Preparing the Can or Bottle
Before you begin roasting your chicken, it’s essential to set up the can or bottle correctly. This preparation will help enhance steam release while ensuring that the chicken cooks evenly.
1. Choosing the Right Can or Bottle: Begin with a standard 12-ounce beer can or an aluminum soda can. If you’re opting for a bottle, a small, sturdy bottle that can withstand the heat is ideal. Make sure to clean it thoroughly and remove any labels.
2. Creating Space: If using a can, open it and pour out about half of the liquid. This reduces the weight and allows for better steam distribution. If using a bottle, fill it with about 1/3 of your favorite beer, soda, or a mix of broth and herbs. This liquid will create steam that infuses the chicken with flavor during roasting.
3. Enhancing Steam Release: To allow for maximum steam release, consider puncturing a few small holes in the top of the can or bottle using a can opener or a sharp knife. This step will help keep the chicken moist and enhance the overall flavor.
Balancing the Chicken
Positioning the chicken correctly on the can or bottle is crucial for even cooking and stability.
1. Securing the Chicken: Place the chicken upright over the can or bottle, ensuring that the can fits snugly into the cavity. This setup will allow the chicken to stand upright during roasting, promoting even heat circulation.
2. Safety Tips: Make sure the chicken is balanced well on the can. If it’s wobbling, adjust the position or use a baking dish with high sides to support the chicken. You may also tuck the wings behind the back to prevent them from burning.
Adding Flavorful Elements
To elevate the flavor of your oven-roasted chicken, consider incorporating lemon wedges into the can or bottle.
1. Lemon Wedges: Before placing the chicken on the can, add a few wedges of lemon into the can or bottle. As the chicken roasts, the lemon juice will release, infusing the meat with tangy flavor that balances the richness of the chicken.
2. Additional Herbs and Spices: Feel free to add fresh herbs, such as rosemary or thyme, into the can with the lemon. These aromatics will further enhance the flavor profiles as they steam during the roasting process.
Roasting Process: Timing and Temperature
Now that your chicken is set up, it’s time to roast it to perfection.
1. Time Considerations: The roasting time will vary based on the size of the chicken. A standard 4-5 pound chicken should roast for about 1.5 to 2 hours at 375°F (190°C). If you’re using a larger or smaller bird, adjust the time accordingly—generally, aim for about 20 minutes per pound.
2. Internal Temperature Guidelines: To ensure your chicken is safe to eat, it must reach an internal temperature of 165°F (75°C). Use a meat thermometer inserted into the thickest part of the thigh without touching the bone to check for doneness. To achieve juicy results, remove the chicken from the oven when it reaches about 160°F (70°C); it will continue to cook while resting.
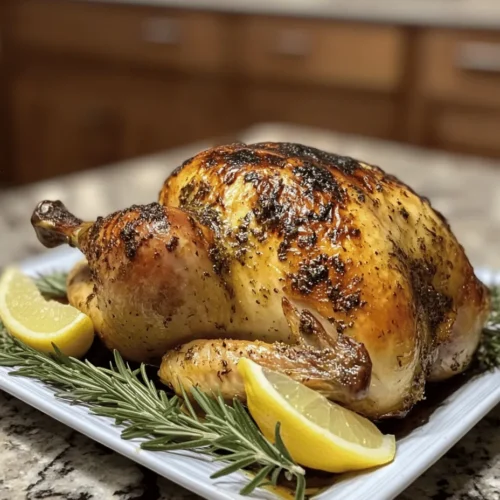
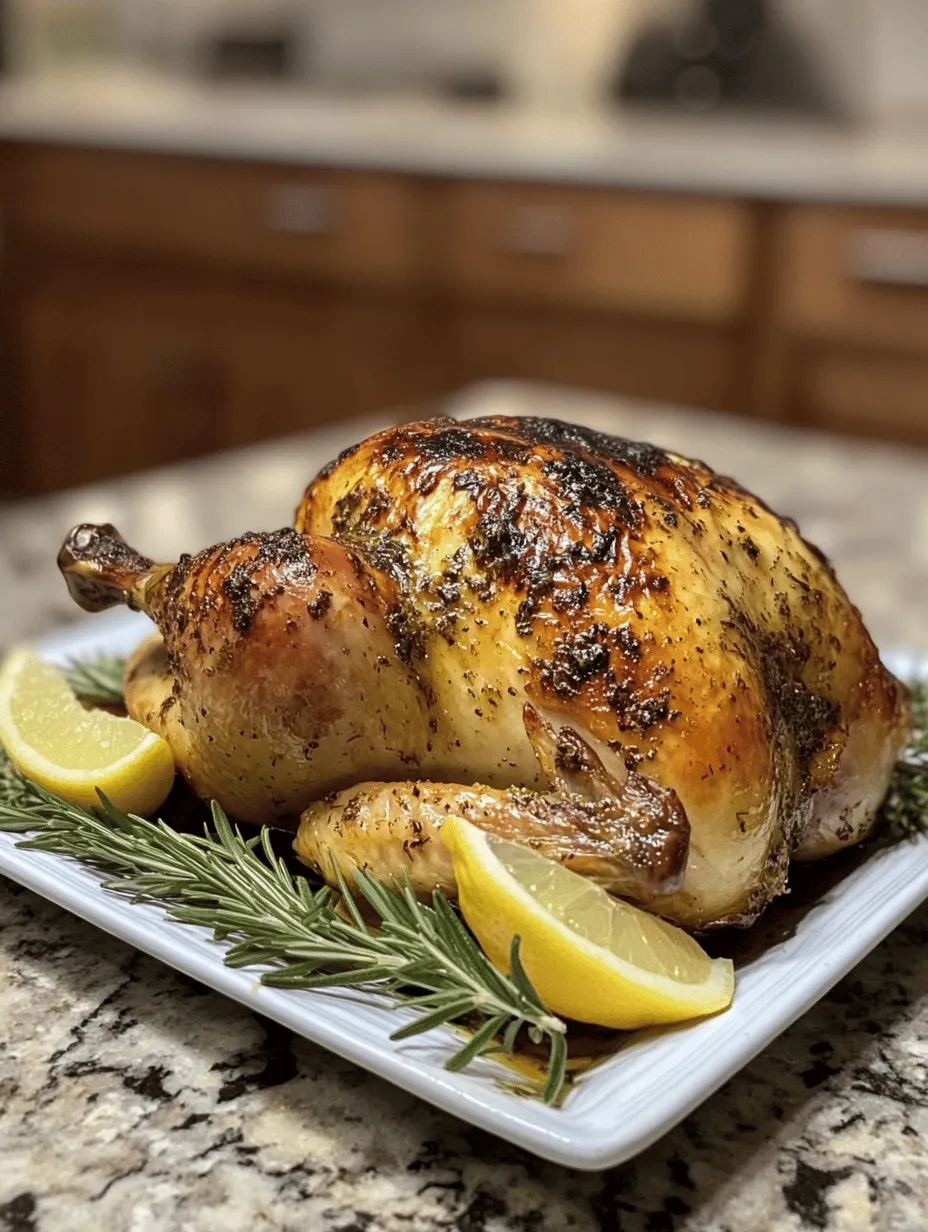
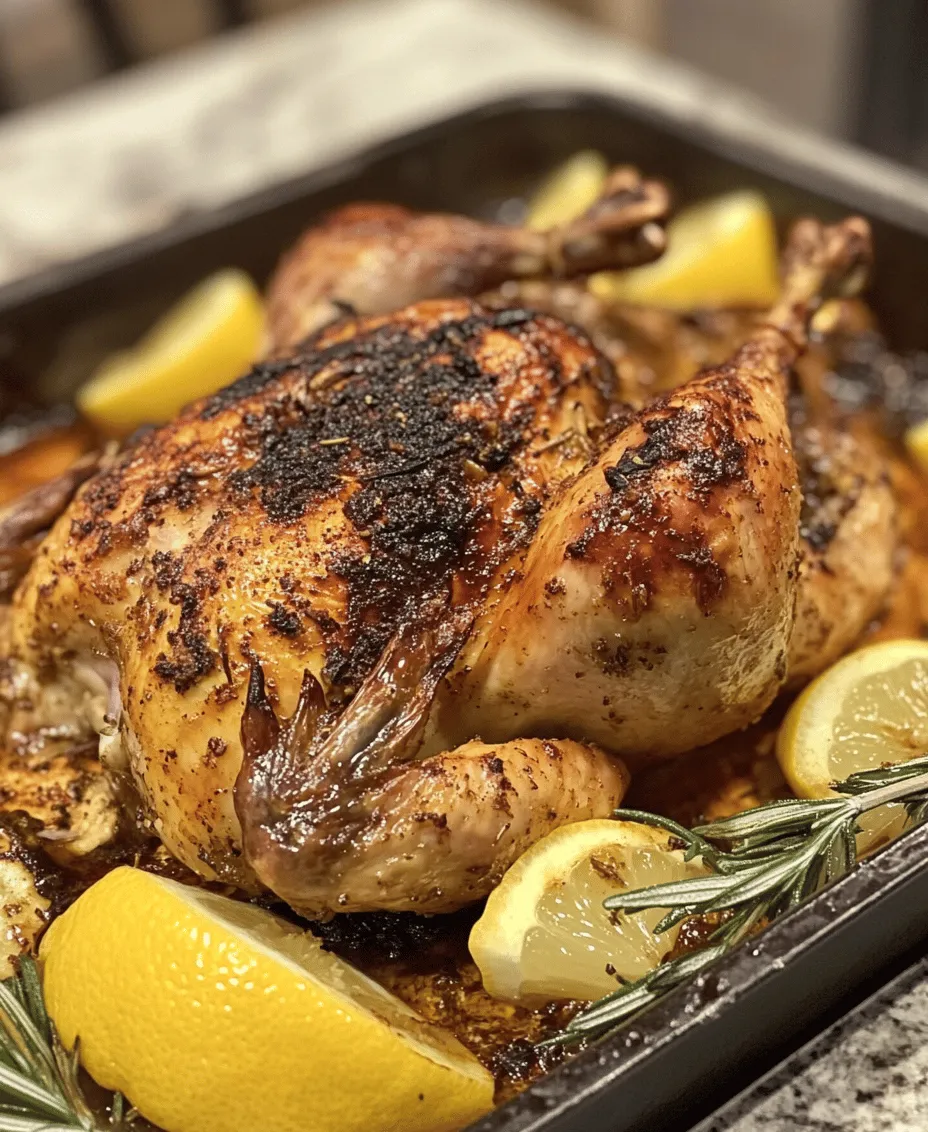
3. Visual Cues for Perfect Roasting: Look for a golden-brown skin that is crispy and firm. The juices should run clear when you pierce the thigh. If the skin appears pale or rubbery, it may need additional time in the oven.
Resting and Serving Your Oven-Roasted Chicken
After roasting, let your chicken rest before carving.
1. The Importance of Resting: Resting allows the juices to redistribute throughout the meat, resulting in a more succulent and flavorful chicken. Tent the chicken loosely with aluminum foil and let it rest for about 10-15 minutes before carving.
2. Carving Techniques: For efficient slicing, start by removing the legs and thighs. Cut through the joint where they attach to the body. Next, slice the breast meat off the bone, cutting against the grain for tender pieces. Serve the carved chicken on a platter, showcasing its golden skin.
3. Presentation Ideas: To enhance the visual appeal, arrange the chicken pieces on a serving platter and garnish with fresh rosemary sprigs. You can also add lemon slices or roasted vegetables for a colorful presentation.
Pairing Suggestions for Your Roasted Chicken
To create a delightful meal, consider what to serve alongside your oven-roasted chicken.
1. Side Dishes: A variety of side dishes can complement the flavors of your chicken wonderfully:
– Roasted Vegetables: Carrots, Brussels sprouts, and potatoes tossed in olive oil and seasoned with salt and pepper.
– Grains: Fluffy rice pilaf or quinoa salad with herbs can provide a hearty base.
– Salads: A fresh green salad with a tangy vinaigrette will balance the richness of the chicken.
2. Beverage Pairings: Pair your chicken with beverages that enhance its flavors:
– Wines: A crisp white wine, such as Sauvignon Blanc or a light-bodied red like Pinot Noir, complements the dish well.
– Craft Beers: If you prefer beer, opt for a light ale or a citrusy IPA that can enhance the lemony notes of the chicken.
– Non-Alcoholic Options: Sparkling water with a splash of lemon or a refreshing iced tea can also work beautifully.
Conclusion
Oven-roasted chicken on a can is not only a fun and creative cooking method but also an incredibly flavorful way to prepare a classic dish. With its crispy skin, juicy meat, and the added aroma from steaming elements, this recipe is sure to impress your family and friends.
Remember to take your time during preparation, follow the roasting guidelines closely, and let the chicken rest before carving for optimal juiciness. Feel free to explore different flavor combinations and side options to make this dish your own. Enjoy the joys of cooking at home, and embrace the satisfaction that comes from creating a delicious, memorable meal. Whether it’s a casual weeknight dinner or a festive gathering, this oven-roasted chicken recipe is a surefire way to bring everyone together at the table.