Introduction
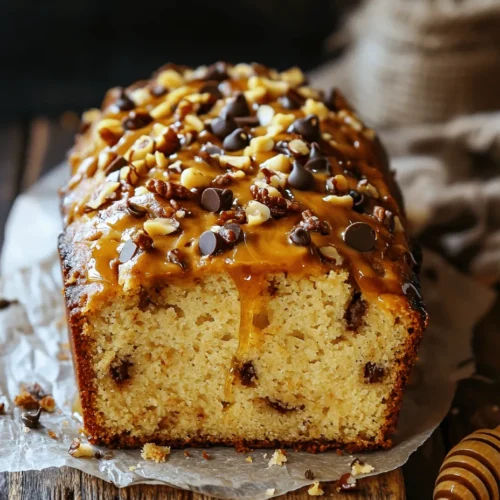
Peanut butter is a beloved ingredient that has found its way into countless recipes, from classic sandwiches to indulgent desserts. Its rich, creamy texture and nutty flavor make it a versatile choice for both sweet and savory dishes. In the baking world, peanut butter shines, adding depth and moisture to various baked goods. One standout creation is the Creamy Peanut Butter Dream Bread—a delightful treat that’s perfect for breakfast, snacks, or even dessert.
This recipe takes the beloved flavors of peanut butter and elevates them to new heights with a few unique twists. The use of creamy peanut butter not only infuses the bread with its iconic taste but also contributes to a moist texture that is simply irresistible. To enhance the sweetness, we incorporate applesauce, which acts as a natural sweetener and moisture booster, ensuring that each slice is tender and soft. For those looking to add an extra layer of indulgence, the recipe offers optional ingredients like chocolate chips or chopped nuts, allowing you to customize the bread to your taste.
In this article, we will guide you through the ingredients needed, the preparation steps, and some additional tips to ensure your Creamy Peanut Butter Dream Bread turns out perfectly every time. Whether you’re a seasoned baker or a novice in the kitchen, this recipe is designed to be approachable and rewarding, inviting you to enjoy the delightful combination of flavors and textures.
Understanding the Ingredients
To create your Creamy Peanut Butter Dream Bread, it’s essential to understand the role of each ingredient in the recipe. This knowledge not only ensures better results but also allows you to make substitutions or adjustments as needed.
Creamy Peanut Butter
At the heart of this recipe is creamy peanut butter, which provides the primary flavor and moisture. The smooth, rich consistency of the peanut butter helps create a tender crumb in the bread. When selecting peanut butter, opt for a natural variety without added sugars or oils for the best flavor and health benefits.
Sugars (Granulated and Brown)
Both granulated sugar and brown sugar are used in this recipe to create a balanced sweetness. Granulated sugar contributes to the overall sweetness, while brown sugar, which contains molasses, adds moisture and a hint of caramel flavor. Together, they enhance the bread’s texture and taste, ensuring each slice is both sweet and satisfying.
Applesauce
Incorporating applesauce is a wonderful way to add natural sweetness and moisture to the recipe. It not only helps to reduce the amount of added sugar but also acts as a binding agent, making the bread tender and soft. The subtle apple flavor complements the peanut butter beautifully, making for a deliciously harmonious blend.
Eggs
Eggs are a crucial component in many baking recipes, and this one is no exception. They serve as a binding agent, helping to hold the ingredients together and provide structure. Additionally, eggs add richness to the bread, enhancing both its flavor and nutritional profile.
Baking Powder and Baking Soda
To achieve the desired fluffiness in your Creamy Peanut Butter Dream Bread, both baking powder and baking soda are included as leavening agents. These ingredients help the bread rise, creating a light and airy texture. It’s important to use the correct measurements of these leavening agents to ensure proper rising during baking.
Flour
The foundation of any bread recipe, flour provides the structure necessary for the bread to maintain its shape. In this recipe, all-purpose flour is typically used, but you can experiment with whole wheat flour or gluten-free alternatives if desired. The flour absorbs moisture and contributes to the overall texture of the bread.
Milk
Adding milk to the recipe brings richness and moisture to the batter. It helps to create a smooth consistency and enhances the flavor profile of the bread. Depending on your dietary preferences, you can use whole milk, almond milk, or any other type of milk you enjoy.
Optional Ingredients
To add an extra dimension of flavor and texture, consider incorporating optional ingredients like chopped nuts or chocolate chips. Chopped walnuts or pecans can add a delightful crunch, while chocolate chips offer a sweet contrast to the peanut butter. These additions can be tailored to your personal taste and make the bread even more indulgent.
Preparing for Success: Essential Kitchen Tools
Before you dive into making your Creamy Peanut Butter Dream Bread, gather the necessary kitchen tools to streamline the process. Having everything ready will make your baking experience more enjoyable and efficient.
– Mixing Bowls: Use a large bowl for combining the wet ingredients and a medium bowl for the dry ingredients. This separation ensures thorough mixing and helps prevent clumping.
– Electric Mixer or Whisk: An electric mixer makes it easy to cream together the peanut butter and sugars, but a whisk will also work well if you prefer a more hands-on approach.
– Measuring Cups and Spoons: Accurate measurements are crucial in baking, so make sure you have a reliable set of measuring cups and spoons on hand.
– Loaf Pan (9×5-inch): A standard 9×5-inch loaf pan is ideal for this recipe, providing the perfect shape and size for your bread to rise and bake evenly.
– Parchment Paper (Optional): Lining the loaf pan with parchment paper can help prevent sticking and make for an easier cleanup.
– Cooling Rack: Once your bread is baked, transferring it to a cooling rack allows it to cool evenly and prevents sogginess.
Step-by-Step Guide to Making Creamy Peanut Butter Dream Bread
Now that you have a grasp of the ingredients and tools, let’s dive into the step-by-step process of making your Creamy Peanut Butter Dream Bread. Follow these detailed instructions to ensure your bread turns out perfectly every time.
Step 1: Preheat Your Oven
Begin by preheating your oven to 350°F (175°C). Preheating ensures that your bread bakes evenly and rises properly.
Step 2: Prepare Your Loaf Pan
While the oven is heating, prepare your loaf pan. If you’re using parchment paper, cut a piece that fits the bottom of the pan and extends slightly over the edges. This will make it easier to lift the bread out once it’s baked.
Step 3: Combine the Wet Ingredients
In a large mixing bowl, add 1 cup of creamy peanut butter, 1/2 cup granulated sugar, and 1/2 cup brown sugar. Using an electric mixer or whisk, cream these ingredients together until smooth and well combined. The mixture should be light and fluffy, which helps to incorporate air for a better rise.
Next, add 2 large eggs, 1/2 cup of applesauce, and 1/2 cup of milk to the bowl. Mix these wet ingredients until fully incorporated. The eggs will provide structure, while the applesauce and milk will add moisture to your batter.
Step 4: Mix the Dry Ingredients
In a separate medium bowl, whisk together 1 ½ cups of all-purpose flour, 1 teaspoon of baking powder, and 1/2 teaspoon of baking soda. Mixing the dry ingredients separately ensures even distribution of the leavening agents throughout the flour.
Step 5: Combine Wet and Dry Ingredients
Gradually add the dry mixture to the wet mixture, stirring gently until just combined. Be careful not to overmix, as this can lead to a dense bread. If you’re adding chocolate chips or chopped nuts, fold them in at this stage for an extra burst of flavor.
Step 6: Transfer to Loaf Pan
Pour the batter into your prepared loaf pan, using a spatula to smooth the top if necessary. Make sure the batter is evenly distributed to ensure uniform baking.
Step 7: Bake
Place the loaf pan in the preheated oven and bake for 50-60 minutes, or until the top is golden brown and a toothpick inserted into the center comes out clean. If the top begins to brown too quickly, you can loosely cover it with aluminum foil during the last 15 minutes of baking.
Step 8: Cool and Enjoy
Once baked, remove the bread from the oven and allow it to cool in the pan for about 10 minutes. Then, carefully lift the bread out using the parchment paper (if used) and place it on a cooling rack to cool completely. Once cooled, slice and serve your Creamy Peanut Butter Dream Bread, enjoying it plain or with your favorite toppings.
This delightful recipe is sure to become a favorite in your home, offering a perfect balance of flavors and textures that everyone will love. As you prepare to bake, remember that the journey is just as enjoyable as the destination, and the results are bound to satisfy your cravings for something sweet and nutty.
 Creamy Peanut Butter Dream Bread—a delightful treat that’s perfect for breakfast, snacks, or even dessert.” />
Preheating the Oven
Before diving into the mixing and baking process, it’s crucial to preheat your oven to 350°F (175°C). Preheating is an essential step in baking, as it ensures that your Creamy Peanut Butter Dream Bread bakes evenly throughout. When the batter goes into a hot oven, it helps set the structure of the bread quickly, preventing it from becoming dense or gummy. A consistent temperature also plays a significant role in achieving that golden-brown crust we all love. So, don’t skip this step; set your oven ahead of time, and let it reach the desired temperature while you prepare your ingredients.
Mixing Wet Ingredients
Once your oven is preheated, it’s time to focus on the wet ingredients. In a large mixing bowl, combine the creamy peanut butter, applesauce, and any additional wet ingredients such as vanilla extract. The goal here is to achieve a smooth, creamy consistency that will contribute to the moistness of the final bread.
Using a hand mixer or a whisk, blend these ingredients until they are fully incorporated. If you’re using natural peanut butter, be sure to mix it well to combine the oils that may have separated. This step is vital as it ensures that the peanut butter is evenly distributed throughout the bread, enhancing its flavor and texture.
Combining Dry and Wet Ingredients
Now that your wet ingredients are ready, it’s time to mix them with the dry ingredients. In a separate bowl, whisk together your all-purpose flour, baking powder, baking soda, and salt. Make sure these dry ingredients are well combined, as this will help them evenly distribute when mixed with the wet ingredients.
When combining the wet and dry mixtures, it’s important to do so gently. Overmixing can lead to a dense bread, which is not what we want. Stir the ingredients until just combined, ensuring that there are no dry flour pockets remaining. A few lumps in the batter are perfectly fine; they will bake out during the cooking process.
Incorporating Optional Ingredients
If you’re looking to elevate your Creamy Peanut Butter Dream Bread, consider adding optional ingredients such as chopped nuts or chocolate chips. If you decide to include these, ensure they are evenly distributed throughout the batter. To do this, toss them in a small amount of flour before folding them into the mixture. This technique helps prevent them from sinking to the bottom of the loaf during baking.
When adding chocolate chips, semi-sweet or dark chocolate works best to balance the sweetness of the bread. If you’re feeling adventurous, try using a mix of different types of chocolate for a more complex flavor profile.
Baking Process
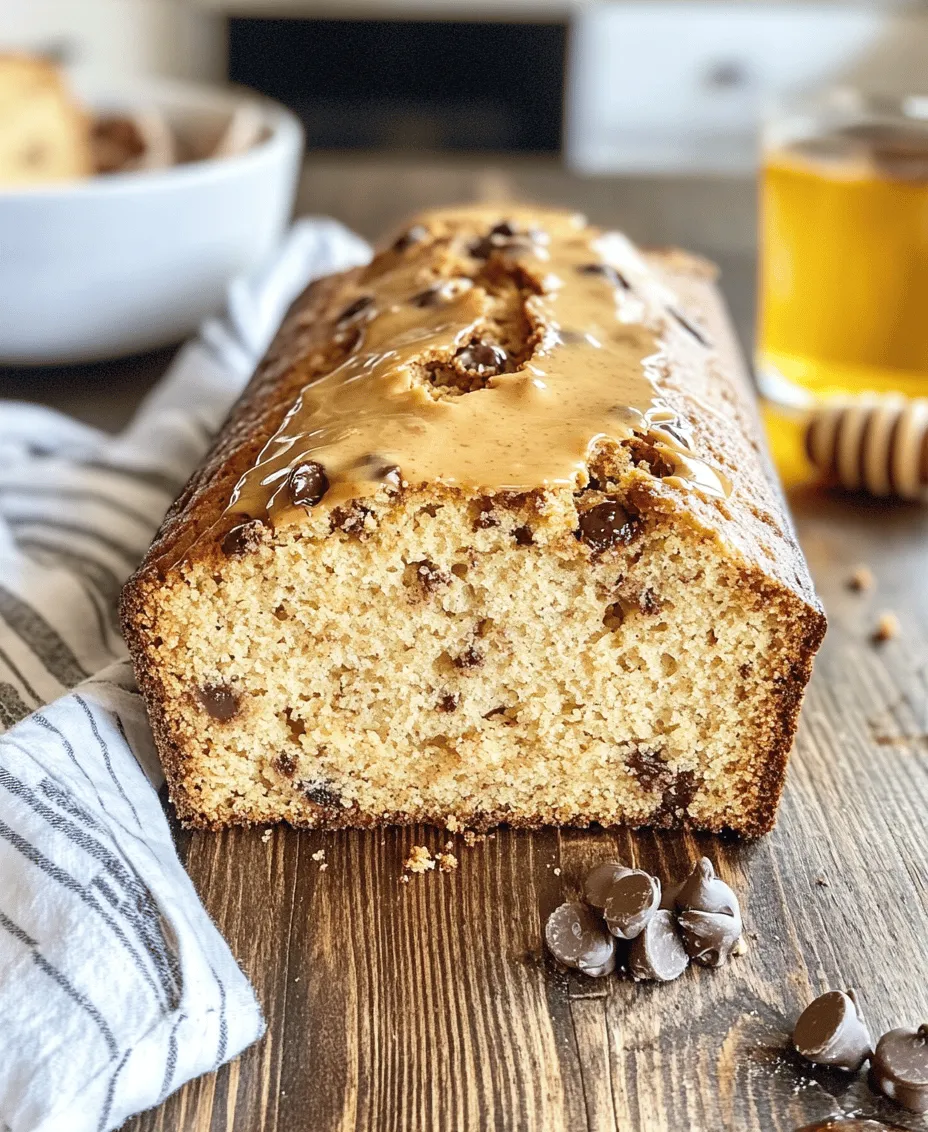
Once your batter is prepared and all ingredients are well incorporated, it’s time to pour it into a greased loaf pan. Smooth the top with a spatula to ensure an even bake. Place the pan in your preheated oven and bake for approximately 50-60 minutes.
The baking time can vary based on your oven and the size of the loaf pan, so it’s essential to keep an eye on it as it bakes. To test for doneness, insert a toothpick into the center of the bread. If it comes out clean or with just a few moist crumbs, your bread is ready. If there’s wet batter on the toothpick, give it a few more minutes and check again.
Cooling and Serving Suggestions
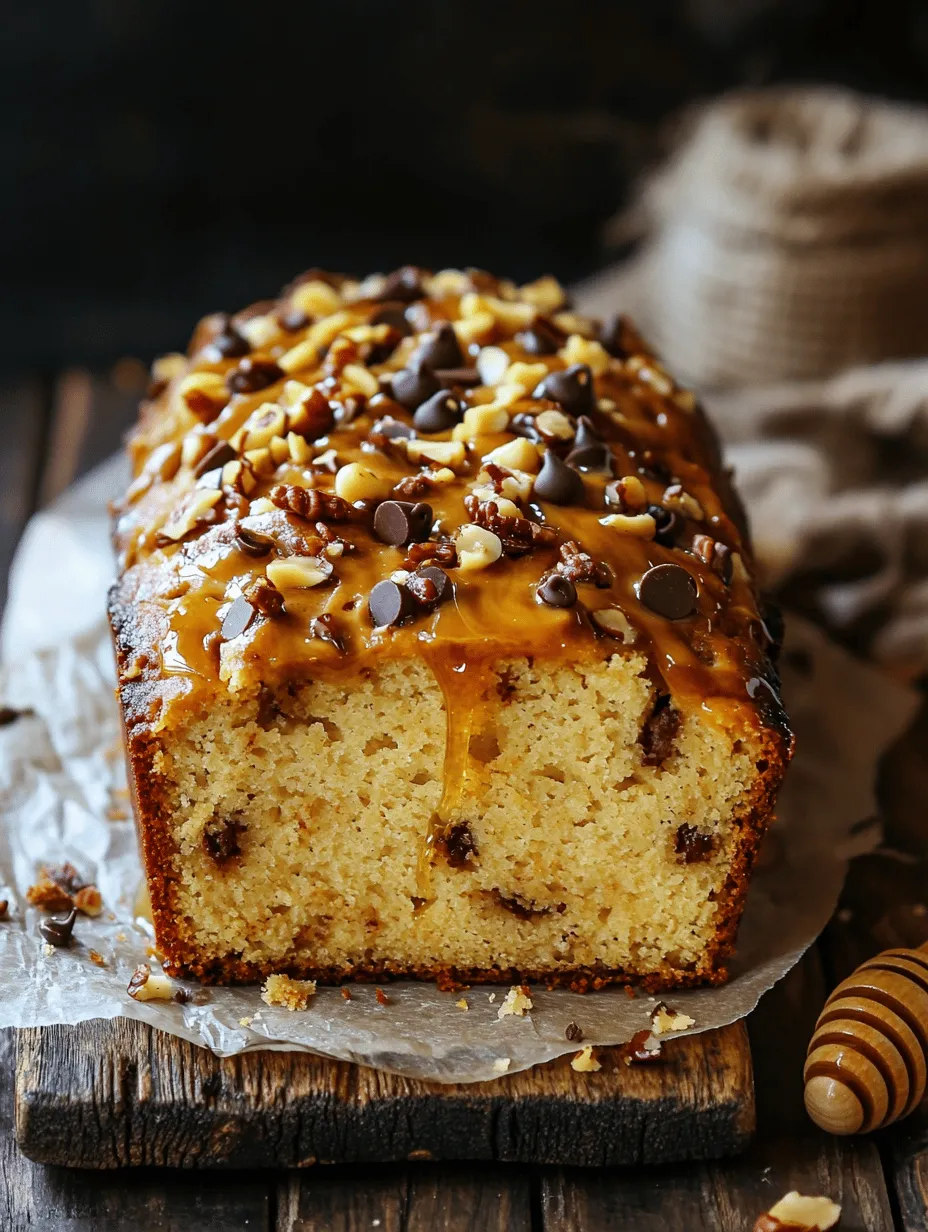
Once your Creamy Peanut Butter Dream Bread is baked to perfection, remove it from the oven and let it cool in the pan for about 10 minutes. This cooling period allows the bread to set and makes it easier to remove from the pan without falling apart. After that, transfer it to a wire rack to cool completely.
When it comes time to serve, slice the bread into thick pieces for a hearty treat. This bread is incredibly versatile; enjoy it warm with a smear of additional peanut butter, or top it with your favorite spreads like honey or fruit jam. It also makes an excellent base for breakfast toast, a satisfying snack, or even a delightful dessert option.
Nutritional Benefits of Ingredients
Understanding the nutritional benefits of the ingredients in your Creamy Peanut Butter Dream Bread can enhance your appreciation for this delicious treat. Here’s a breakdown of the key components:
– Peanut Butter: Packed with healthy fats and protein, peanut butter is a great source of energy. It contains monounsaturated fats, which can help lower bad cholesterol levels. Moreover, it’s rich in vitamins and minerals, including vitamin E, magnesium, and potassium.
– Applesauce: This low-calorie ingredient serves as a fantastic substitute for oil or butter, reducing the overall fat content of the bread. It also adds moisture and a hint of natural sweetness without extra sugar.
– Nuts: Adding nuts not only contributes texture but also brings in additional nutrients. Nuts are an excellent source of healthy fats, protein, and fiber, making them a heart-healthy addition to your bread.
– Chocolate Chips: While they add indulgence to the recipe, chocolate chips can also provide antioxidants and may offer heart-health benefits when consumed in moderation.
Creative Variations on the Classic Recipe
One of the best aspects of the Creamy Peanut Butter Dream Bread is its versatility. Here are some creative variations to consider, catering to different dietary preferences:
– Gluten-Free Options: If you’re looking for a gluten-free version, substitute the all-purpose flour with a gluten-free flour blend. Make sure the blend is suitable for baking to achieve the right texture.
– Vegan Adaptations: To make this bread vegan-friendly, replace the eggs with flaxseed meal or chia seeds mixed with water. Additionally, opt for plant-based milk instead of dairy milk, and ensure your chocolate chips are dairy-free.
– Flavor Variations: Experiment with spices like cinnamon or nutmeg for added warmth. You can also try different nut butters, such as almond or cashew butter, for a unique flavor profile.
Pairing Suggestions for Peanut Butter Dream Bread
Pairing your Creamy Peanut Butter Dream Bread with the right accompaniments can elevate the experience. Here are some delightful ideas:
– Ideal Accompaniments: Spread additional peanut butter on top for a protein boost, or try honey or fruit jam for a sweet contrast. For a savory twist, cream cheese can provide a rich, tangy flavor.
– Serving Ideas: This bread can be enjoyed in various ways—serve it as an energizing breakfast toast topped with banana slices, or slice it for an afternoon snack with your favorite spread. It also works beautifully as a dessert, perhaps paired with a scoop of vanilla ice cream.
– Beverages that Complement the Flavors: To complete your meal, consider pairing the bread with a hot cup of coffee or tea. For a refreshing option, a smoothie with fruits such as bananas or berries can complement the rich flavors of the bread.
Conclusion
The Creamy Peanut Butter Dream Bread is not just a simple recipe; it’s a delightful treat that brings comfort and satisfaction. With its rich flavors and moist texture, this bread is perfect for any occasion, whether it’s breakfast, a snack, or dessert. Its versatility allows for numerous adaptations, catering to various dietary needs and preferences.
By trying your hand at this recipe, you’ll not only enjoy a delicious loaf but also experience the joy of creating something special in your kitchen. So gather your ingredients, embrace the baking process, and savor the comforting flavors of your homemade Creamy Peanut Butter Dream Bread. Your taste buds will thank you!