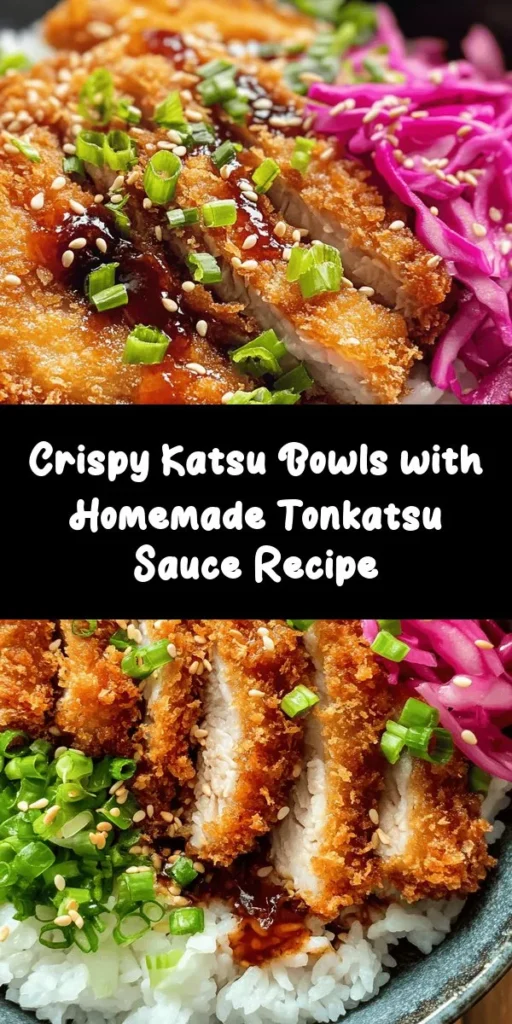
Introduction
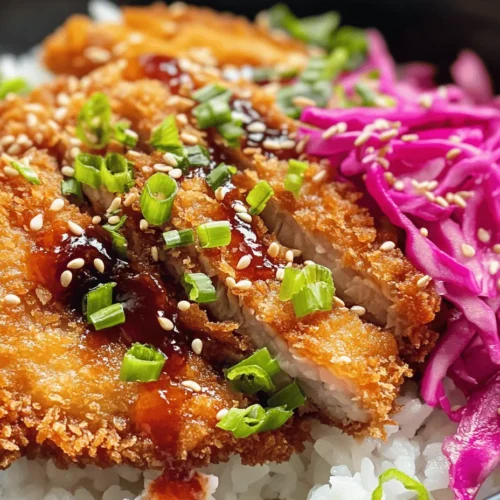
Crispy Katsu Bowls represent a delightful intersection of flavors and textures, showcasing the best of Japanese cuisine. This beloved dish features a staple known as katsu, which typically consists of breaded and fried meat, served over a bed of rice with a variety of toppings. The star of the show is undoubtedly the crispy pork katsu, perfectly golden and crunchy on the outside, tender and juicy on the inside. What makes this dish even more irresistible is the addition of homemade tonkatsu sauce, a tangy and savory concoction that elevates the katsu to new heights. Combined with fresh, crunchy vegetables and a sprinkle of sesame seeds, these bowls are not just satisfying to the palate but also visually appealing.
The origins of katsu can be traced back to the late 19th century in Japan, where it was inspired by Western cooking methods, particularly breaded and fried cutlets. Over the years, katsu has evolved into a beloved comfort food that is now enjoyed around the globe. The appeal of crispy katsu bowls lies not only in their delicious flavor but also in their ease of preparation. With a few simple ingredients and steps, you can create a delectable meal that rivals your favorite restaurant.
In this article, we will explore the essence of katsu, understand the components of tonkatsu sauce, gather the necessary ingredients, and guide you through the initial steps to prepare this mouthwatering dish from scratch. Get ready to embark on a culinary adventure that will bring the flavors of Japan right to your kitchen!
The Essence of Katsu
Definition of Katsu
At its core, katsu is a Japanese term that translates to “cutlet.” It refers to a breaded and deep-fried meat cutlet, most commonly made with pork, but chicken and beef variations also exist. The meat is typically pounded thin, coated in a seasoned flour mixture, dipped in egg, and then rolled in panko breadcrumbs before being fried to achieve that signature crispiness. The light, airy texture of panko breadcrumbs makes them ideal for achieving the perfect crunch, setting katsu apart from other breaded dishes.
Historical Background and Cultural Significance
Katsu has a rich history that reflects Japan’s culinary evolution. Emerging during the Meiji era (1868-1912), the dish was influenced by Western cooking practices introduced to Japan. Initially, katsu was a luxury item enjoyed by the upper class, but as it gained popularity, it became accessible to the masses. Today, katsu is a comfort food staple, often served in restaurants, homes, and even as street food. It embodies the fusion of cultures and showcases Japan’s ability to adapt and innovate within its culinary traditions.
The Popularity of Katsu in Modern Cuisine
In recent years, katsu has gained international acclaim, becoming a favorite among food enthusiasts worldwide. Its versatility allows for various adaptations, making it suitable for different dietary preferences. The rise of food blogs and social media has further fueled its popularity, with stunning images of crispy katsu bowls capturing the attention of home cooks everywhere. This dish’s ability to balance savory, sweet, and tangy flavors, along with its satisfying crunch, makes it a go-to option for busy weeknight dinners or special occasions alike.
Understanding Tonkatsu Sauce
Tonkatsu sauce is the perfect complement to katsu, providing a rich and flavorful contrast to the crispy meat. This sauce is a thick, sweet, and tangy condiment that enhances the overall experience of the dish. Let’s delve deeper into its components and discover how each ingredient contributes to the sauce’s unique flavor profile.
Ingredients Breakdown and Their Roles
1. Ketchup: The base of tonkatsu sauce, ketchup adds sweetness and a slight tang that balances the savory notes of the sauce. It provides a familiar flavor that makes the sauce approachable for many.
2. Worcestershire Sauce: This sauce delivers depth and complexity, with its mix of vinegar, molasses, and a variety of spices. It adds a subtle umami flavor that enhances the overall taste of the tonkatsu sauce.
3. Soy Sauce and Mirin: Soy sauce brings in the umami component, contributing a salty, savory element that rounds out the sweetness of the ketchup. Mirin, a sweet rice wine, adds a hint of sweetness and depth, further enriching the flavor profile.
4. Dijon Mustard: A key ingredient that introduces a touch of spice, Dijon mustard elevates the sauce’s flavor, giving it a unique kick that pairs beautifully with the crispy pork katsu.
Importance of Homemade Sauce Versus Store-Bought
While store-bought tonkatsu sauce is readily available, making your own sauce at home allows for greater customization and freshness. Homemade sauce enables you to adjust the flavors to suit your personal taste preferences, whether you prefer a sweeter sauce or one with a bit more tang. Additionally, crafting your own sauce ensures that you know exactly what goes into it, allowing you to avoid preservatives and artificial ingredients often found in commercial options.
Tips for Adjusting the Sauce to Personal Taste Preferences
When making your own tonkatsu sauce, feel free to experiment with the ratios of each ingredient to achieve your desired flavor. If you like a sweeter sauce, consider adding a bit more ketchup or mirin. For a tangier profile, increase the amount of Worcestershire sauce or add a splash of rice vinegar. A dash of hot sauce can also introduce a spicy element if you enjoy heat. This versatility makes homemade tonkatsu sauce a delightful addition to not only katsu bowls but also a variety of dishes like grilled meats and roasted vegetables.
Gathering Your Ingredients
To create the perfect crispy katsu bowls with homemade tonkatsu sauce, you’ll need the following ingredients:
Ingredients List
1. For the Katsu:
– 2 boneless pork loin chops (about 1-inch thick)
– Salt and pepper, to taste
– 1/2 cup all-purpose flour
– 1 large egg, beaten
– 1 cup panko breadcrumbs
– Vegetable oil, for frying
2. For the Tonkatsu Sauce:
– 1/4 cup ketchup
– 2 tablespoons Worcestershire sauce
– 1 tablespoon soy sauce
– 1 tablespoon mirin
– 1 teaspoon Dijon mustard
3. For Serving:
– Cooked white rice (for serving)
– Shredded cabbage or other fresh vegetables (like carrots and cucumbers)
– Sesame seeds, for garnish
– Green onions, thinly sliced (for garnish)
A Detailed Look at Each Component, Including Possible Substitutes
– Pork Loin Chops: This cut is ideal for katsu due to its tenderness and flavor. If you prefer a leaner option, chicken breast or thighs can be used as substitutes. For a richer flavor, try using pork tenderloin.
– Panko Breadcrumbs: These Japanese-style breadcrumbs provide the best texture for katsu. If you can’t find panko, regular breadcrumbs can be used, although the texture will be less crunchy.
– Mirin: If mirin is unavailable, you can substitute it with a mixture of rice vinegar and sugar (1 tablespoon of rice vinegar mixed with 1 teaspoon of sugar) to replicate its sweetness.
– Vegetable Oil: While vegetable oil is commonly used for frying, you can also use canola or peanut oil, both of which have high smoke points and neutral flavors.
– Fresh Vegetables: Feel free to personalize your toppings with your favorite vegetables. Shredded lettuce, sliced radishes, or even avocado can add a fresh element to your dish.
Importance of Quality Ingredients for the Best Flavor
When preparing any dish, the quality of your ingredients plays a crucial role in the final outcome. Fresh, high-quality pork will yield a more flavorful and tender katsu, while using good-quality sauces and condiments will elevate your tonkatsu sauce. Investing time and effort into sourcing the best ingredients will pay off in the deliciousness of your crispy katsu bowls.
Step-by-Step Preparation of Tonkatsu Sauce
Making your own tonkatsu sauce is a simple process that requires minimal effort. Follow these steps to whip up a batch of this flavorful condiment:
1. Mix the Ingredients: In a small mixing bowl, combine the ketchup, Worcestershire sauce, soy sauce, mirin, and Dijon mustard. Use a whisk or fork to blend the ingredients until well combined.
2. Taste and Adjust: After mixing, taste the sauce and adjust according to your preference. If you desire more sweetness, add a touch more ketchup or mirin. For added tanginess, consider incorporating a splash more of Worcestershire sauce.
3. Storage Tips: If you’re making the sauce in advance, store it in an airtight container in the refrigerator. It can last for up to two weeks, making it a convenient option for quick meals. Just give it a good stir before using, as some separation may occur.
Preparing the Katsu
With the tonkatsu sauce ready, it’s time to focus on preparing the pork katsu. This step is crucial to achieving the perfect crispy texture and flavor.
Selecting the Right Cut of Pork and Its Preparation
When choosing your pork cut, opt for boneless pork loin chops for their balance of tenderness and flavor. To prepare the pork, start by gently pounding the chops to an even thickness, about 1/2 inch thick. This helps the meat cook evenly and ensures a tender result. Season both sides with salt and pepper for added flavor.
The Breading Process Explained
The breading process is vital for achieving that signature crunch. Follow these steps:
1. Dredge in Flour: Begin by placing the seasoned pork chop in a shallow dish with flour. Make sure to coat both sides evenly, shaking off any excess flour.
2. Dip in Egg: Next, transfer the floured pork chop to the beaten egg, ensuring it is fully coated. This step helps the breadcrumbs adhere to the meat.
3. Coat with Panko: Finally, place the coated pork chop in a plate filled with panko breadcrumbs. Press down gently to ensure the breadcrumbs stick well to the surface. Repeat this process for each chop.
4. Frying the Katsu: Heat a generous amount of vegetable oil in a large skillet over medium-high heat. Once the oil is hot, carefully add the breaded pork chops, frying them for about 3-4 minutes on each side or until they are golden brown and cooked through. Use a meat thermometer to ensure the internal temperature reaches 145°F (63°C).
This first part of the recipe article sets the stage for the creation of delicious crispy katsu bowls with homemade tonkatsu sauce. In the following sections, we will dive into serving suggestions and additional tips for achieving the best results. Prepare to impress your family and friends with this mouthwatering dish!
Importance of Seasoning
Seasoning is crucial in any recipe, and the crispy katsu bowl is no exception. Properly seasoning your flour, egg wash, and panko breadcrumbs can elevate the flavor profile of your katsu to new heights. Start with the flour; consider adding a pinch of salt and pepper, or even a dash of garlic powder or paprika for an extra kick. This initial layer of flavor sets the stage for the katsu.
Next, for the egg wash, whisk in a little soy sauce or mirin to infuse your katsu with a rich umami taste. Finally, ensure that your panko breadcrumbs are seasoned adequately. You can mix in some dried herbs or spices to achieve a more complex flavor. Seasoning at each step not only enhances the taste but also ensures a delightful experience with every bite of your crispy katsu.
Techniques for Perfect Breading with Flour, Egg, and Panko
The breading process is an art that requires attention to detail. Follow these steps to ensure your katsu is perfectly breaded:
1. Flour Coating: Start by placing your seasoned flour in a shallow dish. Dredge each piece of protein (be it pork, chicken, or tofu) in the flour, ensuring an even coat. Shake off any excess flour, as too much can lead to clumping during frying.
2. Egg Wash: In a separate bowl, beat the eggs until smooth. Dip the floured protein into the egg wash, making sure it is fully coated. This step is essential as it acts as the glue that holds the panko in place.
3. Panko Crust: Finally, roll the egg-coated protein in the panko breadcrumbs. Press gently to ensure the breadcrumbs adhere well. For an even crispier texture, you can double-dip by repeating the egg wash and panko coating process.
Tips for Achieving the Perfect Crispy Texture
Achieving a perfect crispy texture is the hallmark of a great katsu. Here are some useful tips:
– Quality of Panko: Use Japanese panko breadcrumbs, which are lighter and airier than traditional breadcrumbs. This allows for a crunchier texture when fried.
– Resting Time: After breading, let your katsu rest for about 10-15 minutes before frying. This allows the coating to adhere better during cooking.
– Avoid Overcrowding: When frying, avoid overcrowding the pan, as this can lower the oil temperature and lead to soggy katsu. Fry in batches if necessary to maintain consistent heat.
Frying Techniques for Perfect Katsu
Best Practices for Frying Katsu to Ensure Crispiness
Frying is where the magic happens, and several best practices can help you achieve that perfect crispy katsu:
– Choosing the Right Oil: Select oils with a high smoke point, such as vegetable oil, canola oil, or peanut oil. These oils can handle the high temperatures required for frying without burning.
– Frying Temperature: The ideal frying temperature is around 350°F (175°C). Use a thermometer to monitor the oil temperature, or drop a small piece of bread into the oil; if it sizzles and browns quickly, the oil is ready.
– Signs That the Oil Is Ready for Frying: Look for gentle bubbling around a wooden spoon or chopstick placed in the oil. If the bubbles are vigorous, the oil may be too hot, while a lack of bubbling indicates it’s not hot enough.
– How to Avoid Soggy Katsu: After frying, place the katsu on a wire rack instead of paper towels. This prevents steam from getting trapped underneath, maintaining the crispiness.
Assembling the Katsu Bowl
After successfully frying your katsu, it’s time to assemble your bowl. Presentation can enhance the eating experience significantly.
Instructions on How to Assemble the Katsu Bowl for Presentation and Flavor Balance
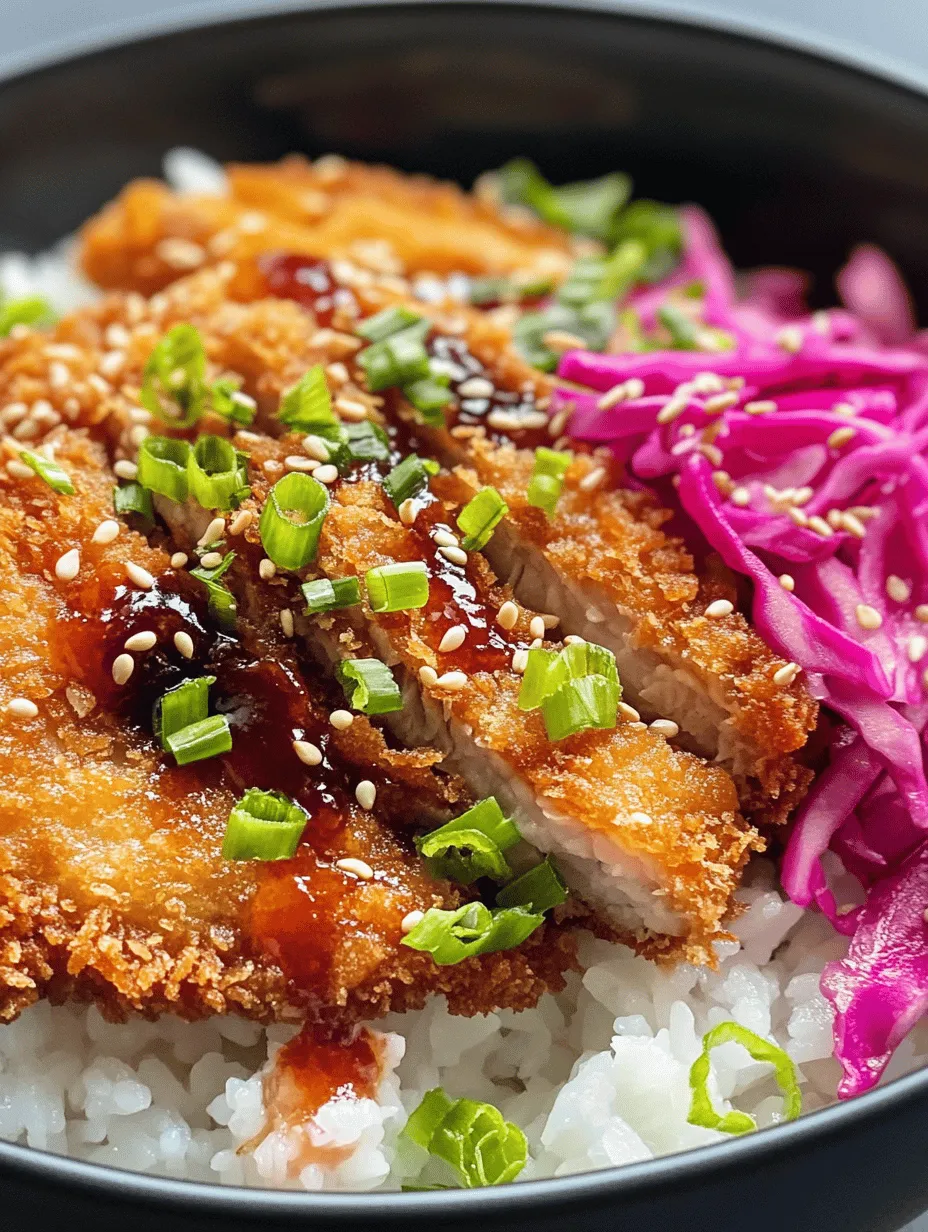
1. Layering: Begin with a generous base of steamed rice. The rice should be warm and fluffy, acting as the perfect canvas for your katsu.
2. Adding Katsu: Place the fried katsu on top of the rice. If desired, slice the katsu into strips for easier eating and a more appealing presentation.
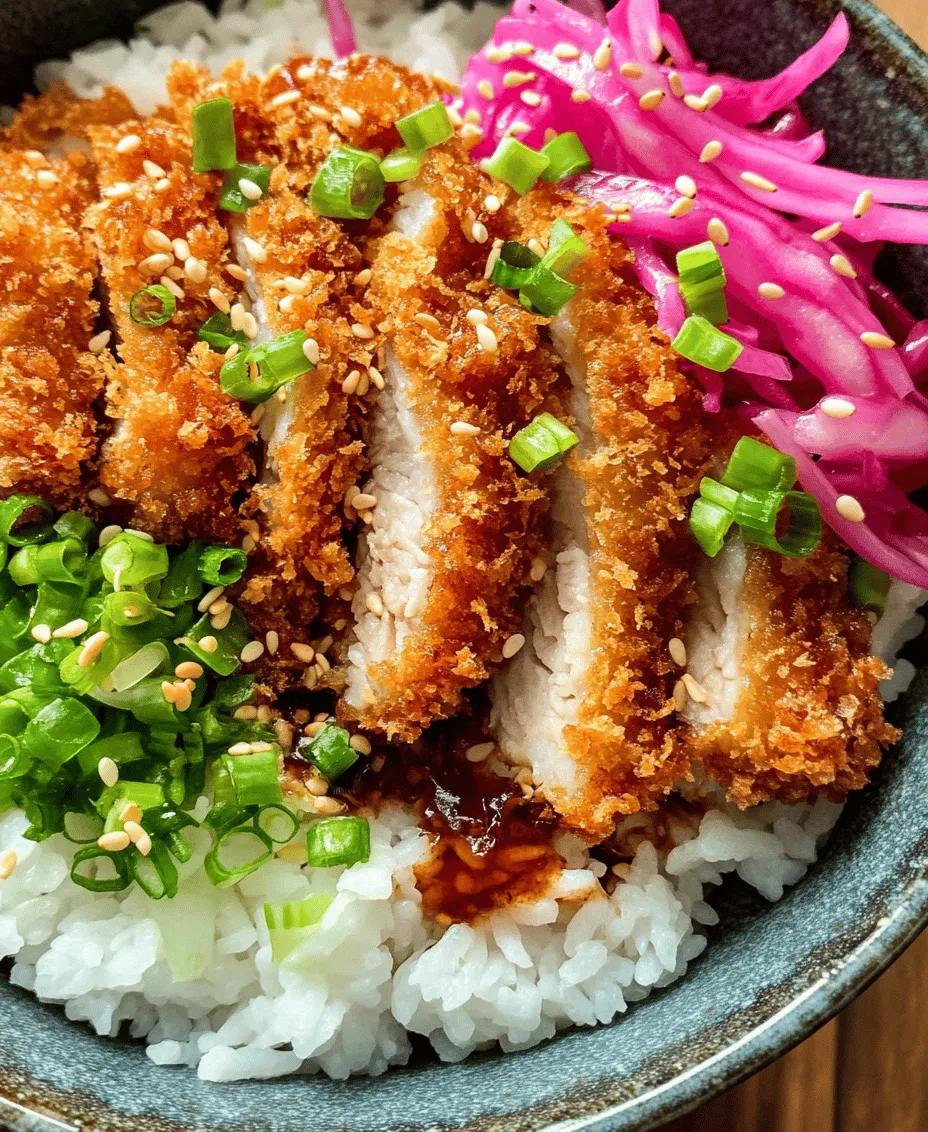
3. Toppings: Add toppings such as shredded cabbage, sliced green onions, and pickled ginger. These not only add color but also provide crunch and contrast to the rich katsu.
4. Drizzle with Tonkatsu Sauce: Generously drizzle your homemade tonkatsu sauce over the katsu. This tangy-sweet sauce is essential for flavor balance.
5. Garnishing: Finish with a sprinkle of sesame seeds or a few slices of nori. Garnishing not only enhances visual appeal but also contributes additional flavor elements.
Variations and Customizations
One of the best aspects of katsu bowls is their versatility. You can customize your bowl to suit your preferences or dietary needs.
Suggestions for Alternative Proteins
– Chicken Katsu: Substitute pork with chicken breast or thighs for a leaner option. Chicken katsu is just as delicious and offers a different flavor profile.
– Tofu Katsu: For a vegetarian or vegan option, use firm tofu. Press the tofu to remove excess moisture before breading and frying.
– Fish Katsu: White fish like tilapia or cod can also be coated and fried for a lighter, flaky version of the dish.
Additional Toppings and Side Options
– Seasonal Vegetables: Incorporate seasonal vegetables like bell peppers, carrots, or zucchini into your bowl for added nutrition and color.
– Different Types of Pickles: Try using different pickles, such as daikon or cucumber, to add tang and crunch.
– Spicy Mayo or Other Sauces: For those who enjoy a bit of heat, consider adding a drizzle of spicy mayo or a chili sauce alongside the tonkatsu sauce for a flavor boost.
Serving Suggestions
To enhance the dining experience, consider these serving suggestions:
Pairing Options
– Drinks: Pair your katsu bowl with a crisp Japanese lager or a refreshing iced green tea. Both complement the dish beautifully and cleanse the palate.
– Appetizers: Serve with light appetizers like edamame or miso soup to start the meal on a flavorful note.
– Desserts: Conclude your meal with a light dessert such as mochi or green tea ice cream to round out the experience.
Best Practices for Serving Katsu Bowls at Gatherings
When serving katsu bowls at gatherings, consider setting up a “build-your-own” station. Provide various proteins, toppings, and sauces so guests can customize their bowls to their liking. This interactive approach can make the meal more enjoyable and engaging.
Nutritional Information
Understanding the nutritional aspects of your dish can help you balance indulgence with health.
Breakdown of Calories, Protein, Carbohydrates, and Fat
A typical serving of crispy katsu bowl (with pork, rice, and tonkatsu sauce) contains approximately:
– Calories: 650-800 (depending on portion sizes and toppings)
– Protein: 30-40 grams (primarily from the protein source)
– Carbohydrates: 70-80 grams (mostly from rice)
– Fat: 25-30 grams (mainly from frying oil and the breading)
Discussion on Balancing Indulgence with Nutrition
While katsu bowls are indulgent, you can make them healthier by opting for leaner proteins, using less oil for frying (or air frying), and adding plenty of vegetables. This way, you can enjoy the crispy delight without compromising your nutritional goals.
Conclusion
Creating crispy katsu bowls with homemade tonkatsu sauce is not just about cooking; it’s an experience that brings joy and satisfaction. The process of seasoning, breading, frying, and assembling culminates in a dish that is not only visually appealing but also bursting with flavor. Encouraging creativity through variations and customizations allows you to explore different tastes while honing your culinary skills.
So, roll up your sleeves and dive into this delightful recipe. Whether for a casual weeknight dinner or a special gathering, your katsu bowls are sure to impress. Enjoy the process, relish the flavors, and share your delicious creations with family and friends. Happy cooking!