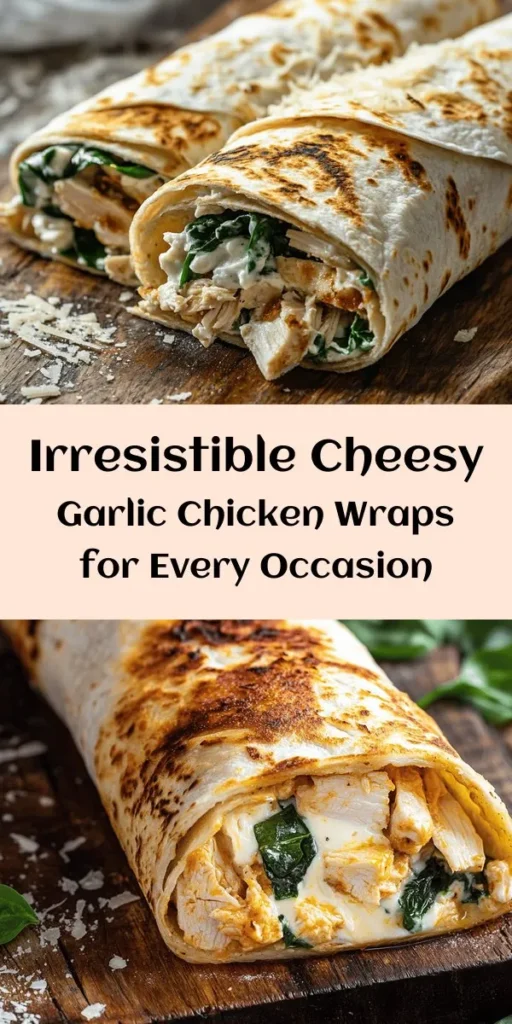
Introduction
Are you looking for a meal that is both satisfying and easy to prepare? Look no further than Cheesy Garlic Chicken Wraps—a dish that combines the savory goodness of tender chicken, the rich creaminess of cheese, and the aromatic flavor of garlic, all wrapped up in a convenient and versatile format. These wraps not only satisfy your cravings but also make for a fantastic option for various occasions, whether you’re enjoying a quiet dinner at home, packing a lunch for work, or impressing guests at a gathering.
One of the greatest advantages of Cheesy Garlic Chicken Wraps is their versatility. They are perfect for lunch, dinner, or even as a party appetizer. You can serve them alongside a fresh salad or a side of crispy fries for a complete meal. The combination of flavors and textures will leave your taste buds dancing, making them a favorite among both adults and kids alike.
When crafting these wraps, the quality of your ingredients makes all the difference. Opting for homemade components rather than store-bought can elevate the dish, ensuring that you enjoy the freshest flavors while also providing a healthier alternative. By selecting quality ingredients, you not only enhance the flavor but also contribute to a more nutritious meal.
The Appeal of Cheesy Garlic Chicken Wraps
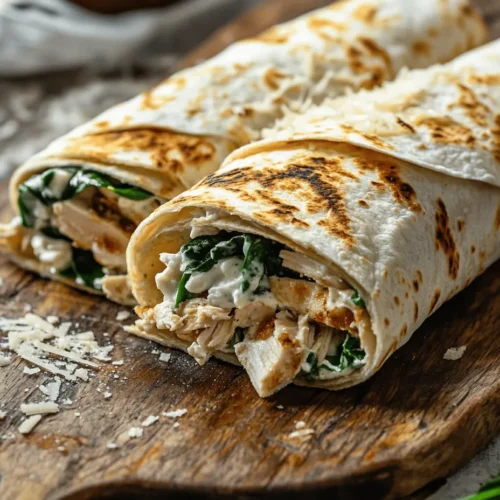
One bite of these Cheesy Garlic Chicken Wraps is enough to understand their widespread appeal. The flavor profile is nothing short of delightful, offering a savory explosion of cheesy, garlicky goodness. The tender chicken, generously coated in melted cheese, pairs beautifully with the aromatic garlic, creating a dish that is both comforting and indulgent.
From a nutritional standpoint, these wraps are also a winner. Chicken, the star ingredient, is an excellent source of protein, essential for muscle repair and overall health. The addition of fresh spinach not only adds a vibrant green color but also infuses the dish with vital vitamins and minerals, including Vitamin A, Vitamin C, and iron. Garlic, known for its numerous health benefits, adds flavor while also supporting the immune system and promoting heart health.
In our fast-paced world, convenience is key, and Cheesy Garlic Chicken Wraps deliver on this front as well. With quick preparation and cooking times, this recipe is tailored for busy lifestyles. You can whip up a batch in under 30 minutes, making it an ideal choice for weeknight dinners or last-minute meal prep.
Ingredients Breakdown
To create the perfect Cheesy Garlic Chicken Wraps, you’ll need a few key ingredients that come together to create a harmonious blend of flavors and textures. Here’s a closer look at each component and its nutritional benefits:
Key Ingredients
1. Cooked Chicken: The foundation of this dish, cooked chicken provides lean protein that keeps you feeling full and energized. You can use leftover roasted chicken, grilled chicken, or even rotisserie chicken for convenience.
2. Cheeses: A blend of cheeses is essential for that gooey, melty texture. Common choices include mozzarella for its stretchiness, cheddar for a sharp bite, and cream cheese for creaminess. Each cheese adds its own unique flavor profile, enhancing the overall experience.
3. Garlic: Fresh garlic is the star of the show, providing a robust flavor and aroma that elevates the wraps. Garlic is also packed with antioxidants and has anti-inflammatory properties, making it a healthy addition.
4. Spinach: Fresh spinach not only adds a pop of color but also contributes valuable nutrients such as iron, calcium, and vitamins A and K. Its mild flavor complements the other ingredients without overpowering them.
5. Tortillas: The wrap itself can be made using flour or whole wheat tortillas, which serve as the perfect vessel for holding all the delicious fillings. The choice of tortilla can cater to different dietary preferences.
Nutritional Benefits of Each Ingredient
– Cooked Chicken: Approximately 25 grams of protein per 3-ounce serving, making it a great muscle-building food.
– Cheese: While cheese can be calorie-dense, it provides calcium and protein. Opting for lower-fat varieties can help balance indulgence with health.
– Garlic: Contains compounds like allicin that may help reduce blood pressure and cholesterol levels.
– Spinach: Low in calories but high in fiber, spinach supports digestive health and is an excellent source of vitamin K.
– Tortillas: Whole wheat options offer more fiber and nutrients compared to traditional flour tortillas, making them a healthier choice.
Variations
One of the best aspects of Cheesy Garlic Chicken Wraps is their adaptability. You can easily customize the recipe to suit your tastes or dietary needs. Here are a few suggestions for substitutions:
– Different Cheeses: Experiment with a variety of cheeses such as gouda, pepper jack, or feta for different flavor profiles.
– Vegetables: Add bell peppers, mushrooms, or zucchini for extra nutrients and crunch. These can be sautéed alongside the garlic for added flavor.
– Seasonings: Spice things up with herbs like parsley, basil, or oregano, or add a dash of chili flakes for a kick.
– Tortilla Options: Try using corn tortillas for a gluten-free option or lettuce leaves for a low-carb version.
Step-by-Step Cooking Instructions
Now that you have a solid understanding of the ingredients and their benefits, let’s dive into the step-by-step cooking instructions to make your Cheesy Garlic Chicken Wraps. Follow these guidelines closely for the best results:
Step 1: Gather Your Ingredients
Before you start cooking, gather all the ingredients and tools you’ll need. This includes:
– Cooked chicken (shredded or diced)
– Cheese (your choice of mozzarella, cheddar, cream cheese, etc.)
– Fresh garlic (minced)
– Spinach (fresh or sautéed)
– Tortillas (flour or whole wheat)
– Olive oil or cooking spray
– Optional: additional veggies, spices, or herbs
Step 2: Prepare the Chicken
If you’re using leftover cooked chicken, ensure it’s shredded or diced into bite-sized pieces. If you’re starting with raw chicken, season it with salt, pepper, and any preferred spices. You can grill, bake, or pan-cook the chicken until it reaches an internal temperature of 165°F (75°C). Once cooked, let it cool slightly before shredding or dicing.
Step 3: Sauté the Garlic and Spinach
In a skillet, heat a tablespoon of olive oil over medium heat. Add the minced garlic and sauté for about 30 seconds until fragrant. Be careful not to burn the garlic, as it can turn bitter. Next, add the fresh spinach and cook until wilted, about 2-3 minutes. Once done, remove the skillet from heat and set it aside.
Step 4: Combine the Fillings
In a mixing bowl, combine the cooked chicken, sautéed garlic, and spinach. Add in your choice of cheese, mixing well to ensure that everything is evenly distributed. If desired, sprinkle in some additional seasonings or herbs to enhance the flavor.
Step 5: Assemble the Wraps
Lay a tortilla flat on a clean surface. Spoon a generous amount of the chicken and cheese mixture onto the center of the tortilla. Be careful not to overfill, as this can make wrapping difficult. Fold in the sides of the tortilla and then roll it from the bottom up, tucking in the filling as you go to create a tight wrap.
Step 6: Cook the Wraps
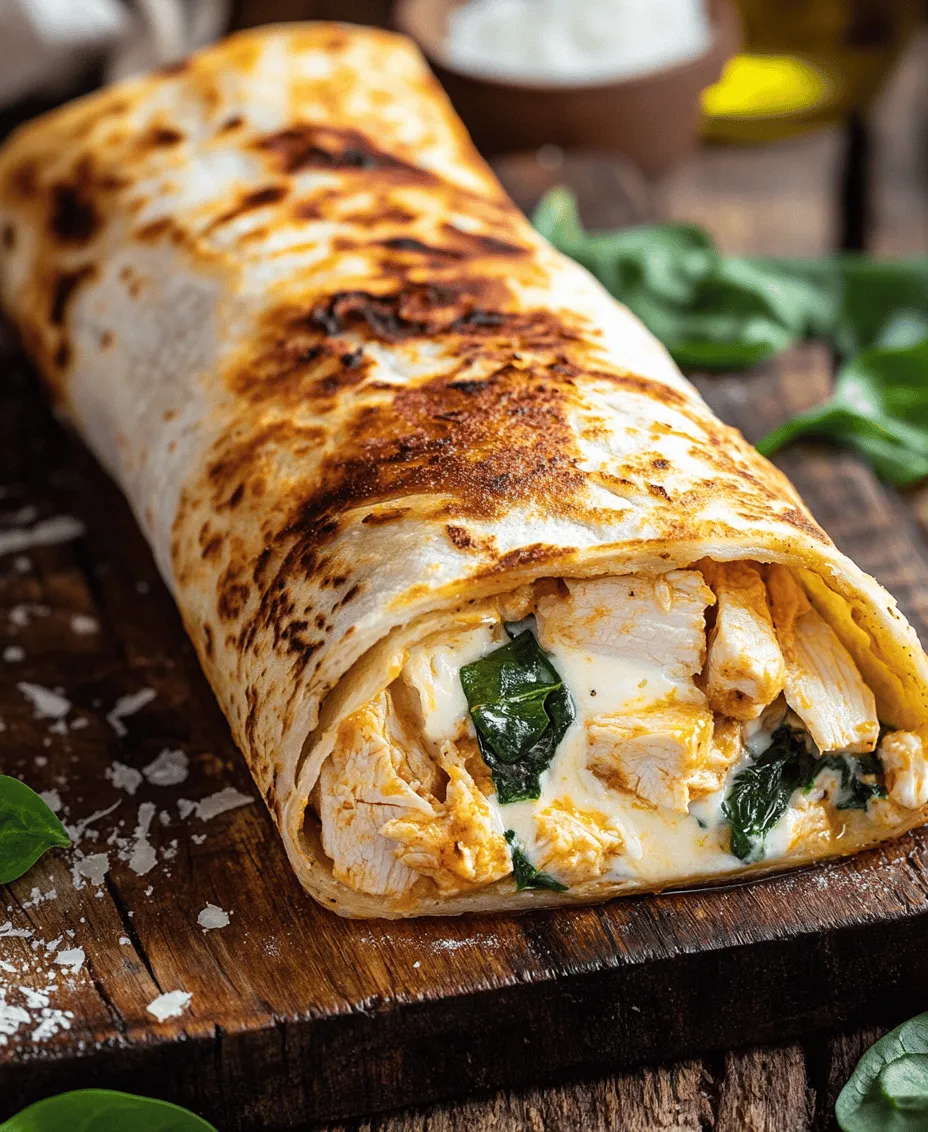
To achieve a crispy outside and melty inside, heat a skillet over medium heat and lightly grease it with cooking spray or a drizzle of olive oil. Place the wraps seam-side down in the skillet and cook for 2-3 minutes on each side, or until golden brown and crispy. You can also use a panini press for this step if you have one.
Step 7: Serve and Enjoy
Once the wraps are cooked to perfection, remove them from the skillet and let them cool for a minute before slicing them in half. Serve them warm with your favorite dipping sauce, such as ranch dressing, salsa, or a creamy garlic sauce.
By following these detailed steps, you’ll create mouthwatering Cheesy Garlic Chicken Wraps that are sure to impress. This dish is not only easy to make but also adaptable to your personal preferences, making it a perfect addition to your culinary repertoire. Get ready to savor every bite of this cheesy, garlicky delight!
Mixing the Filling
To create the ultimate cheesy garlic chicken filling, it’s crucial to achieve the right consistency and flavor profile. Start by shredding or finely chopping your cooked chicken; this will ensure that every bite is packed with flavor and that the filling holds together well.
Tips for Achieving the Perfect Cheesy Consistency and Flavor:
1. Choose the Right Cheese: Opt for a combination of cheeses to create a rich and creamy texture. Cream cheese serves as a great base, providing a smooth consistency, while shredded cheddar or mozzarella offers that melty goodness that enhances the overall flavor.
2. Add Garlic Wisely: Fresh garlic gives the best flavor, but if you’re short on time, garlic powder can be a quick substitute. Start with one clove of minced garlic per two cups of chicken and adjust according to your taste preference.
3. Incorporate Creamy Elements: To ensure your filling is not too dry, consider adding a splash of sour cream or Greek yogurt. This not only adds creaminess but also a tangy flavor that complements the chicken and cheese beautifully.
4. Season Generously: Don’t skimp on seasoning. Salt, pepper, and a dash of paprika can elevate the filling. For a more robust flavor, try adding some Italian seasoning or even a pinch of cayenne for a touch of heat.
5. Mix Thoroughly: Combine all the ingredients in a large bowl, mixing until well incorporated. This ensures that the flavors meld together, providing a uniform taste in every bite.
Assembling the Wraps
Once your filling is ready, it’s time to assemble the wraps. Proper rolling and sealing techniques are essential to prevent any spillage during cooking.
Techniques for Rolling and Sealing:
1. Choose the Right Tortilla: Opt for large flour tortillas for wrapping. They are more pliable and can hold more filling without tearing.
2. Add the Filling Strategically: Spoon a generous amount of filling onto the center of the tortilla, but be careful not to overfill. A good rule of thumb is to leave about two inches on each side to allow for proper folding.
3. Fold and Roll: Start by folding the sides of the tortilla inwards over the filling. Then, starting from the bottom, roll it tightly, tucking in the filling as you go. This ensures that the wrap is compact and prevents any leakage.
4. Seal the Edges: You can use a little bit of the cream cheese or sour cream as a glue to seal the edges of the tortilla. Alternatively, you can place the seam-side down when cooking to help keep it closed.
Cooking the Wraps
Cooking the wraps correctly is key to achieving a perfect golden-brown finish that is both appetizing and flavorful.
Best Practices for Cooking:
1. Preheat Your Pan: Use a non-stick skillet or a griddle, and preheat it over medium heat. A properly heated pan helps in achieving that crispy exterior while keeping the filling warm.
2. Use Butter or Oil: For additional flavor and crispiness, add a tablespoon of butter or olive oil to the pan before placing the wraps. This creates a golden crust that enhances the overall texture.
3. Cook in Batches: Avoid overcrowding the pan. Cook two to three wraps at a time, depending on the size of your skillet. This allows for even cooking and prevents steaming.
4. Cook Until Golden Brown: Allow each wrap to cook for about 3-4 minutes on each side or until golden brown. Flip them carefully with a spatula to prevent tearing.
5. Check the Temperature: The internal temperature of the filling should reach at least 165°F (74°C) to ensure food safety, especially if you used pre-cooked chicken.
Serving Suggestions
To elevate your Cheesy Garlic Chicken Wraps, consider pairing them with complementary side dishes and sauces that enhance the dining experience.
Ideal Pairings:
1. Dipping Sauces: A tangy ranch dressing or a spicy salsa can perfectly complement the flavors of the wraps. You could also whip up a garlic aioli for a richer dip that mirrors the garlic flavor in the wraps.
2. Fresh Salads: A light side salad featuring mixed greens, cherry tomatoes, and a zesty vinaigrette can provide a refreshing contrast to the richness of the wraps.
3. Seasoned Fries or Chips: Crispy fries seasoned with garlic and herbs or homemade tortilla chips with guacamole can add extra crunch and flavor.
Presentation Ideas:
1. Plating: Arrange the wraps on a large platter, cut them in half diagonally to showcase the filling, and garnish with fresh herbs like parsley or cilantro for an attractive presentation.
2. Serving for Gatherings: For parties, consider serving the wraps on a wooden board alongside various dipping sauces. This creates a visually appealing spread that encourages guests to help themselves.
3. Individual Servings: For a more formal touch, serve each wrap on a small plate with a side of salad and a dipping sauce in a ramekin.
Portioning for Meal Prep:
1. Storing Leftovers: Allow the wraps to cool completely before storing them in an airtight container in the refrigerator. They can last for up to three days.
2. Freezing for Later: If you plan to freeze some wraps, wrap each individually in plastic wrap and then place them in a freezer bag. They can be kept frozen for up to two months.
3. Reheating Tips: To reheat, place the wraps in a preheated oven at 350°F (175°C) for about 15-20 minutes until heated through. Alternatively, you can microwave them for a quick meal, but this may not retain the crispiness.
Variations and Customizations
One of the best aspects of Cheesy Garlic Chicken Wraps is their versatility. You can easily customize the recipe to cater to different dietary preferences or flavor profiles.
Vegetarian Option:
For a delicious vegetarian twist, substitute the chicken with plant-based protein sources, such as:
– Chickpeas or Black Beans: Mash or leave them whole for added texture.
– Grilled Vegetables: Zucchini, bell peppers, and mushrooms can add a delightful smokiness to your wraps.
– Tofu or Tempeh: These can be marinated and sautéed to provide a hearty filling.
Spice It Up:
If you enjoy a kick of heat, consider the following additions:
– Hot Sauce: Mix in your favorite hot sauce directly into the filling for a spicy flavor boost.
– Fresh Peppers: Diced jalapeños or serrano peppers can add fresh heat.
– Red Pepper Flakes: A sprinkle of these can easily elevate the heat level without overpowering the dish.
Flavor Infusions:
Experimenting with herbs and spices can transform the taste of your wraps. Consider these suggestions:
– Fresh Herbs: Basil, cilantro, or dill can add brightness and freshness.
– Smoked Paprika: This can impart a smoky flavor that pairs wonderfully with the cheese and chicken.
– Lemon Zest: A touch of citrus can brighten the filling and enhance the overall flavor profile.
Conclusion
Cheesy Garlic Chicken Wraps are not only delicious but also incredibly versatile, making them suitable for a variety of occasions—from casual weeknight dinners to festive gatherings. Their adaptability allows you to cater to different dietary needs and flavor preferences, ensuring that everyone at your table can enjoy a satisfying meal.
Encouraging you to try this recipe is easy; it showcases the joy of cooking at home and sharing delightful meals with loved ones. Whether you follow the traditional chicken filling or explore the variations, these wraps are sure to impress. So gather your ingredients, get creative, and enjoy the process of making these cheesy, garlicky delights!