

Introduction
Chewy chocolate chip cookies are a beloved classic that brings joy to both bakers and cookie lovers alike. Their perfect combination of a soft, tender center and slightly crispy edges makes them an irresistible treat. Whether you’re baking for a family gathering, a casual get-together, or simply to indulge yourself, these cookies will undoubtedly bring smiles to all who savor them. There’s something magical about the aroma that fills your kitchen as they bake, filling the air with the nostalgic scent of melting chocolate.
Baking cookies at home not only allows you to control the ingredients but also gives you the opportunity to enjoy the whole process, from measuring the ingredients to the satisfying moment of pulling them out of the oven. Unlike store-bought cookies, homemade versions can be customized with your favorite ingredients, ensuring that each bite is fresh and delightful. What sets these chewy chocolate chip cookies apart is their texture—made with a careful balance of ingredients and techniques to achieve a perfect chewiness.
The warm melted chocolate chips combined with the slight crunch of edges create a contrast that makes these cookies special. You can easily elevate their presentation or add personal touches, such as nuts for a delightful crunch or a sprinkle of sea salt for added sophistication. Each bite is a perfect blend of sweet and a hint of salt, making it difficult to stop at just one.
Recipe Overview
– Total Time: 30 minutes
– Yield/Servings: 24 cookies
– Difficulty: Not specified in the recipe
This cookie recipe is simple enough for budding bakers while delivering flavors that can satisfy even the most discerning palates. The chewy texture is achieved by balancing the sugars and incorporating the right amount of moisture. Those looking for health-conscious alternatives can consider adding chopped walnuts or pecans to boost nutritional value and add extra flavor.
These cookies are ideal for serving at parties, family gatherings, or simply as an after-dinner treat. They can also be stored in an airtight container for several days, ensuring that you have a sweet snack ready whenever the craving strikes.
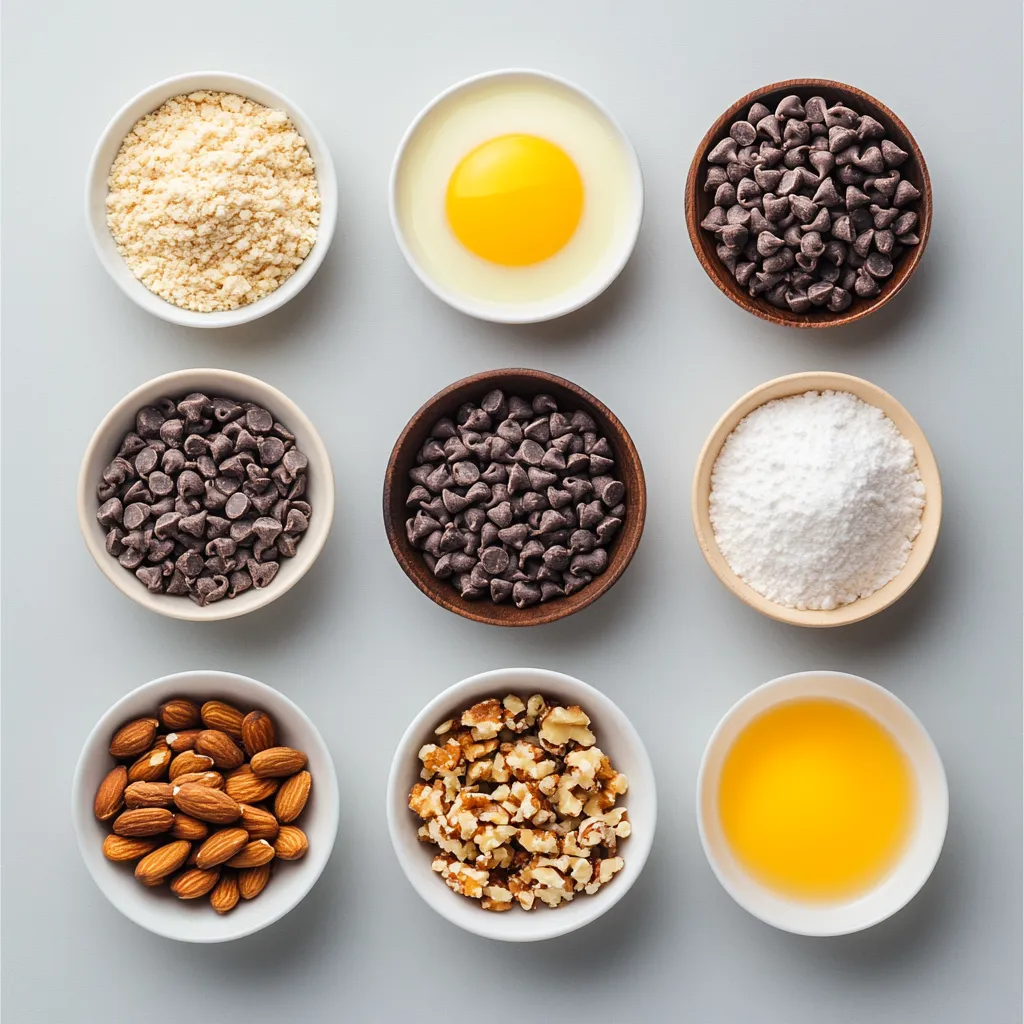
Ingredients
– 2 1/4 cups all-purpose flour
– 1/2 teaspoon baking soda
– 1 teaspoon salt
– 3/4 cup unsalted butter, melted and slightly cooled
– 1 cup packed light brown sugar
– 1/2 cup granulated sugar
– 2 teaspoons pure vanilla extract
– 1 large egg
– 1 large egg yolk
– 2 cups semi-sweet chocolate chips
– 1/2 cup chopped walnuts or pecans (optional)
In this recipe, all-purpose flour serves as the backbone, providing the structure and stability crucial for cookies. Baking soda acts as a leavening agent, allowing the cookies to rise slightly as they bake, while salt enhances the flavors, making the sweetness stand out. The use of unsalted butter is important for controlling the cookie’s flavor; melting the butter contributes to the chewy texture by creating a uniform fat distribution.
The combination of light brown and granulated sugar is key to achieving the perfect chewiness—brown sugar adds moisture and depth of flavor, while granulated sugar helps create a slightly crispy edge. Eggs play a vital role in binding the ingredients together—both the whole egg and the additional yolk contribute richness and moisture. For chocolate lovers, semi-sweet chocolate chips are a classic choice, offering a balance of sweetness and deep chocolate flavor. Lastly, the optional chopped walnuts or pecans introduce additional flavor and crunch, enhancing the overall cookie experience.
Instructions
1. Begin by preheating your oven to 350°F (175°C). Line a baking sheet with parchment paper to prevent sticking.
2. In a medium-sized bowl, whisk together the all-purpose flour, baking soda, and salt until well blended. Set this mixture aside for later use.
3. In a large mixing bowl, combine the melted butter with the brown sugar and granulated sugar. Mix these ingredients together until the mixture is smooth and creamy, ensuring there are no lumps.
4. Add the pure vanilla extract, egg, and egg yolk to the butter-sugar mixture. Beat everything together until all ingredients are thoroughly combined and the mixture is light and fluffy.
5. Gradually incorporate the dry flour mixture into the wet ingredients, mixing gently until just combined. Be careful not to overmix, as this can lead to tough cookies.
6. Carefully fold in the semi-sweet chocolate chips and chopped nuts (if you choose to use them) until they are evenly distributed throughout the dough.
7. Using a cookie scoop or a tablespoon, drop rounded portions of dough onto the prepared baking sheet, ensuring there is about 2 inches of space between each cookie to allow for spreading.
8. Place the baking sheet in the preheated oven and bake for 10-12 minutes, or until the edges of the cookies are lightly golden while the centers remain soft and slightly underbaked.
9. Once baked, remove the cookies from the oven and let them cool on the baking sheet for approximately 5 minutes. Afterward, transfer them to a wire rack to cool completely.
These instructions are designed to produce the perfect chewy chocolate chip cookie, emphasizing the importance of using the right techniques and paying attention to detail for the best results. Following them closely will ensure that anyone, regardless of their baking experience, can achieve that coveted homemade cookie texture.
Following a structured preparation approach helps in better control of the final product, leading to consistently great results every time.

Techniques for Dropping Cookie Dough
When it comes to dropping cookie dough onto the baking sheet, consistency in size is key. A uniform cookie ensures even baking and consistent texture. Using a cookie scoop is often recommended for this purpose, as it allows for precise measurements. The scoop creates perfectly rounded balls of dough, leading to cookies that bake uniformly, both in size and texture.
Using a cookie scoop vs. tablespoon
While a tablespoon can be used to drop dough, a cookie scoop provides a more efficient and reliable approach. Cookie scoops often come in various sizes, allowing bakers to customize cookie dimensions according to preference. Additionally, using a scoop minimizes mess since dough remains contained within the scoop until it is released onto the baking sheet.
Maintaining the right spacing for even baking
Spacing is crucial on the baking sheet, as it allows cookies to expand without merging into one another. Each cookie should be placed about 2 inches apart, as specified in the recipe. This distance allows heat to circulate around each cookie, providing even cooking and helping maintain a chewy texture with golden edges.
Consistency of dough and its effects on shape
The consistency of the cookie dough plays a significant role in cookie shape post-baking. A well-mixed dough should be thick yet pliable, making it easy to form drops of dough while retaining their shape during the baking process. If the dough is too soft or runny, cookies will spread too much, resulting in flat, thin cookies. Conversely, if the dough is too stiff, cookies may lack the chewy texture they’re known for.
Baking Process
Ideal baking temperatures and times
These Chewy Chocolate Chip Cookies bake well at 350°F (175°C). This temperature promotes a nice balance of baking — allowing the edges to crisp up while keeping the centers soft. The baking time of 10-12 minutes is crucial; it’s best to keep a close eye on the cookies starting at the 10-minute mark.
Signs of doneness to look for
Properly baked cookies should have lightly golden edges while the center remains soft. If you notice browning across the entire surface, the cookies may be overbaked. Opting to remove cookies from the oven when they still look underbaked assures a chewy texture.
Difference between soft centers and fully baked cookies
Understanding the difference between soft centers and fully baked cookies is vital for achieving the desired outcome. Soft-centered cookies will continue to cook slightly after being removed from the oven, benefiting from residual heat. Fully baked cookies, on the other hand, will be firm to the touch and lack any softness once cooled.
Using cooling racks: why it’s necessary
Once the cookies are out of the oven, transferring them to cooling racks is essential. It allows for even cooling and prevents steam buildup that can lead to soggy bottoms. Cooling racks provide airflow underneath the cookies, helping maintain their ideal chewy texture.
Flavor Variations
Enhancing the recipe with flavor additions
For those looking to elevate their cookies’ taste, consider enhancing the recipe with a variety of flavor additions. A tablespoon of espresso powder can deepen chocolate flavors, while a zest of orange can add brightness.
Different types of chocolate (dark, milk, white)
Experimenting with chocolate types can also yield exciting variations. Dark chocolate chips provide a robust flavor, while milk chocolate will create a sweeter profile. White chocolate offers a creamier texture, appealing to those with a sweet tooth.
Other mix-ins: dried fruits, coconut
For additional texture and taste, consider incorporating mix-ins such as dried fruits or unsweetened coconut flakes. Dried cherries, cranberries, or shredded coconut can introduce new flavors that complement the chocolate brilliantly.
Seasonal variations
Tailor your cookies to seasonal festivities! Incorporating spices like cinnamon or nutmeg can transform your cookies into a delightful autumn treat, while festive sprinkles or candy canes can adapt them for the holiday season.
How to adapt for holidays or special occasions
For special occasions, consider shaping cookies into themed designs using cookie cutters or using vibrant decorations like icing or edible glitter.
Storing and Serving Suggestions
Proper storage methods for maximum freshness
To maintain freshness, cookies should be stored in an airtight container. Placing parchment paper between layers can prevent them from sticking together and preserve their chewy texture.
Room temperature vs. refrigeration
Chewy Chocolate Chip Cookies store well at room temperature for about a week. For longer storage, they can be frozen in an airtight bag for up to three months, retaining their freshness and flavor.
Creative serving ideas
Presenting cookies creatively can enhance their appeal. Serve them on a beautiful platter or stack them with layers of parchment paper. Consider drizzling melted chocolate over the tops or dusting with powdered sugar for an elegant touch.
Pairing cookies with drinks (milk, coffee)
For a classic touch, pair cookies with a glass of cold milk or a warm cup of coffee. The warmth of a beverage can complement the chewy texture of the cookies, enhancing the overall experience.
Serving warm cookies: reheating techniques
To enjoy the cookies warm, reheat them in a microwave for about 10-15 seconds or in an oven at 300°F (150°C) for a few minutes. This will revive their soft, gooey centers, making for a delicious treat.
Healthier Alternatives
Suggestions for making a healthier cookie
For those seeking a healthier option, substitute some all-purpose flour with whole wheat flour. This adds fiber while retaining a pleasant texture.
Whole wheat flour or gluten-free options
For a gluten-free version, consider using a gluten-free all-purpose flour blend to ensure similar results.
Reducing sugar content
Another avenue for health-conscious bakers is reducing the sugar content. You might lower both brown and granulated sugars by about a quarter and still achieve a pleasing result without compromising much on flavor.
Nutritional breakdown of cookie alternatives
While specifics on nutritional breakdown are not provided in the recipe, substituting ingredients with lower-calorie options can help balance out indulgence with healthier choices. However, it’s essential to recognize that the fundamental joy of baking lies in the treats themselves.
Troubleshooting Common Issues
Identifying and correcting cookie problems
Every home baker faces challenges from time to time. Understanding common cookie issues can guide you to produce the best outcomes consistently.
Cookies spreading too much
If cookies spread too much during baking, consider checking the butter temperature. Using melted butter is essential, but if it’s too hot, it can lead to excessive spreading. Also, ensure that your flour is properly measured and that the dough is chilled before baking.
Cookies turning out too hard or too soft
Hard cookies may arise from overbaking or using too much flour. To achieve a soft result, ensure you’re measuring flour accurately and checking for doneness early. Alternatively, if cookies are too soft, they might need a few extra minutes in the oven.
How to save a batch gone wrong
Most cookie difficulties can be resolved. If cookies turn out flat, you can try refrigerating the remaining dough for 30 minutes before baking another batch. For hard cookies, a simple trick is to place a slice of bread in the container, helping absorb excess moisture and softening the cookies over time.
Conclusion
These Chewy Chocolate Chip Cookies offer a delightful blend of textures, with their crispy edges and soft, gooey centers. The combination of brown and granulated sugars provides a perfect balance of sweetness, while optional nuts add a delightful crunch. Overall, the total prep and baking time of just 30 minutes makes these cookies a quick and satisfying treat anyone can enjoy.

Chewy Chocolate Chip Cookies The Ultimate Recipe
Ingredients
- 2 ¼ cups all-purpose flour
- ½ teaspoon baking soda
- 1 teaspoon salt
- ¾ cup unsalted butter melted and slightly cooled
- 1 cup packed light brown sugar
- ½ cup granulated sugar
- 2 teaspoons pure vanilla extract
- 1 large egg
- 1 large egg yolk
- 2 cups semi-sweet chocolate chips
- ½ cup chopped walnuts or pecans optional
Instructions
- Preheat your oven to 350°F (175°C) and line a baking sheet with parchment paper.
- In a medium bowl, whisk together flour, baking soda, and salt. Set aside.
- In a large bowl, mix melted butter with brown sugar and granulated sugar until smooth.
- Add vanilla extract, egg, and egg yolk to the mixture and beat until light and fluffy.
- Gradually mix in the dry ingredients until just combined, being careful not to overmix.
- Fold in chocolate chips and nuts until evenly distributed.
- Drop rounded portions of dough onto the baking sheet, leaving space between each cookie.
- Bake for 10-12 minutes until edges are golden and centers are soft.
- Cool on the baking sheet for 5 minutes, then transfer to a wire rack to cool completely.