Introduction
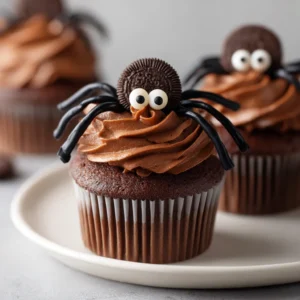
When Halloween rolls around, there’s no better way to celebrate than with a treat that’s both delicious and playfully themed. The Creepy Crawly Spider Cupcakes offer a perfect blend of rich chocolate and festive decoration that captures the imagination of both kids and adults alike. These delightful cupcakes transform the ordinary into something extraordinary, making them a fantastic centerpiece for Halloween parties or spooky gatherings.
The beauty of these cupcakes lies not just in their taste but in their whimsical appearance. With chocolate frosting, chocolate wafer cookies for spider bodies, and black licorice or gummy worms for legs, these treats are sure to be a hit. The edible candy eyes add a final touch of fun, making each cupcake as visually appealing as it is delicious. The excitement of seeing these creepy crawly creatures will add an element of festivity, making the preparation and inclusion of these cupcakes a memorable experience for all involved.
Whether you’re hosting a Halloween bash or simply want to make a fun dessert for your family, these spider cupcakes will make any occasion feel a little more special. Decorating them can be a creative venture, inviting everyone—from young children to seasoned bakers—to express their artistic flair through the use of candy and chocolate.
Recipe Overview
– Total Time: 1 hour
– Prep Time: 20 minutes
– Servings: 12 cupcakes
– Difficulty: Not specified in the recipe.
Snapshotting the playful flavors, these Creepy Crawly Spider Cupcakes present a rich chocolate profile complemented by vibrant decorations, making them a perfect treat for family gatherings or school parties. The recipe is versatile, allowing for customization based on personal taste or seasonal ingredients. You can easily swap different candies for the spider legs or add other decorative elements to give your cupcakes a unique twist that matches your event.
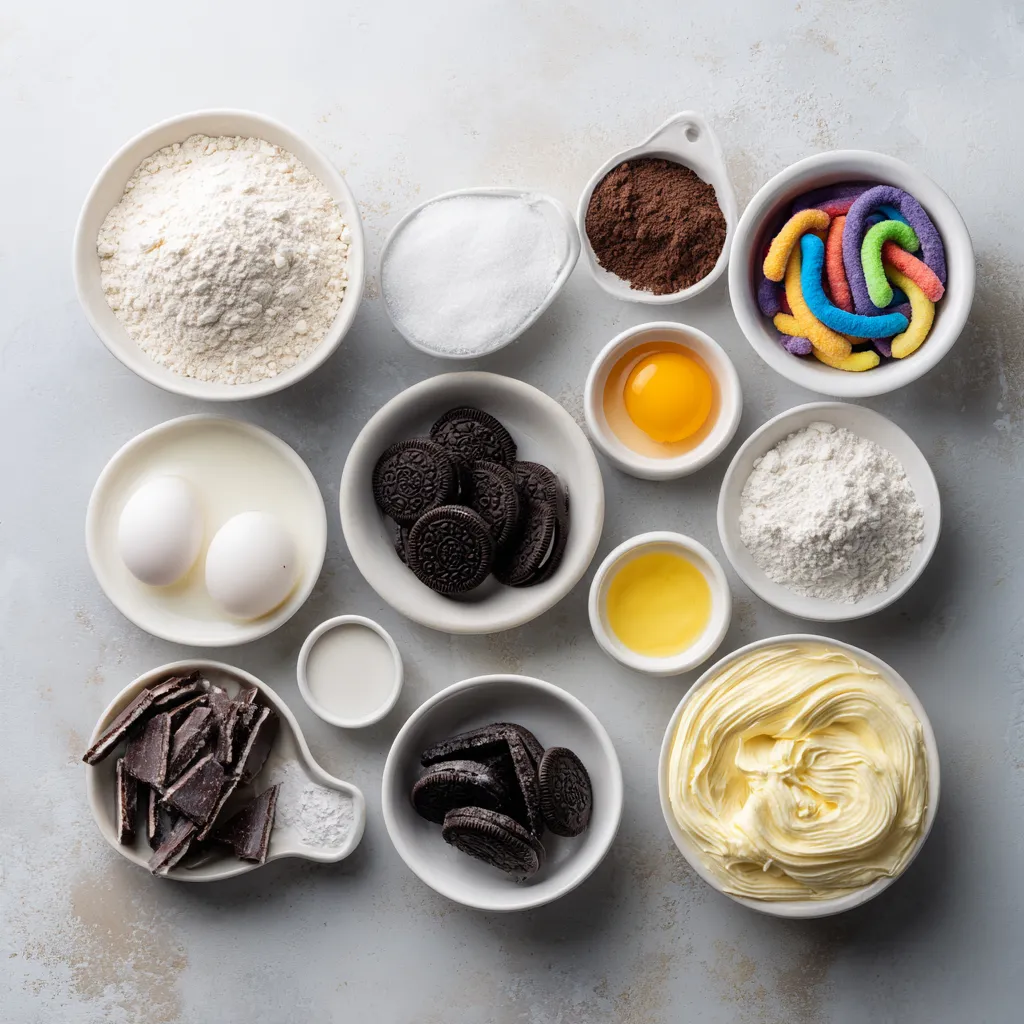
Ingredients
– 1 1/2 cups all-purpose flour
– 1 cup granulated sugar
– 1/2 cup unsweetened cocoa powder
– 1 teaspoon baking powder
– 1/2 teaspoon baking soda
– 1/4 teaspoon salt
– 1/2 cup unsalted butter, softened to room temperature
– 2 large eggs
– 1 teaspoon pure vanilla extract
– 1 cup whole milk
– 1 container (16 oz) rich chocolate frosting
– 12 chocolate wafer cookies (to represent spider bodies)
– 24 edible candy eyes (or small chocolate candies)
– 1 cup black licorice or gummy worms (for spider legs)
In creating these cupcakes, attention to detail in each ingredient contributes significantly to the overall flavor and texture. For instance, using high-quality unsweetened cocoa powder will deepen the chocolate taste, while fresh eggs will ensure the proper rise and moistness of the cupcakes. The butter must be softened to room temperature to create a fluffy, light batter, essential for the perfect cupcake base.
Instructions
1. Preheat Oven: Start by preheating your oven to 350°F (175°C). Prepare a muffin tin by lining each cup with colorful cupcake liners to add a festive touch.
2. Mix Dry Ingredients: In a large mixing bowl, sift together the all-purpose flour, granulated sugar, unsweetened cocoa powder, baking powder, baking soda, and salt. Whisk these dry ingredients thoroughly until well combined, ensuring there are no lumps.
3. Cream Butter and Eggs: In a separate bowl, beat the softened butter with a hand mixer until it becomes light and fluffy, roughly 2-3 minutes. Add the eggs one at a time, mixing well after each addition. Stir in the pure vanilla extract until fully incorporated.
4. Combine Ingredients: Gradually add the dry mixture to the creamed butter and eggs. Alternate with pouring in the whole milk, starting and ending with the dry ingredients. Mix gently until just combined—be careful not to overmix to keep your cupcakes soft and airy.
5. Fill Cupcake Liners: Evenly distribute the cupcake batter into the prepared liners, filling each about two-thirds full to allow room for rising.
6. Bake: Place the muffin tin in the preheated oven and bake for 18-20 minutes. To check for doneness, insert a toothpick into the center of a cupcake; it should come out clean. Once baked, allow the cupcakes to cool completely on a wire rack.
7. Frost Cupcakes: Once the cupcakes are completely cool, generously spread a thick layer of chocolate frosting on the top of each cupcake using a spatula or a piping bag for a more decorative finish.
8. Create Spiders: To assemble your creepy crawly creatures, take one chocolate wafer cookie and position it in the center of each frosted cupcake as the spider’s body. Cut the black licorice or gummy worms into smaller pieces and affix 8 legs around the sides of the cookie to create the spider’s limbs.
9. Add Eyes: Finally, use a dab of frosting to stick two candy eyes on the top of each cookie to complete your spook-tacular spider look!
Equipment Needed
To prepare your Creepy Crawly Spider Cupcakes, having the right tools will greatly enhance your baking experience. A muffin tin along with colorful cupcake liners is essential for baking the cupcakes perfectly while adding festive flair. It’s recommended to have mixing bowls and a whisk for combining your ingredients seamlessly. The use of a hand mixer or stand mixer for creaming the butter ensures a light and airy texture, which is crucial for fluffy cupcakes.
For frosting the cupcakes, a spatula or piping bag will help you achieve that beautiful chocolate coating you desire. Keeping a toothpick handy is practical for checking the doneness of your cupcakes. If you want to add an extra layer of creativity, consider using cookie cutters for additional shapes or themed decorations that might complement your spooky party theme.
Preparation Steps
Starting the preparation process begins with an important step—preheating the oven. Proper oven temperature is crucial for achieving that perfect rise in your cupcakes, creating the delightful texture that will have everyone raving. While the oven is heating up, you can organize your workspace, laying out your ingredients and tools. This not only streamlines the process but also helps you keep track of what you’ve accomplished.
The mixing of the dry ingredients is another key step; it is vital to ensure all components are evenly intermixed. Sifting not only removes lumps but combines the flour with other dry ingredients, enhancing the final cupcake texture. The meticulous attention to these steps sets the foundation for a delightful treat that will stand out at any gathering, especially one themed around Halloween.
{{image_3}}
Mixing and Baking the Cupcakes
Step-by-step guide through the mixing of dry ingredients
To start your cupcake making journey, it’s essential to properly prepare your dry ingredients. This involves not only measuring but also ensuring a seamless blend that facilitates a uniform cupcake texture. First, use a fine-mesh sieve to sift the all-purpose flour, cocoa powder, baking powder, baking soda, and salt into a large mixing bowl. Sifting not only removes lumps but also aerates the flour, enhancing the overall texture of your cupcakes. After sifting each ingredient, whisk them collectively using a balloon whisk. This technique helps to incorporate air and further blends any remaining dry clumps. Aim for a light, fluffy consistency—ideally, you want to achieve a uniform blend where all dry ingredients are well distributed.
Instructions for creaming the butter and integrating eggs
The next step involves creaming the softened unsalted butter, which is pivotal for achieving a light and airy texture. Using a hand mixer, beat the butter on medium speed until it transforms into a pale, fluffy mass—approximately 2 to 3 minutes. This process incorporates air, leading to the desired volume in the final cupcakes. Once your butter is ready, add each egg individually, ensuring you mix thoroughly after each addition. This step is crucial, as it helps create an emulsion between the butter and eggs, contributing to moisture retention. The addition of vanilla extract adds flavor and complements the chocolate batter beautifully.
Combining dry and wet ingredients
When integrating your dry ingredients with your butter and egg mixture, it’s important to alternate with the whole milk. This prevents the batter from becoming too liquid and helps maintain the light texture achieved from the creamed butter. Begin by adding about one-third of the dry mixture, followed by half of the milk. Continue this process—mixing just until combined—until both dry and wet ingredients are thoroughly incorporated. Overmixing can lead to dense cupcakes, so it’s best to use gentle folds with a spatula where necessary.
Filling the cupcake liners evenly
Filling the cupcake liners is a crucial aspect to ensure even baking and rise. Utilize a standard ice cream scoop or a measuring cup to distribute the batter evenly among the liners, filling them about two-thirds full. This allows for enough room for the cupcakes to rise without overflowing. If the batter is too close to the edge, you run the risk of messy overflow in the oven. A properly filled liner should look neat, with the exact right amount of batter to rise beautifully while maintaining shape.
Baking Process
Detailed baking instructions
Baking your cupcakes in a preheated oven at 350°F (175°C) ideally should take approximately 18-20 minutes. For best results, position the muffin tin in the middle of the oven to promote even heat circulation. Beyond the toothpick test, you can gauge doneness by observing the cupcake dome. They should spring back slightly when lightly pressed in the center, and the edges should appear set and firm. If you catch a delightful aroma wafting through your kitchen and the tops are no longer wet, it’s typically a good indication that they are close to being perfectly baked.
Post-baking cooling tips
Once baked, it’s imperative to allow the cupcakes to cool completely on a wire rack. Cooling on a wire rack prevents moisture buildup that could lead to soggy bottoms. When cupcakes remain in the tin, residual heat can create steam, diminishing the fluffy texture you worked hard to achieve. After about 5-10 minutes in the tin, carefully transfer them to the rack, allowing the air to circulate around and cool them entirely.
Frosting the Cupcakes
Step-by-step on applying chocolate frosting
Frosting your cupcakes can be a delightful and creative process. Start by ensuring the cupcakes are completely cool for optimal frosting application. Using a spatula, spread a generous amount of chocolate frosting on the top of each cupcake. For a smoother, more professional finish, swipe the spatula in a circular motion and gently lift it from the surface in a quick motion to create peaks.
Options for creating decorative designs
For those who desire more artistic designs, piping bags come in handy. Fill a piping bag fitted with your favorite decorative tip with frosting. This allows for more intricate designs such as rosettes, swirls, or even creating a layered look. A traditional star tip can create stunning, textured tops, perfect for showcasing the creativity behind your spooky cupcakes.
Assembling the Spiders
Guide to crafting the spider decoration
Transforming your frosted cupcakes into creepy crawly spiders requires a few simple steps. Begin by placing one chocolate wafer cookie in the center of each cupcake, acting as the spider’s body. To create spider legs from black licorice or gummy worms, cut them into 2- to 3-inch segments. Position four segments on each side of the cookie, effectively creating the spider’s eight legs—an eye-catching feature that emphasizes the Halloween theme.
Suggested methods for cutting black licorice or gummy worms
When cutting the licorice or gummy worms, use clean, sharp kitchen scissors, which can slice through these candies without squishing them. Alternatively, you can use a sharp knife, being cautious to avoid any serious accidents. Aim for consistency in the size of the legs to ensure an even appearance on all cupcakes.
Adding Final Touches
Completing the cupcakes with edible candy eyes
To place the edible candy eyes, simply use a small dab of frosting on each cookie to provide a sticky surface. Position two eyes on the top of each wafer, making them slightly uneven for a more whimsical appearance. This adds character and fun to your already delightful cupcake creation.
Creative inspiration for further decoration
If you’re feeling particularly creative, you can add final embellishments like edible glitter or Halloween-themed sprinkles around the frosting base. These additional touches will not only augment the spooky aesthetic but can also make your cupcakes even more enticing.
Presentation Ideas
Tips for presenting the cupcakes at a Halloween gathering
To present your creepy crawly spider cupcakes effectively, arrange them on a thematic platter or serving tray that fits your Halloween motif. Consider adding fake spiders or webbing as decor around the platter to enhance the visual appeal further. You could also consider using a tiered stand to add height and drama to the display, drawing attention and delighting your guests.
Recommendations for additional Halloween-themed decorations
Enhancing the serving area with Halloween-themed decorations such as little pumpkins, ghost lanterns, or spooky lights can elevate your gathering. These additives create a festive atmosphere that complements the fun and whimsical nature of your cupcakes, ensuring that they are the center of attention during the festivities.
Storage Recommendations
Guidelines for storing leftover cupcakes
If you have leftovers, store your spider cupcakes in an airtight container to maintain their freshness. Ensure they are well-sealed to prevent them from drying out or absorbing odors from the refrigerator. They are best when consumed within three to four days of baking.
Discussing the best practices for freezing cupcakes
For longer storage, consider freezing the unfrosted cupcakes. After they have completely cooled, individually wrap them in plastic wrap and store them in a freezer-safe bag. This method ensures they maintain their texture. When ready to enjoy, let them thaw at room temperature for a couple of hours, then frost them when they’re at room temperature.
Conclusion
Creepy crawly spider cupcakes showcase a wonderful balance of rich chocolate flavor and entertaining presentation, making them an ideal choice for festive gatherings. Their soft and airy texture, combined with creative spider decorations, delights both the eyes and the palate. With a preparation and baking time of about an hour, these cupcakes are a satisfying project to bring fun and sweetness to any celebration.