

Introduction
Cut-out sugar cookies have long held a special place in the hearts of bakers and cookie enthusiasts alike. Their versatility and charm make them a staple at celebrations and gatherings, from birthday parties to holiday festivities. The joy of rolling out dough, using cookie cutters to create fun shapes, and decorating with colorful icing and sprinkles brings an element of creativity and nostalgia to baking. These cookies are not just treats; they are edible canvases that invite imagination and personalization.
Among the many varieties of sugar cookies, the delightful vanilla cut-out sugar cookies stand out for their balanced sweetness, tender crumb, and rich vanilla flavor. This recipe is perfect for those looking to create a batch of cookies that not only taste amazing but also look stunning on any dessert table. Whether you’re preparing for a festive occasion, a themed party, or simply want to indulge in a classic treat, these cookies will surely impress.
In this article, we will take an in-depth look at the ingredients that make these cookies so special and guide you through the preparation steps to achieve cookie perfection. With a little patience and practice, you’ll be able to create delightful vanilla cut-out cookies that will become a cherished recipe in your baking repertoire.
Understanding the Ingredients
Creating the perfect batch of delightful vanilla cut-out sugar cookies begins with understanding the role of each ingredient. Here’s a breakdown of the essential components that contribute to the delicious flavor and texture of these cookies.
All-Purpose Flour: The Backbone of the Cookies
All-purpose flour is the primary structure-building ingredient in sugar cookies. It provides the necessary gluten that helps the cookies maintain their shape while baking. When measuring flour, it’s crucial to avoid compacting it in the measuring cup, as this can lead to using too much flour and result in tough cookies. Instead, spoon the flour into the cup and level it off for accuracy. The right amount of flour ensures that the cookies are soft yet sturdy enough to hold their shape when cut.
Unsalted Butter: Key to Achieving a Rich Flavor
Unsalted butter is a vital ingredient in this recipe, not only for its rich flavor but also for its ability to create a tender, melt-in-your-mouth texture. Butter contributes to the cookies’ overall richness and helps to balance the sweetness of the sugar. Using unsalted butter allows you to control the saltiness of the cookies, ensuring a pleasant overall flavor. Make sure the butter is softened to room temperature before using it in the recipe; this allows for easy creaming with sugar and helps incorporate air into the dough, resulting in a lighter cookie.
Granulated Sugar: For Sweetness and Texture
Granulated sugar is the sweetening agent in this recipe, and it plays a crucial role in achieving the right texture for cut-out sugar cookies. Sugar not only sweetens the cookies but also helps to create a tender crumb and a slightly crisp edge. The creaming process, where sugar is beaten with butter, allows for air incorporation, leading to a light and airy cookie. For those looking to experiment with taste, you can also substitute part of the granulated sugar with powdered sugar for a slightly different texture.
Eggs and Extracts: Their Role in Binding and Flavor Enhancement
Eggs are essential for binding the ingredients together and adding moisture to the cookie dough. They help create a cohesive mixture that results in cookies that hold their shape while baking. Additionally, eggs contribute to the overall flavor profile and richness of the cookies. In this recipe, we will use large eggs, which provide the right amount of moisture and fat.
Vanilla extract is the star flavor in these delightful cookies. The quality of the vanilla you choose can greatly impact the overall taste. Pure vanilla extract is preferred over imitation vanilla for its depth of flavor. For those looking to elevate the flavor even further, consider adding a splash of almond extract or lemon zest, which can bring a delightful twist to the classic vanilla taste.
Optional Ingredients: Royal Icing, Colored Sprinkles, and Edible Glitter
While the base recipe for these vanilla cut-out sugar cookies is delicious on its own, you can take them to the next level with optional decorative ingredients. Royal icing is a popular choice for decorating cookies, as it dries hard and creates a beautiful finish. Colored sprinkles or edible glitter can add a festive touch, making your cookies perfect for any occasion. Feel free to unleash your creativity with these additional ingredients, transforming simple cookies into eye-catching treats.
Preparation Steps for Perfect Cookies
Now that we’ve covered the essential ingredients, let’s dive into the preparation steps for making these delightful vanilla cut-out sugar cookies. Each step is crucial to achieving the best results, so pay close attention to the details.
Preheating the Oven: The Critical First Step for Baking Success
Before you begin mixing ingredients, it’s important to preheat your oven. This step ensures that your cookies bake evenly and helps achieve that perfect golden-brown color. Set your oven temperature to 350°F (175°C) and allow it to fully preheat while you prepare the cookie dough. This way, when you place your cookies in the oven, they’ll start baking immediately, creating a beautifully soft and tender texture.
Combining Dry Ingredients: Importance of Proper Mixing to Avoid Lumps
In a medium bowl, combine the all-purpose flour, baking powder, and a pinch of salt. Whisking these dry ingredients together helps to evenly distribute the baking powder and salt, avoiding any clumps in the final dough. The baking powder is essential for creating a light and fluffy cookie, as it helps the dough rise during baking. Be sure to set this mixture aside while you prepare the wet ingredients.
Creaming Butter and Sugar: Techniques for Achieving the Right Consistency
In a large mixing bowl, add the softened unsalted butter and granulated sugar. Using an electric mixer, beat the butter and sugar together on medium speed until the mixture is light and fluffy, usually around 2-3 minutes. This process is known as creaming, and it’s vital for incorporating air into the dough, resulting in a tender cookie. The mixture should appear pale in color and have a smooth texture.
Incorporating Wet Ingredients: Tips on Mixing Without Overdoing It
Next, add the eggs and vanilla extract to the creamed butter and sugar mixture. Beat until just combined, being careful not to overmix. Overmixing can cause the cookies to become tough. The goal is to achieve a smooth and cohesive dough without any visible egg or butter separation. This gentle approach will ensure that your cookies stay soft and tender after baking.
Chilling the Dough: Why This Step is Essential for Cut-Out Cookies
Once your dough is mixed, it’s time to chill it. Divide the dough in half, wrap each portion in plastic wrap, and flatten it into disks. Refrigerate for at least 1 hour, or up to overnight. Chilling the dough is a crucial step for cut-out cookies as it firms up the butter, making it easier to roll out and cut shapes without the dough losing its form. Additionally, the chilling process enhances the flavor of the cookies, allowing the ingredients to meld together.
Rolling Out and Cutting Shapes: Techniques for Even Thickness and Smooth Edges
After chilling, remove the dough from the refrigerator and let it sit at room temperature for about 5-10 minutes to soften slightly, making it easier to roll out. Lightly flour your work surface and rolling pin to prevent sticking. Roll out one disk of dough to about ¼ inch thickness, ensuring an even thickness throughout. This consistency is essential for uniform baking.
Using cookie cutters, cut out your desired shapes and transfer them to a parchment-lined baking sheet. Leave some space between each cookie, as they may spread slightly during baking. If you want to keep the edges sharp and defined, avoid putting too much pressure on the cookie cutter as you cut.
Once your cookie shapes are cut and arranged on the baking sheet, you’re ready to move on to the baking stage, where the magic truly happens.
With these steps, you’re well on your way to creating delightful vanilla cut-out sugar cookies that are perfect for any occasion. Stay tuned for our next section, where we will delve into the baking and decorating processes to complete your cookie masterpiece.
Baking the Cookies
When it comes to baking Delightful Vanilla Cut-Out Sugar Cookies, precision is key. The temperature of your oven and the baking time you adhere to can make or break your cookie experience. Preheat your oven to 350°F (175°C), which is the optimal temperature for achieving a perfect cookie texture. If your oven runs hot, you may need to adjust the temperature slightly.
Importance of Oven Temperature and Baking Time
Oven temperature plays a crucial role in how your cookies will turn out. If the oven is too hot, the cookies can spread too quickly and possibly burn before they’re fully cooked. Conversely, if the temperature is too low, you may end up with cookies that are undercooked and doughy in the center.
Once your oven reaches the correct temperature, place the cookie sheets in and set a timer for 8-10 minutes, depending on the size of your cookies. The general rule of thumb is to remove the cookies from the oven when the edges are just lightly golden and the centers look slightly underbaked. They will continue to cook on the sheet as they cool, leading to that perfect soft and chewy texture we all love.
Signs That Cookies Are Ready: How to Identify the Perfect Bake
To identify when your cookies are ready, look for the following signs:
1. Color: The edges should be lightly golden, while the center remains slightly pale.
2. Texture: The cookies should look set but soft in the middle. You don’t want them to be shiny or wet.
3. Touch: If you gently press the center of a cookie, it should spring back, indicating that it’s fully baked.
Cooling Process: Why Letting Cookies Cool Properly Matters
Once your cookies are out of the oven, be patient! Allow them to cool on the baking sheet for about 5 minutes before transferring them to a cooling rack. This cooling period is essential for two reasons. First, it allows the cookies to firm up, making them easier to handle. Secondly, letting them cool on the baking sheet helps to enhance the flavors as the cookies set. Once they are adequately cooled, they are ready to be decorated or enjoyed as is!
Decorating Your Cookies
Now that your cookies are baked to perfection, it’s time to let your creativity shine through decoration. Royal icing is a popular choice for decorating sugar cookies because it dries hard, making for beautiful, intricate designs that can be stacked without sticking.
Introduction to Royal Icing: What It Is and Why It’s a Popular Choice
Royal icing is a smooth frosting made from egg whites or meringue powder, powdered sugar, and water. Its ability to dry hard makes it ideal for cookie decoration, allowing for detailed designs and a polished finish. You can also add food coloring to royal icing, making it versatile for any theme or occasion.
Step-by-Step Guide on Decorating with Icing and Sprinkles
1. Prepare the Royal Icing: In a bowl, combine 2 egg whites (or 2 tablespoons of meringue powder with 4 tablespoons of water) and 4 cups of powdered sugar. Beat until the mixture is glossy and holds stiff peaks.
2. Color the Icing: Divide the icing into separate bowls and add gel food coloring to achieve your desired shades. Use a toothpick to add color gradually until you reach the desired hue.
3. Outline the Cookies: Use a piping bag fitted with a small round tip to outline your cookies. This creates a barrier for your flooded icing.
4. Flood the Cookies: Take a slightly thinner version of the royal icing (by adding a few drops of water to the original icing) and fill in your outlined area. Use a toothpick to spread the icing evenly.
5. Add Sprinkles: If you’re using sprinkles, add them while the icing is still wet to ensure they stick well.
6. Let Them Dry: Allow the decorated cookies to dry for at least 6 hours or overnight to ensure the icing hardens completely.
Creative Ideas for Cookie Shapes and Designs
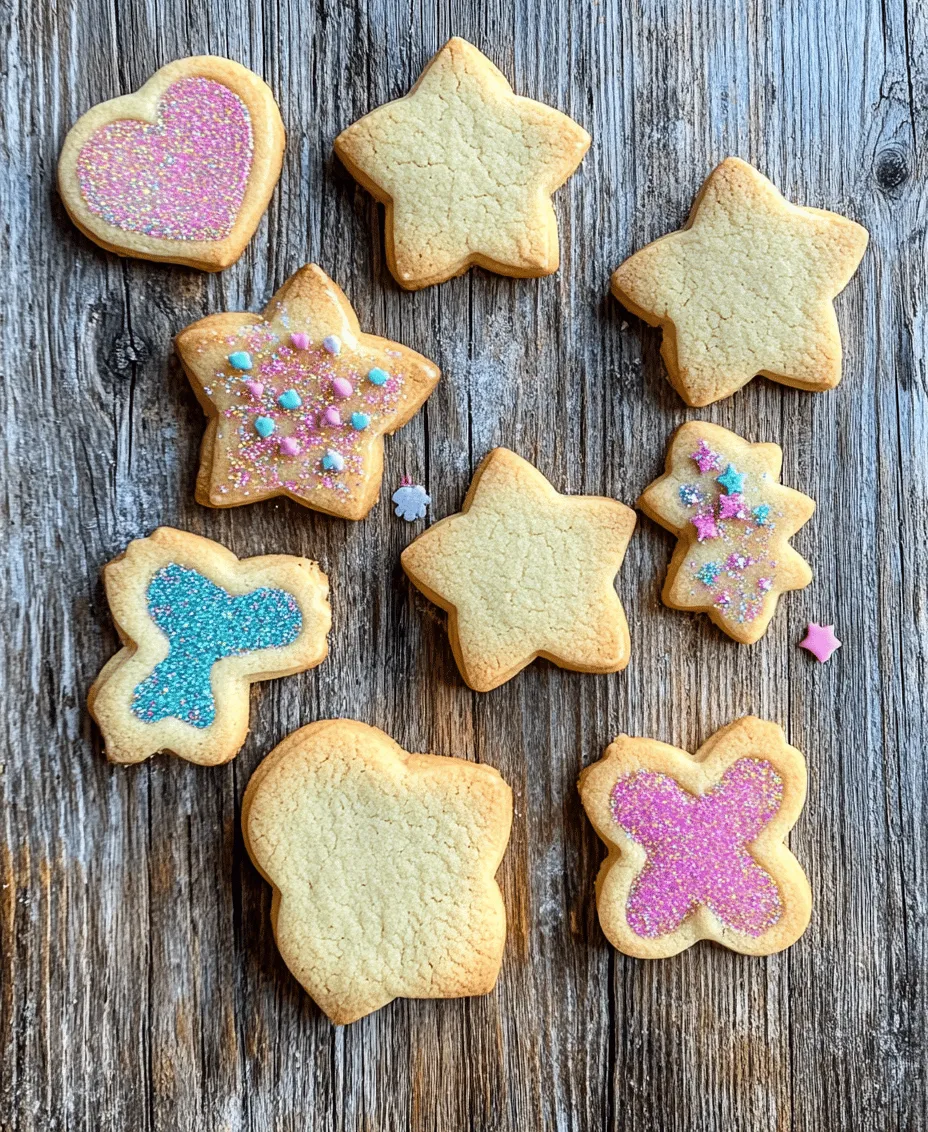
The beauty of cut-out cookies lies in their versatility. Use a variety of cookie cutters to create shapes that suit different occasions—hearts for Valentine’s Day, stars for Christmas, or even intricate floral designs for spring. For added flair, consider using edible glitter, metallic paint, or even edible markers to personalize each cookie.
Serving Suggestions
Once your cookies are beautifully decorated, it’s time to think about how to present them.
Best Practices for Presenting Your Delightful Cookies
– Plating: Use a decorative platter or cake stand to showcase your cookies. Arrange them in a visually appealing manner, alternating shapes and colors for a dynamic presentation.
– Gift Wrapping: For gifting, consider placing cookies in clear cellophane bags tied with a ribbon. This not only keeps them fresh but also adds a festive touch.
Pairing Suggestions: What Drinks or Desserts Complement Cut-Out Cookies
Delightful Vanilla Cut-Out Sugar Cookies pair wonderfully with various beverages. Consider serving them alongside:
– Tea: A classic black tea or herbal tea complements the sweetness of the cookies.
– Coffee: A rich roast coffee or flavored latte can enhance the vanilla essence of the cookies.
– Milk: For a nostalgic touch, serve with a glass of cold milk—perfect for dipping!
Ideas for Using Cookies in Celebrations, Holidays, and Special Occasions
These cookies are perfect for various celebrations. Use them as party favors at birthdays, as festive treats for holiday gatherings, or even as personalized gifts for special occasions. You can also create themed cookie assortments for baby showers or wedding receptions, making them a delightful addition to any event.
Storing Your Cookies
To keep your cookies fresh and delicious, proper storage is crucial.
Tips for Proper Storage to Maintain Freshness
Allow your cookies to cool completely before storing them. This prevents moisture buildup, which can lead to soggy cookies.
Best Containers for Keeping Cookies Crisp and Delicious
Store your cookies in an airtight container at room temperature. A metal tin or glass jar with a tight-fitting lid works perfectly. If you want to keep them crisp, consider placing a piece of bread in the container; it will absorb excess moisture.
How to Freeze Cookies for Longer Shelf Life
If you want to enjoy these cookies at a later date, freezing is an excellent option. Place the cooled cookies in a single layer on a baking sheet and freeze until solid. Once frozen, transfer them to a freezer-safe bag or container. They can last up to three months in the freezer. When ready to eat, just thaw at room temperature for a few hours.
Conclusion
Baking Delightful Vanilla Cut-Out Sugar Cookies is not just about creating a tasty treat; it’s about the joy of sharing and the memories made along the way. This versatile recipe allows for endless creativity through decoration and presentation, making it suitable for any occasion.
Whether you’re celebrating a special day or simply enjoying quality time with family, these cookies bring a sense of warmth and happiness. So roll up your sleeves, gather your loved ones, and embark on a delightful baking adventure. Creating and sharing these cookies will surely leave lasting memories and sweet moments in your heart.