Introduction
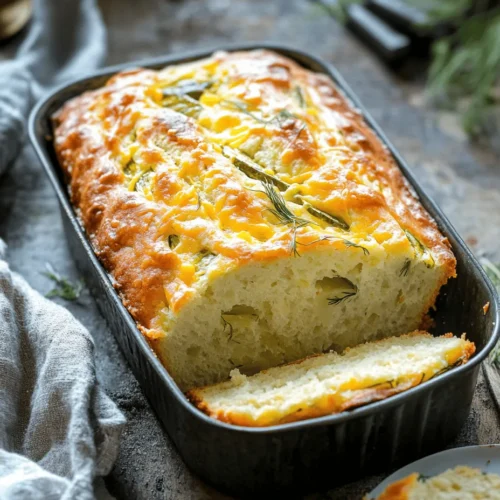
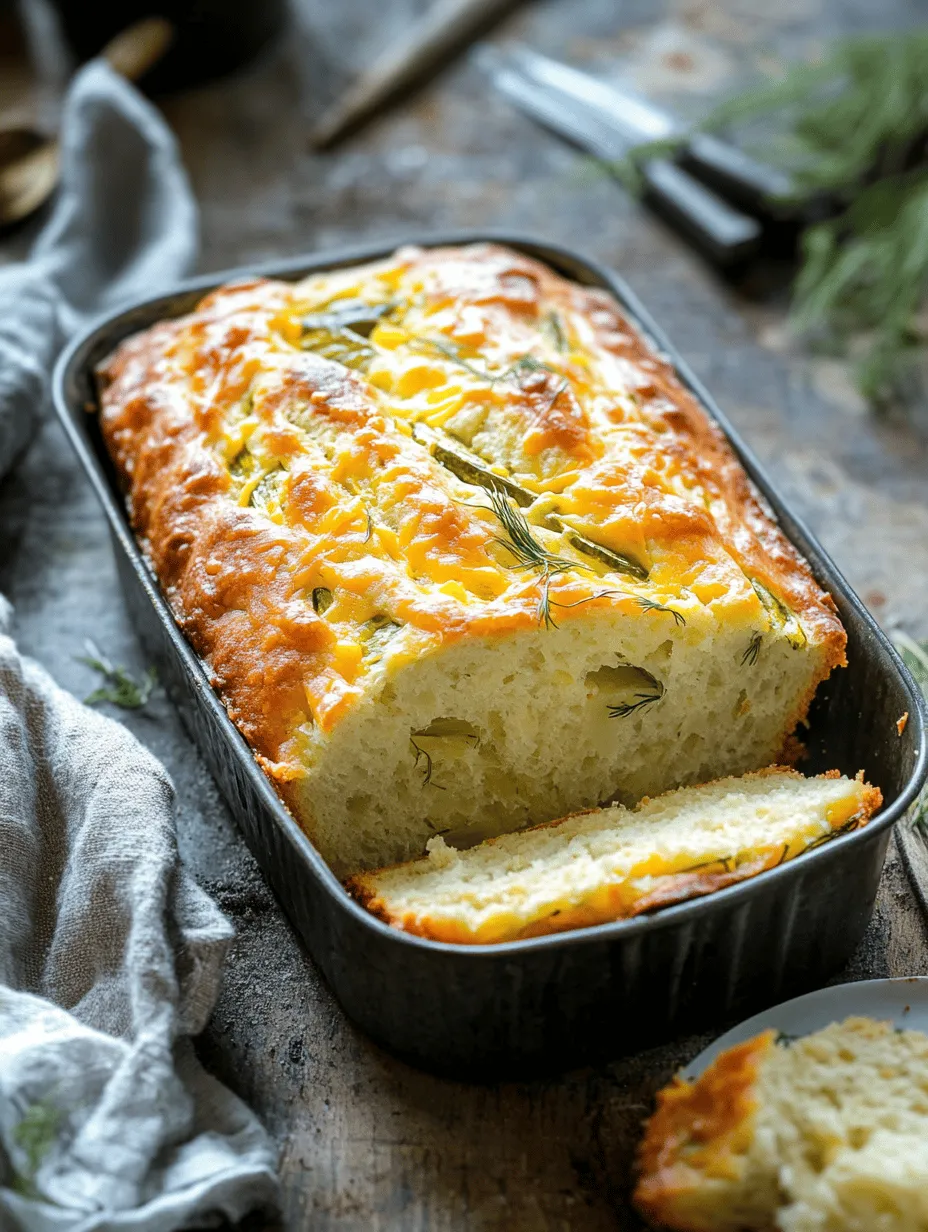
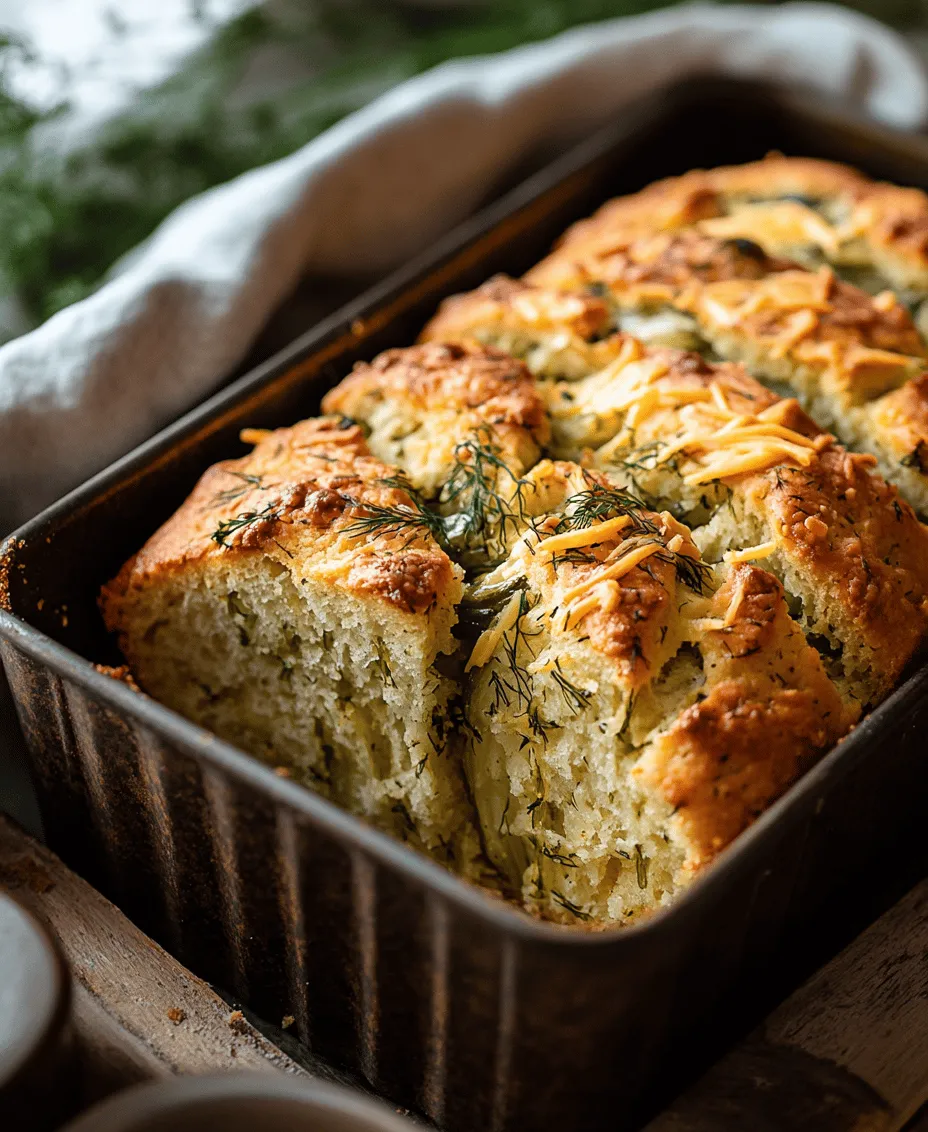
If you are a fan of bold and unconventional flavors, then Dill Pickle Bread is a recipe you absolutely must try. This unique bread combines the tangy, zesty taste of dill pickles with the comforting texture of freshly baked bread, resulting in a delightfully surprising culinary experience. The appeal of this bread lies not only in its flavor but also in its versatility—perfect for sandwiches, as an accompaniment to soups, or even toasted with butter for a flavorful snack.
The concept of incorporating pickles into baked goods may seem unusual, but it’s part of a broader trend that celebrates pickle-flavored recipes. From pickle-flavored chips to dips and even cupcakes, the addition of pickles to various dishes has garnered a loyal following among food enthusiasts. Dill Pickle Bread stands out as a favorite among adventurous eaters and is a testament to how creative you can get in the kitchen.
In this article, we will walk you through the enticing world of Dill Pickle Bread. You will learn about the essential ingredients that make this bread so special, as well as detailed preparation steps to ensure your baking success. Whether you’re a seasoned baker or a novice, this recipe promises to be a fun and rewarding experience.
Understanding Ingredients
Before we dive into the preparation steps, it’s essential to understand the role each ingredient plays in the recipe. Each component contributes to the overall flavor, texture, and success of your Dill Pickle Bread.
All-Purpose Flour: The Foundation of the Bread
All-purpose flour serves as the backbone of our Dill Pickle Bread. It provides the necessary structure and body, allowing the bread to rise properly while maintaining a tender crumb. When measuring your flour, it’s crucial to spoon it into the measuring cup and level it off with a knife to avoid packing it down, which could lead to dense bread.
Dill Pickle Juice: The Star Ingredient
Dill pickle juice is what sets this bread apart from traditional recipes. This tangy liquid not only infuses the bread with flavor but also adds moisture, resulting in a soft and tender loaf. The acidity in the pickle juice interacts with the leavening agents in the recipe, contributing to a light and airy texture. Be sure to use high-quality dill pickle juice for the best results—homemade or a favorite brand can elevate the flavor.
Chopped Dill Pickles: Texture and Additional Flavor
Chopped dill pickles bring a delightful crunch to the bread and enhance its overall flavor profile. Their briny goodness complements the bread’s texture, creating a delightful contrast with each bite. For the best results, choose pickles that you enjoy eating on their own, as their flavor will be concentrated in the final product.
Granulated Sugar: Balancing the Tanginess
While it may seem counterintuitive to add sugar to a savory bread, granulated sugar plays a crucial role in balancing the tanginess of the dill pickles. It enhances the flavor without making the bread sweet, allowing the savory elements to shine through. Just a few tablespoons will help achieve the perfect harmony of flavors.
Olive Oil: Adds Richness and Moisture
Olive oil is another essential ingredient that contributes to the bread’s richness and moisture. It not only adds a subtle fruity flavor but also helps keep the bread soft and fresh for longer. If you prefer a different flavor profile, you can substitute it with melted butter or another type of oil, but olive oil works particularly well in this recipe.
Baking Powder and Baking Soda: Role in Leavening
Both baking powder and baking soda are vital for providing lift to the bread. Baking powder is a double-acting leavening agent, which means it works both when mixed into the dough and when exposed to heat in the oven. Baking soda, on the other hand, requires an acidic component—in this case, the dill pickle juice—to activate its leavening properties. Together, they create a light and fluffy texture that is characteristic of a well-baked loaf.
Dried Dill Weed: Enhances Dill Flavor
To amplify the dill flavor, dried dill weed is added to the recipe. This herb complements the dill pickle juice and chopped pickles, creating a robust dill profile that pickle lovers will adore. Dried dill is convenient and provides a concentrated flavor, but if you prefer fresh dill, feel free to substitute it and adjust the quantity to your taste.
Black Pepper: Adds a Subtle Kick
A dash of black pepper adds a subtle depth of flavor to the bread. It enhances the overall taste without overpowering the other ingredients. You can adjust the amount of black pepper according to your preference—more for a spicier kick or less for a milder loaf.
Cheddar Cheese: Optional Ingredient for Added Flavor Depth
While the core recipe is delicious as is, some bakers enjoy adding shredded cheddar cheese for an extra layer of flavor. The sharpness of the cheese pairs beautifully with the tangy pickles, creating a savory and satisfying loaf. If you choose to add cheese, consider using a sharp variety for the best flavor impact.
Preparation Steps Explained
Now that we have a clear understanding of the ingredients and their roles in this delightful recipe, let’s move on to the preparation steps that will guide you in creating your very own Dill Pickle Bread.
Preheating the Oven: Importance for Proper Baking
Before you begin mixing your ingredients, preheat your oven to 350°F (175°C). Preheating is crucial for achieving the perfect rise and texture in your bread. An adequately heated oven ensures that your bread begins baking immediately, which helps create a nice crust while keeping the inside soft and fluffy.
Mixing Dry Ingredients: Ensuring Even Distribution of Leavening Agents and Seasonings
In a large mixing bowl, combine the all-purpose flour, baking powder, baking soda, granulated sugar, dried dill weed, and black pepper. Whisk these dry ingredients together thoroughly to ensure even distribution of the leavening agents and seasonings. This step is essential for avoiding clumps of baking powder or soda that could lead to uneven rising or flavor pockets in your bread.
Combining Wet Ingredients: Achieving the Right Consistency
In a separate bowl, mix together the dill pickle juice, chopped dill pickles, and olive oil. Whisk these ingredients until well combined. The goal here is to create a cohesive mixture that will be incorporated into the dry ingredients. Once combined, pour the wet mixture into the bowl with the dry ingredients.
Gently stir the mixture with a spatula or wooden spoon until just combined. Be careful not to overmix; a few lumps are perfectly fine. Overmixing can lead to a dense texture, so it’s best to stop as soon as there are no dry flour pockets visible.
Once the wet and dry ingredients are combined, if you’re opting to add shredded cheddar cheese, fold it in gently at this stage. This will ensure that the cheese is evenly distributed throughout the bread.
With these initial steps completed, you are well on your way to creating a delicious Dill Pickle Bread that is sure to impress your family and friends. In the following sections, we will explore baking, cooling, and serving tips to enhance your experience and ensure the best results. Stay tuned for the continuation of this delicious journey as we delve deeper into the world of Dill Pickle Bread.
Merging Wet and Dry Ingredients: Techniques to Avoid Overmixing
When it comes to baking, the technique of merging wet and dry ingredients is crucial for achieving the perfect texture in your Dill Pickle Bread. Overmixing can lead to a dense and tough loaf, which is not what we want. To prevent this, it’s essential to be gentle and deliberate in your mixing.
Start by creating a well in the center of your dry ingredients after they have been sifted and measured accurately. Slowly pour the wet mixture into this well. Using a spatula or wooden spoon, fold the wet and dry ingredients together. The key here is to mix just until you see no more dry flour; lumps are perfectly acceptable. This folding technique ensures that you’re combining the ingredients without activating too much gluten, which is what causes that undesirable toughness.
If you find the mixture to be too thick, you can add a splash of pickle juice to help loosen it up without compromising the flavor. Remember, the goal is to maintain a light and airy structure, allowing the Dill Pickle Bread to rise beautifully in the oven.
Transferring Batter to Loaf Pan: Tips for Smooth Pouring and Leveling
Once your batter is well combined, it’s time to transfer it into the loaf pan. This step can be deceptively simple but requires a little care to ensure that your loaf bakes evenly. Start by greasing your loaf pan with butter or lining it with parchment paper to prevent sticking.
Using a spatula, scoop the batter from the mixing bowl, allowing it to fall gently into the prepared pan. It’s best to do this in batches to control the pouring better. Once all the batter is in the pan, gently shake the pan from side to side to help it settle. This not only helps level the batter but also eliminates any air bubbles trapped within.
After leveling it out with a spatula, use the back of a spoon or an offset spatula to smooth the top. This will ensure that your Dill Pickle Bread has an even rise and a beautiful golden-brown crust once baked.
Baking Process: Signs to Look for in a Perfectly Baked Loaf
Baking times can vary depending on your oven, but generally, you can expect your Dill Pickle Bread to take around 50 to 60 minutes at 350°F (175°C). To determine if your bread is perfectly baked, there are several signs to look for.
First, the top of the loaf should be golden brown and spring back when lightly pressed. Additionally, you can use the classic toothpick test: insert a toothpick into the center of the loaf, and if it comes out clean or with just a few crumbs clinging to it, your bread is done.
Another indicator is the aroma; a freshly baked loaf will fill your kitchen with a delightful smell of dill and bread. Finally, if you gently tap the bottom of the loaf, it should sound hollow. If it does not, return it to the oven for an additional 5-10 minutes and check again.
Cooling and Slicing: Best Practices for Serving
Once your Dill Pickle Bread is out of the oven, it’s essential to let it cool properly before slicing. Cooling it in the pan for about 10-15 minutes will help the structure set, making it easier to remove. After that, carefully transfer the loaf onto a wire rack to cool completely. This step is crucial to prevent the bottom from becoming soggy.
When it comes time to slice, use a serrated knife for a clean cut without squishing the loaf. Aim for slices about half an inch thick to allow for optimal spreading and enjoyment. If you’re serving the bread warm, be sure to have your favorite spreads and toppings ready to enhance the dill flavor.
Serving Suggestions
Creative Ways to Enjoy Dill Pickle Bread
Dill Pickle Bread is a versatile addition to any meal or occasion. Here are some creative ways to enjoy it:
– As an Appetizer: Slice the bread into small pieces and serve it with a creamy dip or spread. A dill-infused cream cheese or herbed butter enhances the bread’s flavor while providing a delightful contrast in texture.
– Side Dish Options: Pair your Dill Pickle Bread with sandwiches, burgers, or grilled meats. The tangy flavor of the pickles complements rich dishes beautifully, making it an excellent sidekick for summer barbecues or picnic lunches.
– Unique Snack Ideas: This bread makes for a fantastic snack on its own or toasted. Spread a light layer of butter or a drizzle of olive oil on a slice, and enjoy it with your favorite beverage, be it tea, coffee, or even a refreshing cold beer.
Nutritional Information
Understanding the nutritional value of your Dill Pickle Bread is essential for those who are health-conscious or have dietary restrictions. A standard serving (1 slice) of Dill Pickle Bread contains approximately:
– Calories: 180
– Carbohydrates: 30g
– Protein: 4g
– Fats: 6g
This bread is vegetarian-friendly and can easily be adapted for gluten-free diets by using a gluten-free flour blend. Always check the labels to ensure that all ingredients meet your dietary needs, especially if you’re serving guests with specific restrictions.
The Cultural Significance of Dill Pickles
Dill pickles have a rich history and a prominent place in various cuisines around the world. In American culture, pickles are not just a condiment but a beloved staple featured in everything from burgers to potato salads. Their tangy and refreshing flavor makes them a favorite for enhancing dishes.
In Eastern European cuisines, dill pickles are often served alongside meats and are integral to traditional recipes, showcasing their versatility. The integration of dill pickles into baked goods, like our Dill Pickle Bread, reflects a growing trend of incorporating unexpected flavors into classic recipes, allowing for delicious culinary exploration.
Conclusion
Dill Pickle Bread is an innovative twist on a classic loaf that offers a delightful flavor profile, making it a unique addition to your baking repertoire. Its versatility allows it to shine as an appetizer, side dish, or snack, appealing to a wide range of tastes.
Encouraging readers to try their hand at this recipe not only provides a delicious outcome but also a chance to explore the cultural significance of dill pickles in cooking. So gather your ingredients, follow the steps, and share your experiences with this delightful bread that is sure to impress family and friends alike.