

Introduction
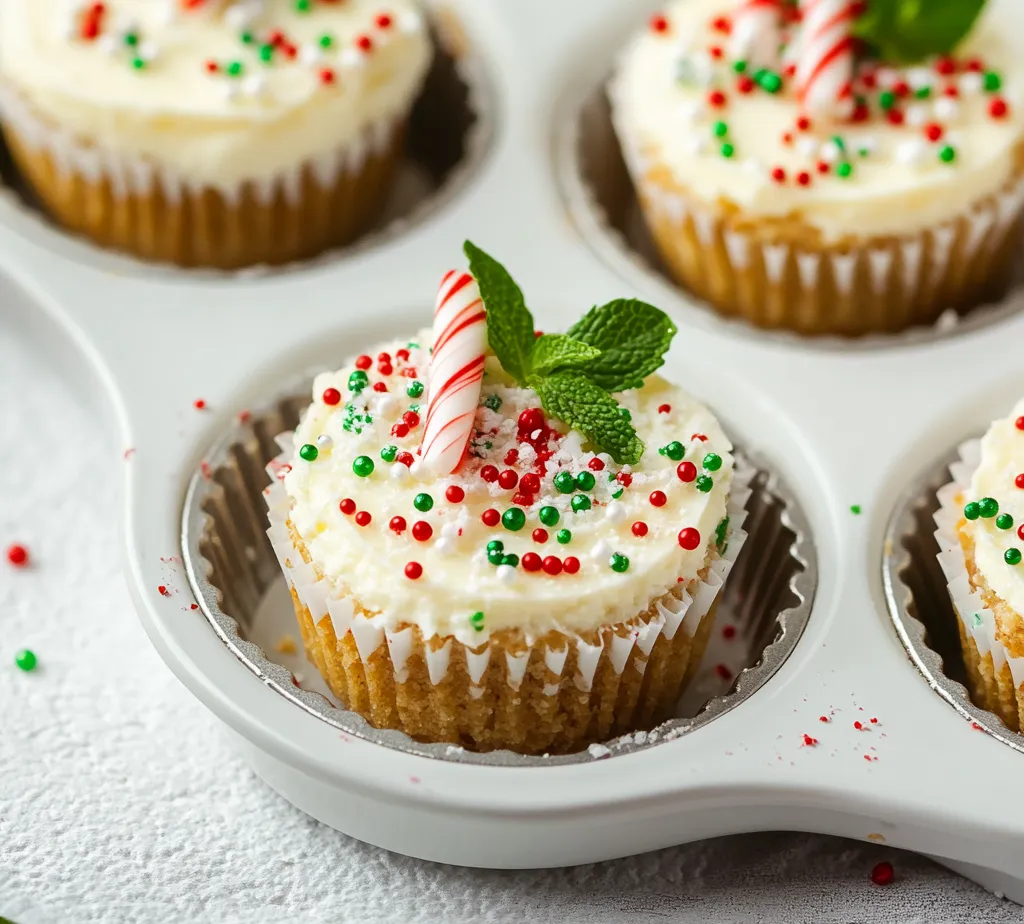
The holiday season calls for delightful treats that are easy to prepare yet impressively festive. One such treat is the Festive No-Bake Mini Cheesecakes, a simple yet elegant dessert perfect for Christmas gatherings. The light and creamy nature of these cheesecakes, coupled with a crunchy graham cracker crust, makes them an appealing choice for dessert tables, festive parties, or family get-togethers. Not only do they offer a rich taste experience, but their delightful presentation, adorned with festive decorations, elevates them to a visually stunning centerpiece.
In addition to their great taste, these mini cheesecakes are wonderfully versatile. You can enjoy them plain or enhance their flavors with the optional peppermint extract for a seasonal twist. Bright decorations of red and green sprinkles, along with optional mini candy canes or fresh mint for garnish, make these treats not only delicious but also a feast for the eyes. Whether you’re hosting a holiday dinner or attending a potluck, these mini cheesecakes will impress everyone.
Recipe Overview
– Total Time: 4 hours 20 minutes
– Yield/Servings: 12 mini cheesecakes
– Difficulty: Not specified in the recipe
Ingredients
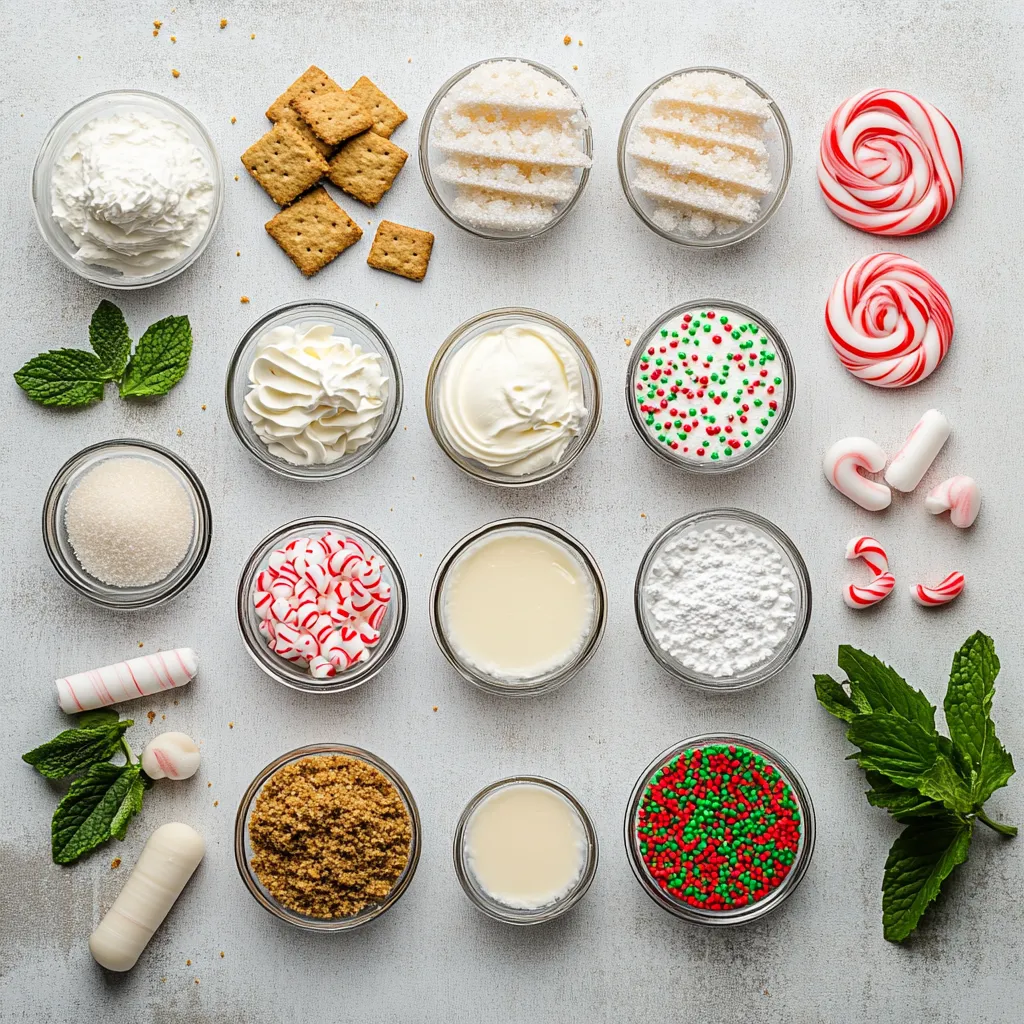
Understanding the importance of quality ingredients in achieving the perfect mini cheesecakes is crucial. Below is the list of ingredients needed for this recipe:
Crust Ingredients
– 1 ½ cups graham cracker crumbs
– ½ cup unsalted butter, melted
– 2 tablespoons granulated sugar
Cheesecake Filling Ingredients
– 16 oz cream cheese, softened to room temperature
– 1 cup powdered sugar
– 1 teaspoon vanilla extract
– 1 cup heavy whipping cream
– ½ teaspoon peppermint extract (optional for a minty twist)
Decorative Ingredients
– Red and green sprinkles for festive decoration
– Fresh mint leaves for garnish (optional)
– Mini candy canes for a cheerful touch (optional)
Instructions
The preparation step-by-step for these mini cheesecakes is both straightforward and satisfying. Here’s how to create them:
1. Prepare the Crust: In a medium-sized mixing bowl, blend the graham cracker crumbs, melted butter, and granulated sugar. Stir until the mixture is well combined and resembles wet sand.
2. Form the Crusts: Line a standard muffin tin with paper liners. Take about 2 tablespoons of the crust mixture and press it firmly into the bottom of each liner, ensuring it is packed tightly. Once done, place the muffin tin in the refrigerator to allow the crusts to set while you prepare the filling.
3. Make the Cheesecake Filling: In a large mixing bowl, use an electric mixer to beat the softened cream cheese until it becomes creamy and smooth. Gradually incorporate the powdered sugar and vanilla extract, mixing until thoroughly combined and fluffy.
4. Whip the Cream: In a separate bowl, whip the heavy cream with a mixer until stiff peaks form. Gently fold the whipped cream into the cream cheese mixture until it is fully combined. If desired, add the peppermint extract for an extra festive flavor.
5. Fill the Cups: Retrieve the muffin tin from the refrigerator. Spoon or pipe the cheesecake filling generously over the crusts, filling each cup to the brim. Use a spatula or the back of a spoon to smooth the tops for an even finish.
6. Chill: Cover the muffin tin with plastic wrap and refrigerate for a minimum of 4 hours, or until the cheesecakes are set and firm to the touch.
7. Decorate: Once the cheesecakes have set, carefully remove them from the muffin tin. Decorate each mini cheesecake with a sprinkle of red and green decorations, a fresh mint leaf, and a mini candy cane for that extra festive flair.
8. Serve: Delight in your charming no-bake Christmas mini cheesecakes as a sweet and festive treat perfect for holiday gatherings!
Preparing the Crust
Mixing the Ingredients
The crust of a cheesecake serves as a foundational element that adds both flavor and texture. To create the crust for your mini cheesecakes, start by mixing graham cracker crumbs with melted unsalted butter and granulated sugar in a medium-sized bowl. It’s essential to ensure that the crumbs are well-coated with the butter, so when pressed, they bind together effectively. The combination should take on a sandy texture, similar to wet sand, which will form a solid base once chilled.
Achieving the Right Texture
When successfully mixed, the crust should be crumbly yet hold together when squeezed in your hand. This consistency is crucial for the cheesecakes to retain their shape upon removal from the muffin tin. If the mixture is too dry, the crust may crumble, leading to an unstable dessert. Conversely, if it’s too wet, it could turn mushy. Achieving the right balance in texture will ensure a perfect crust for your mini cheesecakes.
Setting the Crust
After pressing the crust mixture into the muffin liners, place the entire muffin tin in the refrigerator. This chilling time is crucial because it allows the butter to solidify, thereby firming up the crust. Consistency in the crust is key to having a sturdy base that complements the creamy filling without falling apart. Allowing it to set properly ensures a more enjoyable eating experience; guests can easily enjoy the mini cheesecakes without worrying about the crust collapsing.
Making the Cheesecake Filling
Beating the Cream Cheese
The filling is where the magic of cheesecakes truly happens. Begin by softening the cream cheese until it’s at room temperature, which will make it easier to achieve a creamy, lump-free base. In a large mixing bowl, use an electric mixer at medium speed to beat the cream cheese until it is smooth. Gradually add in powdered sugar and vanilla extract, continuing to mix until the filling becomes fluffy and airy. The combination of these ingredients will create a rich and flavorful cheesecake base that balances perfectly with the crust.
In the next section, we will explore the remaining steps of the cheesecake-making process including whipping the cream and the finishing touches that bring it all together!
Softening and Beating the Cream Cheese
To achieve the perfect creamy texture for your cheesecake filling, it is essential to start with softened cream cheese. Allow the cream cheese to sit out at room temperature for at least 30 minutes before use. Softened cream cheese is easier to blend, ensuring a smoother texture without lumps. Using an electric mixer, beat the cream cheese on medium speed until it is fluffy and creamy, which typically takes 2 to 3 minutes. The goal is to create a light base that will eventually hold the whipped cream mixture. Pay attention to the texture here; the cream cheese should have a silky consistency that allows it to combine seamlessly with the other ingredients.
Adding Sweetness and Flavor
Once the cream cheese has reached the desired texture, it’s time to incorporate the powdered sugar and vanilla extract. Gradually add the powdered sugar while mixing continuously on low speed, allowing it to blend without creating a cloud of sugar. This gradual process also helps prevent the sugar from settling. Once fully incorporated, add the vanilla extract, which not only enhances the flavor but also adds a pleasant aroma. Continue mixing for another minute until the blend achieves a uniform creamy consistency that is both sweet and flavorful.
Whipping the Cream
Whipping the heavy cream is a crucial step in creating a light and airy filling for your mini cheesecakes. To do this, it’s essential to start with cold equipment. Place your mixing bowl and beaters in the refrigerator for about 10 minutes before whipping. Pour the heavy cream into the chilled bowl and begin mixing on a low speed to avoid splattering. Once it begins to thicken, increase to high speed, whipping until stiff peaks form. Stiff peaks should hold their shape and stand upright when you lift the beaters. Be cautious not to overwhip the cream, as it can turn grainy and eventually separate, leading to a less desirable texture in your final filling.
Combining the Mixtures
The art of folding is critical when combining the whipped cream with the cream cheese mixture. Gently add a third of the whipped cream to the cream cheese blend. Using a rubber spatula, carefully lift the mixture from the bottom of the bowl and fold it over the top in a circular motion. This technique preserves the airiness of the whipped cream while gently incorporating it into the denser cream cheese mixture. Repeat this process with the remaining whipped cream until fully combined, ensuring you maintain a light and fluffy consistency.
Filling the Cups
Spoon or Pipe Technique
When it’s time to fill the crusts, you have the option to either spoon or pipe the cheesecake filling. If you choose the spooning method, use a large tablespoon to scoop the filling and generously drop it into each crust. For a more precise and visually appealing approach, consider using a piping bag fitted with a large round tip. This allows you to control the amount of filling and creates an even and beautiful finish. If you go for piping, squeeze gently from the top while keeping the tip close to the crust, making sure to fill it uniformly.
Smoothing the Tops
To ensure that the tops of the mini cheesecakes are smooth, you can use the back of a spoon or a small offset spatula to gently level the filling. Start from the edge of the cup and work your way towards the center, smoothing out any bumps along the way. This detail not only enhances the aesthetic appeal but also makes for a beautiful canvas when decorating.
Chilling the Cheesecakes
Importance of Chilling
Chilling is a vital step that allows the cheesecake filling to firm up and set properly. Not only does chilling solidify the filling, but it also helps the flavors meld together, resulting in a more harmonious taste. During this process, the buttery graham cracker crust will mingle with the creamy filling, leading to a delightful experience in every bite.
Recommended Chill Time
The recommended minimum chilling time is 4 hours, but for the best results, consider chilling them overnight. If you’re uncertain about their doneness, gently touch the center of a cheesecake; it should feel firm to the touch yet slightly springy. If it appears too soft, allow additional time in the refrigerator.
Decorating the Mini Cheesecakes
Festive Touches
Decoration adds a joyful flair to your mini cheesecakes. Along with red and green sprinkles, consider exploring different decoration ideas such as edible glitter or holiday-themed stencils. Lightly dusting the tops with edible gold or silver glitter can elevate the appearance, creating an elegant touch for special occasions.
Using Fresh Mint and Candy Canes
Incorporating fresh mint leaves provides a vibrant green pop, contributing both flavor and color. Place a fresh mint leaf on top of each cheesecake just before serving. Mini candy canes can either be placed upright in each cheesecake or crumbled around the base for added visual appeal and a hint of peppermint flavor, tying back to the optional peppermint extract used in the filling.
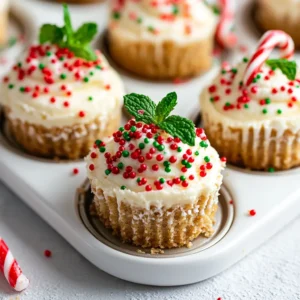
Arrangement Presentation
To create a stunning display, arrange your cheesecakes on a decorative platter. Line the platter with festive parchment paper or a seasonal cloth that complements the holiday spirit. You can also enhance the presentation with ornaments or small holiday lights around the platter, ensuring a warm and inviting setup.
Serving Suggestions
Ideal Occasions
These no-bake mini cheesecakes are not limited to Christmas celebrations; they are versatile enough to shine at a variety of occasions such as holiday parties, family gatherings, or even a New Year’s Eve bash. Their individual portions make them easy to serve and enjoy.
Beverage Pairings
To enhance the experience, pairing these mini cheesecakes with seasonal beverages like hot cocoa, coffee, or spiced apple cider can create a delightful contrast between rich and warm flavors, complementing the sweetness of the cheesecake beautifully.
Storing Leftovers
Refrigeration Tips
If you happen to have leftovers, storing them correctly is essential to maintain their quality. You should cover the mini cheesecakes with plastic wrap or transfer them into an airtight container to keep them fresh. Refrigerated, they will last for about 3 to 5 days without sacrificing flavor or texture.
Freezing Guidelines
Not specified in the recipe, but typically, no-bake cheesecakes can be frozen. If you wish to freeze the mini cheesecakes, allow them to set completely first. Afterward, wrap each cheesecake individually in plastic wrap, then place them in an airtight freezer bag. For best results, consume them within 2 to 3 months for optimal flavor and texture.
Festive No-Bake Mini Cheesecakes are a delightful addition to any holiday celebration, offering a creamy texture with a rich flavor profile. Their quick preparation and festive presentation make them ideal for gatherings, ensuring they capture the essence of festive cheer with every bite. The timing allows for ample customization, ensuring they fit perfectly into your holiday festivities.
Festive No-Bake Mini Cheesecakes for Christmas
Ingredients
- 1 ½ cups graham cracker crumbs
- ½ cup unsalted butter melted
- 2 tablespoons granulated sugar
- 16 oz cream cheese softened
- 1 cup powdered sugar
- 1 teaspoon vanilla extract
- 1 cup heavy whipping cream
- ½ teaspoon peppermint extract optional
- red and green sprinkles for decoration
- fresh mint leaves for garnish optional
- mini candy canes for decoration optional
Instructions
- In a mixing bowl, blend graham cracker crumbs, melted butter, and granulated sugar until combined.
- Line a muffin tin with paper liners and press 2 tablespoons of the crust mixture into each liner.
- In a large bowl, beat softened cream cheese until creamy, then mix in powdered sugar and vanilla extract.
- Whip heavy cream in a separate bowl until stiff peaks form, then fold into the cream cheese mixture.
- Spoon or pipe the cheesecake filling over the crusts, smoothing the tops.
- Cover the muffin tin with plastic wrap and refrigerate for at least 4 hours.
- Once set, remove cheesecakes from the tin and decorate with sprinkles, mint leaves, and mini candy canes.
- Serve and enjoy your festive mini cheesecakes!