
Introduction
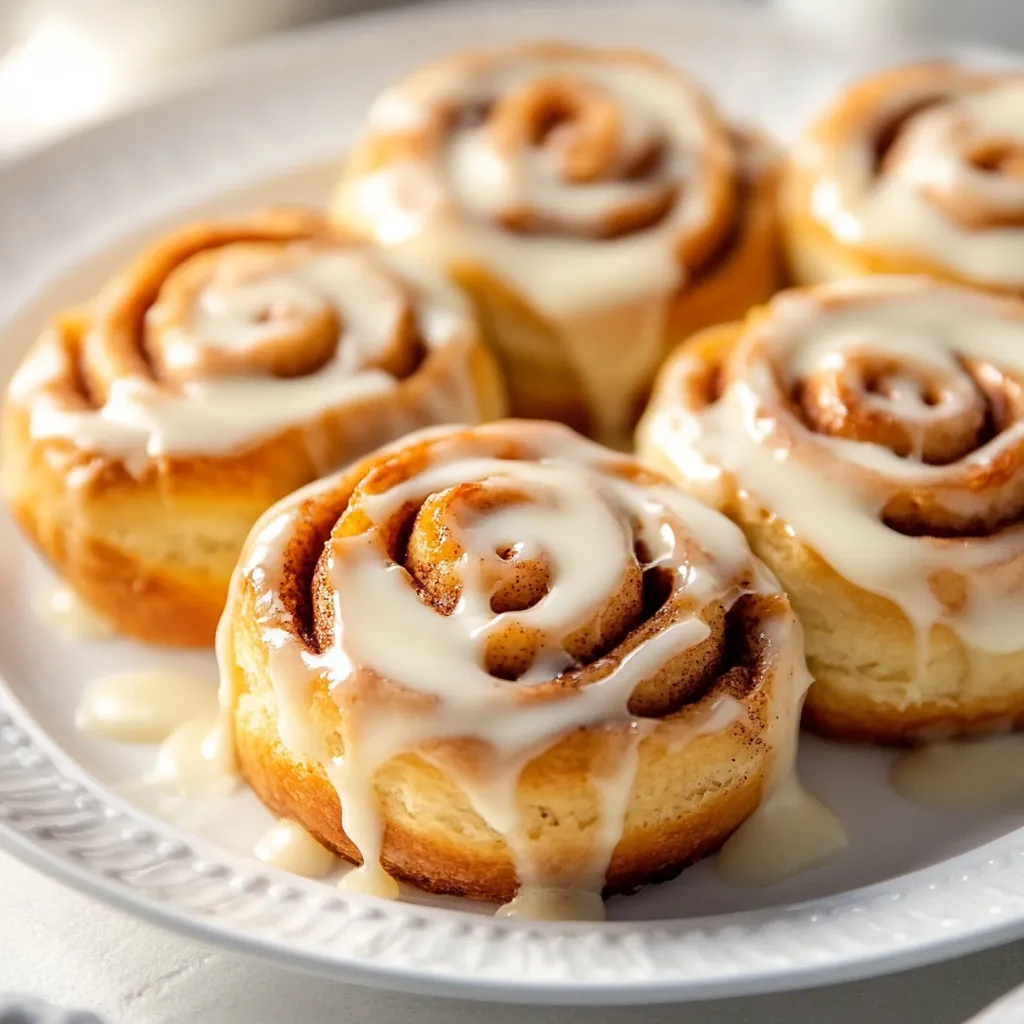
Cinnamon rolls are a classic treat that never goes out of style. Their rich, buttery flavor combined with the sweet hint of cinnamon makes them a favorite across various occasions—from cozy weekends to holiday gatherings. The allure of these rolls lies not only in their delightful taste but also in their comforting aroma as they bake, filling your kitchen with warmth. Traditionally, preparing cinnamon rolls can take a fair amount of time, often involving lengthy rising periods. However, with this Fluffy One-Hour Cinnamon Rolls recipe, you can enjoy this indulgent treat in just about an hour.
The appeal of homemade cinnamon rolls lies in their fresh flavor and customizable nature. While store-bought versions can sometimes taste artificial or overly sweet, homemade rolls allow you to control the ingredients and achieve the perfect balance you desire. Plus, there’s an undeniable joy in pulling freshly baked rolls from the oven, still warm, and watching as they melt into a creamy frosting drizzled generously over the top. This recipe is a simple, quick way to enjoy that experience, whether you’re preparing breakfast for the family or bringing a sweet treat to a gathering.
Recipe Overview
– Total Time: 1 hour
– Yield/Servings: 12 servings
– Difficulty: Not specified in the recipe
This recipe is designed to save you time without compromising on the quality of your cinnamon rolls. In less than an hour, you can create soft, fluffy rolls that rival those made by professionals. With a perfect blend of spices and sweetness, these rolls are sure to impress everyone around the breakfast table or at a brunch gathering.
Ingredients
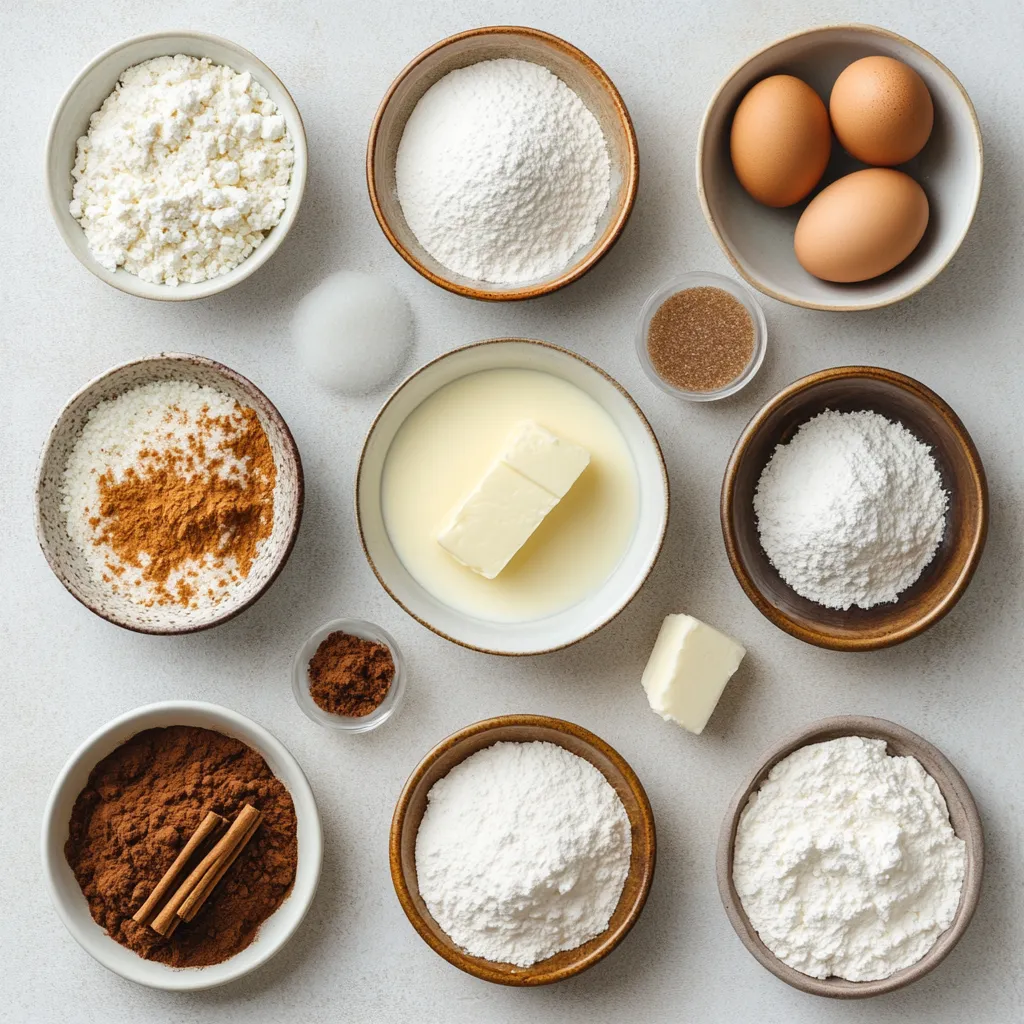
– 4 cups all-purpose flour
– 1/2 cup granulated sugar
– 1 packet (2 1/4 tsp) instant yeast
– 1 tsp salt
– 1 cup whole milk, warmed to 110°F
– 1/3 cup unsalted butter, melted
– 2 large eggs
– 1/2 cup packed brown sugar
– 2 tbsp ground cinnamon
– 1/2 cup unsalted butter, softened (for filling)
– 1 tsp vanilla extract
– 1/4 cup cream cheese, softened (for frosting)
– 1 cup powdered sugar
– 2 tbsp milk (for frosting)
Instructions
1. In a large mixing bowl, combine 2 cups of all-purpose flour, granulated sugar, instant yeast, and salt. Stir the dry ingredients thoroughly to ensure even distribution.
2. In another bowl, whisk together the warmed milk, melted butter, and eggs until the mixture is smooth and fully combined.
3. Gradually pour the wet mixture into the bowl of dry ingredients, stirring gently until they start to come together. Slowly add the remaining flour, half a cup at a time, until a soft and slightly sticky dough forms.
4. Transfer the dough onto a lightly floured surface and knead it for about 5 minutes, or until it becomes smooth and elastic. Shape the dough into a ball and place it in a greased bowl. Cover it with a damp cloth and let it rise in a warm environment for 15 minutes.
5. While the dough rises, prepare the cinnamon filling by mixing the packed brown sugar, ground cinnamon, and softened butter in a small bowl until well blended and creamy.
6. After 15 minutes, roll the dough out into a large rectangle, approximately 16×24 inches, on a floured surface. Evenly spread the cinnamon filling over the dough, leaving a small border around the edges.
7. Starting from one long edge, tightly roll the dough into a log shape. Pinch the seam to seal it securely. Using a sharp knife, cut the log into 12 equal pieces. Arrange these rolls in a greased 9×13 inch baking dish.
8. Cover the baking dish with plastic wrap and allow the rolls to rise in a warm area for an additional 20 minutes.
9. Preheat your oven to 375°F (190°C). Bake the rolls for 20-25 minutes, or until they are golden brown and cooked through.
10. While the rolls are baking, prepare the frosting by combining the softened cream cheese, powdered sugar, vanilla extract, and milk in a bowl. Mix until the frosting is smooth and creamy.
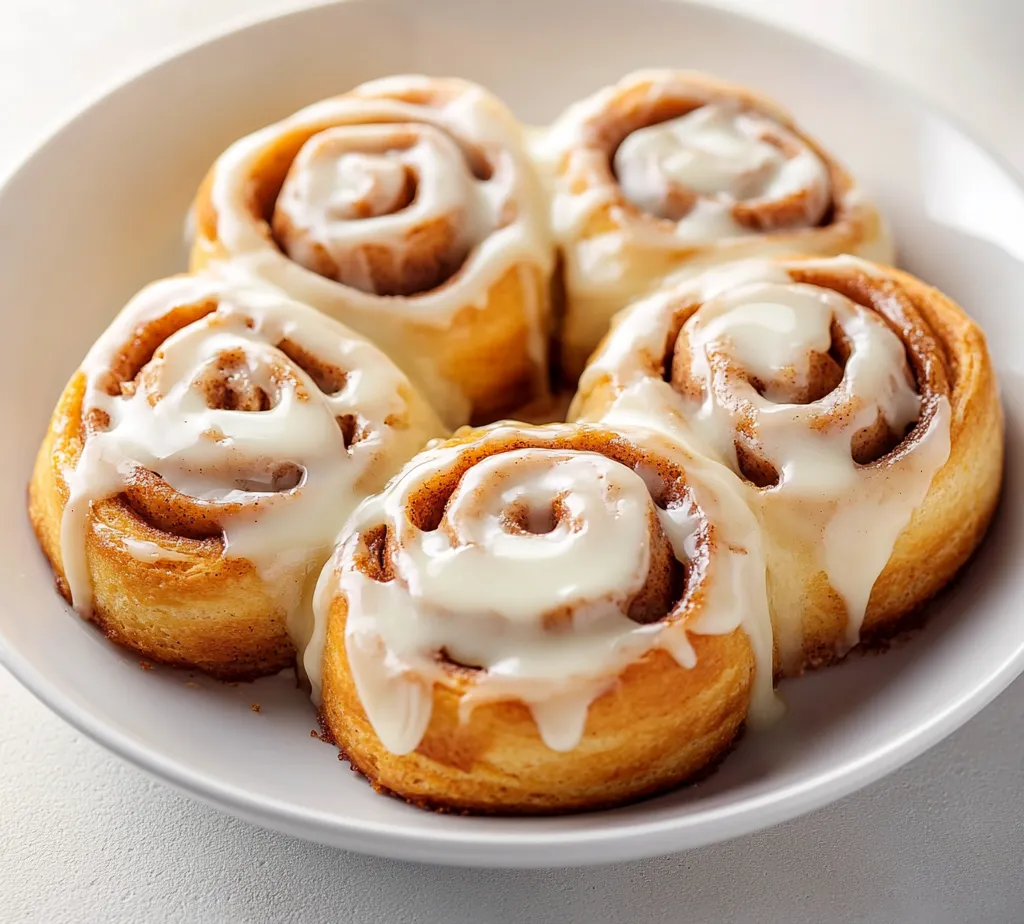
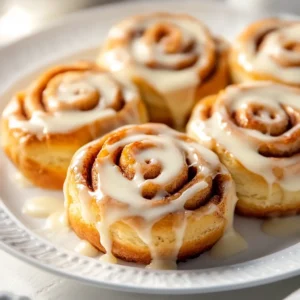
11. Once the rolls are out of the oven, let them cool for a few minutes. Generously drizzle the cream cheese frosting over the warm rolls. Serve immediately and savor the delightful flavors!
Equipment Needed
To make these Fluffy One-Hour Cinnamon Rolls, you will need several essential tools that will facilitate the preparation process. Ensure you have the following equipment on hand:
– Mixing Bowls: A large mixing bowl for combining the dry ingredients and a separate bowl for the wet ingredients will be crucial.
– Measuring Cups and Spoons: Accurate measuring tools are vital for achieving the right balance of ingredients for the best results.
– Rolling Pin: An essential tool for rolling out the dough into the desired rectangular shape.
– Sharp Knife: To cut the rolled dough into equal pieces, a sharp knife is preferred for clean cuts that maintain the shape of the rolls.
– Baking Dish: A greased 9×13 inch baking dish is needed for baking the rolls until golden and fluffy.
– Plastic Wrap: This will cover the rolls while they rise, helping to keep moisture in and promoting a successful rise.
– Oven: For the final baking, a preheated oven set to 375°F (190°C) is necessary to ensure even heat distribution.
With the right equipment at your disposal, you set yourself up for a smoother baking experience, allowing you to focus on the joy of creating delicious homemade cinnamon rolls.
Preparing the Dough
Creating the dough is a critical step in making fluffy cinnamon rolls. Start by combining the dry ingredients—two cups of all-purpose flour, granulated sugar, instant yeast, and salt—in a large mixing bowl. Stir these ingredients thoroughly to ensure that the yeast and salt are evenly distributed throughout the flour and sugar mixture. This is essential for even rising and flavor.
Next, you’ll want to mix the wet ingredients in a separate bowl. Whisk together warmed milk, melted butter, and eggs until they create a smooth, cohesive mixture. It’s particularly important for your milk to be warmed to approximately 110°F, as this temperature encourages the yeast to activate without killing it.
Once the wet and dry ingredients are prepared, gradually incorporate the wet mixture into the dry ingredients, stirring gently. As the dough begins to come together, add in the remaining flour half a cup at a time until it forms a soft, slightly sticky dough.
The next step is kneading, which is crucial for developing the dough’s gluten structure, ensuring that your rolls will be soft and fluffy. Transfer the dough to a lightly floured surface and knead for about 5 minutes until it becomes smooth and elastic. Making sure it is not overly sticky will also contribute to a better texture in the final product.
First Rise: Importance and Duration
The initial rise of the dough plays a pivotal role in the final texture and flavor of your cinnamon rolls. After kneading, shape the dough into a ball and place it in a greased bowl, covering it with a damp cloth. This prevents the dough from drying out and creates a warm environment that is conducive to rising. Allow the dough to rise in a warm area for 15 minutes.
This short rising period is effective because of the instant yeast used in the recipe. Unlike active dry yeast, instant yeast requires less time to produce carbon dioxide, which makes the dough rise. The result is a lighter and fluffier roll in less time, making this recipe a fantastic option for those who are busy yet craving this delicious treat.
Benefits of a 15-Minute Rise
The 15-minute rise for the cinnamon roll dough plays a crucial role in creating the fluffy texture that makes these treats so beloved. This relatively short resting period allows the yeast to activate quickly while preventing over-proofing. During this time, gluten begins to develop, setting the foundation for the dough’s structure. A short rise also means you can enjoy freshly baked cinnamon rolls in just one hour, making them a perfect treat for spontaneous gatherings or leisurely breakfasts.
Optimal Rising Environment
For the dough to rise effectively, the environment must be warm and draft-free. Ideal conditions can be achieved by placing the dough in an oven that has been preheated for a few minutes and then turned off, or even in a sunny spot in the kitchen. The warm temperature encourages yeast activity, thus enhancing the dough’s rise quickly. Some people may also find it helpful to cover the bowl with a damp cloth to retain moisture, which helps to create a soft dough.
Visual Cues for Dough Readiness
Recognizing when the dough has adequately risen is essential. Look for the dough to have approximately doubled in size and to feel puffy. You can perform the “poke test” by gently pressing your finger into the dough; if the indentation remains and doesn’t spring back immediately, it indicates that the dough is well-proofed and ready for the next step in making your cinnamon rolls.
Making the Cinnamon Filling
Ingredients for the Filling
To prepare the cinnamon filling that contributes to the flavor explosion found in each roll, you will need packed brown sugar, ground cinnamon, and softened unsalted butter. The brown sugar brings a deep, molasses-like sweetness that pairs beautifully with the cinnamon’s warm spice.
Step-by-Step Mixing Process
Start by adding the softened butter, brown sugar, and ground cinnamon to a bowl. Use a fork or a hand mixer to blend the ingredients until smooth and creamy. It’s vital to ensure that the butter is well-incorporated for optimal spreading. This mixture should be thick enough to hold its form but spreadable, preventing it from oozing out while baking.
Important Texture and Consistency to Look For
The ideal texture for the cinnamon filling is creamy yet pliable. It should easily coat the dough without being too liquidy, which would cause it to drip out during baking. When you spread it onto the rolled-out dough, it should adhere nicely but still be easy to manipulate as you roll it up.
Rolling Out the Dough
Measuring the Rectangle
Once your dough has risen, it’s time to roll it out. On a lightly floured surface, use a rolling pin to flatten the dough into a rectangle measuring approximately 16 x 24 inches. This size ensures that each roll has enough filling while maintaining a manageable thickness. Aim for an even thickness of about 1/4 inch to create rolls that bake evenly.
Spreading the Filling Evenly
With the dough rolled out to the desired shape, it’s time to spread the cinnamon filling over the entire surface, leaving a small border around the edges. Use an offset spatula or the back of a spoon to evenly distribute the filling, applying enough pressure to allow it to adhere without tearing the dough.
Techniques for Rolling the Dough Without Tearing
When rolling the dough, start at one long edge and gently pull it toward you, tucking the filling in as you go. Avoid pulling too tightly at the beginning; you can adjust the tightness as you go along. If you feel resistance or see tearing, lightly reshape the dough and allow it to relax for a minute before continuing.
Shaping the Rolls
Pinching the Seam for Tightness
After rolling the dough into a log, pinching the seam closed is critical to maintaining the shape of your cinnamon rolls during baking. By securing the edge tightly, you ensure that the filling does not seep out. A firm pinch will help lock in the flavors and keep the rolls looking beautiful.
Cutting for Uniformity: Size Matters
Use a sharp knife or dental floss to slice the log into 12 equal pieces, ensuring each piece is roughly the same size. Uniformity is crucial for even baking, as rolls of different sizes can bake at different rates, leading to some being overcooked while others remain doughy.
Arranging Rolls in the Baking Dish
As you cut the rolls, arrange them in a greased 9×13 inch baking dish with some space between each. The rolls will expand during the second rise and baking, so it’s essential to ensure they have room to grow without sticking together.
Second Rise: Preparing to Bake
Covering the Rolls Properly
After arranging the rolls, cover the baking dish with plastic wrap or a clean kitchen towel to help retain moisture. This covers allows the rolls to rise without forming a crust on the dough, which is crucial to achieving that soft, fluffy texture.
Duration and Conditions for the Second Rise
Allow the rolls to rise in a warm, draft-free area for about 20 minutes. Depending on your kitchen temperature, you can adjust the time slightly; warmer spaces may reduce the required rise time. Again, look for the dough to puff up and touch each other lightly as they expand.
Anticipating the Bake Time
Preheat your oven to 375°F (190°C) during the second rise. Keep an eye on the rolls; they should appear fluffy, and if you gently press on them, they should spring back slowly, indicating they’re ready for baking.
Baking the Cinnamon Rolls
Preheating the Oven Correctly
Correctly preheating the oven is critical for baking cinnamon rolls. An accurately heated oven ensures even baking and helps the rolls rise properly during the initial stages of baking. Use an oven thermometer if necessary – a well-calibrated oven can make all the difference.
Identifying When They Are Done
To check if the cinnamon rolls are done, look for a deep golden brown color on top and edges. A skewer or toothpick inserted into the center of a roll should come out clean or with a few sticky crumbs, not wet batter. The rolls will also sound hollow if tapped lightly.
Visual and Textural Indicators of Perfect Rolls
The final baked cinnamon rolls should appear puffy and slightly glossy. They should be soft to the touch but not overly squishy. The edges should be lightly caramelized from the sugar in the filling, enhancing both the flavor and visual appeal.
Crafting the Cream Cheese Frosting
Ingredients Breakdown
The rich cream cheese frosting includes softened cream cheese, powdered sugar, vanilla extract, and milk. This frosting balances the sweetness of the rolls while adding a pleasant tang, creating an irresistible flavor combination.
Step-by-Step Mixing Instructions
In a mixing bowl, combine softened cream cheese and powdered sugar. Mix until smooth and creamy, adding the vanilla extract and milk gradually until the frosting reaches your desired spreading consistency. Adjust the milk based on whether you prefer a thicker or thinner frosting.
Achieving the Perfect Frosting Consistency
The ideal frosting should be spreadable but thick enough to sit atop the warm cinnamon rolls without dripping off. If it’s too thick, slowly add more milk; if it’s too thin, incorporate additional powdered sugar.
Frosting the Rolls
Timing: When to Frost
Let the cinnamon rolls cool for a few minutes after removing them from the oven, allowing the frosting to melt slightly and create a harmonious glaze. Frosting them while they are still warm enhances the flavor experience as the frosting seeps into the rolls.
Techniques for Even Distribution
Using an offset spatula or a butter knife, gently scoop frosting and spread it across the surface of the rolls. Aim for an even coating, ensuring every roll is generously adorned to enhance the overall flavor.
Optional Garnishes for Enhanced Presentation
For added visual appeal, consider garnishing with a sprinkle of cinnamon, chopped nuts, or even a drizzle of caramel sauce over the frosting to elevate the finished product artistically.
Serving Suggestions
Pairing with Beverages: Coffee, Tea, and More
Serving your freshly baked cinnamon rolls can be made even more delightful with beverage pairings. Classic options include freshly brewed coffee, hot tea, or even a warm glass of milk. The richness of the rolls complements warm beverages beautifully.
Best Ways to Serve: Rustic or Elegant Presentation
Whether you choose a rustic presentation on a wooden board or an elegant display on a decorative platter, the cinnamon rolls will shine. To create a family-style breakfast, consider arranging them on a large tray, allowing guests to serve themselves.
Storing Leftover Cinnamon Rolls
To store leftover rolls, allow them to cool completely before transferring them to an airtight container. These cinnamon rolls will maintain their texture at room temperature for up to two days. For longer storage, consider wrapping them well and freezing for up to two months. Reheating is simple, just warm them in the oven or microwave to restore their softness.
Conclusion
Fluffy One-Hour Cinnamon Rolls provide a delightful experience through their soft, pillowy texture and rich flavor profile characterized by cinnamon and sugar. Baked to a perfect golden brown and topped with an irresistible cream cheese frosting, these rolls come together in just one hour, creating an enjoyable indulgence. Eating them fresh out of the oven offers an unforgettable taste sensation.
Fluffy One-Hour Cinnamon Rolls Recipe
Ingredients
- 4 cups all-purpose flour
- ½ cup granulated sugar
- 1 packet instant yeast
- 1 tsp salt
- 1 cup whole milk warmed to 110°F
- ⅓ cup unsalted butter melted
- 2 large eggs
- ½ cup packed brown sugar
- 2 tbsp ground cinnamon
- ½ cup unsalted butter softened (for filling)
- 1 tsp vanilla extract
- ¼ cup cream cheese softened (for frosting)
- 1 cup powdered sugar
- 2 tbsp milk for frosting
Instructions
- Combine 2 cups of flour, sugar, yeast, and salt in a large bowl.
- Whisk warmed milk, melted butter, and eggs in another bowl until smooth.
- Pour wet mixture into dry ingredients and stir gently, adding remaining flour until a soft dough forms.
- Knead dough on a floured surface for about 5 minutes until smooth and elastic.
- Place dough in a greased bowl, cover with a damp cloth, and let rise for 15 minutes.
- Mix brown sugar, cinnamon, and softened butter for the filling.
- Roll dough into a rectangle, spread filling, and roll tightly into a log.
- Cut log into 12 pieces and arrange in a greased baking dish.
- Cover and let rise for an additional 20 minutes.
- Preheat oven to 375°F and bake for 20-25 minutes until golden brown.
- Prepare frosting by mixing cream cheese, powdered sugar, vanilla, and milk until smooth.
- Drizzle frosting over warm rolls and serve.