
Introduction
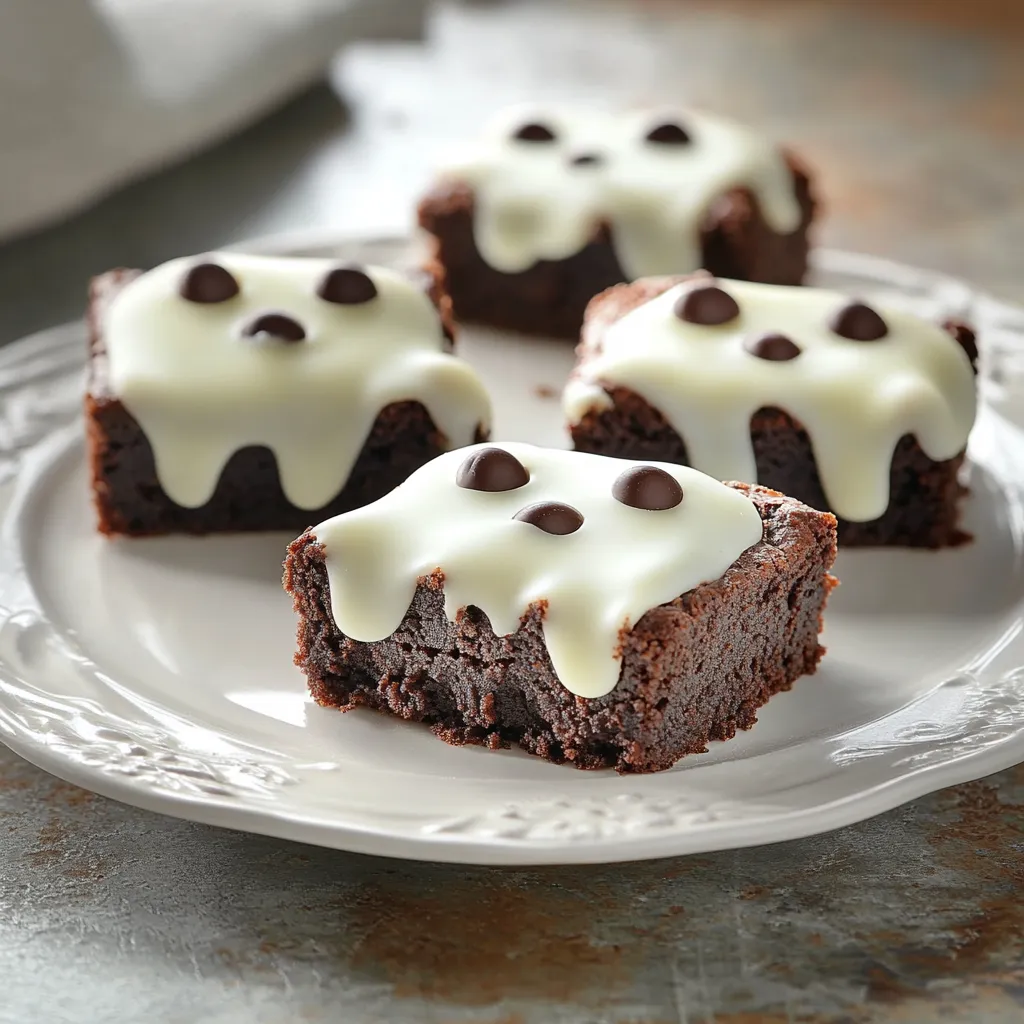
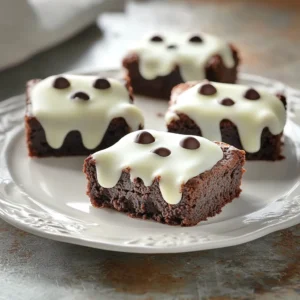
The charm of Halloween often calls for delightful and spooky treats that captivate both kids and adults alike. Ghostly Delight Brownies are the perfect concoction of rich chocolate flavors combined with playful ghostly decorations, making them an eye-catching addition to any Halloween celebration. These brownies are not only delicious but also easy to prepare, ensuring you can whip them up without fuss. The dark, fudgy brownie base serves as an excellent canvas for a layer of creamy, white chocolate that resembles friendly little ghosts, complete with mini chocolate chip eyes that will enchant your guests.
These treats are ideal for Halloween parties, school functions, or even just a fun family dessert during this festive season. Their visually appealing design and scrumptious taste will surely make them a hit among both children and adults. The balance of rich chocolate with a sweet, creamy topping results in a flavor and texture combination that is hard to resist.
Recipe Overview
– Total Time: 1 hour
– Prep Time: 20 minutes
– Servings: 12-16 ghostly treats
– Difficulty: Not specified in the recipe
Ingredients
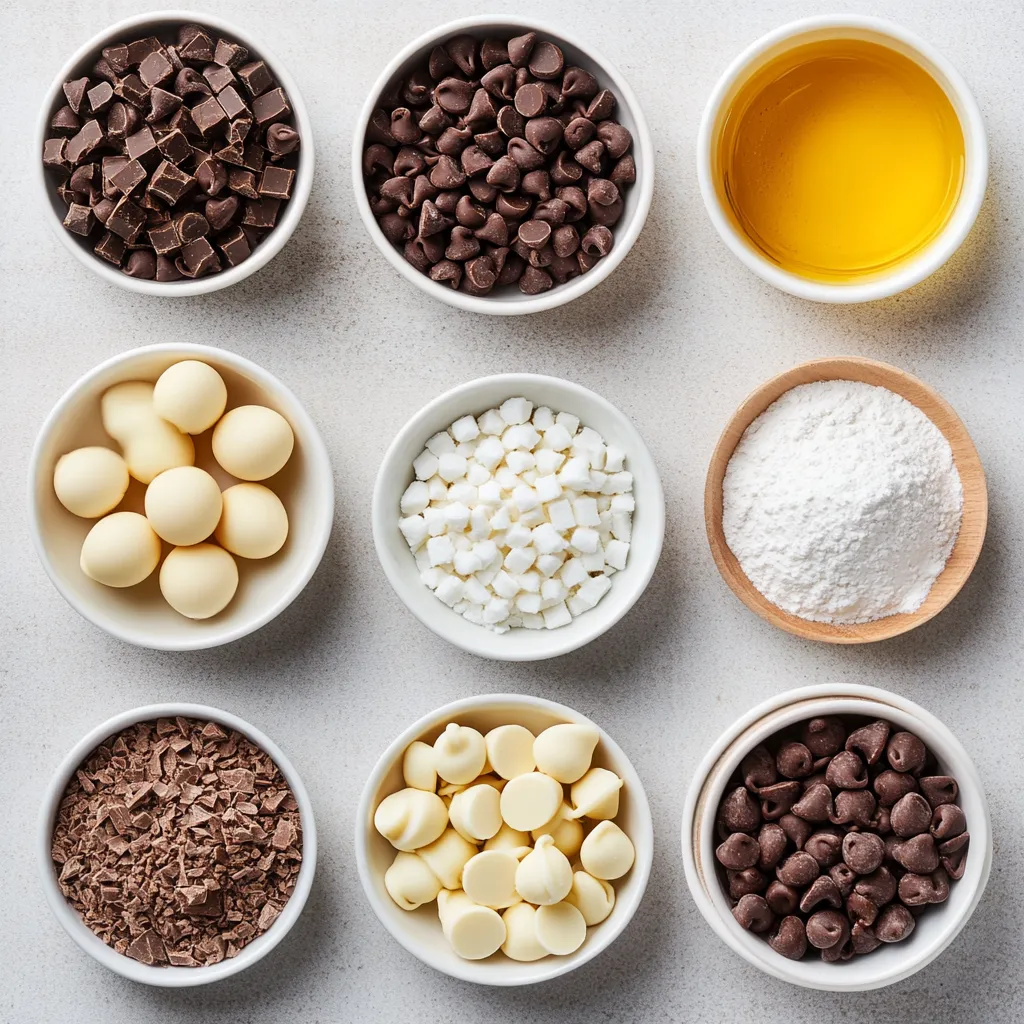
– 1 cup unsalted butter, melted
– 2 cups granulated sugar
– 4 large eggs
– 1 teaspoon vanilla extract
– 1 cup all-purpose flour
– 1 cup unsweetened cocoa powder
– 1/2 teaspoon salt
– 1/2 teaspoon baking powder
– 1 cup semi-sweet chocolate chips
– 1 cup white chocolate chips (for ghost decoration)
– 1 tablespoon coconut oil (to melt white chocolate)
– Mini chocolate chips (for ghost eyes)
Instructions
1. Begin by preheating your oven to 350°F (175°C). Prepare a 9×13 inch baking pan by greasing it or lining it with parchment paper for easy removal later.
2. In a large mixing bowl, pour in the melted butter and granulated sugar. Mix them together thoroughly until the mixture is smooth and well combined.
3. Add the eggs one at a time, ensuring you mix well after each addition to fully incorporate them. Follow this by stirring in the vanilla extract for added flavor.
4. In a separate bowl, sift together the all-purpose flour, unsweetened cocoa powder, salt, and baking powder. This step helps to aerate the dry ingredients and eliminates any lumps.
5. Gradually introduce the dry mixture into the wet ingredients, stirring gently until just combined. Be cautious not to overmix, as this can lead to dense brownies.
6. Carefully fold in the semi-sweet chocolate chips, ensuring they are evenly distributed throughout the batter.
7. Pour the brownie batter into the prepared baking pan, using a spatula to spread it evenly across the surface.
8. Bake in the preheated oven for 25-30 minutes. Check for doneness by inserting a toothpick into the center; it should come out with a few moist crumbs but not wet batter.
9. Once baked, remove the brownies from the oven and allow them to cool completely in the pan on a wire rack. This step is crucial for achieving the perfect texture.
10. While the brownies are cooling, melt the white chocolate chips together with the coconut oil in a microwave-safe bowl. Heat in 30-second intervals, stirring in between, until smooth and glossy.
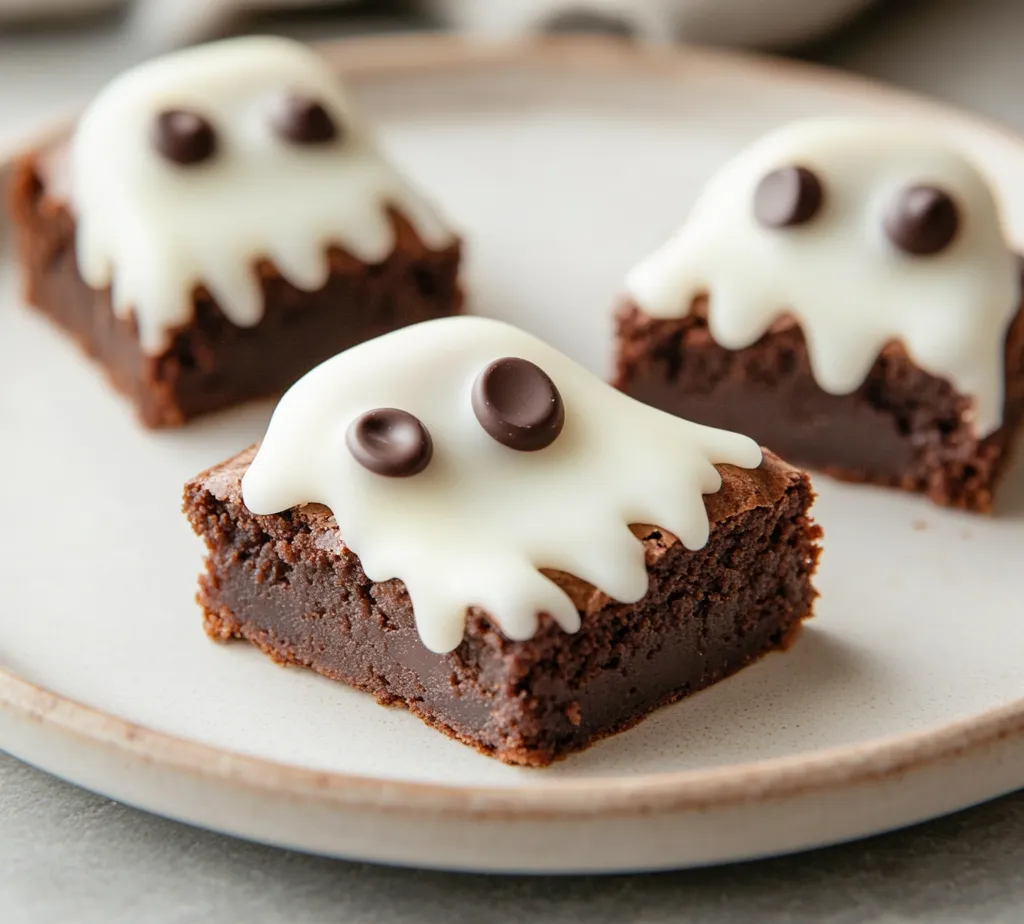
11. Once the brownies have cooled, carefully cut them into ghost shapes using a ghost-shaped cookie cutter for a fun presentation.
12. Dip the tops of each brownie ghost into the melted white chocolate, letting any excess chocolate drip back into the bowl.
13. Before the white chocolate sets, press two mini chocolate chips onto each ghost for their eyes, adding a playful touch.
14. Allow the decorated brownies to sit until the white chocolate has hardened completely before serving.
Preparing the Baking Pan
Understanding how to properly prepare your baking pan ensures the brownies release easily. Selecting the right baking pan is a critical first step in achieving the ideal texture and shape for the brownies. Using a 9×13 inch pan is essential, as it provides enough area for the brownies to bake evenly without becoming too thick or too thin.
Choosing the Right Pan
A 9×13 inch baking pan is recommended for this recipe because it allows for a signature brownie thickness that balances soft centers with slightly crispy edges. A pan with a non-stick coating can make cleanup a breeze, ensuring minimal residue clings to the sides, although greasing or lining with parchment paper will also yield satisfying results.
Greasing or Lining
When preparing your baking pan, you can either grease it with butter or cooking spray or line it with parchment paper. Greasing the pan allows for easy release but can sometimes lead to brownies that stick at the corners. Using parchment paper ensures that the brownies lift out smoothly after cooling. Each method has its benefits depending on personal preference, but both are widely accepted practices that yield great results.
Mixing the Batter
Mastering the batter mixing technique is key to achieving fudgy, moist brownies. This process begins by carefully integrating the wet ingredients, laying the foundation for a rich and decadent brownie.
Combining Wet Ingredients
Start by whisking together the melted butter and granulated sugar until the mixture is smooth. This blending step is essential as it helps to create a well-emulsified mixture that will rise and form a pleasurable texture during baking. The warmth of the melted butter is beneficial, making it easier to dissolve the sugar fully, thereby enhancing the overall sweetness of the brownies.
Incorporating Eggs and Vanilla Extract
Introduce the eggs one at a time, mixing well to incorporate air into the batter. This not only contributes to a light structure but also promotes an even rising of the brownies during baking. After adding the eggs, pour in the vanilla extract. The vanilla adds depth and enhances the chocolate flavor, ensuring every bite is as flavorful as possible.
Sifting the Dry Ingredients
Sifting the flour, cocoa powder, salt, and baking powder is a crucial step. This process not only prevents lumps but also aerates the dry mixture, helping to create a lighter and fluffier brownie. If you skip this step, you may end up with undesirable clumps of cocoa or flour, which could affect the overall texture of the brownies. Sifting incorporates air back into the ingredients and forms the perfect base for blending with the wet mixture seamlessly.
Combining Ingredients
The crucial point in brownie-making lies in the careful combination of wet and dry mixtures. It’s essential to be gentle during this step to avoid overmixing, which can lead to dense, tough brownies. The goal is to incorporate the dry ingredients just until you see no more dry flour visible, as the batter should still maintain a slightly thick consistency. This method preserves the needed moisture and fudgy texture that characterizes perfect brownies. When you fold in the semi-sweet chocolate chips, ensure they are evenly distributed throughout the batter; this adds bursts of melty chocolate that will delight your taste buds.
Gradually Mixing Dry into Wet
When combining the dry ingredients into the wet mixture, the key is to do so gradually. This technique helps preserve the airiness of the batter, which is essential for achieving soft, chewy brownies. Begin by adding about a third of the dry mixture to the wet ingredients, folding gently with a spatula or wooden spoon. Continue adding the dry ingredients in increments, stopping once you see flour streaks. Overmixing at this stage can lead to denser brownie texture. Aim for a few lumps visible in your batter—this indicates the brownies will be delightfully fudgy once baked.
Folding in Chocolate Chips
Once the batter is nearly combined, it’s time to introduce the semi-sweet chocolate chips. Gently fold them into the batter using a rubber spatula. The goal here is to distribute the chocolate chips evenly without deflating the batter you’ve meticulously aerated. Careful folding ensures every bite of brownie has pockets of melty, rich chocolate for an indulgent experience. Take your time during this step, as it truly elevates the flavor profile.
Baking the Brownies
Baking is where science and art come together to transform your batter into delightful brownies. Understanding the delicate balance of temperature and timing can make all the difference.
Preheating the Oven
Setting your oven to 350°F (175°C) is crucial for an even baking process. Preheating allows the brownies to start cooking at the right temperature, ensuring a nice dome on top and a soft interior without overcooking the edges. An oven thermometer can be a useful tool if you’re unsure of your oven’s accuracy. Allow about 10-15 minutes for the oven to come to the right temperature before placing your brownies inside.
Timing the Bake
Baking the brownies for 25 to 30 minutes is not just a set time but a point of observation. Start checking the brownies at the 25-minute mark using the toothpick test. Insert a toothpick into the center; if it comes out with a few moist crumbs, it’s perfect. If it comes out with wet batter, give it a few more minutes. Keep in mind that residual baking will continue to occur even after taking the brownies out of the oven. Therefore, pulling them slightly earlier than the recommended time can yield softer, more enjoyable brownies.
Cooling Process
Allowing your brownies to cool properly is essential for achieving the desired texture, making them easier to cut, and enhancing the overall presentation.
Cooling in the Pan
After baking, remove the brownies from the oven and place them on a wire rack, keeping them in the pan. This method ensures that the bottom of the brownies doesn’t become soggy while still allowing for airflow. Cooling in the pan retains moisture and dramatically improves the cutting experience later.
Importance of Cooling Time
Let your brownies cool completely—this can take around 45 minutes to an hour—before cutting them into shape. If you attempt to cut while they’re warm, they may crumble or lose their intended shapes. Proper cooling allows the brownie structure to firm up, making it easier to achieve clean, sharp edges when cutting.
Decorating the Ghostly Brownies
Once your brownies have cooled, it’s time for the fun part: decorating them into playful ghost shapes that align with the Halloween spirit.
Melting White Chocolate
To create the ghostly coating, melt the white chocolate chips mixed with coconut oil. Using a microwave-safe bowl, heat in 30-second intervals, stirring between each to prevent overheating. The addition of coconut oil not only helps with the melting process but also adds a glossy finish, making your decorated brownies look professional.
Crafting Ghost Shapes
Utilizing a ghost-shaped cookie cutter transforms your brownies into charming ghost treats. Ensure the brownies are fully cooled; otherwise, they may break when you press the cutter down. Gently push the cutter through the brownie and lift the shape out with a knife or spatula, maintaining the integrity of each ghost.
Adding Ghostly Eyes
Before the white chocolate has set, press two mini chocolate chips onto each brownie ghost for their eyes. This step adds character and a whimsical touch to your treats. If you find it easier, you can also create small dollops of melted chocolate using a toothpick for eyes, allowing each ghost to have a unique expression.
Presenting Your Treats
An attractive presentation highlights the festivity of your ghostly brownies, making them even more appealing to your guests.
Spooky Platter Ideas
Arrange your brownie ghosts on a spooky-themed platter to enhance their aesthetic appeal. Consider using colored plates or decorations that reflect Halloween, such as orange and black. You can elevate the look further by scattering edible glitter or Halloween-themed sprinkles around the platter, creating a festive atmosphere.
Additional Decorating Tips
For an even spookier presentation, consider placing your decorated brownies on a bed of faux spider web. This adds a creepy element that complements the Halloween theme. Further decoration suggestions could include edible eyes or candy corn for an extra touch of fun, ensuring that your treat becomes the centerpiece of the gathering.
Storing Leftovers
Proper storage is key to maintaining the deliciousness and texture of your ghostly brownie treats.
Best Storage Practices
To keep your brownies fresh and fudgy, store them in an airtight container at room temperature. This prevents them from drying out while maintaining the soft texture that makes them enjoyable. If you live in a particularly humid climate, refrigeration might be necessary, though this could slightly alter their texture.
How Long Do They Last?
When stored appropriately, these decorated brownies can last up to a week at room temperature while remaining fresh. However, the quality is best enjoyed within the first few days, as the texture and flavor can decline over time. If you find yourself with leftover brownies, consider freezing them for longer preservation, allowing you to enjoy a taste of Halloween even after the season has passed.
Conclusion
Ghostly Delight Brownies present a delightful fusion of rich chocolate flavor and whimsical decoration, perfect for Halloween gatherings. With a soft, fudgy texture and playful ghost shapes, these treats come together within an hour, serving as both a tasty dessert and a captivating centerpiece. Their charm and taste will leave a lasting impression, making them a beloved addition to any festive spread.
Ghostly Delight Brownies Recipe for Halloween Fun
Ingredients
- 1 cup unsalted butter melted
- 2 cups granulated sugar
- 4 large eggs
- 1 teaspoon vanilla extract
- 1 cup all-purpose flour
- 1 cup unsweetened cocoa powder
- ½ teaspoon salt
- ½ teaspoon baking powder
- 1 cup semi-sweet chocolate chips
- 1 cup white chocolate chips
- 1 tablespoon coconut oil
- to taste mini chocolate chips
Instructions
- Preheat your oven to 350°F (175°C) and prepare a 9x13 inch baking pan.
- Mix melted butter and granulated sugar until smooth.
- Add eggs one at a time, mixing well after each addition, then stir in vanilla extract.
- Sift together flour, cocoa powder, salt, and baking powder in a separate bowl.
- Gradually combine dry ingredients with wet ingredients, being careful not to overmix.
- Fold in semi-sweet chocolate chips evenly into the batter.
- Spread the batter into the prepared baking pan and bake for 25-30 minutes.
- Cool the brownies completely in the pan on a wire rack.
- Melt white chocolate chips with coconut oil in a microwave-safe bowl until smooth.
- Cut brownies into ghost shapes and dip tops into melted white chocolate, adding mini chocolate chips for eyes.