
Introduction
Gluten-free peppermint meltaways are a delightful treat that perfectly encapsulate the spirit of the holiday season. These small, sweet spheres offer a refreshing blend of peppermint flavor paired with a creamy consistency that simply melts in your mouth. As temperatures drop and festivities abound, these meltaways serve as an impressive addition to any dessert table or a warm invitation to share with loved ones. They’ve become a staple in American dessert culture, particularly during the winter months when peppermint flavors are most cherished.
These meltaways not only capture the essence of peppermint but also cater to those with gluten sensitivities. With their easy-to-follow preparation steps, they are an accessible option for home bakers, ensuring that everyone can partake in the sweetness of the holidays. The simplicity of the ingredients makes it possible to enjoy these treats without compromising on flavor or texture.
Whether served chilled to create a refreshing contrast or allowed to rest at room temperature to enhance their creamy richness, gluten-free peppermint meltaways are sure to be a crowd-pleaser. They make for wonderful gifts as well, lending an extra touch of care and consideration to the holiday season.
Recipe Overview
– Prep Time: 15 minutes
– Cook Time: 0 minutes
– Total Time: 45 minutes
– Course: Dessert
– Cuisine: American
– Servings: 12
– Calories: ~150 per serving
Ingredients
– 1 cup gluten-free powdered sugar
– 1/2 cup softened coconut oil
– 1/4 cup almond flour
– 1/2 teaspoon peppermint extract
– 1/4 teaspoon vanilla extract
– 1/4 teaspoon sea salt
– 1/2 cup gluten-free dark chocolate chips

Instructions
1. In a large mixing bowl, combine the gluten-free powdered sugar, softened coconut oil, almond flour, peppermint extract, vanilla extract, and sea salt. Use a spatula or electric mixer to blend the ingredients until the mixture is smooth and creamy, ensuring there are no lumps.
2. With clean hands, scoop out portions of the mixture and roll them into small balls, approximately 1 inch in diameter. Place each ball onto a parchment-lined baking sheet, leaving space between them.
3. Once all the balls are shaped, transfer the baking sheet to the refrigerator and chill for about 30 minutes, or until the meltaways are firm to the touch.
4. Meanwhile, prepare the chocolate coating by melting the gluten-free dark chocolate chips. Place them in a microwave-safe bowl and heat in 30-second intervals, stirring well between each interval, until the chocolate is fully melted and silky smooth.
5. After the peppermint balls have chilled, take them out of the refrigerator. Dip each ball into the melted chocolate, using a fork to ensure they are completely coated. Gently tap the fork on the edge of the bowl to remove excess chocolate before placing them back on the parchment-lined baking sheet.
6. Once all the peppermint meltaways are coated in chocolate, return the baking sheet to the refrigerator for an additional 15 minutes, allowing the chocolate to set firmly.
7. Serve the meltaways chilled for a refreshing treat or at room temperature for a delightful dessert experience. Enjoy your scrumptious gluten-free peppermint meltaways!
Mixing the Ingredients
When creating your gluten-free peppermint meltaways, it all begins with the careful balancing of flavors and textures in a mixing bowl. Initially, the gluten-free powdered sugar acts as the base, providing sweetness and a velvety texture. Softened coconut oil is then introduced to the mix, serving a dual purpose as both a binding agent and a source of creaminess. The combination not only lends a delectable lightness to the meltaways but also infuses them with a hint of tropical flavor.
Utilizing an electric mixer or a spatula, blend these core ingredients until you achieve a smooth, creamy consistency. It’s crucial to incorporate the peppermint extract and vanilla extract at this stage, as they elevate the taste profile of the dessert beautifully. The addition of sea salt is equally vital, as it balances the sweetness and enhances the multitude of flavors present.
Forming the Balls
Once your mixture reaches a delightful creamy state, it’s time to shape your meltaways into bite-sized balls. To maintain an even size and uniform texture, use clean hands to scoop out small portions of the mixture, rolling each dollop into a ball approximately one inch in diameter. This technique ensures that all meltaways have a consistent size, which not only looks aesthetically pleasing but also leads to even cooling and coating later on.
Place each ball onto a parchment-lined baking sheet. Remember to leave some space between each ball; this provides ample room for air circulation, which is particularly important during the chilling process.
Chilling the Mixture
After forming the meltaway balls, transfer the baking sheet to the refrigerator. Chilling is a critical step that allows the mixture to firm up, so don’t skip it! Aim for about 30 minutes of chill time, which will ensure that the meltaways are set and easy to handle when it comes time to dip them in chocolate. This chilling period also enhances the texture, providing that tender, melt-in-your-mouth quality that makes these treats so irresistible.
By allowing the meltaways to chill, you’re setting the foundation for a perfectly enjoyable treat filled with flavor and texture that your family and friends will love.
Melting the Chocolate
The chocolate coating is what brings everything together and adds a luscious finish to the peppermint meltaways. For this step, you’ll need a microwave-safe bowl to melt the gluten-free dark chocolate chips. Using a microwave is one of the easiest ways to achieve the glucose level desired in melted chocolate, but it requires careful attention to ensure it remains smooth.
Tools Needed
Having a sturdy bowl and a fork on hand is essential for the melting process. Ensure that your bowl can withstand the heat of the microwave, as you will be placing the chocolate into the microwave in intervals. Using a fork will allow for easy dipping and tapping of the meltaways to achieve a nice, even coating.
Melting Techniques
Begin melting the chocolate by placing the chips in your microwave-safe bowl and heating them in 30-second intervals. After each interval, give the chocolate a good stir. This method allows for a more controlled melting process, which minimizes the risk of overheating. Watch for the moment the chocolate is just fully melted; you want it to be silky smooth without any lumps. A well-melted chocolate coating will envelop the peppermint balls seamlessly, creating an inviting and festive appearance.
Using a Fork for Even Coating
Dipping the peppermint meltaways into the melted chocolate requires some finesse to achieve an even coating. Using a fork is essential as it allows for precision when ensuring each meltaway is thoroughly covered. After rolling a peppermint ball into the chocolate, gently lift it out using the fork, ensuring the chocolate wraps completely around the treat.
Tips for Removing Excess Chocolate
To avoid puddles of hardened chocolate at the base of your meltaways, it is crucial to tap the fork gently on the bowl’s edge after lifting the ball from the chocolate. This technique lets excess chocolate drip back into the bowl, ensuring a thinner, more elegant coating on your meltaway. If you notice occasional clumps of chocolate, use a toothpick or skewer to carefully adjust and even out the chocolate coating.
Setting the Coating
The chilling process after coating the meltaways in chocolate is critical for achieving the perfect texture and firmness. Returning the baking sheet to the refrigerator after chocolate coating allows the chocolate to set properly. Generally, a chilling time of 15 minutes is sufficient for the chocolate to harden completely. However, if you want an even firmer finish, consider chilling for an additional 10 minutes.
Optimal Time for the Best Chocolate Set
Chilling the meltaways for at least 15 minutes ensures the chocolate is fully set while preserving the soft structure of the peppermint center. If served too soon, the chocolate could still be tacky, detracting from the overall treat experience. On the other hand, allowing the meltaways to chill for longer than about half an hour can risk the peppermint filling becoming overly firm, which can affect the melt-in-your-mouth quality that makes these treats stand out.
Serving Suggestions
When it comes to presenting and serving your peppermint meltaways, creativity can take center stage. These treats can easily adapt to unique serves suitable for any occasion.
Presentation Tips
A beautifully arranged platter can enhance the appeal of your peppermint meltaways, especially during holiday celebrations. Start by using a festive plate that matches the seasonal theme. Lay out the meltaways in a circular pattern or in rows, allowing the chocolate-covered edges to shine.
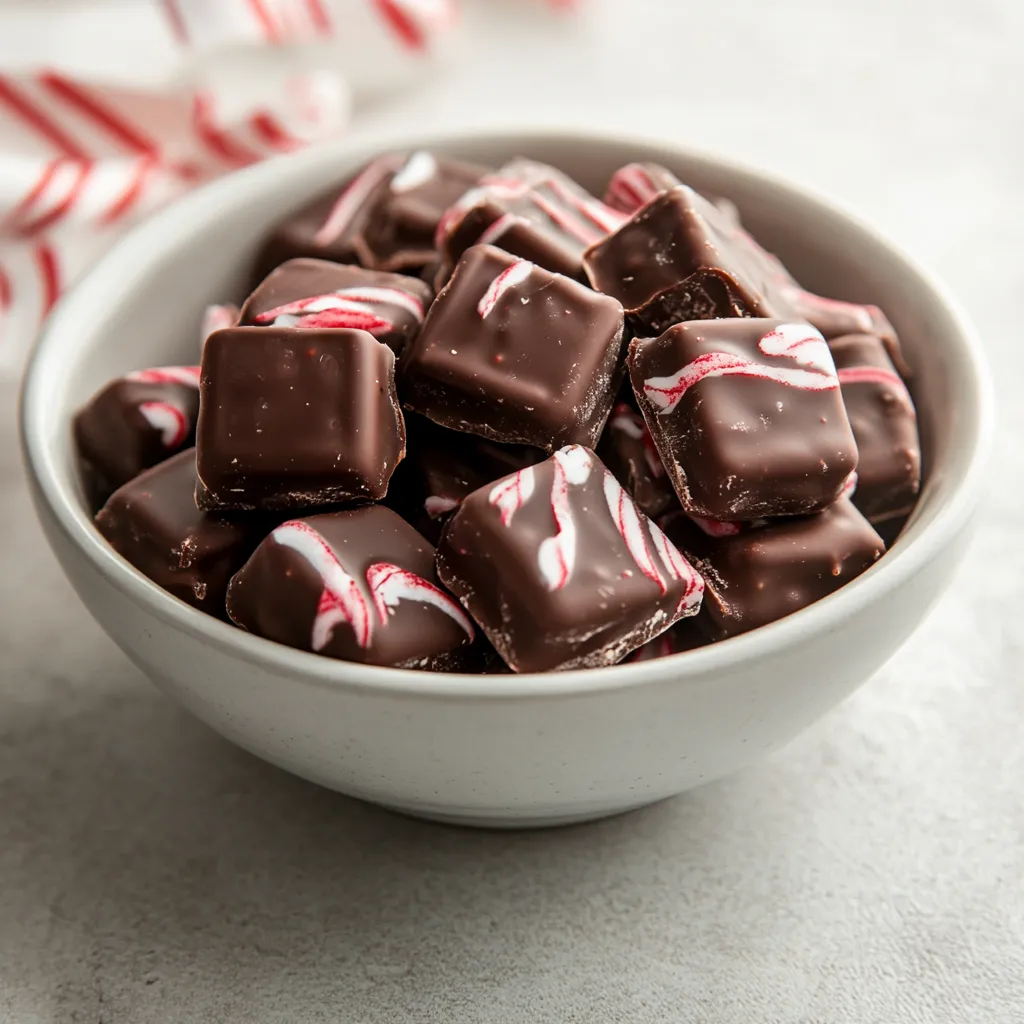
For an added touch of elegance, try garnishing your plate with crushed peppermint candies scattered around the border or in between the meltaways. The bright red and white colors will not only enhance visual appeal but will also complement the peppermint flavor beautifully.
Serving Temperatures
Deciding whether to serve your meltaways chilled or at room temperature has its benefits.
Chilled: Serving the meltaways chilled enhances the refreshing flavor of peppermint, making them a perfect treat after a meal. The colder temperature maintains the firmness of the chocolate, providing a satisfying snap with every bite.
Room Temperature: Alternatively, serving the meltaways at room temperature allows the centers to soften slightly, creating a creamier texture. This can be particularly enticing for those who prefer a more melt-in-your-mouth experience.
Storage Instructions
Storing your peppermint meltaways correctly will help maintain their freshness and flavor.
Refrigerated Storage
For optimal freshness, storing the meltaways in an airtight container in the refrigerator is recommended. This prevents any moisture or odors from bundling into the chocolate coating, which could affect both flavor and texture. Ensure that they are placed in a single layer, separated by parchment paper if necessary, to avoid sticking together.
Shelf Life Information
When stored correctly in the refrigerator, these meltaways can last for about one week. Over time, the texture may become firmer, but their flavor will remain intact. If stored at room temperature, it is best to consume them within a few days, as the chocolate may begin to lose its quality quicker in a warmer environment.
Variations of the Recipe
While the standard recipe is delicious on its own, exploring variations can bring additional flair to your peppermint meltaways.
Flavor Variations
Playing with different flavors can elevate your meltaway game. Consider replacing peppermint extract with other extracts like orange, almond, or coconut for a twist on the classic treat. Each alternative will impart a distinct aroma while still pairing well with the chocolate coating.
Ingredient Substitutions
If you have dietary restrictions or preferences, there are a few simple ingredient swaps you can make. For instance, if almond flour is not suitable, other nut flours such as hazelnut or cashew flour can be used. For those looking for a nut-free option, sunflower seed flour might be a suitable alternative.
Substituting the coconut oil with a different type of oil, like canola or vegetable oil, can work too, although it may alter the flavor slightly. It’s always essential to remain aware of any allergies or dietary needs when making ingredient substitutions.
Nutritional Information
Understanding the nutritional content of your meltaways helps in incorporating them into a balanced diet.
Caloric Breakdown
Each peppermint meltaway contains approximately 150 calories per serving. The primary source of calories comes from the coconut oil and sugar, which contribute significantly to the total. Enjoying one or two can be a delightful indulgence while being mindful of the calories involved.
Health Benefits of Ingredients
Using almond flour offers some beneficial properties, as it is lower in carbohydrates than traditional wheat flour and provides healthy fats and protein. Additionally, coconut oil is known for its potential health benefits, including promoting heart health and providing a source of quick energy due to its medium-chain triglycerides.
Common FAQs
Addressing frequent questions surrounding the recipe can help clarify some common concerns and enhance the overall cooking experience.
Can I use a different type of oil?
Yes, if coconut oil isn’t available or desired, you can replace it with another oil like canola or vegetable oil. However, it’s important to note that this will alter the flavor and potentially the texture of the meltaways.
How can I make these meltaways vegan?
To make these peppermint meltaways vegan, simply replace the chocolate chips with a vegan-friendly version. There are many brands available that offer dark chocolate chips made without dairy, ensuring that you maintain the delicious taste while accommodating a vegan lifestyle.
Conclusion
Gluten-free peppermint meltaways offer a delightful combination of fresh mint and rich chocolate, making them an irresistible dessert choice. With a quick prep time of just 15 minutes, these treats are perfect for holiday gatherings or personal indulgence. Their creamy texture and melt-in-your-mouth experience elevate any dessert table setting.

Gluten-Free Peppermint Meltaways Recipe
Ingredients
- 1 cup gluten-free powdered sugar
- ½ cup softened coconut oil
- ¼ cup almond flour
- ½ teaspoon peppermint extract
- ¼ teaspoon vanilla extract
- ¼ teaspoon sea salt
- ½ cup gluten-free dark chocolate chips
Instructions
- In a large mixing bowl, combine the powdered sugar, coconut oil, almond flour, peppermint extract, vanilla extract, and sea salt until smooth.
- Scoop out portions and roll them into 1-inch balls, placing them on a parchment-lined baking sheet.
- Chill the balls in the refrigerator for about 30 minutes until firm.
- Melt the dark chocolate chips in a microwave-safe bowl in 30-second intervals, stirring until smooth.
- Dip each chilled ball into the melted chocolate, tapping off excess before placing them back on the baking sheet.
- Return the baking sheet to the refrigerator for an additional 15 minutes to set the chocolate.
- Serve chilled or at room temperature for a delightful dessert experience.