Introduction
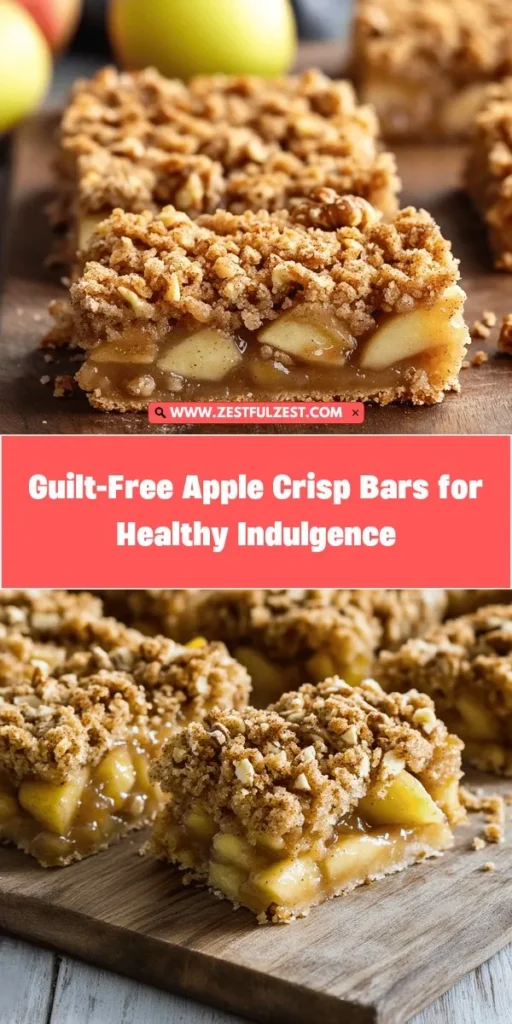
In recent years, the concept of guilt-free desserts has gained significant traction among health-conscious individuals seeking to indulge without compromising their dietary goals. As more people recognize the importance of nutrition, the demand for healthier alternatives to traditional sweets has surged. This shift has led to the creation of delightful recipes that cater to both taste and health, and one such recipe is the Guilt-Free Apple Crisp Bars with a Crunchy Crumb Topping. These bars combine the comforting, nostalgic flavors of baked apples with a satisfying, crunchy topping, making them an ideal snack or dessert option for any occasion.
What sets these apple crisp bars apart is not just their delicious taste but their wholesome ingredients. By utilizing fresh fruit, lower sugar content, and gluten-free options, this recipe provides a satisfying treat that can be enjoyed without the usual guilt associated with dessert. Whether you’re looking for a sweet snack to enjoy with your afternoon tea or a healthier dessert to serve at family gatherings, these apple crisp bars offer the perfect balance of flavor and nutrition.
Understanding the Guilt-Free Apple Crisp Bars
The term “guilt-free desserts” encapsulates a growing trend in our health-conscious society where indulgence meets mindfulness in food choices. As people become increasingly aware of the impact of sugar and processed ingredients on their overall well-being, the demand for desserts that are both satisfying and nutritious continues to rise. Guilt-free desserts are characterized by their use of wholesome, natural ingredients that provide flavor and texture while minimizing unhealthy additives.
What makes these Guilt-Free Apple Crisp Bars a healthier alternative? First and foremost, they feature fresh apples, which contribute natural sweetness and moisture to the recipe. By using lower quantities of refined sugars and opting for healthier substitutes, these bars remain flavorful without the spikes in blood sugar that often accompany traditional desserts. Additionally, this recipe allows for gluten-free flour options, catering to those with dietary restrictions and ensuring that everyone can enjoy a slice of this delicious treat. Overall, these apple crisp bars blend health and indulgence seamlessly, making them a staple for anyone looking to satisfy their sweet tooth without compromising their health goals.
The Nutritional Benefits of Apples
When it comes to the nutritional powerhouse of these apple crisp bars, apples take center stage. Apples are not only delicious but also packed with health benefits that make them an excellent choice for a guilt-free dessert. They are known for their high fiber content, which aids in digestion and contributes to a feeling of fullness. A medium-sized apple contains about four grams of dietary fiber, promoting digestive health and supporting weight management efforts.
Moreover, apples are rich in vitamins and antioxidants. They provide a significant source of vitamin C, which supports the immune system and skin health. The antioxidants found in apples, including quercetin and flavonoids, have been studied for their potential to reduce the risk of chronic diseases, including heart disease and certain cancers. These compounds help combat oxidative stress and inflammation in the body, reinforcing the idea that these Guilt-Free Apple Crisp Bars are not just a delicious treat but also a beneficial addition to your diet.
By incorporating apples into this dessert, you not only enjoy a delightful flavor but also take advantage of their numerous health benefits. The combination of fiber, vitamins, and antioxidants makes these bars a smart choice for those seeking a nutritious dessert option that doesn’t skimp on taste.
Ingredients Breakdown
To create the perfect Guilt-Free Apple Crisp Bars, it’s essential to understand the role of each ingredient in the recipe. The ingredients can be categorized into two main sections: the apple filling and the crust and topping. Each component plays a crucial role in achieving the desired flavor and texture, ensuring that these bars are both satisfying and nutritious.
Apple Filling Ingredients
1. Fresh Apples: The star of the show, fresh apples are the foundation of the filling. Their natural sweetness and juiciness provide a delightful contrast to the crunchy topping. Choose a mix of tart and sweet varieties, such as Granny Smith and Honeycrisp, for a balanced flavor profile.
2. Cinnamon: This warm spice enhances the natural sweetness of the apples and adds a comforting aroma to the bars. Cinnamon is not only flavorful but also has health benefits, including anti-inflammatory properties.
3. Cornstarch: Cornstarch acts as a thickening agent, helping to bind the apple filling together and prevent it from becoming too watery during baking. This ensures that each bite of the bars is packed with apple goodness.
4. Optional Nutmeg: For those looking to elevate the flavor, a pinch of nutmeg can be added. This spice adds depth and warmth, complementing the cinnamon and enhancing the overall taste of the apple filling.
Crust and Topping Ingredients
1. Old-Fashioned Oats: Rolled oats are a key ingredient in the crust and topping, providing a hearty texture and wholesome flavor. They are rich in fiber and can help keep you satisfied.
2. All-Purpose Flour or Gluten-Free Flour: This ingredient serves as the base for the crust and provides structure. For those avoiding gluten, substituting with a gluten-free flour blend works well while maintaining the integrity of the bars.
3. Butter or Coconut Oil: The fat source adds richness and moisture to the crust. Using unsalted butter or coconut oil brings a delicious flavor while keeping the dessert guilt-free.
4. Brown Sugar or Coconut Sugar: For a touch of sweetness, brown sugar or coconut sugar can be used. These alternatives offer a slightly lower glycemic index compared to white sugar, making them a better choice for those watching their sugar intake.
5. Chopped Nuts: Adding nuts like walnuts or pecans not only contributes to the crunch but also boosts the nutritional value. Nuts are a great source of healthy fats, protein, and essential vitamins and minerals.
By understanding the role of each ingredient in the Guilt-Free Apple Crisp Bars, you can appreciate how they come together to create a delicious dessert that is also a smart choice for your health. Each component has been thoughtfully selected to ensure that these bars provide a satisfying treat while incorporating wholesome ingredients that align with your dietary goals.
Step-by-Step Preparation Guide
Now that you have an understanding of the ingredients and their benefits, you’re ready to dive into the preparation of these Guilt-Free Apple Crisp Bars. The process is straightforward and can be broken down into a few key steps to ensure that your bars turn out perfectly each time.
1. Preheat the Oven: Begin by preheating your oven to 350°F (175°C). This allows for even baking, ensuring that your bars are cooked through while maintaining a deliciously crisp topping.
2. Prepare the Apples: Core and slice your fresh apples, making sure to remove any seeds. Aim for thin, even slices to ensure they cook uniformly. In a large mixing bowl, combine the apple slices with cinnamon, cornstarch, and nutmeg (if using). Toss until the apples are well coated, allowing the flavors to meld.
3. Make the Crust and Topping Mixture: In another bowl, combine the rolled oats, flour (or gluten-free flour), and brown sugar. Mix well. Then, add melted butter or coconut oil to the dry ingredients, stirring until the mixture resembles coarse crumbs. This step is crucial for achieving that desirable crunchy topping.
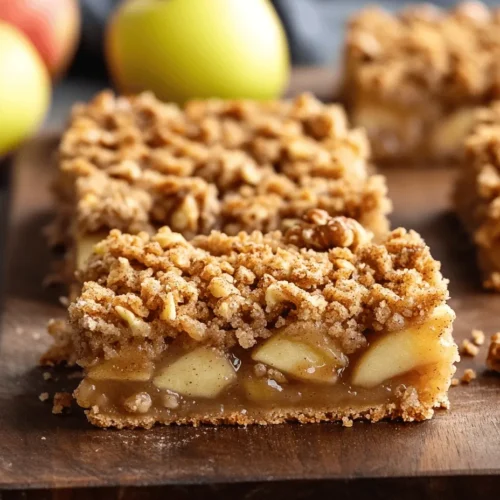
4. Assemble the Bars: Grease a baking dish (9×9 inches works well) or line it with parchment paper for easy removal. Press half of the oat mixture into the bottom of the dish to form a crust. Layer the apple filling evenly on top of the crust, making sure to distribute the apples for consistent flavor. Finally, sprinkle the remaining oat mixture over the apple filling, ensuring it covers the top evenly.
5. Bake: Place the assembled bars in the preheated oven and bake for about 25-30 minutes, or until the topping is golden brown and the apples are tender. The aromas wafting through your kitchen will be irresistible!
6. Cool and Slice: Once baked, remove the bars from the oven and let them cool in the pan for about 10-15 minutes. This cooling period is essential, as it allows the bars to set and makes them easier to slice. After cooling, cut into squares or rectangles, and enjoy your guilt-free treat!
By following these steps, you’ll create delicious Guilt-Free Apple Crisp Bars that are sure to impress. With their crunchy topping and flavorful apple filling, these bars are a perfect blend of health and indulgence, making them a staple in your healthy dessert repertoire.

Preheat the Oven
To kick off your Guilt-Free Apple Crisp Bars, the first step is to preheat your oven to 350°F (175°C). Preheating is a crucial step in the baking process as it ensures that the bars begin cooking at the right temperature right from the start. This helps achieve the perfect texture, allowing the crust to crisp up nicely while keeping the apple filling tender and flavorful. A properly preheated oven promotes even cooking and helps to prevent any sogginess in your dessert, which is especially important for layered recipes like this one.
Prepare the Apple Filling
Next, it’s time to prepare the apple filling, which is the heart of our apple crisp bars. You will need about 4 cups of peeled, cored, and sliced apples. Firm varieties like Granny Smith or Honeycrisp work beautifully for this recipe due to their tart flavor and crisp texture.
In a large mixing bowl, combine the sliced apples with 2 tablespoons of lemon juice. The lemon juice not only adds a delightful tang but also prevents the apples from browning too quickly. Next, sprinkle in 1/4 cup of coconut sugar or your preferred sweetener, along with 1 teaspoon of ground cinnamon and a pinch of nutmeg. Toss the ingredients together until the apples are evenly coated.
Allowing the apples to marinate for about 10 to 15 minutes is essential. This resting period lets the flavors meld and the sugars from the apples release their juices, creating a more flavorful filling. Additionally, this step helps soften the apples slightly, ensuring they bake to perfection in the oven.
Make the Crust and Topping
While your apples are marinating, it’s time to prepare the crust and crumb topping. In a separate bowl, mix together 1 cup of whole wheat flour, 1 cup of rolled oats, and 1/2 teaspoon of salt. These ingredients form the base of your bars, providing a wholesome and hearty texture.
Next, add in 1/2 cup of melted coconut oil or unsalted butter and 1/4 cup of maple syrup or honey for sweetness. Stir until the mixture resembles coarse crumbs. This mixture will serve as both the crust and topping, so it’s important to ensure that you have a good balance of texture. To achieve that crunchy crumb topping, you may want to use your fingers to break up any larger clumps. This will ensure that the topping bakes evenly and provides that sought-after crunch.
Assemble and Bake
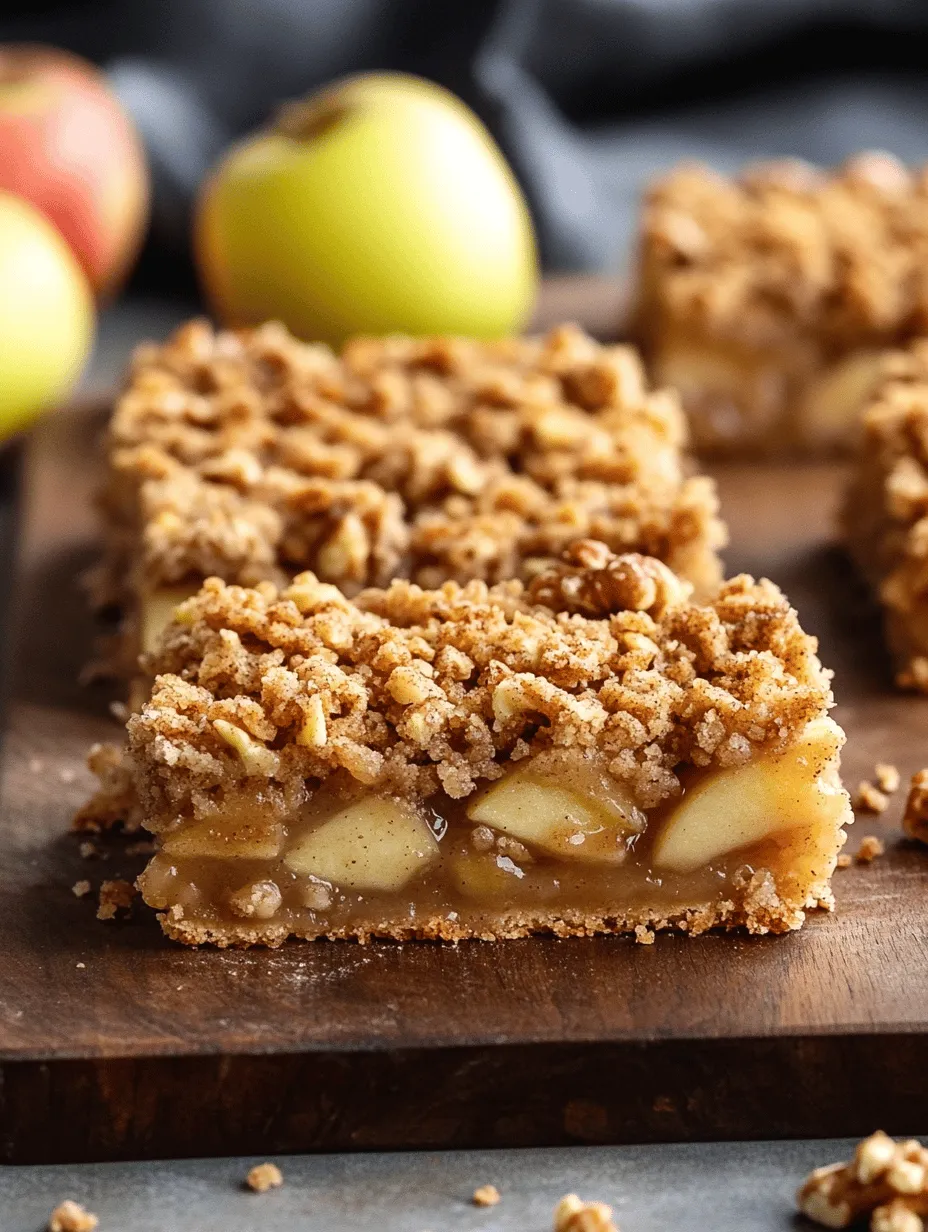
With the apple filling and crumb mixture ready, it’s time to assemble your Guilt-Free Apple Crisp Bars. Start by greasing a 9×9-inch baking pan or lining it with parchment paper for easy removal. Press about two-thirds of the crumb mixture into the bottom of the pan, creating an even layer for your crust. Make sure to press it down firmly to prevent the bars from crumbling apart after baking.
Next, spread the marinated apple filling evenly over the crust. You want to ensure that each bite will have a generous amount of apple flavor. Finally, sprinkle the remaining crumb mixture over the top of the apples, creating a protective layer that will turn golden brown during baking.
Place the assembled bars in the preheated oven and bake for 30 to 35 minutes, or until the top is golden and the apples are bubbly. To check for doneness, you can insert a toothpick into the center; it should come out clean, confirming that the crust is set. Once baked, allow the bars to cool in the pan for at least 15-20 minutes before slicing. This cooling time allows the bars to firm up, making them easier to cut and serving.
Serving Suggestions and Pairings
Your Guilt-Free Apple Crisp Bars are now ready to be enjoyed! These bars are versatile and can be served in a variety of ways. For a classic dessert experience, serve them warm with a scoop of vanilla ice cream or a dollop of whipped cream. The contrast of the warm bars and the cold ice cream creates a delightful sensory experience.
If you prefer a lighter option, a scoop of Greek yogurt drizzled with honey can add a creamy element that complements the apples beautifully. For an extra touch of indulgence, consider a drizzle of caramel sauce or a sprinkle of toasted nuts over the top.
These bars can be enjoyed warm, at room temperature, or even chilled, making them a perfect snack for any time of day. Whether served as a dessert, a breakfast treat, or a mid-afternoon snack, they are sure to be a hit with family and friends.
Storage Tips for Leftovers
If you find yourself with any leftovers (which is often a rarity with these delicious bars), storing them properly is key to maintaining their freshness. Allow the bars to cool completely before storing them in an airtight container. They can be kept in the refrigerator for up to a week.
For longer storage, consider freezing the bars. To do this, wrap them tightly in plastic wrap or aluminum foil, then place them in a freezer-safe bag or container. They can be frozen for up to three months. When you’re ready to enjoy them again, simply thaw them in the refrigerator overnight or reheat them straight from the freezer in a preheated oven at 350°F (175°C) until warmed through.
Conclusion
In summary, these Guilt-Free Apple Crisp Bars are not only a delicious treat but also a healthier dessert option that you can feel good about indulging in. With wholesome ingredients and simple preparation steps, they cater to your sweet tooth without compromising your health goals. The combination of tender apples, a crunchy crumb topping, and the ease of preparation makes this recipe a must-try for any occasion.
Encourage your friends and family to embrace healthier dessert options without sacrificing flavor. The joy of making and sharing these apple crisp bars is sure to create lasting memories and satisfy everyone’s cravings. So, gather your ingredients, preheat that oven, and get ready to enjoy a delightful dessert that brings comfort and joy to your table.