Introduction
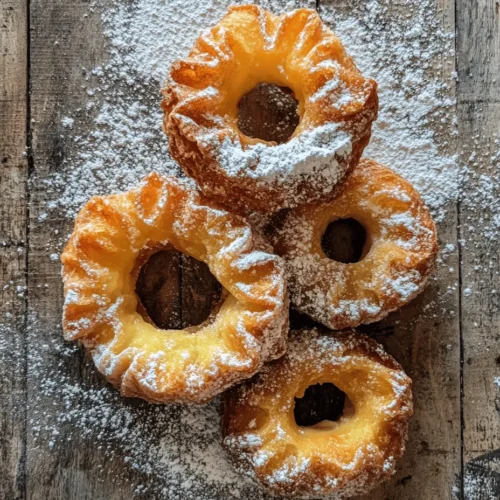
French crullers are a delectable treat that combines elegance and indulgence in every bite. These light, airy donuts possess a unique texture that sets them apart from traditional fried pastries. With their delicate, twisted shape and a crisp exterior, crullers are not only a visual delight but also a flavor sensation that has captured the hearts and taste buds of many. Making French crullers at home can be a rewarding experience, allowing you to create these delightful confections that are often found in patisseries and coffee shops.
What makes crullers particularly appealing is their unique texture—a perfect balance between light and fluffy on the inside, while the exterior remains crisp and golden. The flavor profile is equally enticing; the subtle sweetness combined with the hint of vanilla creates a taste that is both comforting and sophisticated. Once you master the technique of preparing crullers, you’ll find that the joy of making these treats is as fulfilling as savoring them with your morning coffee or sharing them with loved ones.
Understanding French Crullers
Definition and Origin of French Crullers
French crullers, known as “choux à la crème” or “choux pastry” in their native France, are a type of donut made from a dough known as pâte à choux. This unique pastry dough is the foundation of many classic French desserts, including éclairs and cream puffs. The term “cruller” itself comes from the Dutch word “krul,” meaning “curl,” which aptly describes the twisted shape of these pastries. While crullers are a staple in French cuisine, their popularity has spread across the globe, inspiring variations in different cultures.
Differences Between Crullers and Other Types of Donuts
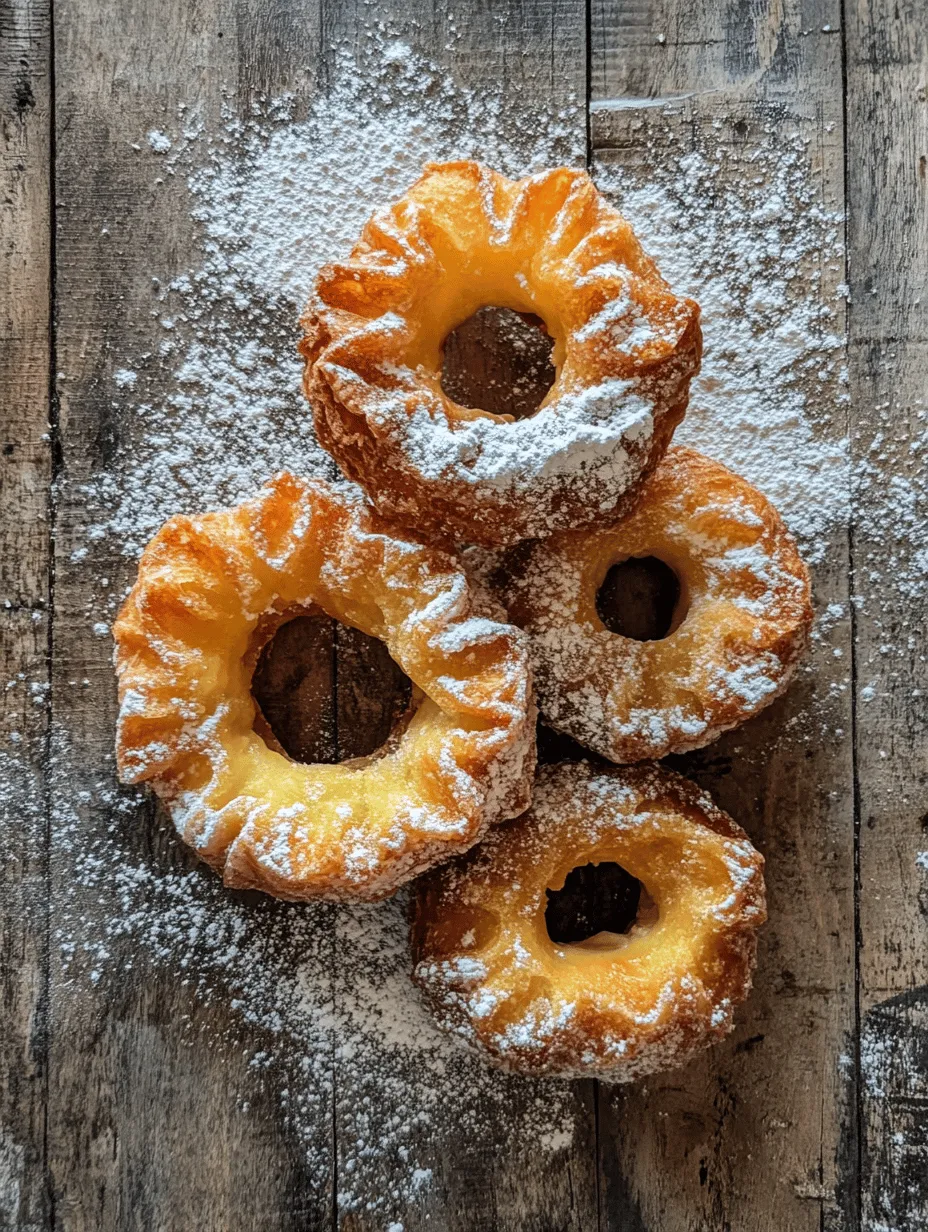
What sets French crullers apart from other types of donuts is primarily the dough used and the method of preparation. Unlike yeast-raised donuts that rely on fermentation for their airy texture, crullers are made with choux pastry, which is cooked on the stovetop before being piped into shape. This cooking method incorporates steam into the dough, resulting in a light and airy interior when fried. Additionally, crullers are often characterized by their twisted or spiral shape, which not only adds to their visual appeal but also allows for more surface area to be coated in glaze.
In contrast, traditional cake donuts are denser and made with a batter that is leavened with baking powder. While both types of donuts are delicious, crullers offer a unique experience that is worth trying at least once—if not more!
Historical Significance and Cultural Variations of Crullers in French Cuisine
Historically, crullers have a rich cultural significance in French cuisine. They are often associated with celebrations and special occasions, making them a beloved treat among families. In addition to their presence in France, crullers have inspired various adaptations in other cultures, including the American-style cruller, which often features a slightly denser texture and a more pronounced flavor profile.
In some parts of the world, crullers are enjoyed during festivals and holidays, symbolizing joy and indulgence. Their versatility allows for numerous variations, including filling them with cream or adding spices for a unique twist. Whether enjoyed plain or adorned with a sweet glaze, crullers continue to be a cherished dessert that transcends cultural boundaries.
Ingredients Breakdown
To create heavenly French crullers, it’s essential to understand the role of each ingredient in the recipe. Below is a detailed breakdown of the key components required for this delightful treat:
Water
Water is a crucial ingredient in cruller dough, as it serves as a solvent that helps to hydrate the flour and activate the gluten. When heated, the water turns to steam, which contributes to the rise and lightness of the crullers. The right amount of water is essential for achieving the perfect dough consistency, enabling it to hold shape while frying.
Unsalted Butter
Unsalted butter is another key ingredient in crullers, adding richness and flavor to the dough. It also contributes to the texture, ensuring that the crullers have a tender crumb. Using unsalted butter allows you to control the salt content in the recipe, resulting in a balanced flavor profile.
Salt
Salt is a small but mighty component in cruller dough. It enhances the overall taste, bringing out the natural flavors of the other ingredients. A pinch of salt not only adds depth to the sweetness but also helps to strengthen the dough, resulting in a better texture.
All-Purpose Flour
All-purpose flour is the backbone of the cruller recipe, providing structure and stability to the dough. The gluten content in the flour allows the dough to hold its shape while frying, resulting in the signature twist of the crullers. It’s important to measure the flour accurately to achieve the right consistency for the dough.
Eggs
Eggs are a vital ingredient that contributes to the texture and structure of crullers. They provide moisture, richness, and stability to the dough. As the eggs are incorporated, they help to create a smooth and glossy texture, which is essential for achieving the perfect cruller. The proteins in the eggs also aid in the leavening process, ensuring that the crullers rise beautifully during frying.
Vanilla Extract
Vanilla extract is what elevates the flavor of crullers to the next level. Its aromatic qualities provide a warm and inviting scent, making the crullers even more appealing. A splash of vanilla adds depth to the overall flavor, complementing the sweetness of the dough.
Sugar
Sugar is the sweetener that balances the flavors in cruller dough. It not only adds sweetness but also contributes to the browning of the crullers during frying, resulting in a beautifully golden exterior. The right amount of sugar ensures that the crullers are delightful without being overly sweet.
Oil for Frying
Choosing the right oil for frying is essential for achieving the perfect crullers. Oils with a high smoke point, such as canola or vegetable oil, are ideal for frying, as they can withstand high temperatures without burning. Proper frying techniques are crucial to ensure that the crullers cook evenly and develop a crispy exterior.
Glaze Ingredients
The finishing touch for crullers often involves a sweet glaze that enhances their flavor and appearance. Common glaze ingredients include powdered sugar, milk, and vanilla extract. This simple combination creates a smooth, sweet coating that takes the crullers from delicious to heavenly. The glaze not only adds sweetness but also gives the crullers a shiny, appealing finish.
Step-by-Step Instructions for Making Crullers
Preparing the Dough
The first step in making heavenly French crullers is preparing the dough. Start by combining the water, unsalted butter, salt, and sugar in a medium saucepan. Place the saucepan over medium heat and stir the mixture until the butter has melted completely and the ingredients are well combined.
Once the mixture reaches a gentle simmer, remove it from the heat and stir in the all-purpose flour all at once. Use a wooden spoon to mix vigorously until the dough forms a cohesive ball and pulls away from the sides of the pan. This process is crucial, as it helps to cook the flour slightly, setting the foundation for the cruller’s texture.
Next, return the saucepan to low heat for a minute or two, allowing the dough to dry out slightly. This step ensures that there is enough moisture for the steam to develop during frying, resulting in light and airy crullers. Once the dough has cooled slightly, you can begin incorporating the eggs.
Incorporating Eggs
Adding the eggs to the dough is a critical step that will define the final texture of your crullers. Crack one egg into the dough and mix it in using a wooden spoon until fully incorporated. The dough will appear a bit watery at first, but don’t worry; continue mixing until it becomes smooth. Repeat this process for each egg, ensuring that each is thoroughly mixed before adding the next.
The addition of eggs contributes to the richness and lightness of the cruller dough. As you mix, you should notice that the dough becomes glossy and elastic. This is a good sign that you are on the right track. Achieving the right consistency is essential; the dough should be thick but still pipeable, holding its shape without being overly stiff.
As you continue to mix, be mindful of the texture. If the dough seems too thick, you can add a tiny bit of water to help achieve a smoother consistency. The goal is to create a dough that pipes easily while maintaining its shape.
Stay tuned for the next part of this heavenly French crullers recipe, where we will dive into the frying process, glazing techniques, and tips for achieving crullers that are truly worthy of their name!

Heating the Oil
Before you dive into frying your crullers, it’s crucial to prepare the oil properly. The temperature of the oil plays a significant role in the frying process, directly influencing the texture and flavor of your crullers. For perfect frying, you want to heat the oil to a temperature between 350°F and 375°F (175°C to 190°C). This temperature range ensures that the crullers cook evenly, forming a golden-brown crust while remaining light and airy on the inside.
Importance of Oil Temperature for Perfect Frying
Using a thermometer is essential for achieving the right oil temperature. If the oil is too hot, the crullers will brown too quickly on the outside, leaving them raw on the inside. Conversely, if the oil is not hot enough, the crullers will absorb too much oil, resulting in greasy, soggy pastries. Therefore, keeping a close eye on the oil temperature is vital. You can test the oil’s readiness by dropping a small piece of dough into the oil; if it sizzles and rises to the surface, the oil is ready for frying.
Safety Tips for Frying at Home
Safety should always be a priority when frying at home. Here are some essential tips to keep in mind:
1. Use a Deep Pot: Choose a pot that is deep enough to accommodate the oil and the crullers without overflowing.
2. Avoid Overcrowding: Fry a few crullers at a time to maintain the oil temperature and ensure even cooking.
3. Use a Slotted Spoon: This tool will help you safely remove the crullers from the oil.
4. Have a Lid Handy: In case of a grease fire, having a lid close by can help you smother the flames.
5. Keep a Fire Extinguisher Nearby: Always be prepared for unexpected situations when frying.
Piping and Frying the Crullers
Once your oil is heated and you’re ready to fry, it’s time to pipe your cruller shapes. The piping technique is essential for achieving the signature look of French crullers.
Techniques for Piping Cruller Shapes
For piping, you will need a piping bag fitted with a large star tip. This will create the fluted edges typical of crullers. Fill the piping bag with the choux pastry dough and practice piping onto parchment paper first to get a feel for the pressure needed. Pipe 3-4 inch long strips, making sure to leave enough space between them for the crullers to expand during frying.
Tips for Frying Evenly and Avoiding Overcrowding
When frying your crullers, always ensure that there is enough space in the pot. Overcrowding can cause the oil temperature to drop dramatically, leading to uneven cooking. Fry only two or three crullers at a time, depending on the size of your pot. This will also allow you to monitor their cooking more closely.
Visual Cues for Determining When Crullers Are Done
As you fry the crullers, keep an eye out for visual cues. The crullers should puff up and turn a beautiful golden brown. A good frying time is around 3-4 minutes per side, but it’s important to remain vigilant. Once they are done, remove them from the oil and place them on a wire rack lined with paper towels to drain excess oil.
Making the Glaze
Now that your crullers are fried to perfection, it’s time to prepare the glaze. A good glaze will add the finishing touch, enhancing both flavor and appearance.
Step-by-Step Process for Creating the Perfect Glaze
1. In a medium bowl, combine powdered sugar with milk or water, whisking until smooth.
2. Add vanilla extract for flavor and continue to whisk until you achieve a homogeneous mixture.
3. If the glaze is too thick, add a little more milk, a teaspoon at a time, until the desired consistency is reached.
Tips for Adjusting Glaze Consistency for Personal Preference
The thickness of the glaze can vary depending on your personal preference. For a thicker glaze, use less liquid; for a thinner glaze, increase the liquid volume. This flexibility allows you to customize your crullers according to your taste.
Glazing the Crullers
With your crullers fried and the glaze prepared, it’s time to bring everything together.
Techniques for Dipping and Allowing the Glaze to Set
Dip the top of each cruller into the glaze, allowing the excess to drip off. You can also use a spoon to drizzle the glaze over the top for a more artistic approach. After glazing, place the crullers on a wire rack to let the glaze set. This typically takes about 10-15 minutes.
Suggestions for Serving and Presentation
For a delightful presentation, consider serving the crullers on a decorative platter. You can garnish them with sprinkles, or a dusting of powdered sugar, or even drizzle some melted chocolate over them for an elegant touch. Pair your crullers with a hot cup of coffee or tea for a complete indulgent experience.
Tips for Perfecting Your Crullers
Creating the perfect crullers might take a bit of practice, but following these tips will help you avoid common pitfalls.
Common Mistakes to Avoid When Making Crullers
1. Not Using Fresh Ingredients: Ensure your ingredients, especially eggs and baking powder, are fresh for the best results.
2. Skipping the Chilling Step: Allow the dough to rest in the refrigerator before piping. This prevents the crullers from spreading too much while frying.
3. Improper Oil Temperature: As mentioned, maintaining the right oil temperature is critical. Use a thermometer to monitor it closely.
Suggestions for Variations and Flavor Enhancements
Feel free to get creative with your crullers! Adding citrus zest, such as lemon or orange, to the dough can elevate the flavor profile. You can also experiment with different glazes, such as chocolate or maple, to suit your mood.
Storage Tips for Keeping Crullers Fresh
If you have leftover crullers, store them in an airtight container at room temperature for up to two days. However, for the best texture, it’s recommended to enjoy them fresh. If you need to keep them longer, consider freezing the unglazed crullers. Once ready to eat, simply thaw and glaze them before serving.
Serving Suggestions
French crullers are versatile and can be enjoyed in various ways.
Ideal Beverages to Pair with French Crullers
These delightful pastries pair beautifully with a variety of beverages. A classic pairing is a cup of freshly brewed coffee, which complements the sweetness of the glaze. Alternatively, a light herbal tea or a rich hot chocolate can also enhance the experience.
Creative Ways to Serve Crullers at Gatherings or Special Occasions
For gatherings, consider presenting crullers on a tiered dessert stand for a chic touch. You can also serve them alongside a selection of dips, such as chocolate ganache or fruit preserves, allowing guests to personalize their cruller experience.
Suggestions for Plating and Garnishing for Visual Appeal
To make your crullers even more visually appealing, consider adding colorful garnishes. Fresh berries, mint leaves, or edible flowers can create a stunning display that is sure to impress guests.
Nutritional Information
While French crullers are undeniably a treat, it’s important to consider their nutritional aspects.
Overview of the Nutritional Aspects of French Crullers
Typically, each cruller contains around 150-200 calories, depending on the size and glaze. They are primarily made up of carbohydrates and fats, with minimal protein content. While they are delicious, moderation is key.
Discussion on Portion Control and Enjoying Treats in Moderation
Enjoying French crullers as an occasional treat can be part of a balanced diet. Pairing them with a nutritious beverage and savoring them mindfully can enhance your overall experience. Consider enjoying one cruller alongside a healthy breakfast or as a delightful afternoon snack.
Conclusion
Making and enjoying homemade French crullers is a rewarding experience that brings joy to both the cook and those indulging in these delectable pastries. With the right techniques, you can create crullers that are light, airy, and beautifully glazed, perfect for any occasion.
As you embark on this culinary adventure, don’t hesitate to experiment with flavors and presentation styles to make the recipe truly your own. The timeless appeal of crullers transcends generations, making them a cherished treat in culinary traditions around the world. So gather your ingredients, follow the steps, and delight in the satisfaction of sharing your homemade French crullers with family and friends. We encourage you to try this recipe and share your results, embracing the joy of baking and the pleasure of enjoying these classic treats.