

Introduction
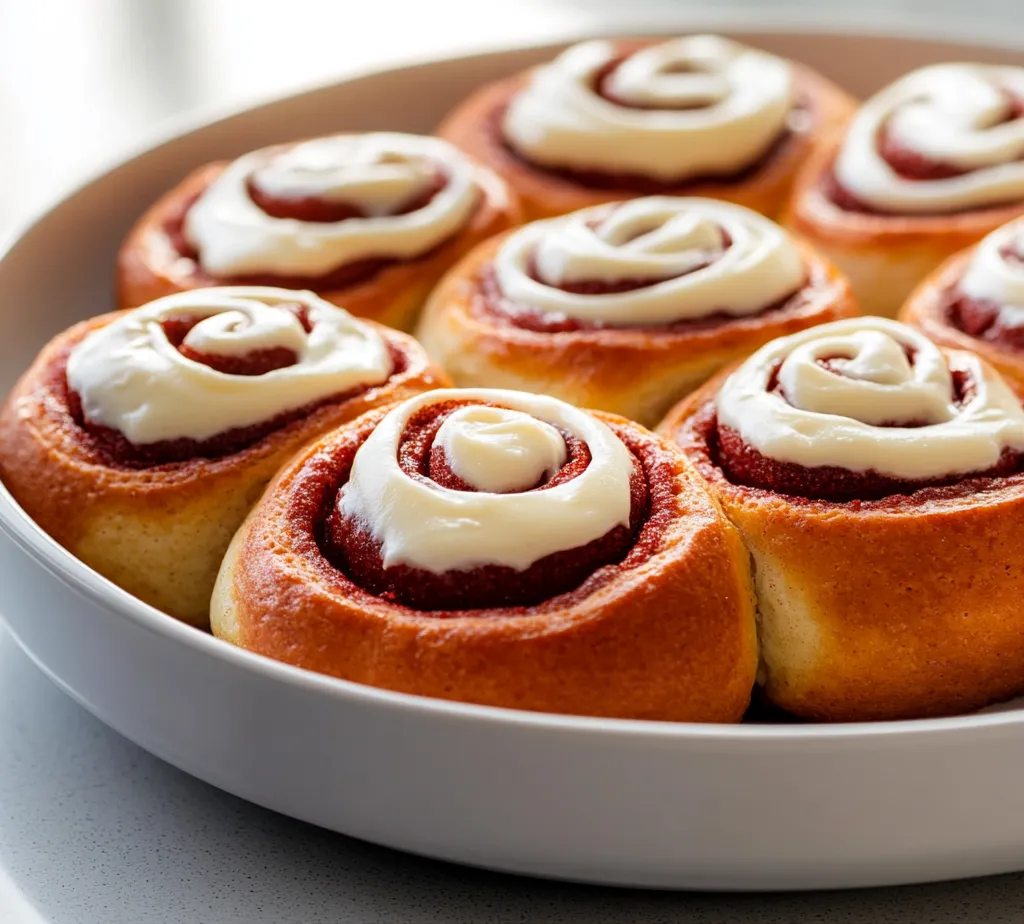
Red Velvet Cinnamon Rolls are the epitome of comfort food, merging the rich, decadent flavors of red velvet cake with the fluffy, warm goodness of cinnamon rolls. These delightful treats are perfect for brunch, dessert, or whenever you need a sweet pick-me-up. Their unique color and flavor make them an eye-catching and delicious addition to any table. The amalgamation of sweet, cinnamon-spiced filling and creamy frosting culminates in a harmonious symphony of flavors that is both indulgent and satisfying.
The process of making these rolls is a delightful journey, worthy of a Sunday morning or any special gathering. Whether you’re celebrating a holiday, hosting a brunch, or simply satisfying a craving, these rolls will surely impress everyone at the table. With a few simple ingredients and some love, you can create these Heavenly Red Velvet Cinnamon Rolls from scratch. In this article, we’ll delve deep into the process to ensure you achieve the best results, with tips for dough preparation, shaping the rolls, and frosting them to perfection.
Recipe Overview
– Total Time: 2 hours
– Yield/Servings: 12
– Difficulty: Not specified in the recipe
Ingredients
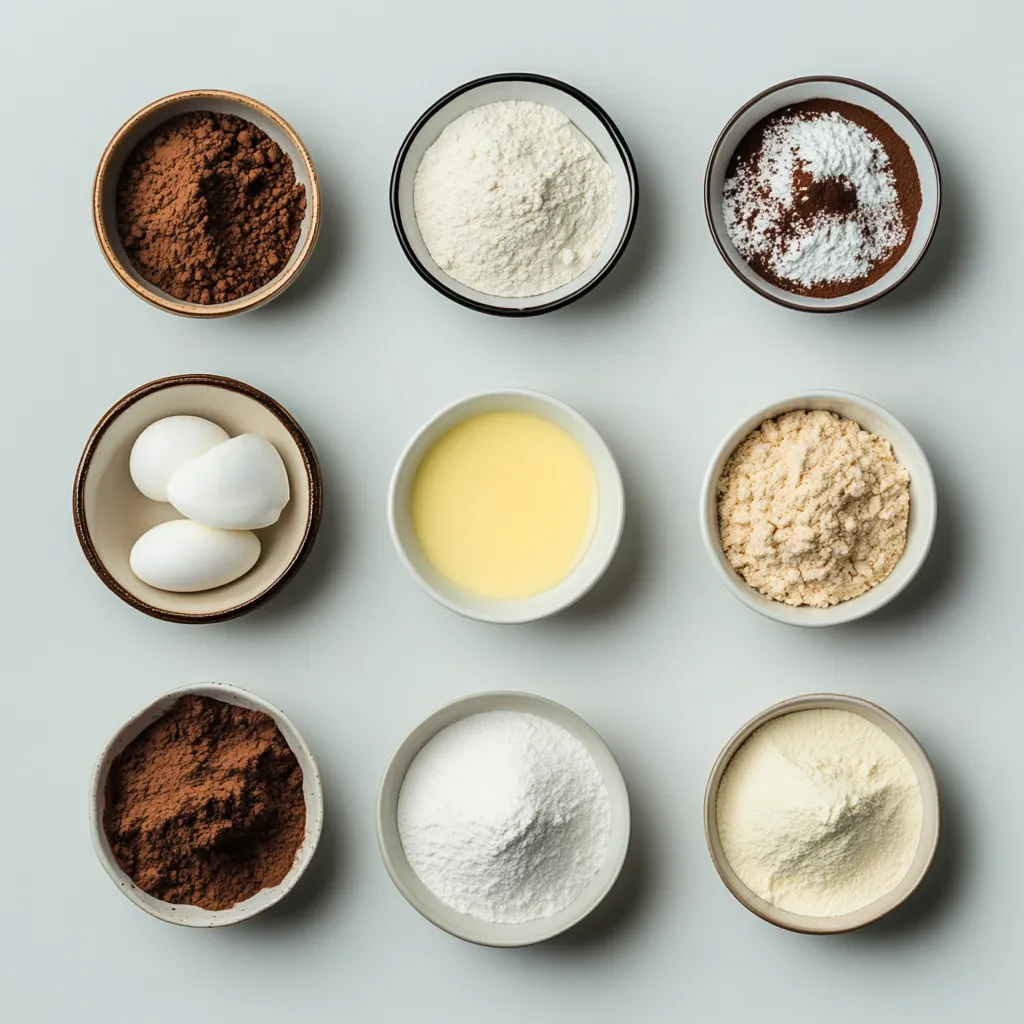
Main Dough Ingredients
– 2 ½ cups all-purpose flour, plus additional for dusting
– 1 cup whole milk, warmed to about 110°F
– ¼ cup granulated sugar
– 2 ¼ teaspoons active dry yeast (equivalent to 1 packet)
– ½ teaspoon salt
– 1 large egg
– ¼ cup unsalted butter, melted
– 2 tablespoons unsweetened cocoa powder
– 2 tablespoons red food coloring
– 1 teaspoon vanilla extract
Filling Ingredients
– ½ cup packed brown sugar
– 2 tablespoons ground cinnamon
– ¼ cup unsalted butter, softened
Cream Cheese Frosting Ingredients
– 4 ounces cream cheese, softened to room temperature
– ¼ cup unsalted butter, softened
– 1 ½ cups powdered sugar
– 1 teaspoon vanilla extract
– 1-2 tablespoons milk (to achieve desired consistency)
Instructions
1. Activate the Yeast: In a small bowl, combine the warmed milk, granulated sugar, and active dry yeast. Allow the mixture to sit for 5-10 minutes until it becomes frothy and bubbly.
2. Mix the Dry Ingredients: In a large mixing bowl, whisk together the all-purpose flour, salt, cocoa powder, and red food coloring until evenly combined.
3. Combine Wet and Dry Ingredients: Pour the frothy yeast mixture into the bowl with the dry ingredients. Add the melted butter, egg, and vanilla extract. Stir until a cohesive dough begins to form.
4. Knead the Dough: Transfer the dough onto a floured surface and knead for 5-7 minutes until it is smooth and elastic. Place the kneaded dough into a greased bowl, cover it with a damp cloth, and let it rise in a warm environment for about 1 hour, or until it has doubled in size.
5. Prepare the Filling: While the dough is rising, mix the packed brown sugar and ground cinnamon together in a small bowl. Set this mixture aside.
6. Roll Out the Dough: After the dough has risen, gently punch it down to release air. Roll it out on a floured surface into a rectangle approximately ½ inch thick.
7. Add Filling: Evenly spread the softened butter over the surface of the rolled-out dough, then sprinkle the cinnamon-sugar mixture generously on top.
8. Shape the Rolls: Starting from one long edge, tightly roll the dough into a log. Pinch the seam to seal it, and then slice the log into 12 equal pieces.
9. Second Rise: Arrange the rolls in a greased baking dish, cover them, and allow them to rise for an additional 30 minutes.
10. Bake the Rolls: Preheat your oven to 350°F (175°C). Bake the rolls for 25-30 minutes, or until they are golden brown and fully cooked.
11. Make the Frosting: While the rolls are baking, prepare the cream cheese frosting. In a mixing bowl, beat together the softened cream cheese, softened butter, powdered sugar, vanilla extract, and milk until the mixture is smooth and creamy.
12. Frost and Serve: Once the rolls are out of the oven, let them cool slightly. Generously spread the cream cheese frosting over the warm rolls. Serve immediately and enjoy this delightful treat!
Equipment Needed
To create the most delicious Heavenly Red Velvet Cinnamon Rolls, particular tools and equipment are essential for a smooth baking experience.
Mixing Bowls
You will need a couple of mixing bowls—one large enough for combining dry ingredients and another smaller bowl for activating the yeast. A glass or metal bowl is recommended for the dough to help it rise effectively.
Baking Dish
A greased baking dish is crucial for this recipe. Opt for a 9×13 inch rectangular or square baking dish for an even bake. An aluminum or glass dish is suitable, as both provide good heat conduction, ensuring the rolls come out perfectly cooked.
Rolling Pin
A good-quality rolling pin is essential for shaping your dough into the desired thickness. Choose one that feels comfortable in your hands; this will make rolling out the dough easier and more enjoyable.
Measuring Tools
Accuracy in baking is key. Hence, invest in reliable measuring cups and spoons. This ensures that you maintain the correct ingredient proportions, leading to the perfect texture and flavor in your rolls.
Preparing the Dough
The preparation of the dough is a critical step in ensuring your rolls are light and fluffy. Here’s how to get started with creating the perfect cinnamon roll dough.
Activating the Yeast
Start by warming the milk to about 110°F; this temperature is perfect for activating the yeast without damaging it. The mixture should become frothy and bubbly after a few minutes, indicating that the yeast is alive and ready to work its magic. This step is vital as it helps the dough rise, creating that signature fluffy texture.
Mixing Dry Ingredients
In a separate bowl, whisk together the all-purpose flour, salt, cocoa powder, and red food coloring to ensure even distribution. This step ensures that all dry ingredients are thoroughly combined, promoting consistent flavor throughout the dough. The red food coloring is what gives these cinnamon rolls their stunning hue, so make sure it’s mixed in well.
Combining Wet and Dry Ingredients
After the yeast has activated, it’s time to combine the wet and dry ingredients. Pour the yeast mixture into the flour mixture, followed by the melted butter, egg, and vanilla extract. Stir gently until a cohesive dough starts to form. At this stage, the mixture might seem a little sticky; this is normal. Keep stirring until it begins to pull away from the sides of the bowl.
Kneading the Dough
Kneading is essential for developing gluten, which gives your rolls structure and texture.
Identifying the Right Consistency
Properly kneaded dough should be smooth, elastic, and not overly sticky. You should be able to stretch it slightly without tearing. If it feels too sticky, you can sprinkle a bit of additional flour on your hands and kneading surface, but be cautious not to over-flour, as this can lead to tough rolls.
Tips for Kneading
To knead effectively, turn the dough out onto a lightly floured surface. Fold it in half toward yourself, then push it away with the palms of your hands. Turn it 90 degrees and repeat this process for about 5-7 minutes. This technique helps develop gluten, allowing the dough to rise nicely during its first proofing stage.
As you work, be mindful of how the dough changes in texture. Initially, it may feel rough, but as you knead, it will become smooth and elastic. This transformation is the key to achieving perfect rolls.
With the dough kneaded properly, you are all set to allow it to rise, creating the delightful cinnamon rolls you crave. In the next part of this article, we will delve into rolling, shaping, and baking these irresistible treats, ensuring your journey to heavenly Red Velvet Cinnamon Rolls is complete.
Techniques to Avoid Over-Kneading and Achieve Elasticity
Proper kneading plays a crucial role in achieving the desired texture of cinnamon rolls. When kneading, your goal is to develop gluten, which gives the dough its elasticity. However, over-kneading can lead to a tough dough, making your rolls less enjoyable.
A good technique to avoid over-kneading is to knead until the dough is smooth and elastic, approximately 5-7 minutes, while checking frequently for the right texture. The dough should spring back when gently pressed, indicating that gluten has formed adequately. If your dough starts becoming overly smooth and shiny, it’s a sign it may be over-kneaded. If this happens, try letting it rest for a few minutes before shaping or rolling.
First Rise
One of the most critical stages in making cinnamon rolls is the rising process. This first rise allows the dough to develop flavor and become fluffy.
Preparing for Rising
Before placing the dough in the bowl, it’s essential to grease it thoroughly. Use a light spray of cooking oil or a thin layer of softened butter to prevent sticking. Covering the bowl with a damp cloth is also important, as this maintains moisture, preventing the dough from forming a hard surface while it rises.
Ideal Rising Conditions
The best environment for dough rising is a warm, draft-free area. An ideal temperature is around 75°F to 80°F. If your kitchen is cool, you can place the bowl in an oven preheated to 200°F for just a few minutes before turning it off; the residual heat will create a perfect rising environment.
Creating the Filling
The filling is where the flavor of cinnamon rolls truly shines. Creating a balanced mixture of cinnamon and sugar can dramatically enhance the taste experience.
Mixing Ingredients for Filling
To achieve a harmonious flavor release, combine the packed brown sugar and ground cinnamon evenly. Give it a good whisk to avoid clumping, which can lead to uneven distribution once the filling is spread. The sweetness of the brown sugar complements the rich cinnamon flavor beautifully.
Preparing the Butter
It’s essential the butter used in the filling is softened, as this allows for seamless spreading over the dough. Softened butter can be achieved by letting it sit out at room temperature for about 30-60 minutes or by microwaving it in short intervals of 5-10 seconds, monitoring closely to ensure it doesn’t melt.
Rolling Out the Dough
The rolling out process is a delicate balance of avoiding both too much pressure and not enough.
Techniques for Rolling
Use a floured surface to prevent the dough from sticking. Start by pressing the dough gently with your palms to flatten it, then use a rolling pin to extend it. Applying very minimal pressure helps retain airflow within the dough, which is essential for a light texture in the final product.
Thickness Recommendations
For the best results, aim for a thickness of about ½ inch when rolling out the dough. This thickness is crucial for ensuring your rolls have a soft and pillowy interior while also being sturdy enough to hold the filling.
Assembling the Rolls
Shaping the rolls carefully is vital to their final appearance and texture.
Spreading Butter
When spreading the softened butter over the rolled-out dough, use an offset spatula or the back of a spoon to ensure an even layer across the surface. This technique helps distribute the flavors of the filling without tearing the dough.
Shaping the Rolls
Starting from one long edge, tightly roll the dough into a log while pressing gently, ensuring that the filling stays intact. After rolling, pinch the seam firmly to seal it. Use a sharp knife or a bench scraper flour-dusted to cut the log into equal 12 pieces, maintaining even portions for consistent baking.
Second Rise
The second rise is equally as important as the first, allowing the rolls to expand further.
Importance of the Second Rise
This step gives the rolls their signature fluffy texture. It helps aerate the rolls and enhances the overall flavor profile by allowing the dough to develop further.
Time and Environment for Rising
After shaping the rolls and placing them in a greased baking dish, cover them again with a damp cloth. Allow them to rise for about 30 minutes in a warm spot until they increase visibly in size.
Baking the Rolls
Getting the baking process right is essential for the perfect cinnamon roll.
Preheating Oven
Preheat your oven to 350°F (175°C) well in advance of when you plan to bake. This ensures that the rolls will start cooking immediately upon entering, which helps maintain their shape and texture.
Identifying Doneness
The rolls are done when they achieve a beautiful golden-brown color on top and a gentle spring back when lightly pressed. You can also use a toothpick to ensure the dough has cooked through; it should come out clean when inserted into the center.
Making Cream Cheese Frosting
The creamy topping is what takes these rolls to the next level.
Mixing Instructions
For a smooth and creamy consistency, start by beating together the softened cream cheese and butter in a mixing bowl until light and fluffy. Gradually mix in the powdered sugar before adding the vanilla extract and milk to achieve the desired thickness.
Adjusting Consistency
If the frosting is too thick, slowly add 1 tablespoon of milk at a time until it reaches your preferred consistency. If it becomes too runny, just add a little more powdered sugar to thicken it back up.
Frosting the Rolls
Frosting the rolls while they are still warm allows the frosting to melt slightly into the rolls, enhancing flavor and texture.
Timing for Frosting
Once the rolls are out of the oven and slightly cooled, spread the cream cheese frosting liberally over each roll. Doing this while they are warm ensures that the frosting adheres well and creates a delicious meld of flavors.
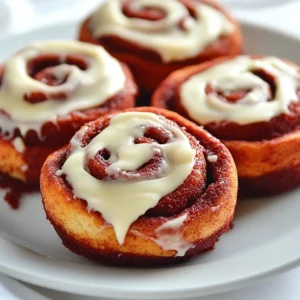
Presentation Tips
For an added visual treat, consider drizzling a bit of extra frosting on top and sprinkling with a light dusting of cinnamon or chocolate shavings. This not only enhances the aesthetic appeal but makes the rolls even more inviting.
Conclusion
These Heavenly Red Velvet Cinnamon Rolls offer a luscious taste and a delightful texture, with a soft, fluffy interior that is perfectly complemented by a creamy frosting. With a total preparation and baking time of about 2 hours, they are well worth the wait and will surely impress anyone fortunate enough to enjoy them. The combination of rich chocolate notes and sweet cinnamon creates an indulgent experience that is hard to resist.
Heavenly Red Velvet Cinnamon Rolls Recipe
Ingredients
- 2 ½ cups all-purpose flour
- 1 cup whole milk
- ¼ cup granulated sugar
- 2 ¼ teaspoons active dry yeast
- ½ teaspoon salt
- 1 large egg
- ¼ cup unsalted butter
- 2 tablespoons unsweetened cocoa powder
- 2 tablespoons red food coloring
- 1 teaspoon vanilla extract
- ½ cup packed brown sugar
- 2 tablespoons ground cinnamon
- ¼ cup unsalted butter
- 4 ounces cream cheese
- ¼ cup unsalted butter
- 1 ½ cups powdered sugar
- 1 teaspoon vanilla extract
- 1-2 tablespoons milk
Instructions
- Activate the yeast by combining warmed milk, granulated sugar, and active dry yeast in a small bowl; let sit until frothy.
- Mix dry ingredients in a large bowl: all-purpose flour, salt, cocoa powder, and red food coloring.
- Combine wet and dry ingredients by adding the yeast mixture, melted butter, egg, and vanilla extract; stir until a dough forms.
- Knead the dough on a floured surface for 5-7 minutes until smooth; let rise in a greased bowl for 1 hour.
- Prepare the filling by mixing brown sugar and ground cinnamon in a small bowl.
- Roll out the dough into a rectangle about ½ inch thick; spread softened butter and sprinkle with cinnamon-sugar mixture.
- Roll the dough tightly into a log and slice into 12 equal pieces.
- Arrange rolls in a greased baking dish, cover, and let rise for 30 minutes.
- Preheat oven to 350°F (175°C) and bake rolls for 25-30 minutes until golden brown.
- Prepare frosting by beating cream cheese, softened butter, powdered sugar, vanilla extract, and milk until smooth.
- Frost warm rolls and serve immediately.