

Introduction
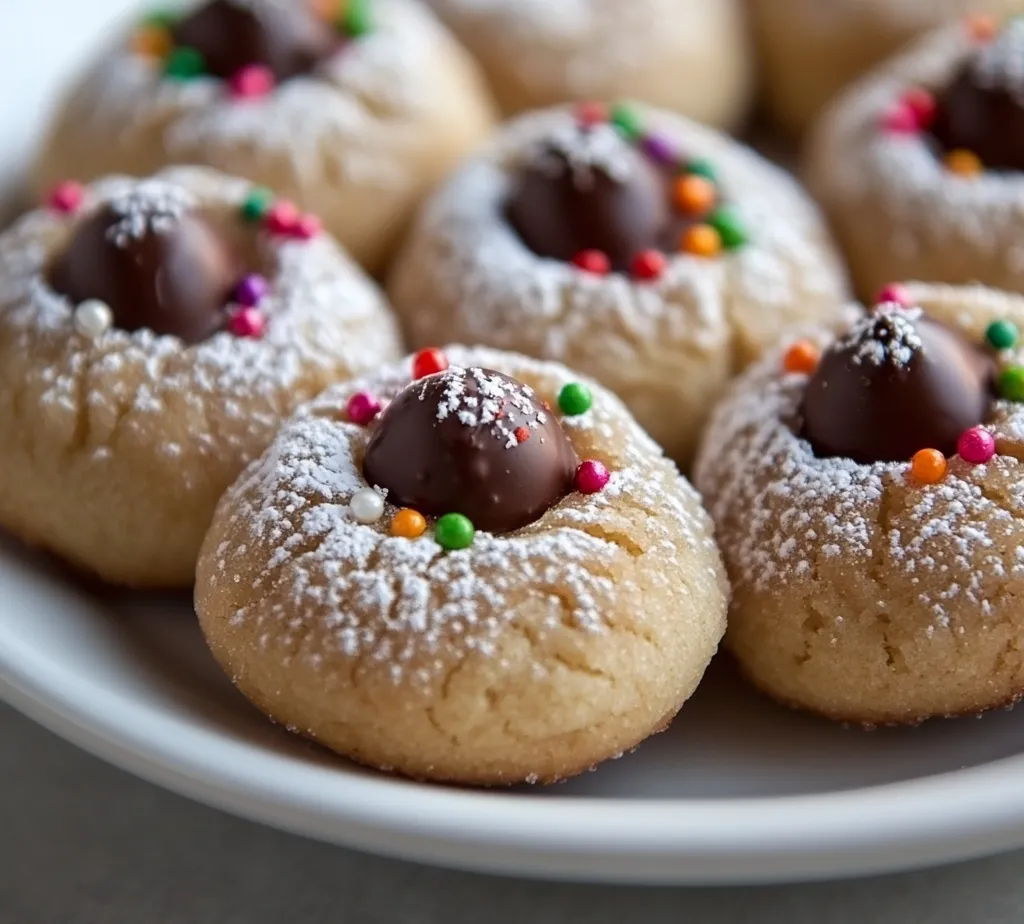
Understanding the joys of holiday baking, especially during festive seasons, can only be heightened by the delightful experience of making Holiday Blossom Cookies. These cookies not only bring warmth to your kitchen but also usher in the spirit of the season with their charming appearance and luscious flavors. The combination of a soft, chewy cookie base topped with a rich chocolate kiss creates a perfect dessert that everyone will adore.
The Holiday Blossom Cookies are ideal for gatherings, holiday parties, or simply to enjoy at home with family. Their easy preparation and fun presentation make them a favorite among both seasoned bakers and those newer to the kitchen. Whether you are looking to add to a cookie platter, gift them in decorative tins, or simply savor a sweet treat, these cookies embody the essence of the holiday season.
Recipe Overview
Here’s a quick look at what makes these Holiday Blossom Cookies a must-have treat:
– Total Time: 30 minutes
– Prep Time: 20 minutes
– Yield: 24 cookies
– Difficulty: Not specified in the recipe
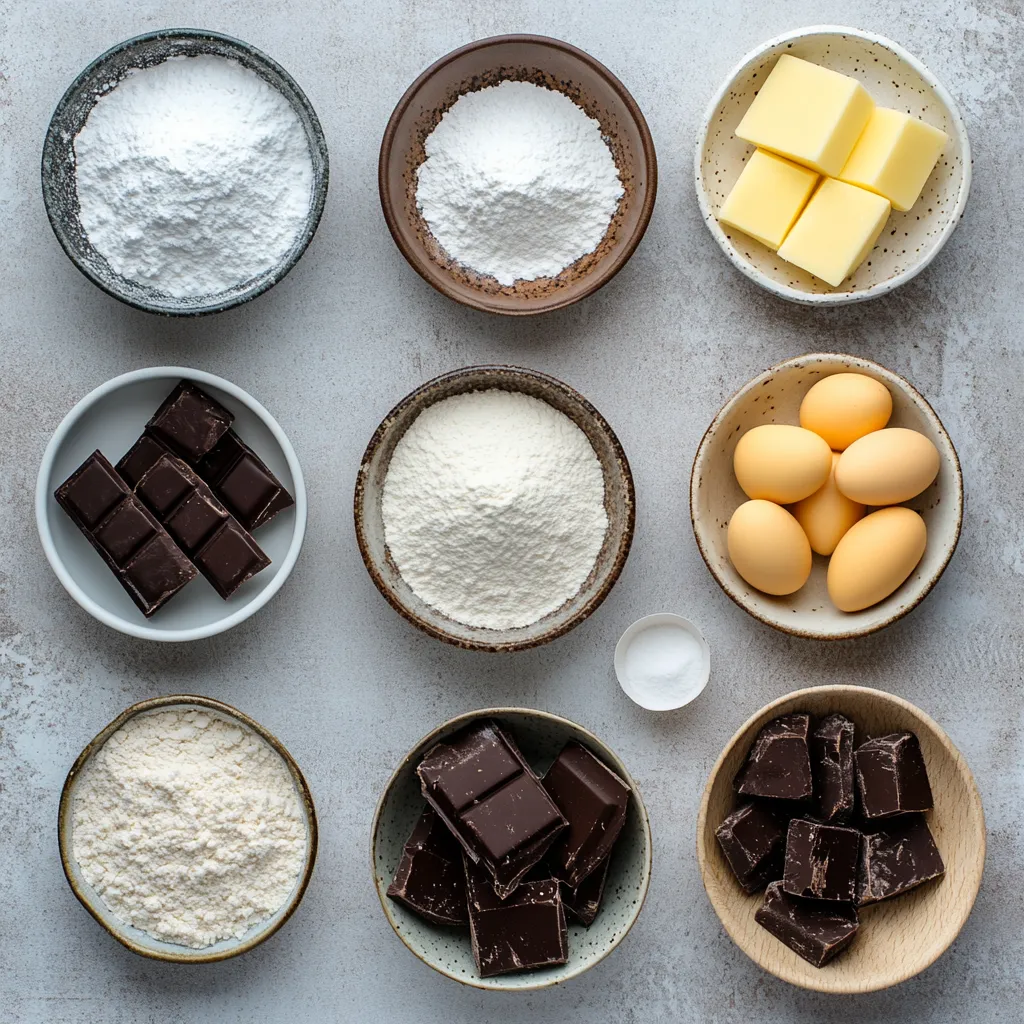
Ingredients
Dairy and Sweeteners
– Unsalted butter: 1 cup, softened
– Granulated sugar: 1 cup
– Brown sugar: 1/2 cup, packed
– Eggs: 2 large
Flavorings
– Pure vanilla extract: 1 teaspoon
Dry Ingredients
– All-purpose flour: 2 3/4 cups
– Baking soda: 1 teaspoon
– Salt: 1/2 teaspoon
Toppings
– Powdered sugar: 1 cup (for coating)
– Chocolate kisses: 1 cup, unwrapped
– Optional: Festive sprinkles for decoration
Instructions
1. Begin by preheating your oven to 350°F (175°C). Line two baking sheets with parchment paper to prevent sticking.
2. In a large mixing bowl, combine the softened butter, granulated sugar, and brown sugar. Use an electric mixer to beat the mixture until it becomes light and fluffy, which should take about 2-3 minutes.
3. Add the eggs to the bowl one at a time, ensuring each is fully incorporated before adding the next. Then, mix in the vanilla extract until the batter is smooth and well combined.
4. In a separate bowl, whisk together the all-purpose flour, baking soda, and salt to ensure even distribution of the dry ingredients.
5. Gradually incorporate the dry mixture into the wet ingredients, using a spatula or mixer on low speed. Mix until just combined; be careful not to overmix, as this can affect the texture of your cookies.
6. Using a tablespoon, scoop out the dough and roll it into a ball between your palms. Once formed, roll each ball in powdered sugar until completely coated.
7. Arrange the dough balls on the prepared baking sheets, leaving about 2 inches of space between each to allow for spreading during baking.
8. Bake the cookies in the preheated oven for 10-12 minutes, or until the edges turn a light golden brown.
9. As soon as you remove the cookies from the oven, gently press a chocolate kiss into the center of each cookie while they are still warm.
10. For an extra festive touch, sprinkle some colorful sprinkles around the chocolate kiss if desired.
11. Let the cookies cool on the baking sheet for about 5 minutes, then carefully transfer them to a wire rack to cool completely.
Prepping the Kitchen
Before diving into the cookie-making process, it’s essential to prepare your workspace. Start by preheating your oven to 350°F (175°C). This ensures that your cookies will bake evenly as soon as you place them in. Additionally, line two baking sheets with parchment paper, which will not only help in easy cookie release but also simplify your cleanup afterward. A tidy workspace leads to efficient baking and a more enjoyable experience.
Creaming Method
The creaming method is critical for achieving the right texture in your cookies. Begin by combining the softened butter, granulated sugar, and brown sugar in a large mixing bowl. Using an electric mixer, beat these ingredients together until the mixture appears light and fluffy, which typically takes about 2-3 minutes. This process incorporates air into the mixture, leading to a lighter cookie texture. Achieving this step successfully lays a strong foundation for your cookie dough and significantly impacts the final product.
Incorporating Wet Ingredients
Once your creamed mixture is light and fluffy, it’s time to add the eggs. Include each egg one at a time, ensuring full incorporation before adding the next—this is crucial as it promotes the uniform distribution of moisture and protein in your cookie dough. Following the eggs, mix in one teaspoon of pure vanilla extract; this ingredient enhances the overall flavor of your cookies. Blend until everything is well combined and the batter looks smooth, which sets the stage for incorporating the dry ingredients.
Mixing Dry Ingredients
In a separate bowl, whisk together the all-purpose flour, baking soda, and salt. This step ensures that the dry ingredients are evenly distributed before they are added to the wet mixture. Proper mixing helps to prevent any clumps and guarantees that the leavening agent (baking soda) is evenly distributed, which is crucial for achieving consistent baking and texture in your final cookies.
Combining Wet and Dry Ingredients
With your wet and dry components prepared, it’s time for the crucial moment of amalgamation. Gradually add the dry mixture into the wet ingredients while mixing on low speed. This method ensures a gentle combination, minimizing the risk of overmixing, which can lead to tough cookies. Mix until just combined—it’s important to stop as soon as the flour is no longer visible, allowing your dough to develop just enough structure for chewy, delicious cookies.
Shaping the Cookies
Once your dough is formed and well-mixed, it’s time to shape your cookies. Start by using a tablespoon to scoop out the dough. Roll each scoop between your palms to create uniform balls. Once formed, roll each ball in powdered sugar for a delightful coating. This step not only adds sweetness but also contributes to the cookies’ characteristic snowy appearance. After rolling, arrange the dough balls on your lined baking sheets, leaving ample space (about 2 inches) between each ball to allow for natural spreading during baking.
With these steps complete, you’re all set to bake delicious Holiday Blossom Cookies that will fill your home with wonderful aromas and festive cheer!
Rolling the Dough
To create the perfect round shape for your Holiday Blossom Cookies, begin by scooping out approximately a tablespoon of dough. Roll this portion between your palms until it forms a smooth ball. It’s important to use slightly less than a full tablespoon for smaller cookies if you prefer a more bite-sized version. Be mindful of keeping the size consistent for even baking, as variations in size can affect the cooking time and texture of the cookies.
Powdered Sugar Coating
Once you have rolled the dough into balls, it’s time to coat them in powdered sugar. This step not only adds sweetness but also contributes to the beautiful, snowy appearance of the cookies. Place the powdered sugar in a shallow dish and gently roll each dough ball in the sugar until fully coated. Ensure there are no patches of dough visible, as this will enhance the presentation and add a delightful sweetness once baked.
Baking the Cookies
Arranging on Baking Sheets
For optimal baking, space the dough balls out on the prepared parchment-lined baking sheets. The recommended distance is approximately 2 inches apart. This spacing allows the cookies to expand without merging into one another during the baking process. Depending on your oven size, you may need to bake in batches, so keep an eye on the number of cookies you place on one sheet.
Baking Process
After arranging the cookies, carefully place the baking sheets into your preheated oven at 350°F (175°C). Bake the cookies for a duration of 10 to 12 minutes. Keep a close watch towards the end of the baking time; as soon as you notice the edges turning a light golden brown, it’s time to take them out. The centers may look slightly underbaked, but they will continue to firm up as they cool on the baking sheet.
Adding the Chocolate Kisses
Pressing Kisses into Cookies
Immediately after removing the cookies from the oven, the next step is to add the chocolate kisses. Gently press one kiss into the center of each warm cookie. The heat from the cookie will cause the chocolate to soften, creating a luscious chocolate center that contrasts beautifully with the cookie’s texture. Be careful not to press too hard, as you want to ensure the cookie holds its shape.
Decorative Touch
For an additional festive flair, consider decorating the cookies after placing the chocolate kisses. Sprinkling colorful sprinkles around the chocolate can create an eye-catching presentation. This fun addition enhances the holiday spirit and makes the cookies more visually appealing, perfect for gatherings or gifting.
Cooling and Serving
Cooling on Baking Sheets
Once you have added the chocolate kisses, allow the cookies to cool on the baking sheet for about 5 minutes. This cooling time is crucial as it helps the cookies maintain their shape, allowing them to set properly without falling apart during transfer.
Transferring to Wire Rack
After the cooling period, carefully move the cookies to a wire rack for complete cooling. This step prevents further cooking and provides ample airflow around the cookies, allowing them to reach the desired chewy texture without becoming soggy or overly soft.
Presentation Ideas
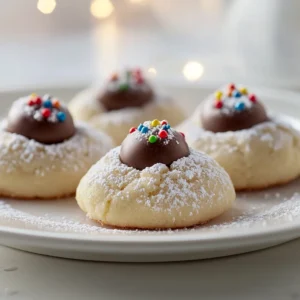
Decorative Arrangements
For serving, present your Holiday Blossom Cookies on a beautiful platter or tiered tray. Arrange them in an attractive pattern and consider adding additional holiday-themed decorations, such as evergreen sprigs or ornaments around the cookies. This festive display creates an inviting presentation for holiday gatherings.
Gift Packaging
If you plan on sharing these delightful cookies as gifts, consider packaging them in decorative tins or box sets. Layer them with parchment paper or colorful tissue to enhance the presentation. This method keeps the cookies fresh while providing a charming and thoughtful gift for friends and family during the holiday season.
Flavor and Texture Profile
Taste Explanation
The flavor profile of Holiday Blossom Cookies is symphonic, with the combination of granulated and brown sugars providing a rich sweetness. Brown sugar introduces a slight molasses flavor that lends depth to the cookies, while the chocolate kisses contribute a creamy richness that pairs perfectly with the cookie base. The subtle vanilla essence enhances the overall taste, creating a comforting and nostalgic flavor experience.
Texture Description
These cookies boast a delightful texture that balances softness and chewiness. The outer edges are slightly crisp, offering a contrast to the soft interior. The melted chocolate kiss adds a gooey center, enhancing the overall mouthfeel. This combination makes every bite an indulgent treat, perfect for holiday celebrations.
Time Management
Preparation Time
This entire recipe comes together in a remarkably efficient timeframe. The preparation time required is approximately 20 minutes from start to finish, not including baking.
Baking Time
After preparation, the baking time will take an additional 10 to 12 minutes per batch. This quick timeline makes these cookies ideal for those looking to whip up a festive treat in a hurry, allowing for spontaneous holiday gatherings or cookie exchanges.
Conclusion
Holiday Blossom Cookies deliver a delightful combination of flavors and textures that perfectly encapsulate the spirit of the festive season. With a soft, chewy base and a melted chocolate kiss center, they are both visually stunning and delicious. The entire process requires roughly 30 minutes, making them a convenient yet impressive addition to any holiday celebration.
Holiday Blossom Cookies Recipe for Festive Celebrations
Ingredients
- 1 cup unsalted butter softened
- 1 cup granulated sugar
- ½ cup packed brown sugar
- 2 large eggs
- 1 teaspoon pure vanilla extract
- 2 ¾ cups all-purpose flour
- 1 teaspoon baking soda
- ½ teaspoon salt
- 1 cup powdered sugar for coating
- 1 cup chocolate kisses unwrapped
- Festive sprinkles optional
Instructions
- Preheat your oven to 350°F (175°C) and line two baking sheets with parchment paper.
- In a large bowl, beat the softened butter, granulated sugar, and brown sugar until light and fluffy.
- Add the eggs one at a time, mixing well after each addition, then mix in the vanilla extract.
- In a separate bowl, whisk together the flour, baking soda, and salt.
- Gradually mix the dry ingredients into the wet ingredients until just combined.
- Scoop out the dough, roll into balls, and coat each ball in powdered sugar.
- Place the dough balls on the baking sheets, leaving space between them.
- Bake for 10-12 minutes until the edges are light golden brown.
- Press a chocolate kiss into the center of each cookie while warm.
- Let cool on the baking sheet for 5 minutes before transferring to a wire rack.