Introduction
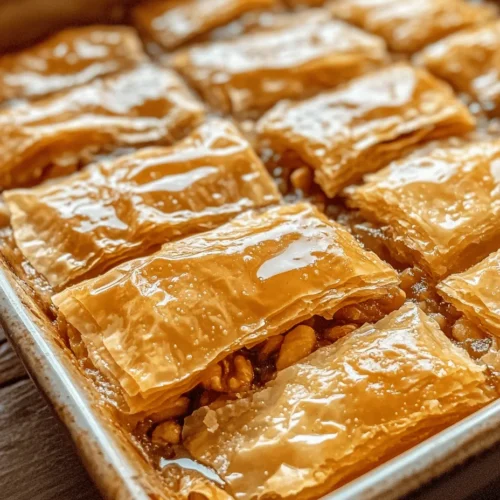
Baklava is a dessert that transcends borders and cultures, captivating taste buds with its rich flavors and delightful texture. This beloved sweet treat, made from layers of flaky phyllo pastry, nuts, and sweet syrup, holds a cherished place in the hearts of many around the globe. Originating in the Ottoman Empire, Baklava has become a staple in various cuisines, particularly in Middle Eastern, Mediterranean, and Balkan regions, each adding its own unique twist to this classic dessert.
The importance of traditional recipes like Baklava cannot be overstated. They serve as a bridge to our culinary heritage, connecting generations through shared experiences of cooking and enjoying food. Making Baklava at home is not just about creating a delicious dessert; it’s about preserving the artistry and cultural significance that comes with it. In this article, we will guide you through the process of making irresistible Baklava from scratch, ensuring you can bring this exquisite treat to your own table.
Understanding Baklava
Definition and History of Baklava
Baklava is a rich, sweet pastry made from layers of thin, flaky dough known as phyllo, filled with chopped nuts, and sweetened with syrup or honey. The origins of Baklava are often debated, with many attributing its creation to the ancient civilizations of the Middle East. Its evolution, however, can be traced back to the kitchens of the Ottoman Empire, where it was refined into the delicate dessert we know today.
Historically, Baklava was reserved for special occasions and celebrations, often served during festivals, weddings, and religious holidays. Its intricate preparation and luxurious ingredients made it a symbol of hospitality and generosity, meant to impress guests and loved ones alike. As it spread across the Mediterranean and into the Balkans, various cultures began to put their own spin on this traditional treat, leading to a myriad of regional variations.
Cultural Significance and Variations Across Different Regions
Baklava is more than just a dessert; it embodies a rich cultural tapestry. In Turkey, for instance, it is often made with pistachios, giving it a vibrant green hue and a unique, nutty flavor. Meanwhile, in Greece, the use of walnuts along with a syrup flavored with cinnamon and cloves is more common, resulting in a slightly spiced, aromatic delight.
In the Balkans, Baklava is commonly served during festive gatherings and special occasions. Each region has its own way of preparing Baklava, whether it’s the thickness of the pastry layers, the choice of nuts, or the sweetness of the syrup. Despite these variations, the essence of Baklava remains consistent: a celebration of flavor and tradition.
The Role of Baklava in Celebrations and Gatherings
Baklava holds a special place in various cultural celebrations. In Middle Eastern countries, it is often served during Ramadan, symbolizing the end of fasting with its rich sweetness. In Greece, it is a traditional offering during Easter and weddings, representing love and prosperity. The act of sharing Baklava during gatherings signifies hospitality and the joy of community.
In addition to its festive role, Baklava has also made its way into contemporary culinary practices, appearing at restaurants and cafes around the world. Regardless of where it is served, Baklava continues to evoke feelings of warmth and nostalgia, making it a beloved dessert for many.
Ingredients Breakdown
To create the perfect Baklava, it’s essential to understand the role of each ingredient in the recipe. Here’s a closer look at the core components that come together to make this iconic dessert.
Phyllo Dough: The Foundation of Baklava’s Flaky Texture
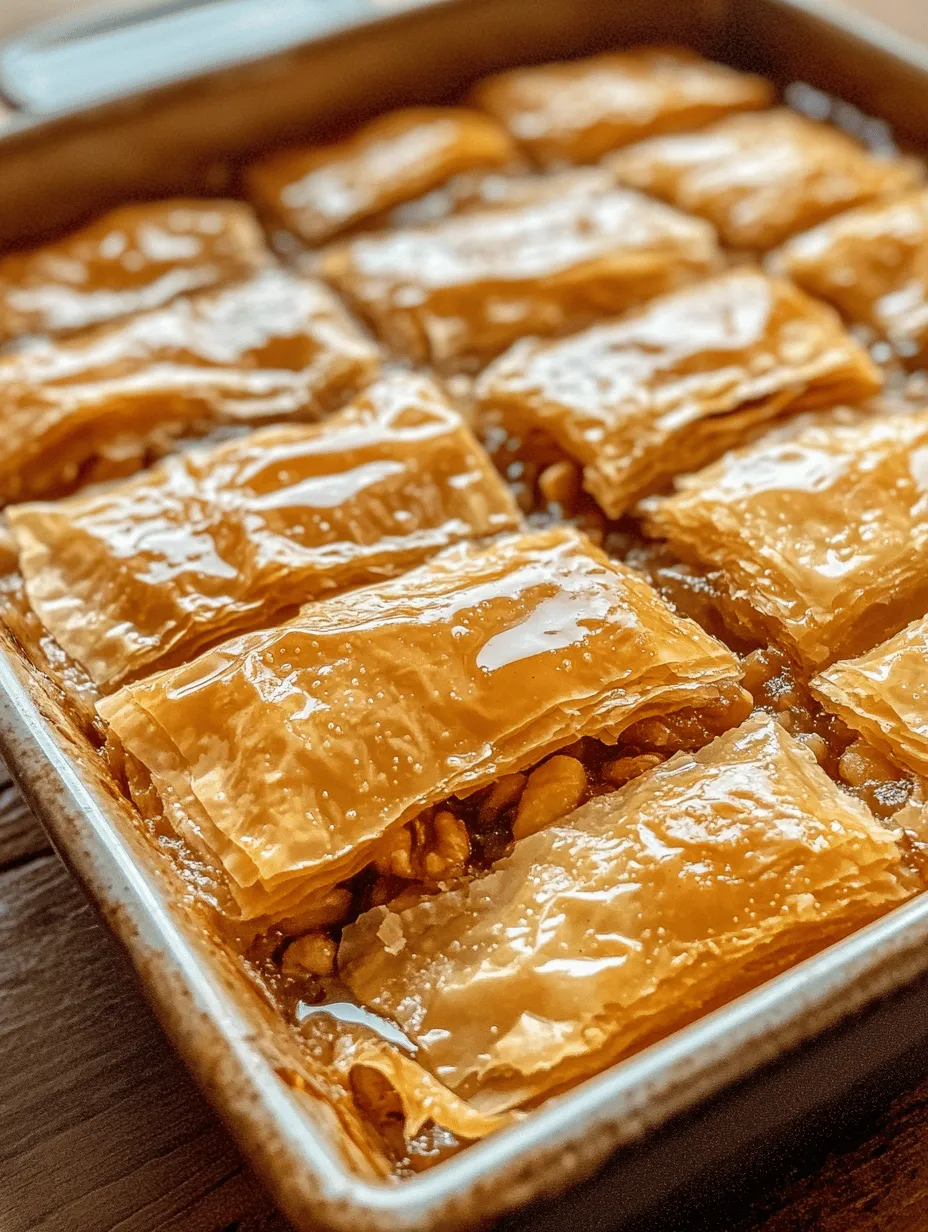
Phyllo dough is the key ingredient that defines Baklava’s characteristic flaky texture. Made from flour, water, and a bit of oil, phyllo is rolled out into paper-thin sheets that are layered to create a light, crisp pastry. The secret to perfect Baklava lies in how these layers are handled; they need to be brushed with melted butter in between to ensure they bake up golden and flaky, without becoming soggy.
When working with phyllo, it’s crucial to keep the sheets covered with a damp cloth to prevent them from drying out, as they can become brittle and difficult to work with. This delicate pastry is the canvas upon which the rich flavors of the nuts and syrup will be built.
Nuts: Traditional Choices and Their Flavor Profiles
The choice of nuts is critical in determining the flavor profile of Baklava. Traditional recipes often call for walnuts and almonds, each bringing its own unique taste and texture to the dish.
– Walnuts: Known for their rich, earthy flavor, walnuts are a popular choice in many Baklava recipes. When chopped finely, they create a delightful crunch and complement the sweetness of the syrup beautifully.
– Almonds: With a slightly sweet and buttery flavor, almonds add a different dimension to Baklava. They can be used alone or in combination with walnuts for a more complex nut filling.
Some variations may include pistachios or hazelnuts, each offering a distinct taste and color to the finished product. The key is to ensure the nuts are finely chopped for even distribution, providing a consistent texture throughout.
Butter: Importance of Using Unsalted Butter for Flavor Control
Butter plays a vital role in Baklava, contributing to both flavor and texture. Using unsalted butter is recommended for precise flavor control, allowing the natural sweetness of the syrup and the nuttiness of the filling to shine without being overwhelmed by salt.
Melted butter is brushed between each layer of phyllo dough, helping to create that signature flaky texture. It’s crucial to use a generous amount of butter, ensuring that each layer is well-coated for optimal results.
Spices: Ground Cinnamon and Its Aromatic Qualities
Ground cinnamon is a staple spice in many Baklava recipes, adding warmth and depth to the overall flavor profile. The aromatic qualities of cinnamon not only enhance the nut filling but also infuse the syrup, creating a harmonious balance of sweetness and spice.
Cinnamon can be adjusted to personal taste, but a moderate amount is typically used to ensure it complements rather than overpowers the other flavors. Some recipes may also incorporate additional spices, such as nutmeg or cloves, for a more complex flavor.
Syrup: The Sweet Balance with Sugar, Honey, and the Zest from Lemon Juice
The syrup is the finishing touch that transforms Baklava from a simple pastry into a decadent dessert. A traditional Baklava syrup is made from a combination of sugar, water, and honey, which adds a rich sweetness and a glossy finish.
To balance the sweetness, a splash of lemon juice or zest is often added. This not only cuts through the richness but also provides a refreshing brightness that enhances the overall flavor. The syrup is poured over the hot Baklava once it has finished baking, allowing it to soak in and create that signature sticky texture.
Step-by-Step Instructions for Making Baklava
Preheat the Oven: Importance of Temperature in Achieving the Perfect Bake
Before diving into the preparation, it’s essential to preheat your oven to 350°F (175°C). This temperature is crucial for achieving the perfect bake, ensuring that the phyllo dough becomes golden and crispy while the nuts and spices meld together beautifully. A properly preheated oven will help to create the desirable texture that Baklava is known for.
Preparing the Nut Filling: Techniques for Finely Chopping Nuts for Even Distribution
While the oven is heating, it’s time to prepare the nut filling. Start by measuring out your choice of nuts, typically a combination of walnuts and almonds. Place the nuts in a food processor and pulse them until they are finely chopped, but be careful not to over-process them into a paste.
The goal is to achieve a coarse yet uniform texture that will distribute evenly throughout the Baklava. Once chopped, transfer the nuts to a bowl and mix in the ground cinnamon. This mixture will add flavor and richness to each layer of the Baklava, creating a delightful contrast against the flaky pastry.
Now that you have a good understanding of Baklava’s rich history, its cultural significance, and the ingredients that make it so special, you’re ready to embark on the exciting journey of making this traditional dessert. In the next steps, we will guide you through the process of assembling and baking your Baklava, ensuring that you can enjoy this irresistible treat in the comfort of your own home.
Handling Phyllo Dough
Working with phyllo dough can seem daunting, but with the right techniques, it becomes manageable and enjoyable. The most critical aspect of handling phyllo is preventing it from drying out. Phyllo is incredibly delicate and can become brittle if exposed to air for too long. Here are some essential tips to keep your phyllo dough fresh while you work:
1. Keep it Covered: Always keep the phyllo sheets covered with a damp kitchen towel. This moisture will help maintain its flexibility and prevent it from cracking as you layer it.
2. Work Quickly: Once you remove a sheet from the package, try to work quickly to layer it before it has a chance to dry out. If you need to step away, ensure that the remaining sheets are well-covered.
3. Use a Non-Stick Surface: Lay your phyllo on a clean, flat surface lined with parchment paper or a silicone baking mat. This prevents the sheets from sticking and makes it easier to lift them during assembly.
4. Tear and Repair: If you accidentally tear a sheet, don’t worry! You can easily patch it up by layering another piece over the tear. The filling will hide any imperfections once baked.
Layering Techniques
The heart of baklava’s rich texture and flavor lies in its layers. Proper layering of phyllo and nut mixtures is crucial for achieving that signature flaky and crispy finish. Here’s how to master the art of layering:
1. Start with the Base: Begin by brushing a generous amount of melted butter onto the bottom of your baking dish. Place your first sheet of phyllo on top, then brush it lightly with butter before adding the next sheet.
2. Layering: Continue this process, adding about 8 to 10 sheets of phyllo, each brushed with butter. The butter not only adds flavor but also creates a barrier that helps the layers stay separate during baking.
3. Nut Mixture: Once you have a solid base of phyllo, it’s time to add your nut mixture. Sprinkle an even layer of your finely chopped nuts (walnuts, pistachios, or almonds) over the phyllo. The nut layer should be about 1/4 inch thick, allowing the flavors to shine through without overwhelming the phyllo.
4. Repeat: Follow this layering pattern—phyllo, butter, nut mixture—until you’ve used up your nuts and phyllo sheets. Finish with a final layer of phyllo, ideally around 6 to 8 sheets brushed with butter.
Cutting Baklava
Before baking, cutting the baklava into shapes is a vital step that influences both presentation and serving. Here’s how to do it effectively:
1. Shape Selection: Traditional baklava is often cut into diamond or square shapes. Use a sharp knife to make your cuts, slicing through all the layers down to the bottom of the pan.
2. Cut Before Baking: It’s essential to cut the baklava before it goes into the oven. This allows the heat to penetrate through the layers, ensuring even cooking and making it easier to serve once baked.
3. Even Portions: Ensure your cuts are evenly spaced to create uniform pieces. This not only improves the aesthetic but also ensures that all pieces bake at the same rate.
Baking Process
The baking process is where your baklava transforms from layers of dough and nuts into a golden, flaky dessert. Here’s what to look for during baking:
1. Preheat Your Oven: Make sure your oven is preheated to 350°F (175°C) before placing the baklava inside. This ensures even cooking from the start.
2. Baking Time: The baklava typically bakes for about 45 minutes to 1 hour. Keep an eye on it, especially towards the end of the baking time. You’re looking for a deep golden brown color on the top layer.
3. Cooling: Once baked, remove the baklava from the oven and allow it to cool in the pan for at least 10-15 minutes. This cooling period helps the layers settle.
Preparing and Applying the Syrup
The syrup is what ties the baklava together, adding sweetness and moisture. Here’s how to prepare and apply it for maximum absorption:
1. Syrup Ingredients: In a saucepan, combine sugar, water, and a splash of lemon juice. Optionally, you can add a cinnamon stick or a splash of rose or orange blossom water for extra flavor.
2. Simmer: Bring the mixture to a boil and then reduce the heat, allowing it to simmer for about 10 minutes. You want the syrup to thicken slightly but not become overly viscous.
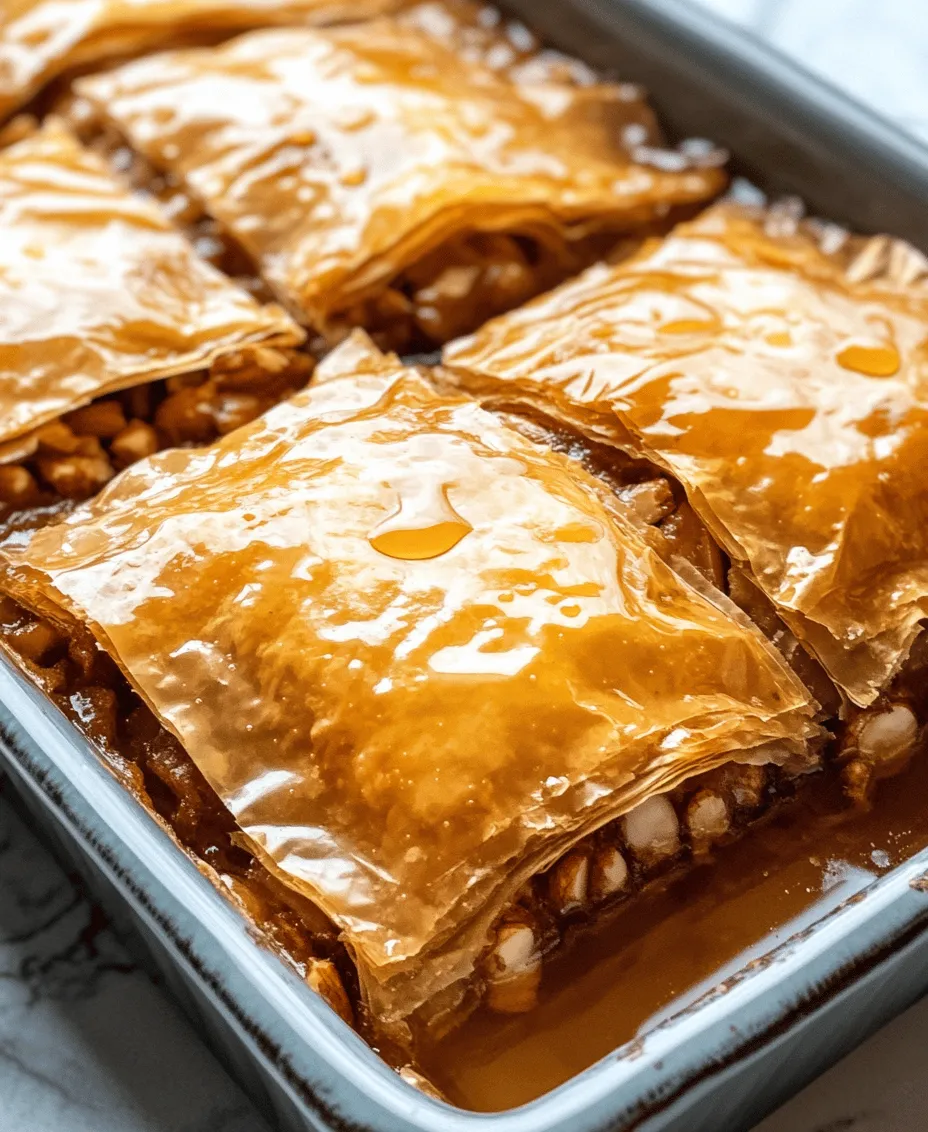
3. Timing is Key: The key to a perfectly syruped baklava is timing. Pour the syrup over the baklava while it’s still hot and fresh from the oven. This allows the syrup to seep into the layers, enhancing the flavor.
4. Let it Soak: After applying the syrup, allow the baklava to sit for several hours or, preferably, overnight. This resting period allows the syrup to penetrate fully, resulting in a moist and flavorful dessert.
Serving Suggestions
Baklava is a versatile dessert that can be enjoyed in various ways. Here are some serving suggestions to enhance your baklava experience:
1. Ideal Serving Temperature: Baklava can be served warm or at room temperature. While some prefer it warm, serving it at room temperature allows the flavors to fully develop.
2. Presentation Tips: For an elegant presentation, arrange the baklava on a decorative platter. Consider garnishing with finely chopped nuts or a dusting of powdered sugar for an added touch.
3. Beverage Pairings: Baklava pairs beautifully with a variety of beverages. Traditional pairings include strong tea or coffee, which balance the sweetness of the dessert. You can also serve it with dessert wines that complement the nutty flavors.
4. Accompanying Flavors: Consider adding a dollop of whipped cream or a scoop of vanilla ice cream on the side. You can also sprinkle some crushed pistachios or a drizzle of honey on top for extra flavor and texture.
Storage and Shelf Life
Proper storage is crucial for maintaining the freshness and quality of your baklava. Here are some best practices:
1. Storing Baklava: Store your baklava in an airtight container at room temperature. If you’re concerned about it drying out, you can also cover it with plastic wrap.
2. Refrigeration Effects: While baklava can be refrigerated, it’s best enjoyed at room temperature. Refrigeration can alter the texture, making it less crispy. If refrigerated, allow it to come back to room temperature before serving for the best experience.
3. Shelf Life: Properly stored baklava can last for about a week at room temperature. If you want to keep it longer, consider freezing it. Just ensure it’s well-wrapped to prevent freezer burn, and it can last for up to three months.
Health Considerations
While baklava is a delicious treat, it’s essential to be mindful of its nutritional content:
1. Nutritional Overview: A piece of baklava typically contains around 150-200 calories, depending on the size and ingredients used. It is rich in fats from the nuts and butter, and it can contain a significant amount of sugar.
2. Enjoying in Moderation: Like many sweets, moderation is key. Enjoying baklava as an occasional treat can be a part of a balanced diet, allowing you to savor its rich flavors without overindulging.
3. Healthier Alternatives: If you’re looking for a lighter version, consider reducing the amount of sugar in the syrup or using alternative sweeteners. You could also experiment with whole grain phyllo dough or reducing the butter content while maintaining flavor through the use of spices and nuts.
Conclusion
Making traditional baklava is not just about creating a dessert; it’s about embracing a culinary tradition that has been cherished across cultures for centuries. The joy of layering delicate phyllo, the aroma of baking nuts, and the sweet syrup soaking into each piece brings a unique satisfaction that store-bought alternatives simply can’t match.
As you embark on this baking adventure, remember that baklava is more than just a treat—it’s a symbol of celebration and sharing. Whether enjoyed at family gatherings, special occasions, or simply as a sweet indulgence at home, your homemade baklava will undoubtedly delight all who taste it. So gather your ingredients, invite your loved ones into the kitchen, and enjoy the process of creating this timeless dessert. Your effort will not only be rewarding but will also allow you to appreciate the rich cultural significance and love that goes into every layer of baklava.