
Introduction
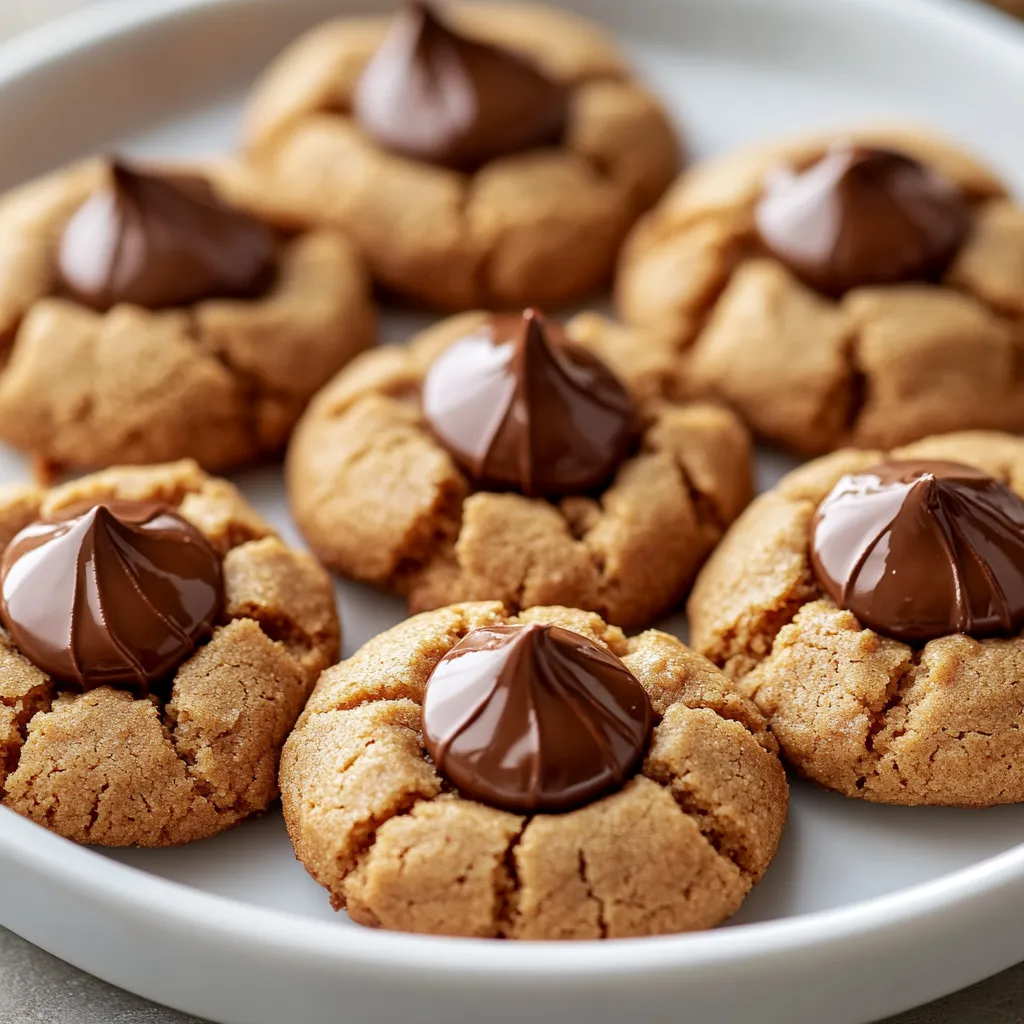
Peanut Butter Blossom Cookies are a delightful treat that perfectly combines the rich, nutty flavor of creamy peanut butter with the sweet surprise of a melted chocolate kiss in the center. These cookies have grown immensely popular over the years, especially around the holidays, thanks to their playful and inviting appearance. They evoke warm memories of baking with loved ones, making them a cherished recipe handed down through generations.
The intriguing history of these cookies can be traced back to the original recipes appearing in cookbooks the mid-20th century, but they have roots in classic peanut butter cookies. The addition of the chocolate kiss on top adds a whimsical touch and has helped solidify their status as a quintessential American cookie. Their texture is a marvelous blend of chewy and slightly crisp edges, making them irresistible to both kids and adults alike.
Whether enjoyed at a festive gathering or as a delightful snack with a cup of milk, Peanut Butter Blossom Cookies are sure to bring smiles and happiness to any occasion. Their combination of flavors and textures makes each bite a wonderful experience.
Recipe Overview
– Total Time: 30 minutes
– Prep Time: 15 minutes
– Bake Time: 10-12 minutes
– Yield: 36 cookies
– Difficulty: Not specified in the recipe
Peanut Butter Blossom Cookies are characterized by their simple preparation and the delightful contrast of flavors from the peanut butter and chocolate. The cooking method involves baking the cookies in a preheated oven, allowing them to rise slightly and develop their signature chewy interior. Ideal for parties, holiday celebrations, or even as an everyday treat, these cookies can be enjoyed by everyone.
Ingredients
– 1 cup creamy peanut butter
– 1 cup granulated sugar
– 1 cup packed brown sugar
– 1 teaspoon pure vanilla extract
– 1 large egg
– 2 cups all-purpose flour
– 1 teaspoon baking soda
– 1/2 teaspoon salt
– 1 cup granulated sugar (for rolling)
– 36 unwrapped milk chocolate kisses
The quality of the ingredients plays a crucial role in achieving the best results when baking these cookies. High-quality creamy peanut butter adds a deeper flavor, while fresh eggs and flour contribute to the cookie’s overall texture. Be sure to use granulated sugar and packed brown sugar to achieve the right sweetness and moisture balance, and don’t skimp on the chocolate kisses for that ultimate finishing touch.

Instructions
1. Preheat your oven to 350°F (175°C) and prepare a baking sheet by lining it with parchment paper. This will prevent the cookies from sticking and make cleanup easier.
2. In a large mixing bowl, combine the creamy peanut butter, granulated sugar, brown sugar, and vanilla extract. Use a mixer or a wooden spoon to blend the ingredients together until the mixture is smooth and creamy.
3. Crack the egg into the peanut butter mixture and mix well until the egg is fully incorporated and the mixture is uniform.
4. In a separate bowl, whisk together the all-purpose flour, baking soda, and salt until they are evenly combined. This will ensure that the leavening agent is well distributed in the dough.
5. Gradually add the dry ingredient mixture to the wet ingredients, stirring gently until everything is just combined. Be careful not to overmix, as this can affect the texture of the cookies.
6. Using your hands, roll the dough into 1-inch balls. Once formed, roll each ball in the additional granulated sugar until fully coated. This will give the cookies a lovely sweet crust.
7. Arrange the sugar-coated balls on the prepared baking sheet, ensuring they are spaced about 2 inches apart to allow for spreading during baking.
8. Bake the cookies in the preheated oven for 10-12 minutes, or until the edges are lightly golden brown. The centers may look slightly soft, which is perfect for a chewy texture.
9. As soon as you remove the baking sheet from the oven, gently press a chocolate kiss into the center of each cookie. The warmth from the cookies will help the kisses melt slightly, creating a delicious topping.
10. Allow the cookies to cool on the baking sheet for about 5 minutes. After that, carefully transfer them to a wire rack to cool completely, which will help maintain their texture.
Preheating the Oven
Preheating the oven is a critical step in baking as it ensures that the cookies begin baking at the correct temperature. Setting the oven to 350°F (175°C) allows the cookies to cook evenly, promoting that delightful structure that we all love. If the oven is not preheated, the cookies may spread too much, resulting in a flat and uneven texture.
Preparing the baking sheet by lining it with parchment paper not only helps prevent the cookies from sticking but also facilitates an easier cleanup process post-baking. This small detail makes a significant difference in maintaining the quality of the cookies, ensuring they come off the sheet intact and looking appetizing.
Mixing Wet Ingredients
The foundation of the cookies is laid during this step, where you combine creamy peanut butter with granulated sugar, brown sugar, and vanilla extract. The mixture should be blended until smooth and creamy, creating a rich base for the cookie dough. The sugars not only sweeten the cookies but also contribute to the overall tenderness by adding moisture.
Vanilla extract serves to enhance and deepen the sweetness of the peanut butter, balancing the overall flavor profile. It brings an aromatic quality that complements the nuttiness of the peanut butter with a hint of warmth, making every bite unforgettable.
Incorporating the Egg
Adding the large egg is fundamental for textural integrity. The egg acts as a binding agent, holding the cookie dough together, while also providing moisture. This results in the cookies being soft and chewy. It’s essential to mix it well until it incorporates seamlessly into the peanut butter mixture, ensuring uniformity throughout the dough.
Preparing Dry Ingredients
The integration of the dry ingredients is equally important. Whisking together the all-purpose flour, baking soda, and salt ensures that they are evenly distributed throughout the mixture. This step is vital for the leavening process; baking soda acts as a leavening agent, helping the cookies rise during baking. A well-integrated flour mixture provides a light and airy texture to the cookie while allowing the distinct peanut butter flavor to shine through.
Combining Wet and Dry Mixtures
When it comes to combining the wet and dry mixtures, gentle handling is the key. Gradually adding the dry ingredients to the wet ones and stirring just until combined is crucial to avoid overmixing, which can lead to tough cookies. The goal is to achieve a cohesive dough that retains a slightly soft texture.
Look for signs of properly combined dough: it should not be overly sticky or crumbly but rather form into manageable balls for rolling. This attention to detail will directly affect the final cookie’s texture—airy yet chewy with a perfect bite.
Forming the Cookies
Once the dough is mixed, it’s time to give shape to your delicious creation. Using your hands, roll the dough into 1-inch balls helps establish uniformity in size, ensuring even baking. Rolling the balls in additional granulated sugar not only adds a beautiful sparkle to the cookies but also contributes a delightful crunch that contrasts with the soft interior.
Place the sugar-coated balls on the prepared baking sheet, making sure to leave enough space between them to allow for spreading during cooking. This spacing is an essential consideration for optimal baking, as cookies that are too close together may merge and lose their distinct shape.

Rolling Cookie Balls
Creating uniform cookie balls is essential for even baking and a pleasing presentation. For the classic Peanut Butter Blossom Cookies, aim for 1-inch balls of dough. Using a standard cookie scoop can help achieve this size consistently, while your hands can easily form the balls if you prefer a tactile approach.
For an even rolling technique, warm the dough slightly in your hands to make it more pliable. If the dough is too sticky, you can lightly flour your hands to prevent it from adhering. Ensure you consistently shape the balls to achieve the best texture and even baking results.
Coating with Sugar
The additional granulated sugar coating not only enhances the visual appeal of the cookies but also contributes to their delightful texture. When the cookie dough balls are rolled in sugar, they develop a sweet crust as they bake, adding an exciting contrast to the softness of the cookie inside.
Alternative options for rolling can include colorful sprinkles or coarse sugar, which can add extra crunch and whimsy. Utilizing flavored sugars, such as cinnamon sugar, can also provide a unique twist on this classic recipe.
Baking the Cookies
Arranging on the Baking Sheet
Correctly spacing the cookie balls on the baking sheet is crucial for even cooking. Place each ball approximately 2 inches apart to allow room for them to spread during baking. Visual guidance can be helpful; imagine spacing them as if they were on an imaginary grid, ensuring that there’s adequate space on all sides. Overcrowding can lead to unevenly baked cookies that stick together, sacrificing texture.
Baking Duration
While the recipe specifies baking for 10-12 minutes, there are additional indicators of doneness beyond just color. Look for edges that appear lightly golden brown and a center that might be soft but not raw. The cookies will continue to firm up as they cool, which is essential for achieving that perfect chewy bite.
Achieving the perfect chewiness involves watching closely in the last few minutes of baking. If your cookies are golden around the edges but still appear slightly underbaked in the center, it’s okay; that residual heat will create a soft, chewy texture once removed from the oven.
Adding Chocolate Kisses
Timing for Adding Kisses
Placing the chocolate kisses correctly plays an important role in the overall flavor and aesthetic of the Peanut Butter Blossom Cookies. The kisses should be added immediately after pulling the hot cookies from the oven. This timing allows the chocolate to melt slightly, creating a delightful topping that infuses the cookie with rich chocolate flavor.
Technique for Pressing Kisses into Warm Cookies
Use a gentle pressing motion to embed the kisses into the center of each warm cookie. Do this carefully to avoid breaking the cookies. The warmth of the cookie should naturally cause the chocolate to soften beautifully, creating an indulgent melt-in-the-mouth experience.
Cooling the Cookies
Importance of Cooling on Baking Sheet
After baking, let the cookies cool on the baking sheet for approximately 5 minutes before transferring them. This resting time allows them to set slightly without falling apart. The cooling period is vital for achieving the proper texture, as it helps the cookies firm up while retaining a gooey center.
Transferring to Wire Rack
To transfer the cookies safely to a wire rack, use a spatula to lift them gently from the edges, moving them directly from the sheet to the rack. Be cautious when handling the cookies, as they can be fragile while warm. Allow them to cool completely on the rack to ensure they maintain their chewy texture and prevent moisture buildup from trapping steam.
Optional Presentation Suggestions
Decorative Platter Arrangements
For an attractive presentation, consider placing the Peanut Butter Blossom Cookies on a decorative platter. This can be enhanced by scattering a little extra granulated sugar around the cookies for a festive, sparkling effect. Available garnishes, such as additional chocolate kisses, can also add a delightful touch to the overall presentation, especially during holiday gatherings or special occasions.
Ideas for Garnishing with Extra Sugar and Chocolate Kisses
Arrange a few extra chocolate kisses on the platter, carefully placing them amidst the cookies to entice guests. You might also consider using seasonal decorations, such as colored liners or holiday-themed decorations, to elevate the display for parties or festive celebrations.
Tips for a Festive Touch During Holidays or Special Occasions
For added flair during holidays, consider using colored sugar or themed sprinkles for rolling the dough, matching the event’s color scheme. A thoughtful presentation can elevate the cookie experience, making each bite not just tasty but visually appealing as well.
Variations and Modifications
Suggestions for Alternative Nut Butters
Though this recipe is centered around peanut butter, alternative nut butters can be used to create a different flavor profile. Almond butter or cashew butter can provide a similar creamy texture while imparting unique flavors.
Brief Outlines of Other Flavors That Work Well
Incorporating a touch of cocoa powder into the other dry ingredients or drizzling melted chocolate over the cookies after cooling can enhance the chocolate flavor. Additionally, sprinkling a little sea salt on top after the kisses have been pressed can create a delightful sweet-salty contrast.
Adaptations for Dietary Restrictions
For those with gluten sensitivities, substituting all-purpose flour with a certified gluten-free flour blend can effectively maintain the integrity of the cookie. If you prefer a vegan version, replacing the egg with flaxseed meal mixed with water or using apple sauce can be effective egg substitutes, yielding softer cookies.
Storing the Cookies
Best Practices for Keeping Cookies Fresh
To keep your Peanut Butter Blossom Cookies fresh, store them in an airtight container at room temperature. A layer of parchment paper between cookie layers can help in preventing them from sticking together.
Containers and Storage Conditions
Opt for a sturdy container that can withstand slight pressure to maintain their shape and texture. Storing them in a dry, cool environment prevents moisture from softening the cookies too much.
Freezing Options for Longer Shelf Life
For longer-term storage, consider freezing the cookies. Place them in a single layer on a baking sheet until fully frozen, then transfer them to a freezer-safe bag or container. The cookies can be enjoyed later by thawing them at room temperature.
Conclusion
Peanut Butter Blossom Cookies present a delightful combination of chewy softness and nutty richness, beautifully enhanced by the sweetness of chocolate. They require minimal preparation and baking time, making them an ideal treat for any occasion. Enjoy their unique texture and flavor combination in just 30 minutes from start to finish.

Peanut Butter Blossom Cookies Recipe
Ingredients
- 1 cup creamy peanut butter
- 1 cup granulated sugar
- 1 cup packed brown sugar
- 1 teaspoon pure vanilla extract
- 1 large egg
- 2 cups all-purpose flour
- 1 teaspoon baking soda
- ½ teaspoon salt
- 1 cup granulated sugar for rolling
- 36 unwrapped milk chocolate kisses
Instructions
- Preheat your oven to 350°F (175°C) and line a baking sheet with parchment paper.
- In a large mixing bowl, combine peanut butter, granulated sugar, brown sugar, and vanilla extract until smooth.
- Add the egg and mix until fully incorporated.
- In a separate bowl, whisk together flour, baking soda, and salt.
- Gradually add the dry ingredients to the wet ingredients, stirring gently until just combined.
- Roll the dough into 1-inch balls and coat each ball in granulated sugar.
- Place the sugar-coated balls on the baking sheet, spaced 2 inches apart.
- Bake for 10-12 minutes until edges are golden brown.
- Press a chocolate kiss into the center of each cookie immediately after removing from the oven.
- Cool on the baking sheet for 5 minutes before transferring to a wire rack.