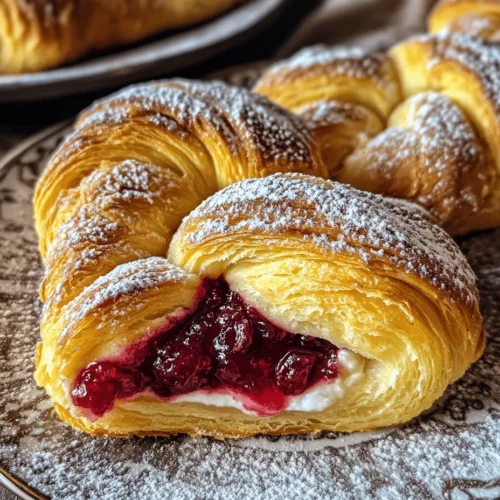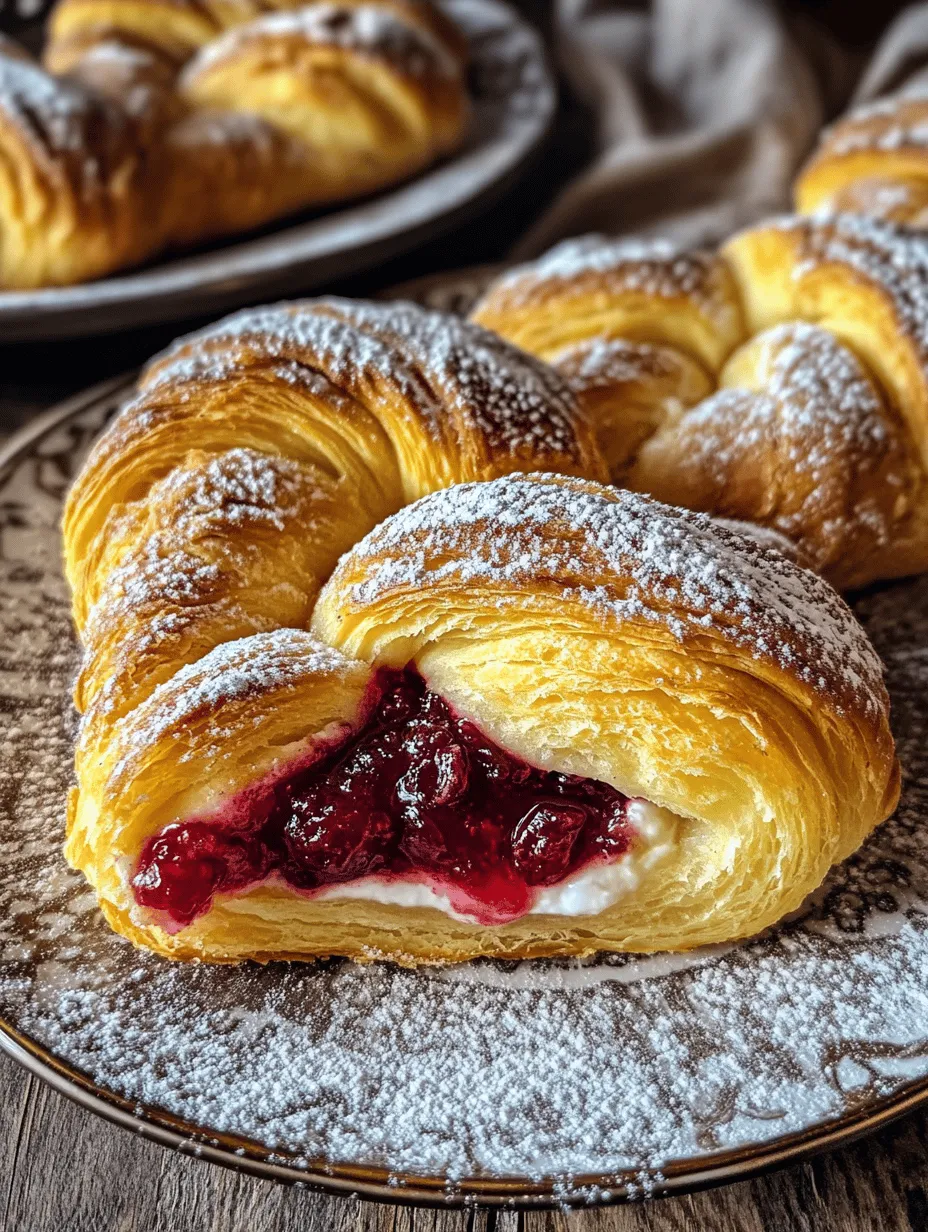

When it comes to breakfast pastries, few can rival the deliciousness of a freshly baked Cheese Danish. The Easy Breakfast Cheese Danish is a delightful creation that marries the creamy richness of cream cheese with the flaky, buttery texture of crescent roll dough. This recipe is perfect for busy mornings when you need a quick yet satisfying meal or as a sweet indulgence for a weekend brunch spread. Not only is it simple to prepare, but it also allows for customization with your favorite fruit preserves, making each batch uniquely yours.
The origins of the Danish pastry can be traced back to 19th-century Denmark, where bakers combined techniques from Austrian and French pastry-making traditions. Over time, the Danish pastry evolved into various forms, filled with sweet or savory fillings, and became popular worldwide. Today’s Cheese Danish is a nod to this rich history, offering a modern twist that is both approachable and delicious. In this article, we will delve into the ingredients that make this Danish so special, provide step-by-step instructions for crafting your own, and share tips for achieving the best possible results.
Understanding the Ingredients: What Makes This Danish Special?
To create a truly delightful Easy Breakfast Cheese Danish, it’s essential to understand the core ingredients that contribute to its rich flavor and flaky texture.
The Core Ingredients of the Cheese Danish
1. Cream Cheese: The star of the filling, cream cheese provides a rich and creamy texture that complements the flaky pastry perfectly. It is essential to use softened cream cheese to ensure a smooth filling that spreads easily within the pastry.
2. Powdered Sugar: This ingredient adds the necessary sweetness to the cream cheese filling, giving it a delightful smooth finish. Unlike granulated sugar, powdered sugar dissolves easily, ensuring a creamy consistency that blends well with the other ingredients.
3. Vanilla Extract: A dash of vanilla extract enhances the overall flavor profile of the Danish, bringing warmth and depth to the filling. This simple addition makes a significant difference in elevating the taste of the pastry.
4. Crescent Roll Dough: The convenient base of this recipe is crescent roll dough, which gives the pastry its signature flaky texture. It’s readily available in most grocery stores and allows you to whip up this breakfast treat in no time.
Optional Ingredients for Customization
While the core ingredients create a fantastic Cheese Danish, there are several optional ingredients that can enhance your pastry and introduce new flavors:
– Fruit Preserves: Adding a fruit preserve to the center of the Danish provides a burst of fruity flavor. Popular choices include raspberry, apricot, or strawberry, but feel free to experiment with your favorites!
– Lemon Zest: Incorporating lemon zest into the cream cheese filling brightens the flavor profile, adding a refreshing citrus note that pairs beautifully with the sweetness of the cream cheese and fruit.
– Extra Powdered Sugar: For those who enjoy a sweeter finish, a light dusting of additional powdered sugar on top of the baked Danish provides a lovely presentation and enhances the sweetness.
Preparation Steps: Crafting Your Cheese Danish
Now that you understand the ingredients that bring this delightful pastry to life, it’s time to dive into the preparation steps involved in creating your Easy Breakfast Cheese Danish.
Preheating the Oven: The First Step to Flaky Perfection
Before you begin mixing your ingredients, it’s crucial to preheat your oven to 375°F (190°C). Preheating ensures that your Danish bakes evenly, allowing the dough to rise properly and achieve that coveted flaky texture. While the oven is warming up, you can prepare your filling and dough, making efficient use of your time.
Crafting the Cream Cheese Filling: The Heart of the Danish
To create the filling, start by taking your softened cream cheese and placing it in a mixing bowl. Using a hand mixer or a spatula, beat the cream cheese until it is smooth and creamy. Next, add in the powdered sugar and vanilla extract. Continue to mix until the ingredients are well combined, creating a velvety filling that will be the star of your Danish. If you’re opting to include lemon zest, now is the time to fold it into the mixture for an added zing.
Assembling the Danish: A Step-by-Step Guide
Once your filling is ready, it’s time to assemble the Danish. Follow these detailed steps to ensure a successful outcome:
1. Roll Out the Dough: Open your tube of crescent roll dough and carefully unroll it onto a lightly floured surface. You’ll notice that the dough is divided into triangles. Press the seams together to form a rectangle, ensuring that there are no gaps.
2. Cut the Dough: Using a sharp knife or a pizza cutter, slice the dough into squares. Aim for roughly 4×4 inch squares, which will give you enough space to fill and fold the pastry.
3. Add the Filling: Spoon a generous dollop of the cream cheese filling into the center of each dough square. If you’re using fruit preserves, add a teaspoon on top of the cream cheese for a delightful burst of flavor. Be careful not to overfill, as this can make sealing the pastry challenging.
4. Seal the Danish: To form the Danish, take two opposite corners of each square and fold them over the filling, pressing gently to seal. You can also pinch the edges together to create a more secure seal. Make sure there are no gaps that would allow the filling to escape during baking.
5. Prepare for Baking: Once all your Danish pastries are assembled, place them on a baking sheet lined with parchment paper. This will prevent sticking and make cleanup easier. If desired, you can brush the tops of the pastries with a little melted butter for added flavor and a beautiful golden color.
With your Easy Breakfast Cheese Danish ready for the oven, you’re well on your way to enjoying a delightful homemade treat that will impress your family and friends. In the next section, we will explore the baking process, share tips for ensuring perfect results, and discuss how to serve and enjoy your delicious pastries.

Applying the Egg Wash: Achieving a Golden Finish
To elevate your Easy Breakfast Cheese Danish from delicious to dazzling, applying an egg wash is a crucial step. The egg wash consists of a beaten egg mixed with a splash of water or milk, which acts as a glaze when brushed onto the pastry before baking. This simple yet effective technique enhances the appearance of your Danish, giving it a lustrous, golden-brown finish that is visually appealing and inviting.
When brushing the egg wash onto your cheese Danish, use a pastry brush to ensure an even application. This thin layer not only adds a beautiful sheen but also helps seal the pastry, keeping the filling from leaking out during baking. The result? A perfectly baked Danish that looks as good as it tastes, making it a standout feature on your breakfast table.
Baking to Perfection: Timing and Temperature
Now that your Danish is prepped and brushed with egg wash, it’s time to bake them to perfection. Preheat your oven to 375°F (190°C), ensuring it reaches the right temperature before placing your pastries inside. A properly preheated oven is essential for achieving that ideal flaky texture.
Bake the cheese Danishes for about 18 to 20 minutes, or until they are puffed up and golden brown. Keep an eye on them towards the latter part of the baking time, as ovens can vary in temperature. You’ll know they are done when the pastry is beautifully browned and the cheese filling is bubbling slightly.
Once baked, remove the Danishes from the oven and allow them to cool on a wire rack for a few minutes. This cooling period helps maintain the flaky texture of the pastry while also making them easier to handle without burning your fingers.
Serving Suggestions: Enjoying Your Cheese Danish
When it comes to serving your Easy Breakfast Cheese Danish, there are countless ways to enjoy this delightful pastry. For a simple presentation, place the warm Danishes on a decorative serving platter, allowing their golden-brown tops to shine.
Cooling and Dusting: The Finishing Touch
Before serving, it is essential to let the cheese Danish cool slightly. This will not only enhance the flavor but also ensure that the filling has set a bit more, making it less likely to ooze out when bitten into. Once they have cooled for about five to ten minutes, a light dusting of powdered sugar adds a touch of sweetness and an elegant finish.
To dust with powdered sugar, use a fine mesh sieve or a sifter, and sprinkle it lightly over the tops of the pastries. This finishing touch not only improves the appearance but also enhances the overall flavor, creating a delightful contrast with the creamy cheese filling.
Pairing Ideas: What to Serve with Your Cheese Danish
To complement your Easy Breakfast Cheese Danish, consider pairing it with a selection of beverages that enhance the experience. A freshly brewed cup of coffee is a classic choice, with its rich flavors balancing the sweetness of the Danish. For a lighter option, a fragrant herbal tea can provide a refreshing contrast, especially varieties like chamomile or mint.
If you’re looking to create a more substantial breakfast spread, consider adding fresh fruit, such as berries or citrus slices, to your table. Their bright flavors and vibrant colors not only add nutritional value but also create a visually appealing arrangement.
Additionally, incorporating yogurt or a fruit compote can enhance the meal’s freshness and provide a creamy counterpart to the flaky pastry. This combination of flavors and textures will impress guests and family alike, making breakfast feel special and indulgent.
The History of Cheese Danish: A Culinary Journey
Origins of the Danish Pastry
The history of Danish pastry, including the beloved Cheese Danish, is as rich as its flavor. The origins of Danish pastry can be traced back to a migration of bakers from Vienna to Denmark in the 19th century. These bakers introduced a laminated dough technique, a method that involves folding butter into dough multiple times to create a flaky texture. This innovative approach to baking laid the foundation for what we now know as Danish pastry.
As the pastry evolved, it absorbed influences from various cultures, leading to the creation of different fillings, including the beloved cheese variant. The Cheese Danish is particularly popular for breakfast, showcasing the versatility of Danish pastry that can be filled with sweet or savory options.
The Cheese Danish’s Popularity in Modern Cuisine
Today, the Cheese Danish has become a staple in bakeries and homes around the world, cherished for its delightful combination of textures and flavors. Its popularity can be attributed to its versatility and ease of preparation. With countless adaptations available—ranging from fruit-topped variations to those infused with spices—there’s a Cheese Danish to suit every palate.
Modern cuisine has seen a resurgence in interest for artisanal baking, where traditional recipes are reimagined to cater to contemporary tastes. This has led to innovations like using alternative cheeses or incorporating seasonal ingredients, allowing the Cheese Danish to adapt and thrive in today’s culinary landscape.
Conclusion: A Sweet Addition to Your Breakfast Table
The Easy Breakfast Cheese Danish offers a harmonious blend of flavors and textures, making it an ideal choice for any occasion. With its straightforward preparation and delightful result, this recipe not only caters to your taste buds but also brings a touch of warmth and comfort to your breakfast routine. Whether enjoyed solo or as part of a larger spread, these Danishes are sure to become a cherished favorite in your home.
By mastering this recipe, you’ll not only impress your family and friends but also gain a deeper appreciation for the history and tradition behind this beloved pastry. So go ahead, treat yourself to the delightful experience of making and savoring your very own Easy Breakfast Cheese Danish. Your mornings will never be the same!