
Introduction
There’s something truly magical about homemade donuts. The process of creating these delightful treats in your own kitchen offers a blend of creativity, nostalgia, and satisfaction that few other baking experiences can match. Whether you are a novice baker looking to impress friends and family or an experienced pastry chef seeking to expand your repertoire, the joy of making donuts from scratch is unparalleled. The recipe we’re diving into today promises a unique melt-in-your-mouth experience that is sure to leave everyone craving more.
Homemade glazed donuts strike the perfect balance between simplicity and indulgence, making them a fantastic option for any occasion, from weekend brunches to special celebrations. Imagine the aroma of freshly fried donuts wafting through your kitchen, the anticipation as they cool, and the sheer delight of biting into a soft, fluffy donut topped with a sweet, glossy glaze. This recipe encapsulates all of that and more, inviting you to explore the world of homemade donuts like never before.
The Allure of Homemade Donuts
The allure of homemade donuts is multi-faceted, with many people drawn to the nostalgia that comes with making them. For countless families, donut-making is a cherished tradition passed down through generations, often associated with fond memories of time spent together in the kitchen. The ability to customize flavors and glazes adds another layer of enjoyment—who wouldn’t want to craft their own signature creation? From classic vanilla and chocolate glazes to creative toppings like sprinkles, nuts, or even fruit, the options are virtually limitless.
Moreover, there’s a profound sense of satisfaction that accompanies enjoying a freshly made donut. Unlike store-bought varieties, which can often be stale or overly sugary, homemade donuts offer a freshness that elevates the entire experience. You have complete control over the ingredients, allowing you to create treats that are not only delicious but also tailored to your preferences. The moment you take that first bite of a warm, glazed donut, with its soft texture and rich flavor, you’ll understand why so many people are enamored with the art of donut-making.
Ingredients Breakdown
Before we dive into the step-by-step process of making these delightful glazed donuts, let’s take a closer look at the key ingredients that contribute to their incredible flavor and texture.
All-Purpose Flour
All-purpose flour serves as the backbone of our donut recipe, providing structure and stability. It has a moderate protein content that allows for the perfect rise and texture. When mixed with the other ingredients, it creates a tender donut that isn’t too dense or overly airy.
Granulated Sugar
Granulated sugar is essential for sweetening our donuts and plays a crucial role in achieving the right texture. Sugar not only adds sweetness but also helps to create a tender crumb by inhibiting gluten formation during mixing. This results in a softer, melt-in-your-mouth donut.
Baking Powder and Baking Soda
Both baking powder and baking soda are leavening agents that help our donuts rise and achieve that light, fluffy texture. Baking powder is a complete leavening agent that releases carbon dioxide when mixed with liquid and heated, while baking soda needs an acid (like buttermilk) to activate. Using both ensures a perfect balance, giving our donuts that desirable lift.
Buttermilk
Buttermilk is a key ingredient in this recipe, contributing to the donuts’ flavor and moisture. Its acidity not only enhances the taste but also reacts with baking soda to create a tender, fluffy texture. If you don’t have buttermilk on hand, you can easily make a substitute by mixing milk with a splash of vinegar or lemon juice.
Eggs
Eggs play a vital role in our donut mixture, providing binding, moisture, and enrichment. They help create a cohesive dough while adding richness and flavor to the final product. Using fresh eggs will ensure that your donuts are as flavorful and delightful as possible.
Unsalted Butter
Unsalted butter is crucial for imparting rich flavor and a moist texture to our donuts. When melted and combined with the other ingredients, it creates a luscious dough that enhances the overall taste. It’s important to use unsalted butter to have better control over the salt content in the recipe.
Vanilla Extract
Vanilla extract is the secret ingredient that elevates the flavor profile of our donuts. It adds a warm, sweet aroma that perfectly complements the other ingredients. Opt for pure vanilla extract for the best flavor, as imitation vanilla can lack the depth and complexity that real vanilla offers.
Oil for Frying
Choosing the right oil for frying is essential for achieving perfectly cooked donuts. Neutral oils with high smoke points, such as vegetable oil or canola oil, are ideal. They won’t impart any unwanted flavors and will allow our donuts to fry evenly and achieve that golden-brown exterior.
Preparing the Dough
Now that we’ve explored the essential ingredients, let’s move on to the exciting part: preparing the donut dough. Follow these step-by-step instructions to create a delectable base for your melt-in-your-mouth glazed donuts.
Mixing Dry Ingredients
Start by measuring out your all-purpose flour, granulated sugar, baking powder, baking soda, and a pinch of salt. In a large mixing bowl, whisk together these dry ingredients until they are thoroughly combined. This step is crucial, as it ensures that the leavening agents are evenly distributed throughout the flour, resulting in uniformly risen donuts. Take your time with this process, as properly mixed dry ingredients lay the foundation for a successful dough.
Combining Wet Ingredients
In a separate bowl, combine the buttermilk, eggs, melted unsalted butter, and vanilla extract. Whisk these ingredients together until you achieve a smooth, homogenous mixture. Gradually add the wet ingredients to the dry ingredients, stirring gently with a spatula or wooden spoon. Be careful not to overmix; you want to combine the ingredients just until they form a cohesive dough. Overmixing can lead to tough donuts, so embrace the gentle folding technique to keep them soft and tender.
Kneading the Dough
Once your dough has come together, transfer it to a lightly floured surface. Using your hands, gently knead the dough for about 1-2 minutes until it becomes smooth and pliable. The goal here is to develop just enough gluten to give the donuts structure without making them dense. Keep in mind that the dough should remain soft, so if it feels too sticky, sprinkle a small amount of flour as needed.
Forming the Donuts
With your dough prepared, it’s time to form the donuts. Roll out the dough to about ½ inch thickness on a floured surface. Using a donut cutter or two round cookie cutters (one larger and one smaller), cut out the donut shapes. If you don’t have a donut cutter, you can use any round cutter and a smaller one to create the hole.
Once you’ve cut out your donuts, place them on a parchment-lined baking sheet. Allow them to rest for about 15-20 minutes, which will help them rise a bit more before frying. This resting period is crucial as it allows the dough to relax, ensuring that your donuts will be light and airy.
Stay tuned for the next part of this article, where we will delve into the frying process and the creation of the delectable glaze that will make these donuts truly irresistible.
Shaping the Donuts
Creating the perfect donut starts with how you shape the dough. This step is crucial for achieving that classic donut look and ensuring even cooking.
Rolling Out the Dough
To roll out your donut dough, first, lightly flour your work surface and your rolling pin. This will prevent sticking and ensure a smooth rolling process. Roll the dough to approximately ½ inch thick; this thickness allows the donuts to rise beautifully while frying. Remember, if the dough is too thick, the donuts may not cook evenly, resulting in dense centers, while dough that is too thin can lead to overly crispy donuts.
A helpful tip is to check the thickness of the dough with a ruler to ensure uniformity. If you notice any sticky patches, sprinkle a little more flour on both the surface and the dough. Once rolled, use a sharp knife or a bench scraper to trim the edges if necessary, giving you a clean work area to cut your donuts.
Cutting the Donuts
Now it’s time to cut your donuts. If you have a donut cutter, this is the perfect opportunity to use it. Align the cutter over the rolled dough and press down firmly to create a clean cut, ensuring that you twist slightly to release the dough from the cutter. If you don’t have a donut cutter, a large glass or a round cookie cutter will work just as well for the outer shape. For the inner hole, use a smaller cutter or the end of a piping tip.
After cutting out your donuts, be sure to gather any scraps of dough and re-roll them to cut out additional donuts. This ensures you maximize your batch and indulge in as many delicious treats as possible. Place the cut donuts on a parchment-lined baking sheet, spacing them apart to prevent them from sticking together.
Frying the Donuts
The frying process is where the magic truly happens. Proper frying will transform your shaped dough into golden, crispy, melt-in-your-mouth delights.
Heating the Oil
To achieve that perfect fry, you’ll need to heat oil to the ideal temperature of about 350°F (175°C). Using a deep-fry thermometer can help you monitor the temperature accurately. If you don’t have one, you can test the oil by dropping a small piece of dough into it; if it sizzles and rises to the surface, the oil is ready.
Be mindful of the type of oil used; vegetable oil, canola oil, or peanut oil are excellent options for frying donuts due to their high smoke points. Avoid using oils with lower smoke points, as they can impart unwanted flavors and may not withstand the high temperatures needed for frying.
Frying Technique
Carefully lower the donuts into the hot oil, ensuring not to overcrowd the pan, which can lower the oil temperature and lead to greasy donuts. Fry the donuts for about 1 to 2 minutes on each side, or until they achieve a beautiful golden-brown color. Use a slotted spoon to gently flip them, taking care not to puncture the dough.
Once fried, remove the donuts from the oil and place them on a cooling rack lined with paper towels to absorb excess oil. Allow them to cool slightly before glazing.
Making the Glaze
Now that your donuts are fried to perfection, it’s time to create a smooth glaze that will take your treats to the next level.
Ingredients for the Glaze
The glaze is simple yet delicious, typically made with powdered sugar, milk, and vanilla extract. For a basic glaze, you will need:
– 2 cups powdered sugar
– 2-4 tablespoons milk (adjust based on desired consistency)
– 1 teaspoon vanilla extract
The powdered sugar provides sweetness and a smooth finish, while the milk helps to achieve the perfect pourable consistency. The vanilla extract adds depth of flavor, making each bite incredibly satisfying.
Whisking to Perfection
In a medium bowl, combine the powdered sugar and vanilla extract. Gradually add the milk, one tablespoon at a time, whisking until you reach your desired consistency. The glaze should be thick enough to coat the back of a spoon but still pourable. If it’s too thick, add a bit more milk; if it’s too thin, whisk in a little more powdered sugar. Aim for a balance that will allow the glaze to drape beautifully over the donuts.
Glazing the Donuts
Now comes the fun part—glazing your donuts!
Dipping Method
While the donuts are still warm, dip the top halves into the glaze. Hold the donut above the bowl, allowing the excess glaze to drip off for a few seconds. This technique ensures an even coating without overwhelming the donut. For a more decorative touch, you can also use a spoon to drizzle glaze over the donuts instead of dipping.
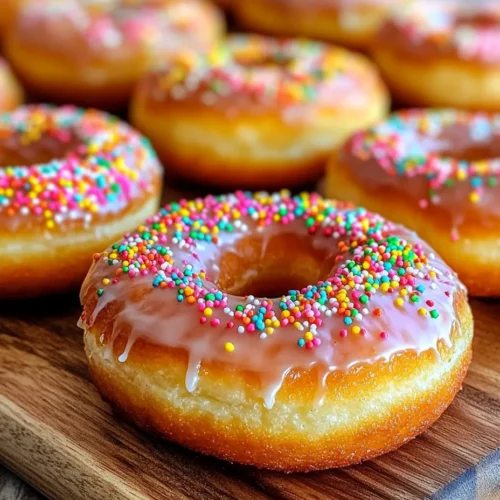
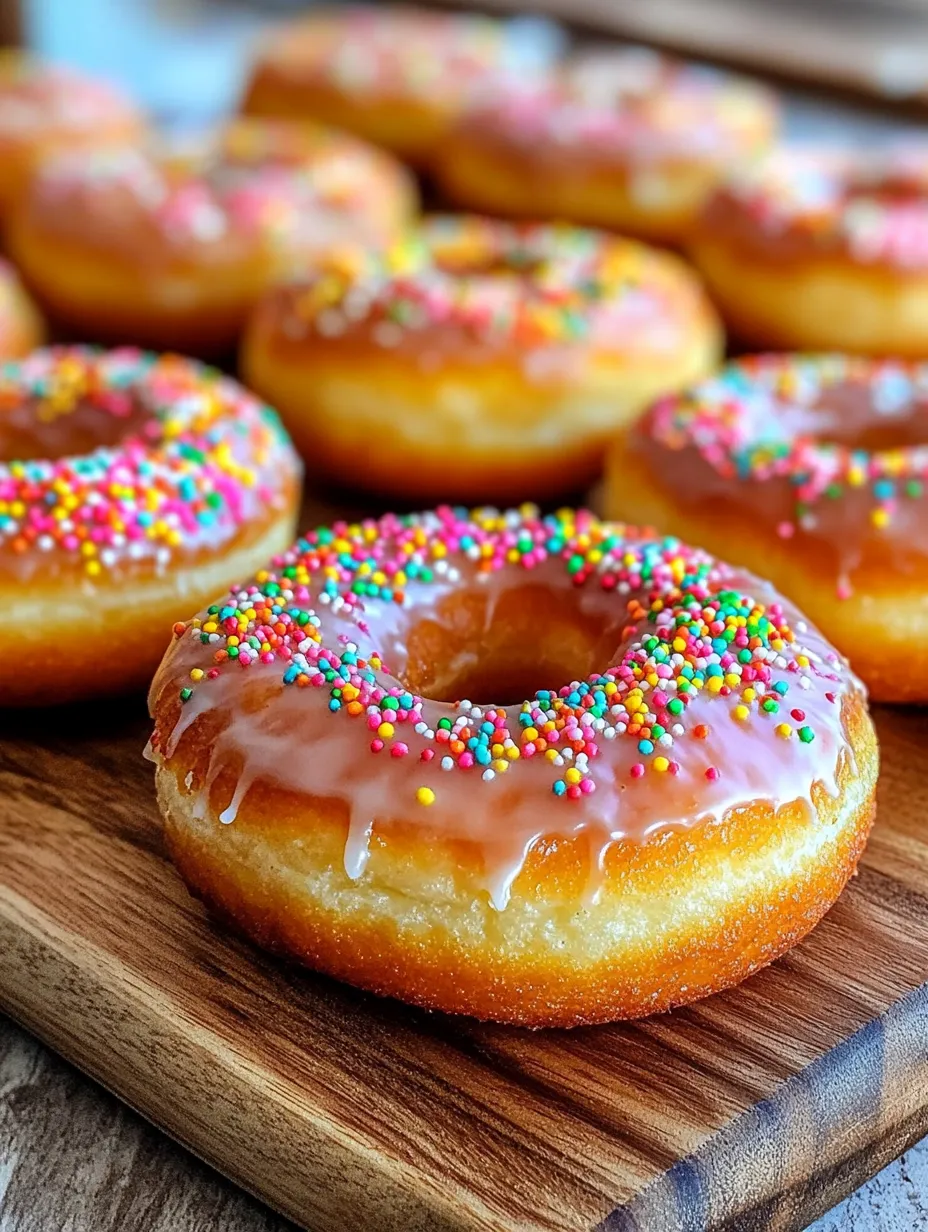
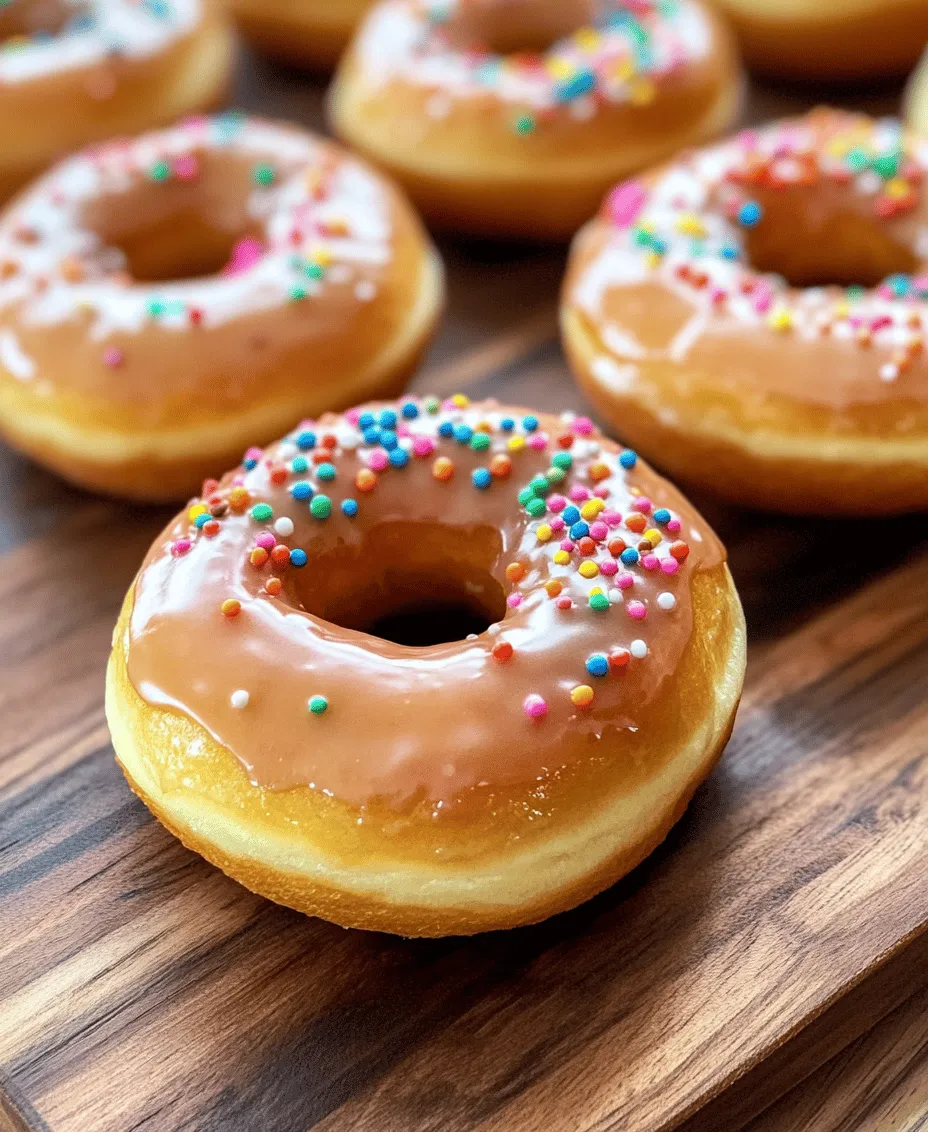
Adding Sprinkles
If you want to add an extra layer of fun and color, now is the time to sprinkle your favorite toppings over the glazed donuts. Whether you prefer colorful sprinkles, crushed nuts, or even a dusting of cocoa powder, this step adds visual appeal and a delightful crunch to each bite.
Serving Suggestions
Now that your melt-in-your-mouth glazed donuts are ready, it’s time to think about presentation and pairing options.
Presentation
Arrange your donuts on a large platter or tiered cake stand for a beautiful display. You can also serve them individually on small plates, which adds a personal touch for guests. Consider adding a few fresh fruits or a small vase of flowers to the table for an inviting atmosphere.
Pairing Options
To enhance the donut experience, consider pairing them with drinks that complement their sweetness. A strong cup of coffee balances the sugar perfectly, while a glass of cold milk or a warm cup of tea offers a comforting contrast. For a more indulgent treat, serve the donuts alongside a scoop of vanilla ice cream for a dessert that’s sure to impress.
Conclusion
Making melt-in-your-mouth glazed donuts at home is a rewarding experience that fills your kitchen with warmth and tantalizing aromas. From the moment you shape the dough to the final glaze, each step is a delightful journey. These donuts are not just a treat; they are a celebration of simple ingredients coming together to create something extraordinary.
Whether for a special occasion, a weekend brunch, or simply to brighten your day, these donuts will surely bring joy and satisfaction. Their unique taste and texture make them a beloved favorite in many households. So, roll up your sleeves, gather your ingredients, and embark on this sweet adventure. Your homemade donuts await, ready to delight family and friends alike!