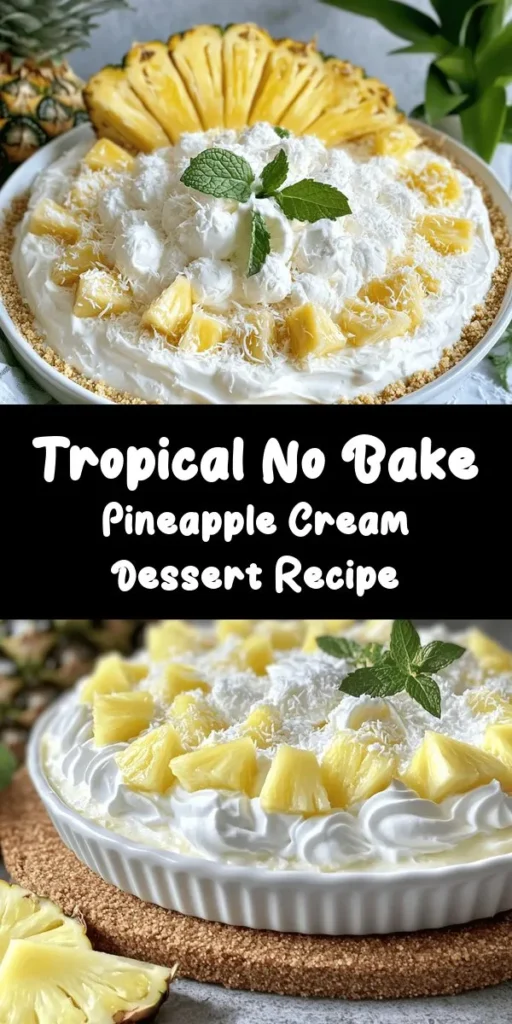
Introduction
If you’re on the lookout for a refreshing dessert that screams summer, look no further than the No Bake Pineapple Cream Dessert. This delightful treat is a perfect blend of tropical flavors, creamy textures, and delightful sweetness that will have everyone at your gathering reaching for seconds. The beauty of this dessert lies not only in its delicious taste but also in its simplicity. With no baking required, this dessert is ideal for those warm summer days when you want something light and satisfying without the hassle of turning on the oven.
The No Bake Pineapple Cream Dessert combines the sweetness of ripe pineapples with a luscious cream filling, nestled in a buttery graham cracker crust. The result is a refreshing treat that is both visually appealing and incredibly easy to whip up. Whether you’re hosting a summer barbecue, a potluck, or simply looking for a sweet way to end your day, this dessert is sure to impress.
Ingredients Overview
To create this delightful No Bake Pineapple Cream Dessert, you’ll need a selection of fresh and flavorful ingredients that come together to make a delectable treat. Here’s a detailed list of what you will need:
Main Ingredients:
– Graham Crackers: The base of our dessert, graham crackers provide a crunchy texture and sweet flavor that contrasts wonderfully with the creamy filling.
– Unsalted Butter: This ingredient binds the crust together, adding richness and flavor.
– Cream Cheese: A key component of the filling, cream cheese adds a tangy creaminess that balances the sweetness of the pineapple.
– Sour Cream: Enhances the creaminess and provides a slight tang, complementing the cream cheese.
– Powdered Sugar: Sweetens the cream filling without the grittiness of granulated sugar, ensuring a smooth texture.
– Whipped Cream: Adds lightness and airiness to the filling, making it fluffy and delightful.
– Crushed Pineapple: The star of the dessert, crushed pineapple provides natural sweetness and a burst of tropical flavor.
Optional Ingredients:
– Shredded Coconut: For those who enjoy a tropical twist, adding shredded coconut can enhance the flavor and texture.
– Chopped Pecans or Walnuts: For an added crunch, sprinkle some nuts on top of the dessert before serving.
– Fresh Pineapple Slices: As a garnish, fresh pineapple adds a beautiful presentation and a hint of freshness.
Using fresh, high-quality ingredients is crucial for achieving the best flavor in your No Bake Pineapple Cream Dessert. The juicy sweetness of ripe pineapple, combined with creamy textures, creates a harmonious blend that is simply irresistible.
Preparing the Crust
The graham cracker crust is the foundation of your No Bake Pineapple Cream Dessert, providing a crunchy contrast to the soft cream filling. Making this crust is straightforward and requires minimal effort. Here’s how to prepare the perfect graham cracker crust:
Step-by-Step Guide to Creating the Crust:
1. Gather Your Ingredients: You will need about 1 ½ cups of graham cracker crumbs, ½ cup of unsalted butter (melted), and a pinch of salt.
2. Crush the Graham Crackers: If you have whole graham crackers, place them in a food processor and pulse until you achieve fine crumbs. Alternatively, you can place them in a zip-top bag and crush them using a rolling pin.
3. Combine Ingredients: In a mixing bowl, combine the graham cracker crumbs, melted butter, and a pinch of salt. The salt enhances the flavor of the crust and balances the sweetness.
4. Mix Until Combined: Stir the mixture until all the crumbs are evenly coated with butter. The mixture should resemble wet sand and hold together when pressed.
5. Press the Mixture into a Pan: Choose a 9-inch pie dish or a square baking dish. Pour the graham cracker mixture into the dish and use the back of a measuring cup or your fingers to firmly press the crumbs into an even layer along the bottom and up the sides of the dish.
6. Chill the Crust: Place the crust in the refrigerator for at least 30 minutes to set. This step is crucial, as chilling helps the crust hold its shape when you add the cream filling.
Tips for Achieving the Perfect Texture:
– Press Firmly: Make sure to press the crust mixture firmly into the dish to create a solid base. If it’s too loose, the crust may crumble when you slice the dessert.
– Chill Before Filling: Allowing the crust to chill not only helps it set but also enhances the overall texture of the dessert.
Creating the Cream Filling
The cream filling is what makes the No Bake Pineapple Cream Dessert so irresistibly creamy and luscious. The combination of cream cheese, sour cream, and whipped cream creates a light yet rich filling that perfectly complements the sweet pineapple. Here’s how to create this delightful filling:
Step-by-Step Instructions for the Cream Filling:
1. Gather Your Ingredients: You will need 8 ounces of cream cheese (softened), 1 cup of sour cream, 1 cup of powdered sugar, and 1 to 2 cups of whipped cream (store-bought or homemade).
2. Beat the Cream Cheese: In a large mixing bowl, use an electric mixer to beat the softened cream cheese until it is smooth and creamy. This step is vital, as it helps to eliminate any lumps and ensures a silky filling.
3. Add the Sour Cream: Once the cream cheese is smooth, add the sour cream. Continue to mix until the two are well combined and creamy.
4. Sweeten the Mixture: Gradually add the powdered sugar to the cream cheese and sour cream mixture. Beat on low speed until the sugar is fully incorporated, then increase the speed to high and beat until everything is smooth and creamy.
5. Whip the Cream: If you’re making homemade whipped cream, pour heavy cream into a separate mixing bowl and beat with an electric mixer until soft peaks form. If using store-bought whipped cream, simply set it aside.
6. Fold in Whipped Cream: Gently fold the whipped cream into the cream cheese mixture. Use a spatula and employ a folding technique to maintain the airiness of the whipped cream. This step is crucial, as it ensures your filling is light and fluffy.
Explanation of the Whipped Cream Process:
Whipping the cream to soft peaks is essential for achieving volume and lightness in your filling. Soft peaks form when you lift the beaters from the cream, and the peaks gently fold over. If you whip the cream too much, it can become grainy or turn into butter, so keep an eye on it!
Combining the Layers
Now that you have your graham cracker crust and your luscious cream filling prepared, it’s time to combine the layers to create the No Bake Pineapple Cream Dessert. This is where the magic happens, and the tropical flavors come together beautifully.
Step-by-Step Instructions for Combining the Layers:
1. Prepare the Pineapple: If you’re using canned crushed pineapple, ensure it’s well-drained to avoid excess moisture in your filling. You can use fresh pineapple as well, diced into small pieces for a chunkier texture.
2. Fold in the Pineapple: Gently fold the drained crushed pineapple into the cream filling mixture, ensuring it’s evenly distributed throughout.
3. Layer the Filling: Spoon the pineapple cream filling into the prepared graham cracker crust, spreading it evenly with a spatula.
4. Smooth the Top: Use the spatula to smooth the top of the filling, ensuring an even surface. This will make for a beautiful presentation when you slice the dessert.
5. Chill Again: Place the combined dessert in the refrigerator and allow it to chill for at least 4 hours, or preferably overnight. Chilling helps the dessert to set and enhances the flavors.
By following these detailed steps, you’ll create a No Bake Pineapple Cream Dessert that is not only delicious but also visually stunning. The combination of the crunchy graham cracker crust, creamy filling, and refreshing pineapple makes this dessert a tropical getaway in every bite. As we continue to explore the final touches and serving suggestions in the next section, you’ll be well on your way to impressing your family and friends with this delightful summer treat.
Achieving the Perfect Texture and Consistency
When creating the No Bake Pineapple Cream Dessert, it’s essential to focus on the texture and consistency to ensure a delightful experience. The filling should be creamy yet light, with a smooth consistency that melts in your mouth. Aim for a balance between the cream cheese and whipped topping to achieve a fluffy but structured filling. The crushed pineapple should be well-drained to prevent excess moisture that could lead to a soggy dessert.
To achieve the ideal texture, mix the cream cheese and sugar until smooth and free of lumps before gently folding in the whipped topping. This method ensures that the filling is airy and luscious. The crust should be firm enough to hold the layers together without being overly hard, allowing for easy slicing and serving.
Assembling the Dessert
Layering the Filling Over the Crust
Once your crust has cooled completely, it’s time to layer the filling. Start by spreading half of the pineapple cream filling evenly over the crust using a rubber spatula. Work gently to avoid disturbing the crust while ensuring the filling reaches the edges. This initial layer acts as a foundation for the dessert, so take your time to create a smooth surface.
Next, spoon the remaining filling over the first layer. Use the spatula to spread it evenly, creating a beautiful, level top. Be patient and apply gentle pressure to avoid mixing the layers. The goal is to have distinct layers that showcase the creamy filling against the crunchy crust.
Adding Shredded Coconut
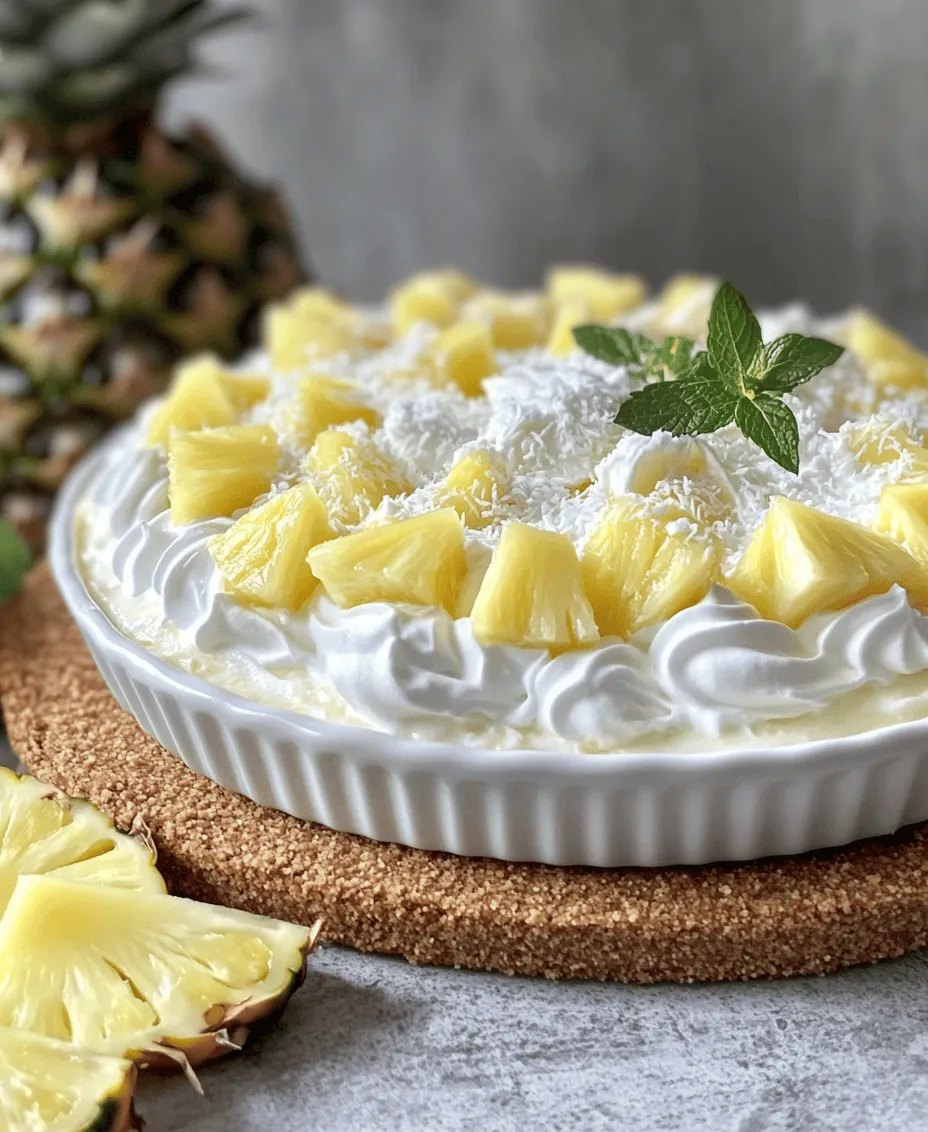
For an added depth of flavor and texture, consider incorporating shredded coconut into your dessert. Coconut provides a delightful chewiness and a hint of tropical sweetness that complements the pineapple perfectly. You can mix shredded coconut directly into the filling or sprinkle it atop the second layer before the dessert chills.
If you decide to mix it into the filling, use about half a cup of unsweetened shredded coconut. This addition will enhance the overall flavor profile, giving it a rich, tropical vibe. When sprinkling on top, reserve some coconut for garnishing after chilling, which adds both visual appeal and texture.
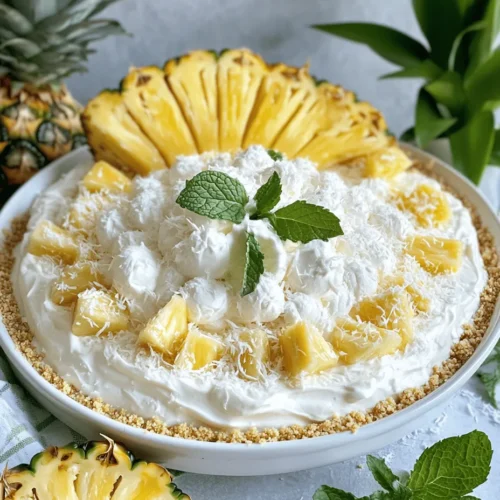
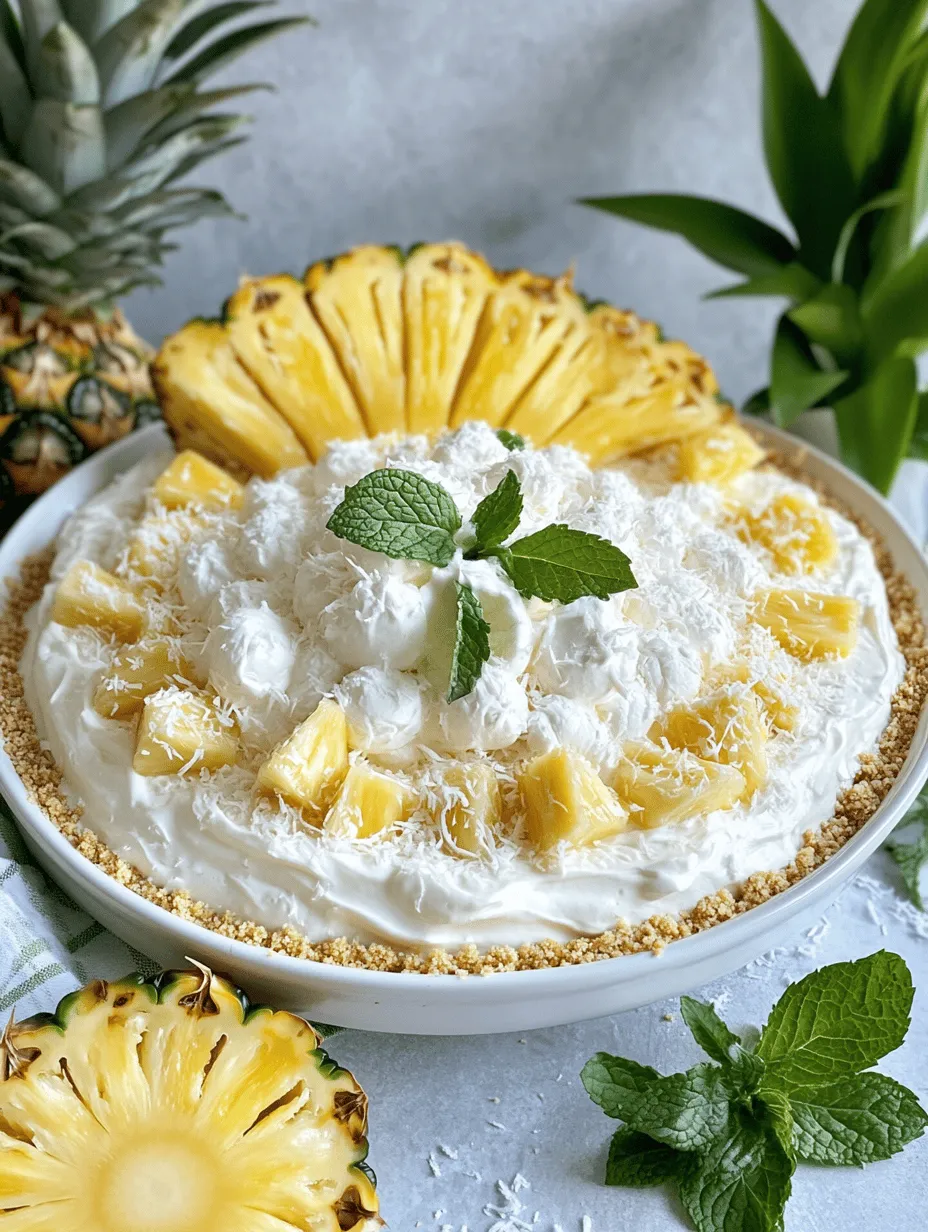
Ensuring Visual Appeal
Presentation matters, especially when it comes to desserts. To achieve a polished look, take care when spreading the filling. Use a spatula or a flat knife to create a smooth surface. If you desire a decorative finish, consider using a piping bag to pipe the edges of the dessert with whipped cream or additional filling. This technique adds elegance and can elevate the visual appeal significantly.
Additionally, consider lightly toasting the shredded coconut before adding it to the dessert. Toasting brings out the coconut’s natural oils and enhances its flavor, making it a standout element in your dish.
The Chilling Process
Importance of Refrigeration
Chilling is a crucial step in setting the No Bake Pineapple Cream Dessert. The refrigeration allows the filling to firm up and develop a cohesive texture. Skipping this step may result in a runny dessert that does not hold its shape upon slicing.
Recommended Chilling Times
For optimal results, refrigerate the dessert for at least four hours. If time allows, chilling it overnight is even better, as this will enhance the flavor and texture, allowing the ingredients to meld beautifully. A longer chilling time will result in a firmer slice, making serving easier and more visually appealing.
Visual Cues for Readiness
To determine when your dessert is ready to serve, look for a couple of visual cues. The top should appear firm and set, without any wobble when gently shaken. A well-chilled dessert will also have a slight sheen, indicating that the filling has thickened properly. When you slice into it, the layers should hold their shape and not ooze out, revealing the beautiful crust and creamy filling.
Serving Suggestions
Presentation Ideas
When it comes time to serve your No Bake Pineapple Cream Dessert, consider how you can make it visually stunning. Use a sharp knife to slice the dessert into squares or wedges, and serve on a chilled plate to maintain its integrity.
A simple yet elegant way to present this dessert is by serving it on a bed of fresh tropical fruits, such as kiwi, mango, or additional pineapple. This not only enhances the visual appeal but also ties in with the tropical theme of the dessert.
Garnishing with Fresh Pineapple and Mint
To elevate your dessert even further, garnish each slice with a fresh pineapple slice and a sprig of mint. The bright green of the mint juxtaposed against the yellow of the pineapple creates a refreshing look. You can also drizzle a bit of coconut cream over the top for added flavor and visual flair.
Pairing Suggestions
Pairing your No Bake Pineapple Cream Dessert with a tropical drink can enhance the overall experience. Consider serving it alongside a piña colada, a refreshing mojito, or even a simple coconut water. These beverages complement the flavors of the dessert and create a cohesive tropical theme for your gathering.
Nutritional Information
Key Nutritional Components
While indulging in a dessert, it’s helpful to be aware of its nutritional composition. A typical serving of No Bake Pineapple Cream Dessert contains roughly:
– Calories: 250-300
– Total Fat: 15-20g
– Saturated Fat: 8-10g
– Carbohydrates: 30-35g
– Sugars: 20-25g
– Protein: 3-5g
These values may vary based on specific ingredients used, such as the type of cream cheese or the amount of sugar.
Dietary Considerations
This dessert is rich and indulgent, making it a treat best enjoyed in moderation. If you’re looking to make it a little lighter, consider using low-fat cream cheese or a sugar substitute to reduce calories without sacrificing flavor. Additionally, using a whole grain or nut-based crust can enhance the nutritional profile, providing more fiber and healthier fats.
Conclusion
The No Bake Pineapple Cream Dessert is a delightful treat that brings the essence of summer to your table, no matter the season. Its creamy filling, combined with the crunchy crust and tropical flavors, makes it a crowd-pleaser for any occasion. Not only is it easy to prepare, but it also allows for creativity in presentation and serving.
This dessert’s appeal lies in its balance of flavors and textures, making every bite a refreshing escape. Whether you’re hosting a summer barbecue, a holiday gathering, or simply want to indulge in a sweet treat, this recipe is sure to impress. So go ahead, gather your ingredients, and enjoy a slice of this delightful dessert that pays homage to the tropical paradise of your dreams.